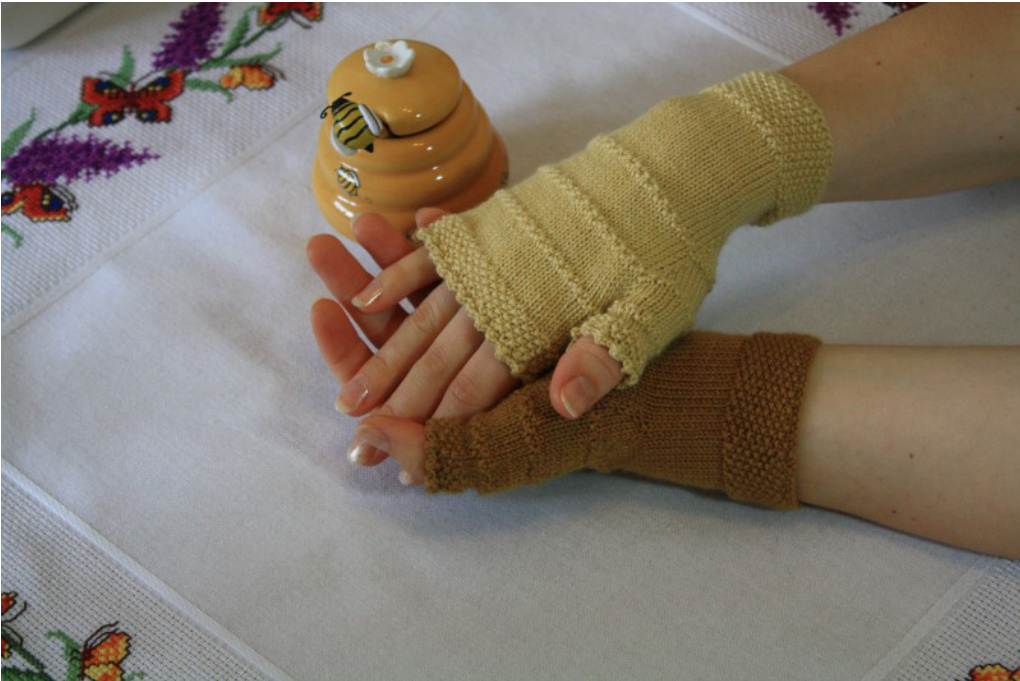
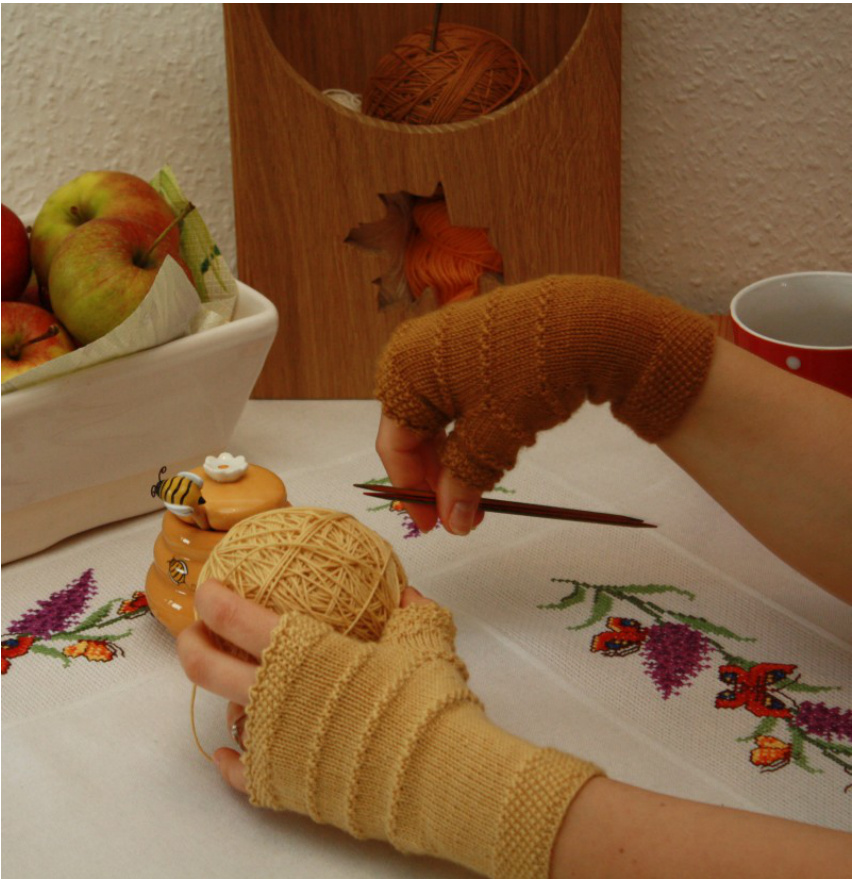
Honey Mustard Mittens
by Toadstool Knittery
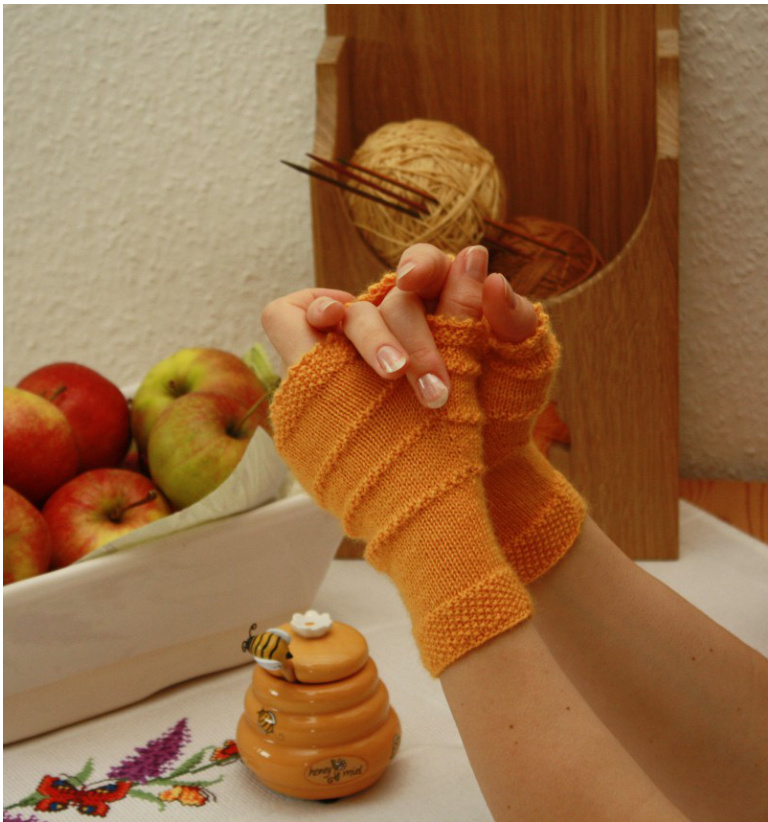
I spent a good deal of time trying to come up with a name for these mittens. When I started designing them I had recently discovered that seed stitch in fingering weight yarn looks a lot like tiny mustard seeds. Being a lover of mustard I named the pattern ,Mustard Seed Mittens\*. The first sample I made was in a vivid yellow yarn and suddenly the seed stitch resembled tiny honeycombs. I was torn. After much thinking (hey, a name is important, right?) I decided on , Honey Mustard Mittens", combining both characteristics.
Required materials and tools
一Sockyarn or any other fingering weight yarn of your choosing (approx. 136 - 168 meters / 149 - 184 yards) Shownin: - Heritage Sockyarn by Cascade Yarns, colour 5643 - Sunflower - Heritage Sockyarn by Cascade Yarns, colour 5611 - Butter - Aktiv 4-fach Uni Sockenwolle by Supergarne, colour 02403 - Sonne - circular needle long enough for the magic-loop technique or two circular needles, size: 2.5 mm (US 1.5) or size needed to obtain correct gauge => this pattern is written for knitting with magic loop or on two circular needles, but can also be adapted to double pointed needles optional: 3 double-pointed needles 10 cm (4 inches) long, size: 2.5 mm (US 1.5) or size needed to obtain correct gauge => you could also knit the small diameter of the thumb on the circular needle by using the magic loop technique but some people prefer short double pointed needles for very small diameters 2 stitch markers (not imperative but useful)
Gauge
34 stitches and 48 rows = 10 cm (4 inches) in stockinette stitch
Sizes
small medium large
Required skills and techniques for this pattern
I will explain some of the techniques, but please understand that I can't possibly explain them al, like for example how to make a basic knit stitch. casting on stitches: german twisted cast on 一knit stitch- purl stitchknitting in the round via magic loop or on two circular needles (or on a set of 5 double pointed needles if preferred) - stockinette stitch (in the round): knit all stitches seed stitch (in the round): - round 1: \*k1, pl (repeat from \* until end of round) - round 2: \*pl, k1 (repeat from \* until end of round) - repeat rounds 1 and 2 as required 一increasing (mlr and mll or your preferred increasing method) decreasing (SSK or your preferred decreasing method) 一picking up stitches casting on additional stitches casting on additional stitches using the cable cast on method (as explained at the end of pattern) modified picot bind off (as explained in the pattern) -",usual" bind off (as explained at the end of pattern)
Abbreviations
k=knit p = purl sts = stitches rnd = round inc = increase dec = decrease m =marker pm=placemarker sm=slipmarker kfb =knit into front and back of stitch mlr = make one right (increase): with left needle, lift strand between sts from the back, knit through the front loop mll = make one left (increase): with left needle, lift strand between sts from the front, knit through the back loop
Instructions
The Honey Mustard Mittens are fingerless mittens that are knitted in the round, from the cuff onwards. They feature a thumb gusset in order to obtain a perfectly tight and yet comfortable fit. Sizes are given in small, medium and large but you can easily adjust the stitch number to your own liking. You could also go up or down one or two needle sizes in order to alter the size. The stitch numbers in parenthesis refer to the sizes M and L.
Cast on
using the german twisted cast-on method cast on 51 (57, 63) stitches. You can use any other method of casting on but the german twisted cast on is a pretty and stretchy cast on and works well with cuffs on mittens and gloves divide stitches onto your two needles needle1: 25 (28, 31) sts needle2: 26 (29, 32) sts place marker to indicate beginning of round, join to knit in the round and knit one round Cuff knit15rounds of seed stitch knit 15 rounds in stockinette stitch or until you have approx. 3 cm ( 1.2 inches) of stockinettestitch
Hand
Begin increasing for the hand section and thumb gusset: rnd 1 => needle1: k 24 (27, 30) sts, kfb => needle2: k25 (28, 31), pm (from here on called ,first marker"), m1r, ktbl, m1l, sm rnd2:k rnd 3: k to 1 sts before end of needle1, kfb => needle 2: k to first marker, sm, mlr, k to end of round marker, mll, sm You should now have 52 (58, 64) hand stitches and 5 stitches on needle2 between both stitch markers for your thumb gusset. You are now done with the hand increases and will furthermore only increase for the thumb gusset. The entire thumb gusset is situated on needle2, so naturally you will have more stitches on needle2 than on needle1. So don't panic, this is completely correct and intentional! The mitt sizes only differ from one another within the hand stitch count as the thumb gusset is already quite roomy. Should you wish for more wiggle room for your thumb, you can always squeeze in a couple more increases. But make sure to always increase evenly on both sides of the thumb gusset! => this round rnd 7: k rnd 8: k rnd 9: inc-rnd as este rnd 10: seed stitch rnd 11: seed stitch rnd 12: inc-rnd rnd 13: k rnd 14: k rnd 15: inc-rnd rnd 16: k rnd 17: k rnd 18: inc-rnd rnd 19: k rnd 20: k rnd 21:inc-rnd rnd 22: seed stitch rnd 23: seed stitch rnd 24: inc-rnd rnd 25: k rnd 26: k rnd 27: inc-rnd rnd 28: k rnd 29: k rnd 30: last inc-rnd = rnd 31: knit to first m holder rnd 32: cast on 1 sts . to end of rou. rnd 33: k rnd 34: seed stitch rnd 35: seed stitch rnds 36-45: k
rnds 46-53:seed stitch rnd54: size S: (ssk, k5) 3 times, ssk, k4, (ssk, k5) 3 times, ssk, k3 => 45 sts size M: (ssk, k6) 3 times, ssk, k4, (ssk, k6) 3 times, ssk, k3 => 51 sts size L: (ssk, k7) 3 times, ssk, k4, (ssk, k7) 3 times, ssk, k3 => 57 sts Bind off stitches using this variation of a 2-point picot bind off(the variation makes the picots smaller, bobblier and more roundish): step 1: cast on 2 new stitches using the cable cast-on step 2: bind off 4 stitches the usual way here comes the variation: do NOT transfer the stitch on your right needle back to the left needle (like you would do for the normal picot bind off) repeat steps 1 and 2 until you have bound off all stitches
Thumb (one size)
Please also read ,A few thoughts on holes and gaps" on the last page! Transfer thumb stitches from waste yarn onto your needles (you can use double-pointed needles now if you don't like knitting very small diameters via magic-loop), pick up 4 additional stitches from the gap between thumb and palm => 27 stitches rnd 1: k rnd 2: seed stitch rnd3:seedstitch rnd 4: k rnd 5: k11, ssk, k12, ssk => 25 sts rnd 6: k rnd 7: k rnd 8-12: seed stitch rnd 13: k5, ssk, k4, ssk, k4, ssk, k4, ssk => 21 sts Bind off stitches like you did for the hand stitches. Weave in ends, wash and block and wear your new mittens!! normalbindoff step 1: knit one stitch (at the beginning of the round you of course will have to knit two stitches to get the bind off started) step 2: pull the first stitch over the second, thus binding off one stitch repeatsteps1 and 2 cablecaston: step 1: insert your right needle between the first and the second stitch on your left needle step 2: wrap your right needle and bring the yarn through (kind of like a normal knit Sstitch) step 3: put the newly created yarn loop onto your left needle (whether you twist it while doing this or not is up to you, I find it doesn't make that much of a differenceintheend) repeat steps 1-3 as needed, make sure to always insert your right needle between the first and second stitch on your left needle
A few thoughts on holes and gaps
I am a fairly tight knitter and I hate when my knitting has holes, except for when I create them on purpose like in lace work. When knitting mittens or gloves you will most likely come to the point where you are facing a gap in your knitting: the gap between thumb and palm, gaps between the fingers. Then you pick up additional stitches but still there is a little hole. I tried several techniques over the years, some work better than others but none satisfied my petty no-hole needs. Some knitters don't fuss about those little holes, some don't even fuss about bigger holes. I tried that once, or I pretended to. I wore my first mittens a lot and the hole got bigger and bigger and annoyed me quite a bit. In the end I had to darn my mittens and was pretty grumpy about it. What I do today besides picking up additional stitches at the gap is this: When you join the yarn for knitting the thumb, you will have a yarn tail that needs weaving in anyway. I use that yarn tail to close up the hole by weaving the yarn tail through the stitches around the hole. This may not be the nicest or most elegant method, but it takes care of the hole and with a bit of practice it will look neat. And you automatically secure the yarn tailwiththismethod! It also helps to knit the newly picked up stitches through the back loop so as to twist them. Copyright 2012, Maike Hense \*\*Toadstool Knittery \*\* http://www.ToadstoolKnittery.de All rights reserved. This pattern is for your personal, non-commercial use only! Please feel free to contact me: maike@ToadstoolKnittery.de