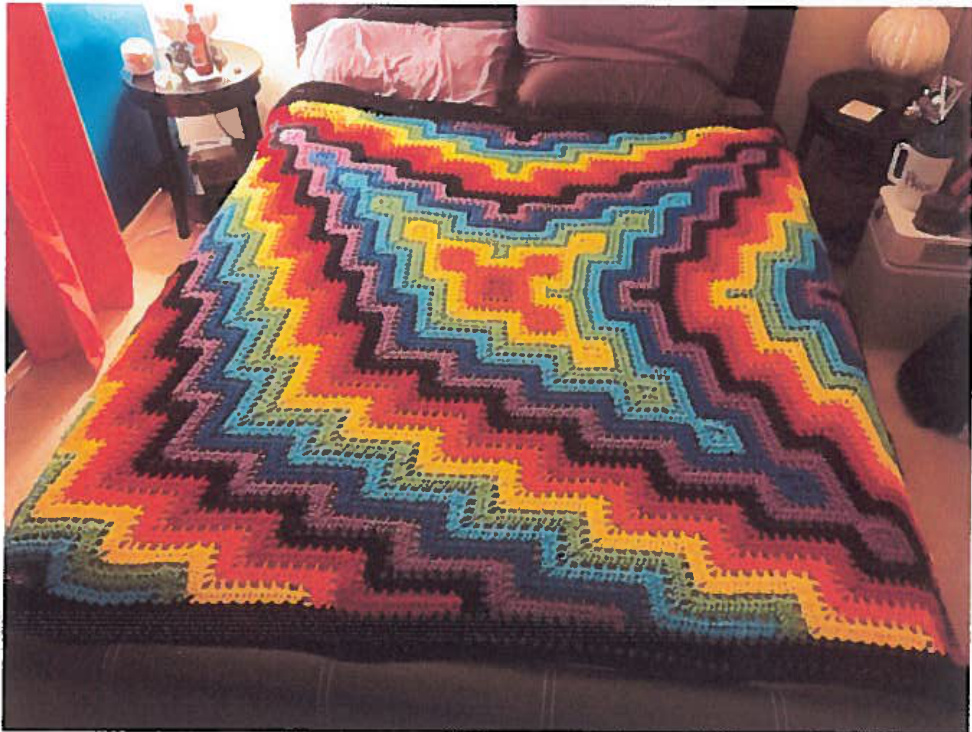
Square and Ripple Blanket (3-pronged version)
I found the original version of this pattern in December 2013 and fell in love with it. I made a baby afghan for my sister's new granddaughter using that pattern. About a month ago, I saw a two-pronged and a four-pronged version on Facebook. Of course I wanted to be different, so I made this three-pronged version.
The original Square and ripple blanket by Sara Palacios can be found at http://www.ravelry.com/patterns/library/square-and-ripple-blanket UPDATED 8/18/2015: Removed "attaching mini-squares at the end of each prong" from row 7. Also made some hand-drawn additions to the chart.
Abbreviations:
beg - beginning ch - chain dc - double crochet dc2tog - double crochet 2 stitches together dc5tog - double crochet 5 stitches together sk - skip sl st - slip stitch sp - space yo - yarn over
Materials:
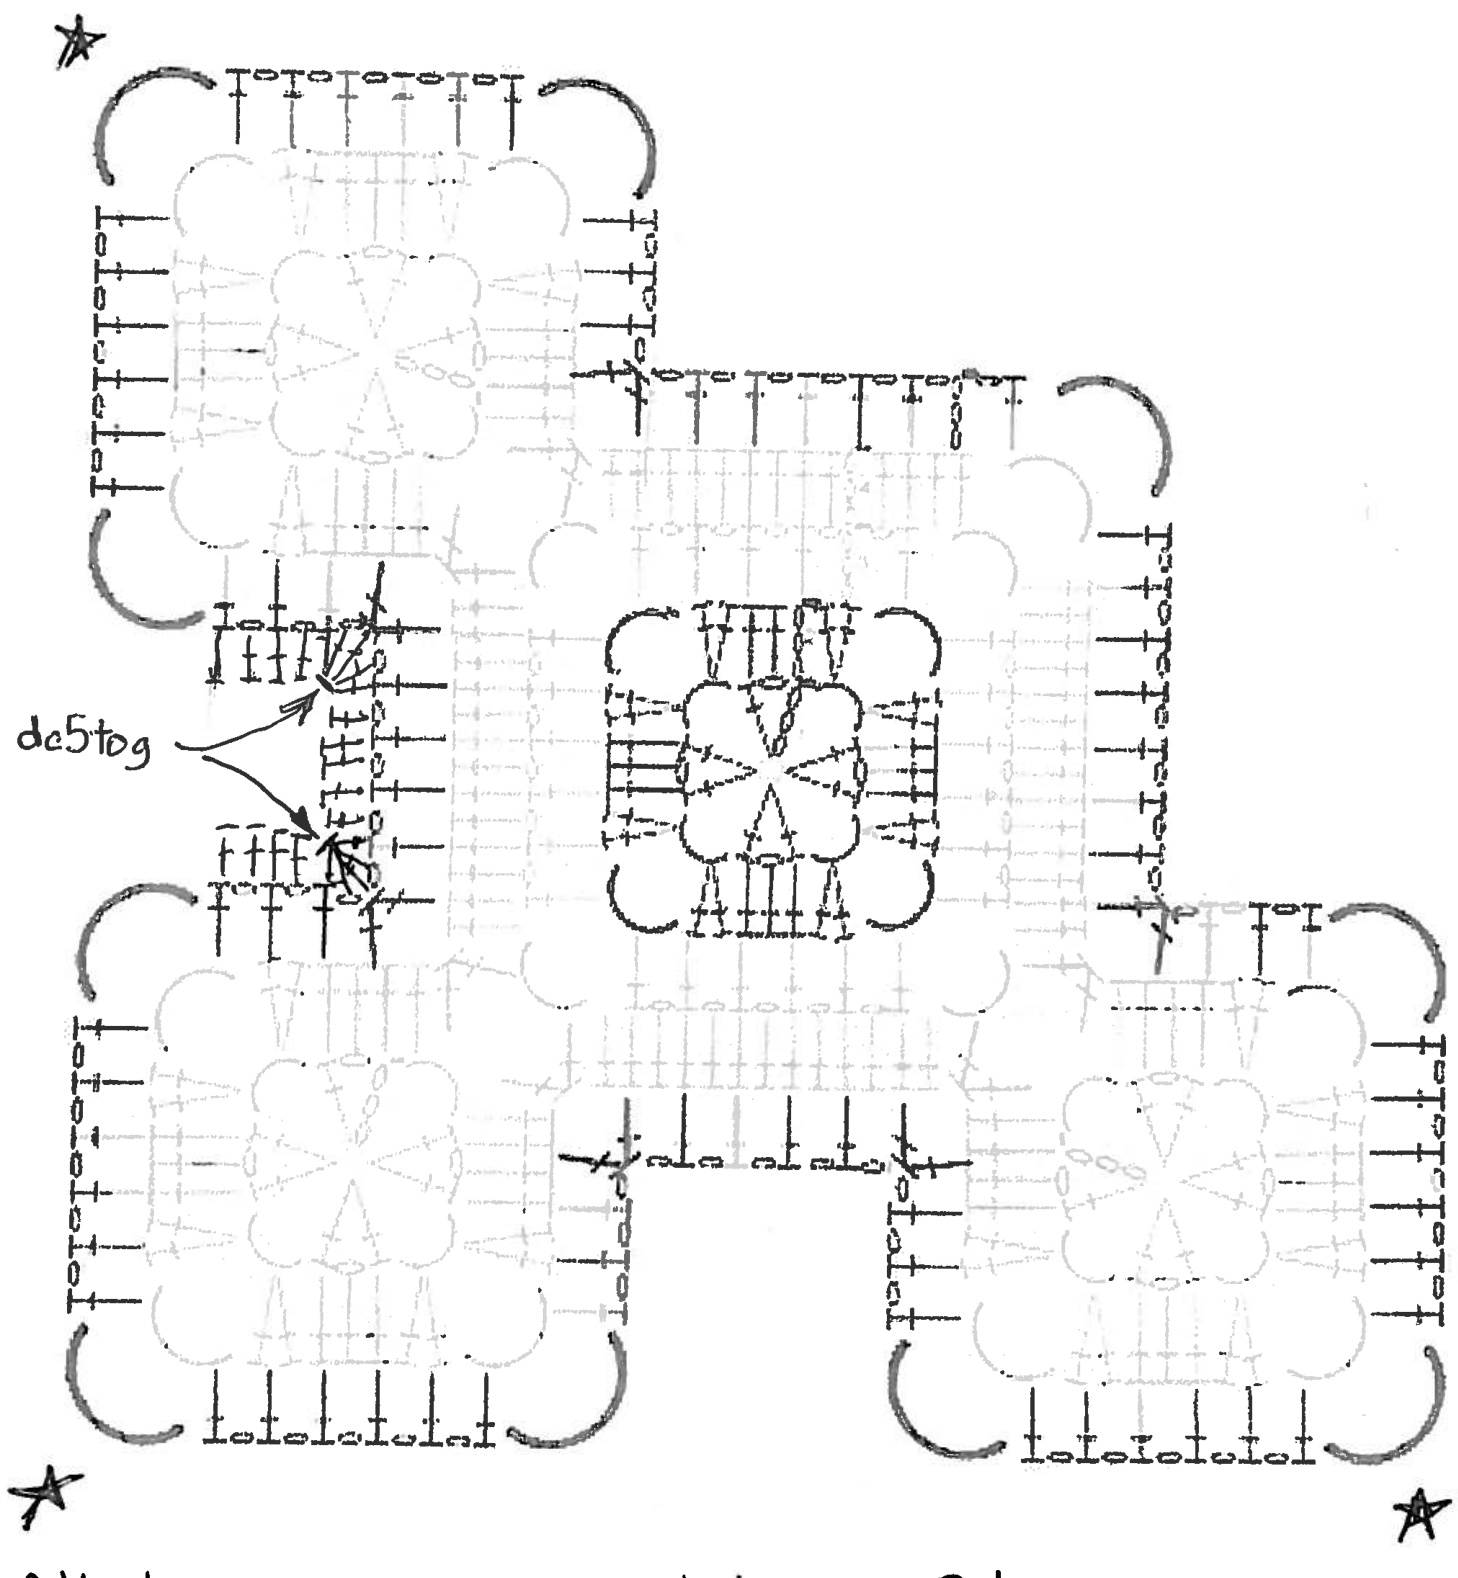
For this project I used Red Heart Super Saver yarn in 7 oz. skeins, oneskeineach of Cherry Red (A) Pumpkin (B) Bright Yellow (C) Spring Green (D) Turqua (E) Blue (F) Medium Purple (G) and two skeins Black (H) Crochet hook Size I/9 (5.5 mm) Yarn needle for weaving in ends. Finished size: Approximately 80" square NOTE 1: I used an invisible join on last round of each color but you can use a sl st to join if you prefer. NOTE 2: Each color is used for two rounds. The first round I'll call the odd round and the second I'll call the even round. Weave in ends as you go. NOTE 3: The attached chart shows the first 5 rounds of the pattern. I took Sara's chart and with some careful cutting and pasting created this version. I have purchased the software and fonts to create charts, but am still trying to figure out how to do such a complexdesign.
Special Stitches:
OROc (Odd Round Outside Corner) In corner sp, work ch1, dc, ch2, dc, ch 1 Roc (Even Round Outside Corner) In corner sp, work 2dc, ch2, 2c ORIC (Odd Round Inside Corner) Worked over 5 stitches, dc2tog as follows: yo, insert hook in st, yo, pull through, yo, pull through 2 loops (2 loops remain on hook), sk next 3 st, yo, insert hook in next st, yo, pull through 2 loops, yo, pull through remaining 3 loops on hook. ERIC (Even Round Inside Corner) Worked over 5 stitches, dc5tog as follows: leaving last loop on hook, dc in next 5 st, yo, draw through all 6 loops.
Mini-square:
You will need 3 mini-squares for each color change which should be made before starting thenewcolor. Make a magic ring. (Alternately, ch4, join with sl st in 1st ch to form ring) Rnd 1: Ch4 (count as dc and ch1), dc in ring, ch2, \* dc, ch1, dc, ch2 \* in ring, repeat from \* to \* twice, join to 3rd ch. Fasten off. Weave in ends. (8 dc, 4 ch1 sp, 4 ch2 sp)
Afghan
For clarity, Rounds 1, 3, 5, etc. are odd rounds, Rounds 2, 4, 6, etc. are even rounds With color A, make a magic ring. (Alternately, ch4, join with sl st in 1st ch to form ring) Rnd 1: Work Mini-Square jnining at the end hut DO NOT fasten off. . (8 dc, 4 ch1 sp, 4 ch2 sp) Rnd 2: Ch 3 (counts as dc), dc in sp, dc in dc, \* EROC in ch2 sp, dc in next 3 st \*, repeat from \* to \* twice, EROC in ch2 so, join. Fasten off A. (28 dc, 4 ch2 sp) Before starting Rnd 3, make 3 Mini-Squares using Color B Rnd 3: With color B, join with sl st in first dc after any ch2 corner. Ch 4 (counts as dc, ch1), sk next st, dc in next st, (ch 1, sk next st, dc in next st) 2 times, \* OROC in corner, dc in next st (ch 1, sk next st, dc in next st) 3 times \*, repeat from \* to \* twice, OROC in corner, join with sl st in 3rd ch at beg of round. (24 dc, 20 ch1 sp, 4 ch2sp) Rnd 4: Joining round. Ch 3 (counts as dc), \* dc in each dc and sp across to corner, dc in corner. Attach mini-square as follows: dc2tog with first st in same corner, and second st in any corner of mini-square. Continuing along mini-square, dc in same corner sp, dc in next dc, next sp and next dc, (EROc, dc in next dc, next sp and next dc,) 3 times, dc in mini-square corner, dc2tog with first st in same corner, and second st in corner of main square, dc in same corner sp (Mini-Square attached).\* Repeat from \* to \* twice, dc in each dc and sp across to corner, ERoc, dc in next dc and ch1 sp, join with sl st to 3rd ch at beg of row. Fasten off B. (7dc along each side of mini-square, 15 dc along each side of main square, 10 outside corners) Before starting Rnd 5, make 3 Mini-Squares using Color C. Rnd 5: With color C, join with sl st in first dc after unused ch2 corner of first square. Ch4, sk next st, (dc in next st, ch 1, skip next st) 5 times, ## ORIC over next 5 st, (ch1, sk next st, dc in next st) twice, OROC, \* (dc in next st, ch 1 skip next st) 3 times, dc in next st, OROc \* repeat from \* to \* once, dc in next st, ch 1, skip next st, dc in next st, ORIC over next 5 st, (dc in next st, ch 1 skip next st) 3 times, dc in next st, ## repeat from ## to ## twice, (ch 1, skip next st, dc in next st) twice, OROC, join with sl st in 3rd chain of ch4 at be of round. Rnd 6: For this round, you will dc in the dc and ch from row below. Ch 3, dc in next 9 st (dc and ch), ## ERIC over next 5 st, dc in next 4 st, EROC, dc in next 11 st and in corner, attach mini-square (see Rnd 4), dc in each st to next corner, EROC, dc in next 4 st, ERIC, dc in next 5 st ##, repeat from ## to ## twice, dc in next 7 st, EROC, dc in next 2 st, join with sl st in top of ch3 at beg of round. Before starting Rnd 7, make 3 Mini-Squares using Color D. Rnd 7: With Color D, work as for Rnd 5. As you work around, fill in the gap between the 1st and 2nd mini-squares as follows: OROC in corner, (dc in next st, ch1, sk next st,) twice, ORIC, ch1, ORIC, ch1, \* remove hook from loop and insert hook in ch1 sp before 1st oRIC, pick up loop and pull through, sk next st, dc in next st \*, repeat from \* to \* inserting hook in 2nd ch1 sp before 1st ORIC, ch1, dc in corner ch1, remove hook from loop and insert hook in ch2 sp of OROC, pick up loop and pull through, ch1, dc in corner , ch1. Continue around filling in the gap between the 2nd and 3rd mini-squares in the same manner Rnd 8: Work in similar manner as rnd 6. When working over the filled in gap from rnd 7, de in first corner sp, dc in sp where you joined the two corners, and dc in the second corner sp. Fasten off color D. Rnd 9 -14: With color E,F and G, repeat rnds 5 and 6 following the established pattern of dc and ch1 in each odd row and dc across in each even row, Rnd 15 & 16: With color H repeat rnds 7 and 8. Rnd 17 & 18: With color A, repeat rnds 5 and 6 without adding mini-square. Filling in space between mini-squares - Work using 2 rows of each color B, C, D, E, F and G. Row 1: Working on wrong side (ws), attach next color with sl st to 3rd corner of any minisquare, ch 4, dc in next st, ch 1, sk1, follow odd row pattern (with ORIC and OROC where appropriate) across to 1st corner of next mini-square ending with ch1, dc in corner. Ch3, TURN. Row 2: Right side (RS), dc in next sp, follow even row pattern (with ERIC and EROC where appropriate) across ending with 2 dc in ch4 sp at beg of row 1. Fasten off, TURN. Row 3: Attach next color with sl st to last dc of previous row, ch 1, sk 1, follow odd row pattern (with ORIC and OROC where appropriate) across ending with ch1, dc in last dc of previous row. Ch3, TURN. Row 4: Repeat row 2. Rows 5 - 12: Repeat rows 1 - 4 twice. Repeat these 12 rows for other space between mini-squares. Filling in remainder of square - Work 24 rows as above fill-in using 2 rows of each color in the following sequence: B, C, D, E, F, G, H, A, B, C, D, E, F, and G. Odd rows are worked from wrong side, even rows are worked on right side. Edging: Using H, work 4 rows in pattern around, rounds 1 and 3 being dc and ch, rounds 2 and 4 being dc all around with appropriate corners.
Attach new mini-sguares at on EvEN rounds.


