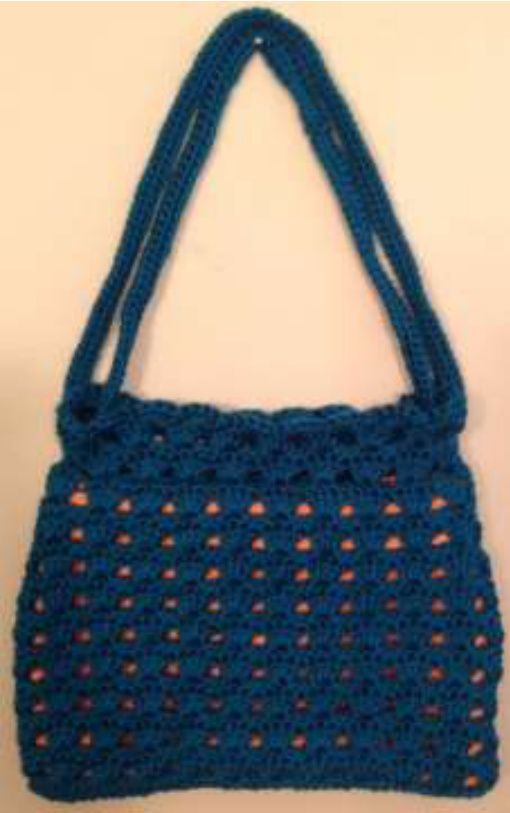
Chic iPad Purse
Easy 1-skein Pattern for a Functional Purse by Sarita Kumar
I have tried and successfully made some purses (such as the Nordstrom-inspired hobo bag), but the patterns always seem to result in pieces that I am unable to use successfully because my iPad which is in its own case NEVER fits right into the purse. On the other hand, I have not found most crocheted iPad holder purses to have the “look" that I like and sometimes the handles sag. So, I created my own pattern and thought I will share. It is customizable in many ways. You can always use different yarn, and use snaps or zippers on the top of the liner to make it functional for other items that you like to carry in your purse. I cannot sew, and so making liners is always challenging for me. I have learned that my favorite way to line anything is by using flannel and hand stitching to close the sides. If you can sew, the type and prints of fabrics you can use to finish these purse are amazing! · The pattern uses Size J hook for the main body and Size F hook for the handle. A yarn needle was used to weave in ends and a sharp stitching needle was used to stitch the lining together (if you are going to sew it on a machine, you won't need the sharp needle).
MATERIALS:
· 1 skein Caron Simply Soft in Pagoda (dark bluish-green) color. (I still have about 20 yards left over after finishing the purse from the 315 yard skein). · O.4 yards of flannel for lining (you can use something else if you prefer) · Thread that matches the lining material for stitching.
PATTERN (IN 3 PARTS):
PART 1: MAIN BODY WITH SIZE J HOOK.
1. Foundation single crochet 44. If FSC is not preferred by you, you can CH 45, and 1 SC in each chain (except the first one from hook) (44 stitches). 2. Round 1: 1 SC in each, 2SC in last stitch turn and continue on the other side by crocheting 1 SC in the lower portion of each stitch in 1st row. 2sC in the last stitch and join with SS to the first stitch of this round (90 stitches). 3. Round 2: 1 SC in each, 2SC in each corner stitch (92 stitches). 4. Round 3: 1 SC in each stitch. Join with SS to first stitch. (92 stitches) 5. Round 4: CH3, 3DC first stitch, skip next 3 stitches, \*4DC in next stitch, skip 3 stitches\*. Repeat around. Join to third chain in first stitch. (23 clusters; 92 stitches). 6. Round 5: 1 SC in each stitch. Join with SS to first stitch. (92 stitches) 7. Round 6: CH1, SS in the next stitch. CH3, 3DC in same stitch, skip next 3 stitches, \*4DC in next stitch, skip 3 stitches\*. Repeat from \* to \* around. Join to third chain in first stitch. (23 clusters; 92 stitches). 8. Round 7: 1 SC in each stitch. Join with SS to first stitch. (92 stitches). 9. Rounds 8-15: Repeat Steps 7 and 8 four more times. 10. Round 16: CH1, SS in the next stitch. CH3, 2DC in same stitch, skip next 2 stitches, \*4DC in next stitch, skip 3 stitches\*. Repeat \* to \* for 9 more clusters. In the next two clusters (should be the edge clusters, one on each side), 3DC instead of 4DC and skip 2 stitches in between clusters. Skip 2 stitches and repeat from \* to \* until you reach the last cluster. In the last cluster, 3DC instead of 4DC. Join to third chain in first stitch. (19 full clusters; 4 smaller clusters; 88 stitches). 11. Round 17: 1 SC in each stitch. Join with SS to first stitch. (88 stitches). 12. Round 18: CH1, SS in the next stitch. CH3, 1DC in same stitch, skip next 2 stitches, \*4DC in next stitch, skip 3 stitches\*. Repeat \* to \* for 9 more clusters. In the next two clusters (should be the edge clusters, one on each side), 2DC instead of 4DC and skip 2 stitches in between clusters. Skip 2 stitches and repeat from \* to \* until you reach the last cluster. In the last cluster, 2DC instead of 4DC. Join to third chain in first stitch. (19 full clusters; 4 smaller clusters; 84 stitches). 13. Round 19: 1 SC in each stitch. Join with SS to first stitch. (84 stitches). 14. Round 20: CH1, SS in the next stitch. CH3 in same stitch, skip next 1 stitches, \*4DC in next stitch, skip 3 stitches\*. Repeat \* to \* for 9 more clusters. In the next two clusters (should be the edge clusters, one on each side), 1DC instead of 4DC and skip 1 stitches in between clusters. Skip 1 stitches and repeat from \* to \* until you reach the last cluster. In the last cluster, 1DC instead of 4DC. Join to third chain in first stitch. (19 full clusters; 4 DC; 80 stitches). 15. Round 21: 1 SC in each stitch. Join with SS to first stitch. (80 stitches). 16. Round 22: CH1, SS in the next stitch. CH3, 3DC in same stitch, skip next 3 stitches, \*4DC in next stitch, skip 3 stitches\*. Repeat \* to \* for 8 more clusters. 4DC in next stitch, skip 1 stitch. 1DC. Skip 1 stitches and repeat from \* to \* until you reach the last cluster. After the last cluster, 1DC. Join to third chain in first stitch. (19 full clusters; 2DC, 78 stitches). 17. Round 23: 1 SC in each stitch. Join with SS to first stitch. (78 stitches). 18. Round 24: CH1, SS in the next 2 stitches. CH3 in same stitch, 3DC in same stitch, skip next 3 stitches. \*4DC in next stitch, skip 3 stitches\*. Repeat \* to \*. Join to third chain in first stitch. (19 full clusters; 76 stitches). 19. Round 25: You can finish this with just one round of 1SC in each stitch of previous step. Or use this fancy Border (optional): CH3, 3DC in the first stitch (this is the space created between the first and last clusters of the previous round). Skip 2 stitches and SS in the next one (the top of the first cluster from previous round). \*\*skip 2 stitches, 4DC in the next space, skip 2 stitches and SS in the next space\*\*. Repeat \*\* to \*\* all around and join the last SS to the 2nd stitch of the first cluster. Finish off.
PART 2:HANDLE WITH SIZEJHOOK
1. Row 1: CH 201. Turn and 1SC in each stitch from the second chain from hook onwards. Turn (200 stitches) 2. Row 2: CH 1, 1SC in each stitch (200 stitches). 3. Row 3-4: Repeat Step 2 of handle two more times (200 stitches each; 4 rows). 4. Join the bottom of the CH row to the back loops of the 4th row using SS method or whip stitch method or any method you prefer to join sides. Fasten off and leave a long tail for joining later.
PART 3:FINISHING
1. Put one end of the rope you created for the handle through the space created by the first and last stitches in Step 18 of the purse. Thread it across to the cluster space on the opposite side. Make sure that you are not twisting the handle anywhere and join the two ends using the tail you left in Step 4 of the Handle. 2.You can choose to line the purse however you wish. I lined it with flannel.


