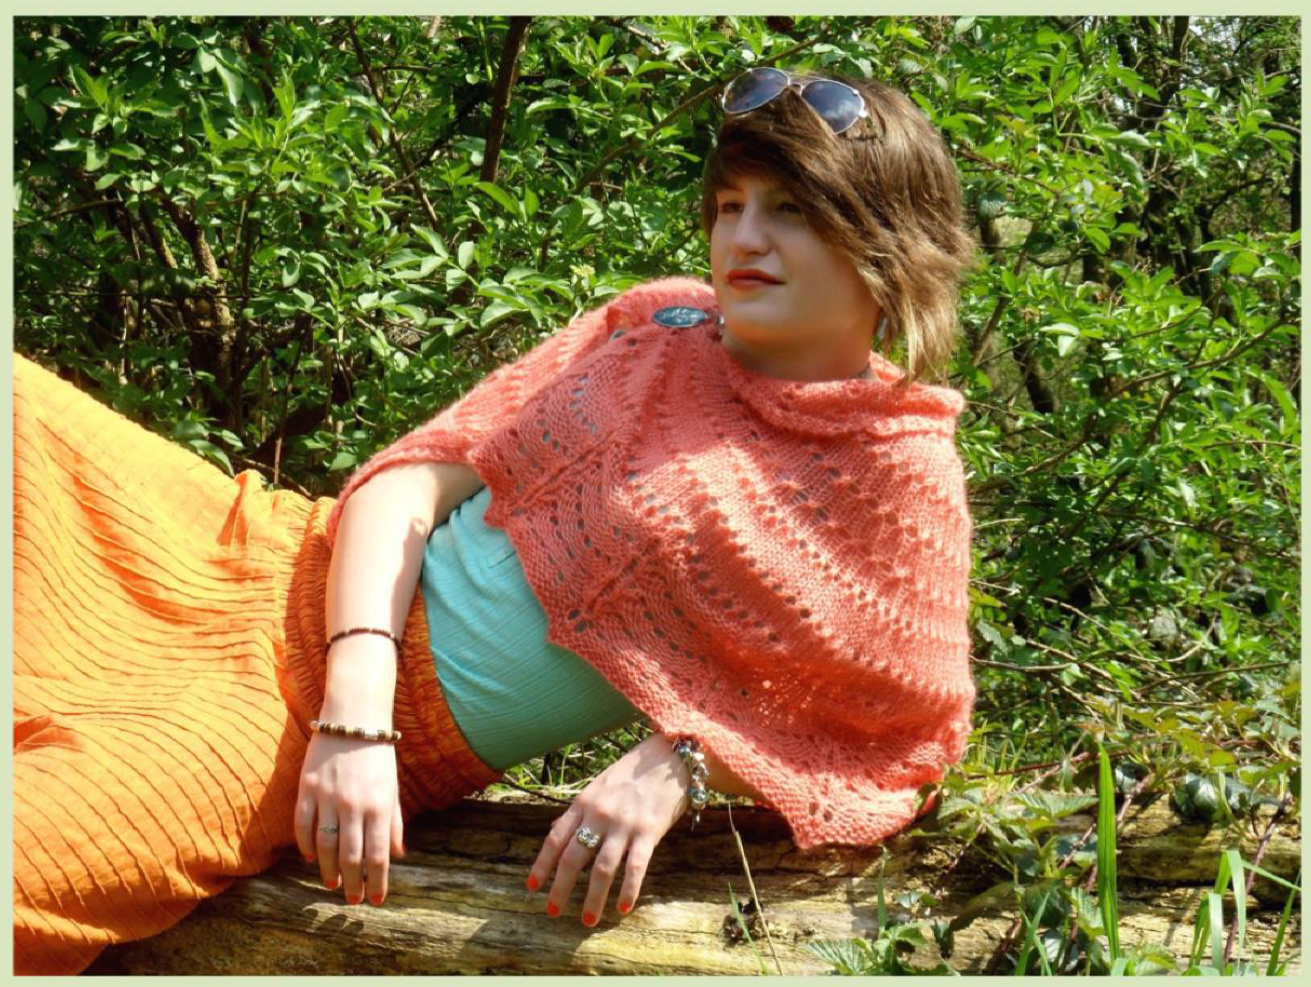
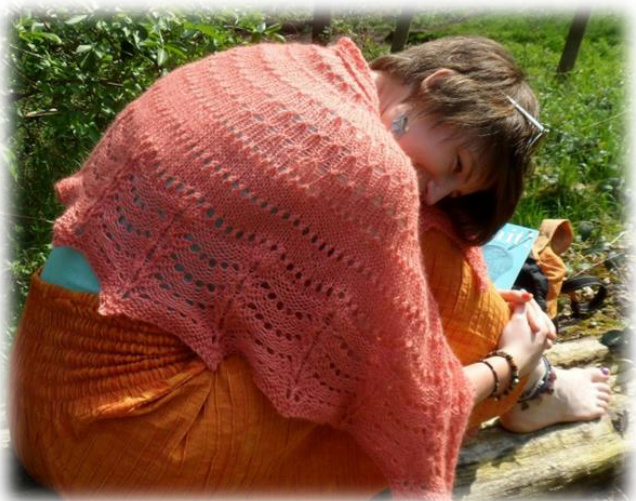
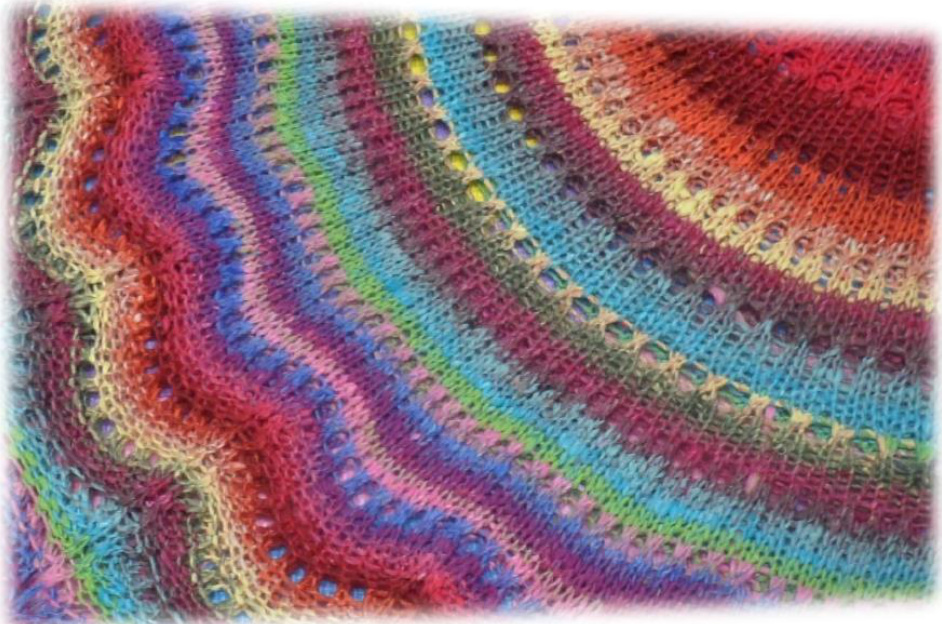
An Afternoon 1n Spring A pretty & easy shawlette that knits up quickly in aran wool. It is designed to be an introduction to both lace and shawl knitting and would suit a confident beginner. By Bev Robinson Finished size - small 1m x 46cm (approx 39" x 18") large 1.22m x 55cm (approx. 48" x 22") Materials - small shawlette 2 balls Wensleydale Long Wool Aran (100g, 160m - 174 yds) large shawlette 2 balls Noro Taiyo (100g, 200m - 219 yds) 6mm Circular needle (120cm) Tension - 15st - 10cm (4") over stocking stitch after blocking.
Notes
| Abbreviations | |
| Knit | K |
| Purl | P |
| Stitch(es) | St(s) |
| Increase by knitting into the front and the back of the next stitch | Kfb |
| increase | inc |
| Yarn over needle | Yo |
| Knit the next two stitches together | K2tog |
| Knit the next two stitches together through the back of the loops | K2togtbl |
| Purl the next two stitches together | P2tog |
| Purl the next two stitches together through the back of the loops | P2togtbl |
| Wrong side | WS |
Two types of increase are used: Kfb to maintain the garter stitch border, and yarn overs to create the eyelet effect. As the increase rows move further apart eyelet rows keep the regular appearance of the pattern. Regular stitch counts are given in brackets & purple font. Increase rows are in pink Eyelet rows are in Turquoise Square brackets [ ] enclose the instructions to be repeated
Method
1 - Cast on 3sts 3-k 4 - Kfb in every stitch (12) 5 -K3, p6, k3 6-K 7 - As row 5 8 -Kfb,k1,[yo, k1] to last st, Kfb (23) 9 - K3, p17, k3 10 -Knit Repeat rows 9 & 10 twice more, then row 9 again. 16 -Kfb,k1 [yo,k1] to last st,Kfb. (45) 17 -K3, p 39, k3 18 -Knit Repeat rows 17 & 18 twice more, then row 17 again. 24 -K3, yo, [k2tog, yo] to last 4 st, k1,yo,k3 (47) 25 - K3, p 41, k3 26 -Knit Repeat rows 25 & 26 twice more, then row 25 again. 32 - Kfb,k1 [yo,k1] to last st, Kfb (93) 33 - K3, p87, k3 34 - Knit Repeat rows 33 & 34 twice more, then row 33 again 40 -K3,yo [k2tog, yo] to last 4 st, k1, yo,k3 (95) 41 -K3, p89, k3 42 -Knit Repeat rows 41 & 42 twice more, then row 41 again. 48 -K3, yo, [k2tog. Yo] to last 4 st, kl, yo,k3 (97) 49 - K3, p91, k3 50 -Knit Repeat rows 49 & 50 twice more, then 49 again 56 -K3,yo, [k2tog. yo] to last 4 st, kl,yo, k3 (99) 57 - K3, p93, k3 58 -Knit Repeat rows 57 & 58 twice more, then 57 again 64 -Kfb, k1, [yo, k1] to last st, kfb (197) 65 -K3. P191, k3
For the small shawlette go straight to edging instructions.
66 -Knit Repeat rows 65 & 66 twice more, then row 65 again. 72 - K3,yo, [k2tog.yo] to last 4 st, kl, yo,k3 (199) 73 - K3.P193, k3 74 -knit Repeat rows 73 & 74 twice more, then row 73 again 80 - K3, yo, [k2tog. yo] to last 4 st, k1,yo, k3 (201) 81 -K3, p195, k3
Edging
Small shawlette inc for edging: k13,Kfb,[k23,Kfb] 7x,K15 (205) Large shawlette inc for edging: k24,Kfb [k49,Kfb] 3x,k26 (205) Rows 1 - 6 form the edging pattern: (Stitches are decreased on rows 3,4 & 5. They are increased back to their original number on row 6) 1 -(WS) k3, p4,[k11.P4] repeat to last 3 st, k3 2 - K3, [k4, p11] repeat to last 7 st, k7 3 - K3, P2, [p2tog, k11, p2togtbl] repeat to last 5 st. p2, k3 4 - K5 [k2togtbl, p9, k2tog] repeat to last 5 st. k5 5 - K3, p2. [p2tog, k7, p2togtbl] repeat to last 5st. P2, k3. 6 - K6, [p1 (yo, p1)6x, k2] with the final repeat ending p1, (y0, p1)6x, k6. Repeat rows 1 - 6 3x total for the small shawlette 4x total for the large shawlette next row -k3, pl, p2tog,[k13, p2tog] 13x. P1, k3. Next row - (RS) k4, [yo, kl, yo, p13] to last 5 st. yo kl yo, k4 (219) knit 4 rows
Cast off
k1, (k1. slip both these stitches back onto the left needle. K2togtbl.) repeat to the end of the row. Fasten off.
Finishing
Wet the shawlette in luke warm water. Roll it up in a towel and stand on it to squeeze it out. Pin it flat onto a dry towel pulling it into a semi-circle and forming the edging into scalloped points. Leave it to dry completely. Sew in the ends. A huge thank you to Racoonims, Purrdee, Kmb34me and ParticuleAlpha who tested this pattern & put their lovely projects up on Ravelry.
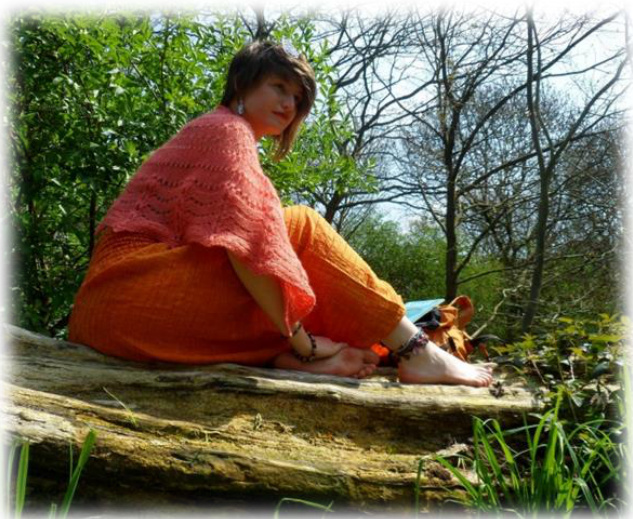
Modelled by Ali Robinson Photography by Bev Robinson I hope you enjoy knitting this pattern. If you have any questions please contact me on Ravelry Best Wishes Bev. Ravelry username - 2bev This pattern is offered for free for your own personal use. Please ask my permission before using it for any commercial purpose.


