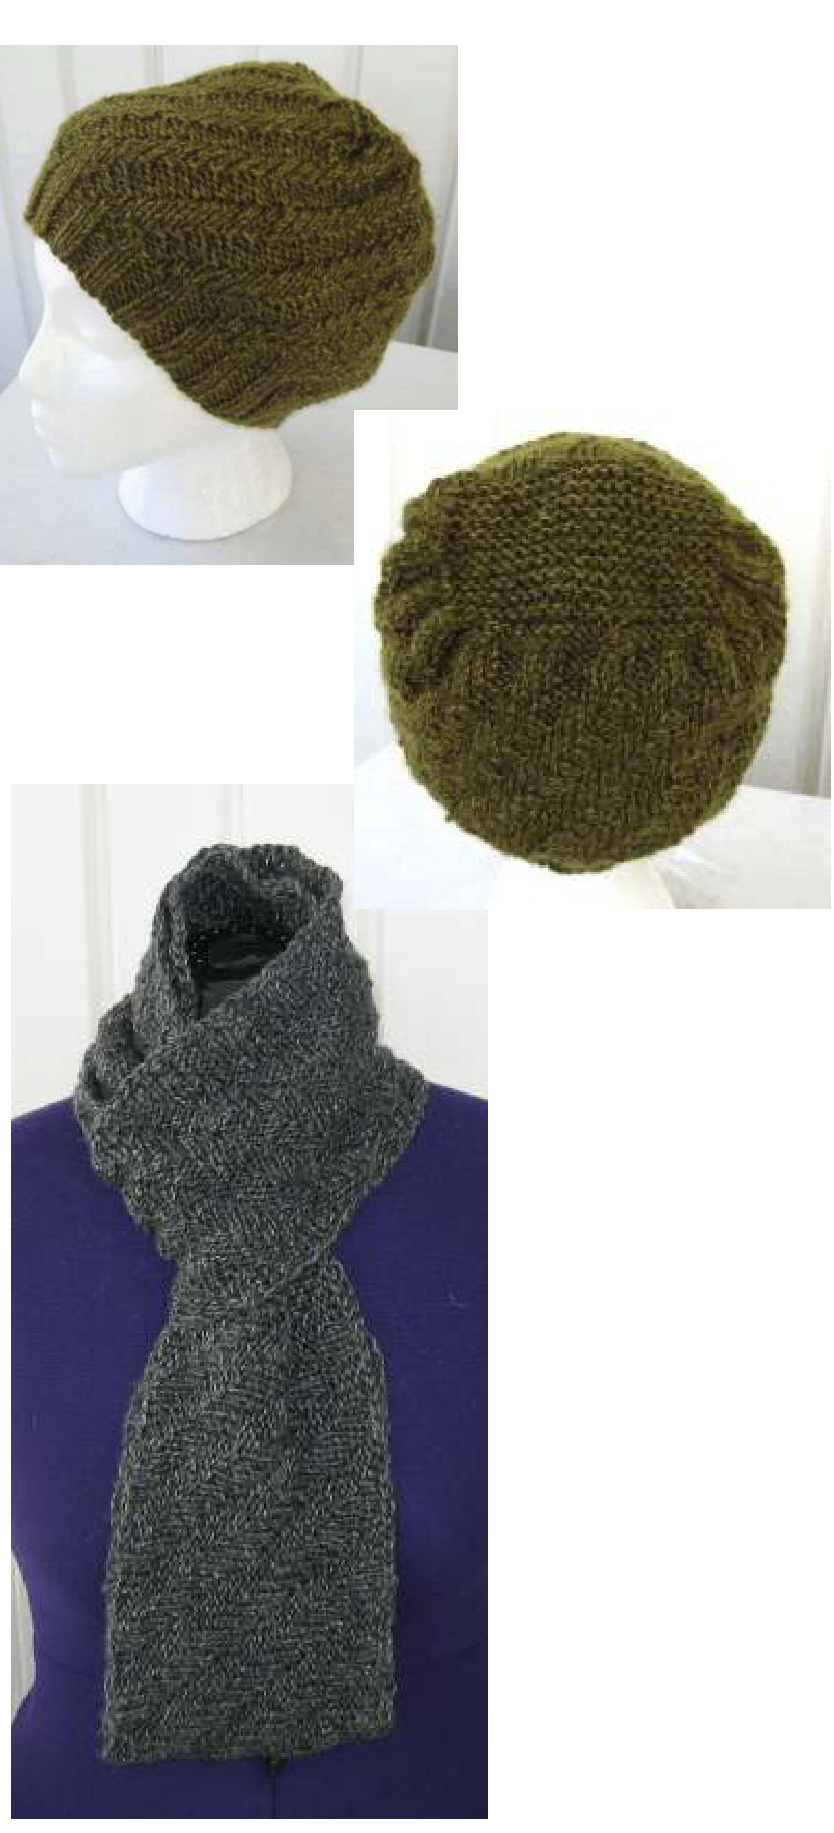
Jet Stream Scarf & Hat
A Simple Knits design This scarf and hat set was designed and knit for my hubby. It's a fast knit in the round using a stitch pattern that swirls around the hat and scarf. Reversible. It looks the same on both sides. Wear the scarf looped around your neck twice or fold in half, place it around your neck, and slip the long end through the fold like a necktie. Pictured scarf was knit with one 250 yard skein of Lion Brand Heartland in Great Smoky Mountains colorway using a size 9 (5.5. mm) circular needle. Scarf is begun with a crocheted CO to match the BO. A tutorial walks you through how to do this. Scarf is crumpled after knitting. Wash and lay it out flat to relax the stitches. After washing, it measured 68" x 6". Hat is knit from the bottom up. The top of the hat is flat. No double points needed. Stitches are decreased along the edges and the seam closed with Russian garter stitch grafting that is similar to a 3 needle BO. Pictured hat was knit with 1 skein of Lion Brand Heartland in Joshua Tree colorway using a size 7 (4.5 mm) 16" circular. (About 125 yards) Pattern also includes instructions for making a smaller cowl scarf.
? 2014 Vicki Mikulak
All rights reserved. For personal, non-commercial use only. Questions? simple.knits@yahoo.com Revised 3/31/2014
Scarf Materials:
250 yds Aran/heavy worsted weight yarn Size 9 (5.5 mm) 16-24" circular knitting needle Crochet hook (for cast on only) 1 stitch marker Size: 54" x 6" 68" x 6" (washed and laid flat to dry) Gauge: 17 sts & 24 rows = 4" Key: CO - cast on k - knit p-purl x - times BO - bind off
Crochet CO Tutorial:
Using a crochet hook and your project yarn, crochet over a knitting needle to CO stitches. It looks like a BO chain edge. Here's how: 1) Make a slip knot on your crochet hook. Place a knitting needle in your left hand and hold the crochet hook in your right hand. Yarn should be tensioned over your left hand. The yarn will run from the slip knot on your crochet hook under your knitting needle to the back. 2) Reach over the top of the knitting needle with your crochet hook and hook the yarn. Pull the yarn through the loop on the hook. This creates the first stitch on your knitting needle. 3) Move the yarn around the tip of the knitting needle to the back ready to CO the next stitch. Repeat Steps 2 & 3 until you have one less stitch than needed (239 sts). Transfer the loop on your crochet hook to your knitting needle as your final CO stitch. You are ready to start knitting Round 1
Scarf Instructions:
With a crochet hook, CO 240 sts onto your knitting needle. (See tutorial on page 1.) Place a stitch marker on your needles, join and begin knitting in the round. Be careful not twist yourco! Note: Stitch pattern moves one stitch to the left every 2 rows. Use written instructions or chart below. Rounds 1&2: (K3, p3) 40x. Rounds 3&4: P1, (k3, p3) 39x, k3, p2. Rounds 5&6: P2, (k3, p3) 39x, k3, p1. Rounds 7&8: (P3, k3) 40x. Rounds 9&10: K1, (p3, k3) 39x, p3, k2. Rounds 11&12: K2, (p3, k3) 39x, p3, k1. Repeat Rounds 1-12 until scarf is wide enough or you have 10 yards left for the BO. BO all stitches a little looser than normal. Cut yarn, pull end through last st to secure. Weave in yarn tails.
For a wider scarf:
For an 8" wide scarf begin with 300 yards of worsted weight yarn.
Chart Notes:
Chart is read from right to left. Each chart row is repeated 40x around the scarf and knit for two rounds.
| Repeat 40x | Rounds | |||||
| k | p | p | p | k | k | 11-12 |
| k | k | p | p | p | k | 9-10 |
| k | k | k | p | p | p | 7-8 |
| p | k | k | k | p | p | 5-6 |
| p | p | k | k | k | p | 3-4 |
| pplp | k | k | k | 1-2 | ||
Key: k = knit p = purl
Cowl option:
If you would like to make a short cowl scarf, CO 108 (120) sts for a 24" (27") cowl. Join in round. Work in pattern until 6-8" from CO edge. Pattern repeats change to 18x (20x). You'll need 100-150 yards of yarn. BO all sts.
Hat Materials:
125 yds Aran/heavy worsted weight yarn Size 7 (4.5 mm) 16" circular knitting needle 4 split ring or locking markers (1 different color) Crochet hook (size G or H) Yarnneedle Size: 21" around x 8.5" deep (unstretched) Gauge: 20 sts & 24 rows = 4" in k3, p3
Key:
CO - cast on k - knit p-purl X - times BO - bind off slip 1 kw - slip 1 st knit wise k2tog - knit 2 sts together (1 st decrease)\* k3tog - knit 3 sts together (2 st decrease)\* PM - place marker \*use k2tog/k3tog or work decrease through back loops. Be consistent with what you use. Note: Stitch pattern moves one stitch to the left every 2 rows. Use written instructions or chart.
Hat Instructions:
CO 108 sts. Place the odd colored stitch marker on needle to mark beginning of round. Join; begin knitting in round. Do not twist your CO! Ribbing: Work in k2, p2 ribbing for 1-1/2". Rounds 1&2: (K3, p3) 18x. Rounds 3&4: P1, (k3, p3) 17x, k3, p2. Rounds 5&6: P2, (k3, p3) 17x, k3, p1. Rounds 7&8: (P3, k3) 18x. Rounds 9&10: K1, (p3, k3) 17x, p3, k2. Rounds 11&12: K2, (p3, k3) 17x, p3, k1. Repeat Rounds 1-12 until hat measures 6-7" from CO edge. Stop at beginning of round marker.
| Repeat 18x | Rounds | ||||
| k | p | p | d k | k | 11-12 |
| k | k | p | p | p k | 9-10 |
| k | k | k | p p | p | 7-8 |
| d | k | k k | p | p | 5-6 |
| p | p | k k | k | d | 3-4 |
| p | Ipp | k | k | k | 1-2 |
Hat Top Setup Round: [K2tog (2x), k21, k2tog) PM] 3x, k2tog (2x), k21, k2tog. (96 sts - 24 between st markers)
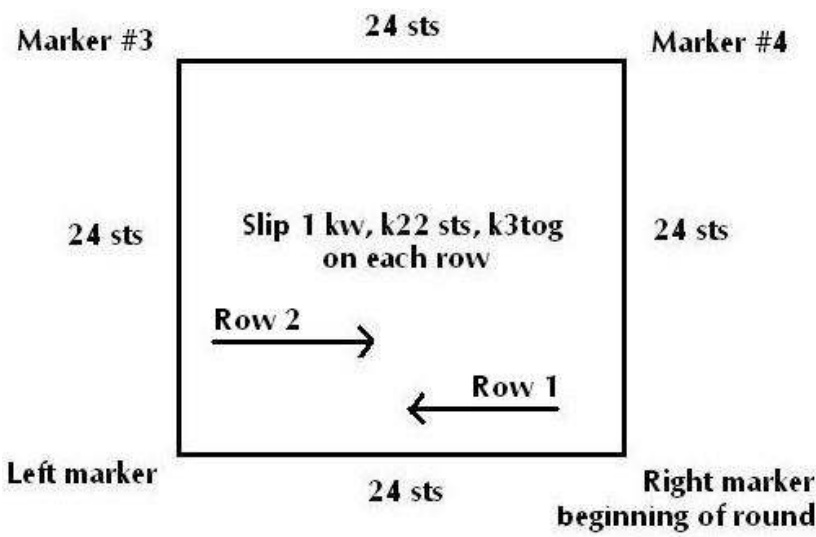
Next you will knit in rows working %4 of the sts (24 sts). As you knit each row you will k3tog the 24th st with 2 sts beyond the next marker. After knitting this section once, you will notice that a gap forms where the k3tog is done. You may remove these left/right stitch markers if you no longer need them as guides. Row 1: Slip 1st st kw and snug it up so it isn't loose. Knit 22 sts (stop one st before left marker or gap). Remove marker. K3tog the last st before the left marker with the next 2 sts after the marker. Replace marker. Turn. Row 2: Slip 1st st kw and snug it up so it isn't loose. Knit 22 sts (stop one st before right marker or gap). Remove marker. K3tog the last st before the right marker with the next 2 sts after the marker. Replace marker. Turn. Repeat Rows 1 & 2 until all that is left are the 24 sts you have been knitting and the 24 sts between markers #3 and #4. Then it is time to close the top seam. For a less visible seam, I recommend using a Russian garter stitch graft. Directions on how to do this are on the next page.
Russian garter stitch graft:
This technique is similar to a three needle BO except it uses the live loops to BO instead of yarn. The seam looks like a subtle braid on one side and is nearly invisible on the other side. Slide the 24 sts you have been knitting to the far end of the circular needle so that the working yarn is near the cable not the needle tip. Move the other 24 sts to the opposite end of the needle near the needle tip. Pull the cable out between the sets of sts. Hold the needle tips side-by-side in your left hand. With a crochet hook (or a knitting needle) in your right hand, go through the first stitch on each needle as if you were going to knit them (2 sts on your hook). Then pull the stitch nearest the end of your hook through the other stitch to BO 1 st. Place the next stitch from the front needle on your crochet hook and pull it through the stitch already on your hook. Repeat using one stitch from the back needle. Alternate taking a stitch from the back and front needle. Each time you have 2 stitches on your crochet hook, BO 1 st. Repeat until all stitches are used. Secure the last stitch with the yarn tail. Weave in both ends.
Confused?
Watch this Youtube video to see a Russian garter stitch graft being done with a crochet hook: http://www.youtube.com/watch?v = C1mReJQx1wk)


