Patterns & Instructions
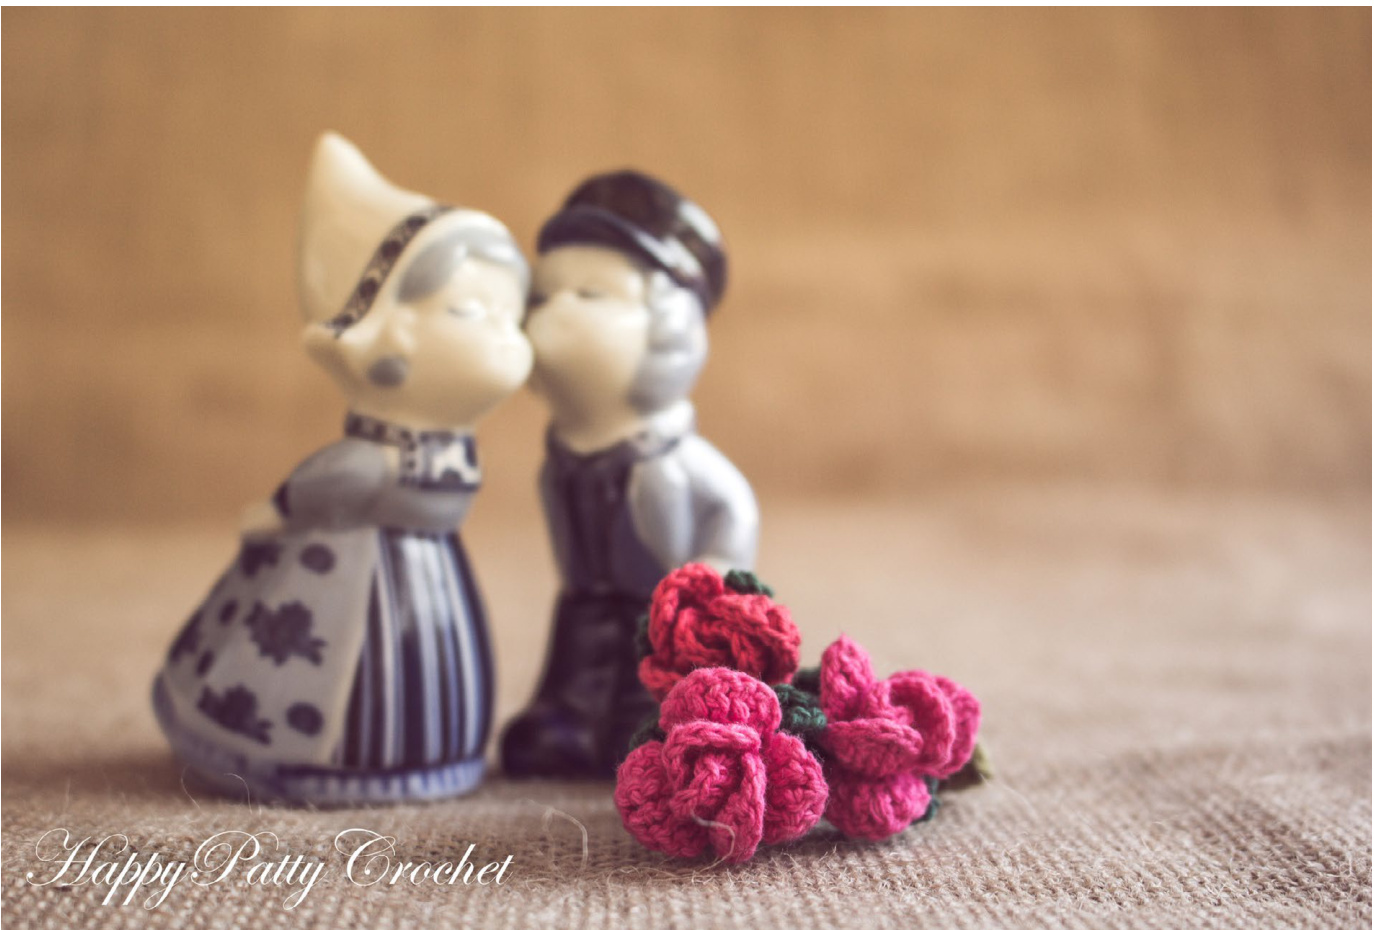
Mini Stem Rose
Skill Level Beginner Skill Needed Crochet
Introduction
In here you will find pattern and instructions for my mini stem rose. Use this instructions to crochet and make your own lovely mini stem roses - decorate your table, office, or shelves with it, use it as an adorable brooch or as any other creative project! The crochet level of the patterns is aimed for beginners, and the process of making this stem flower is easy to follow, shouldn't take long and cheap easy-to-find materials can be used for great results! Don't forget to pay a visit to my Facebook page where upload and update new projects and patterns! Thank you and Happy crocheting!
Materials
Crochet Thread Size #20. - Steel Crochet Hook Size 1.0mm. - Tapestry Needle, Floral Tape, Floral Wire.
Pattern notes
The e-book starts with pattern diagram and then the instructions follows (in American Standard Terms, See appendix for conversion to British).
Materials Note :
I recommend using a 100% mercerized cotton thread in Size #20. But, of course, any durable size #20 (or even #10) thread should work. I've used thread from "Venus" brand, but the more popular Lizbeth brand have size #20 thread that can be used and should be easier to find (or any other brand for that matter).
I've created a page in my Blog where I updated a list of recommended tested threads - see here. When you look for hooks, make sure to check the size of the hook as 1.0mm. For some reason, for 1.0mm. \* If you have problem finding the material needed, don't hesitate to contact me and I'll do my best to help.
Abbreviations
l-st - Slip Stitch hdc - Half Double Crochet yo - Yarn over :h - Chain dc - Double Crochet sk - Skip ic - Single Crochet tc - Triple/Treble Crochet beg - Beginning
Blossom Diagram
(Instructions in the next Page)
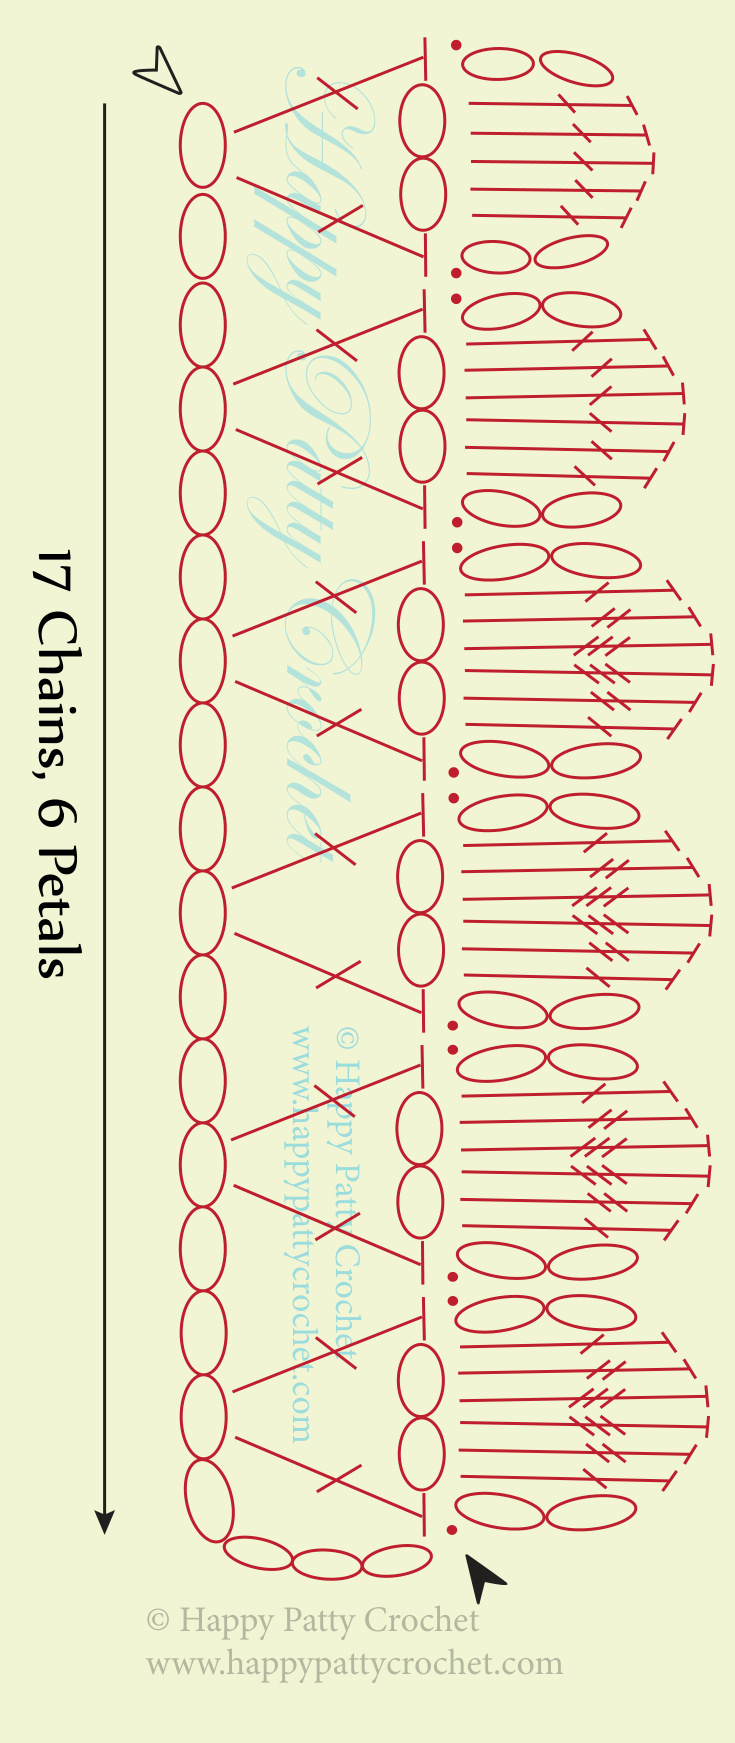
Stitch Key / Abbreviations
- Chain (ch) - Double Crochet (dc) 丰 - Treble Crochet (tc) - Quadruple Crochet (qc / dtc) Start -Cut
Abbreviations Used
ch - Chain sC - Single Crochet sl - Slip st - Stitch beg - Beginning inc - Increase sc - Single Crochet tc - Treble Crochet
Blossom Instructions
Flower is done in a row by row motion, changing direction with each row. Follow the instructions below to complete the crocheted strip that we are going to use to make the flower. Row 1: Ch 17 times, then add 3 more chains, and start your way back with .. Row 2: Skip 4 ch, and work in the 5th ch, [dc, ch 2 times, dc], repeat [] 6 times. After you finish the first two rows, you should have something similar to the image to the left - then crochet the next row, working through the petal loops (photo to the right).
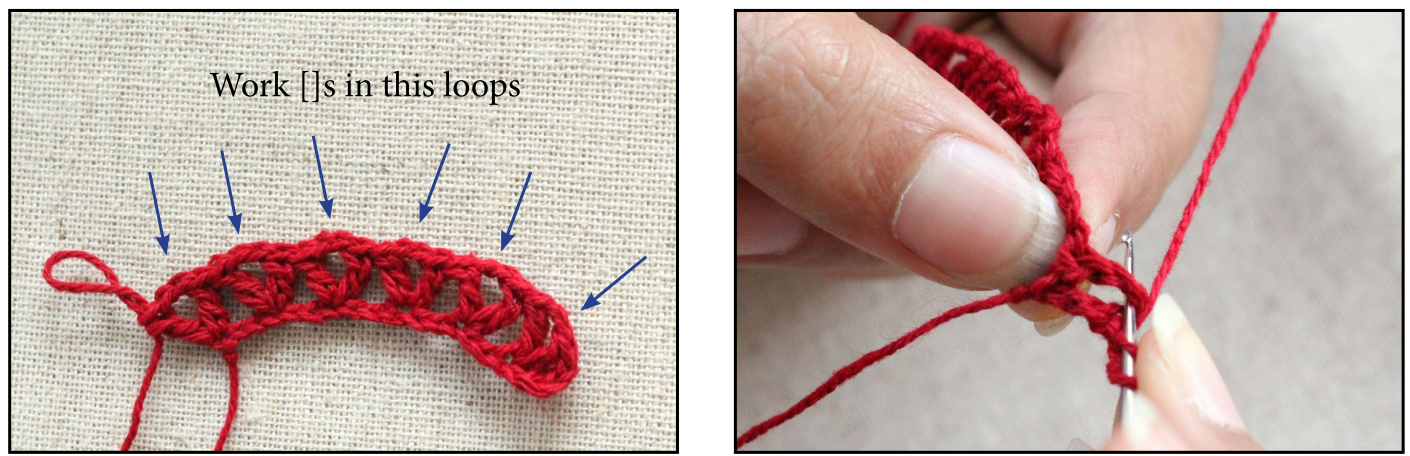
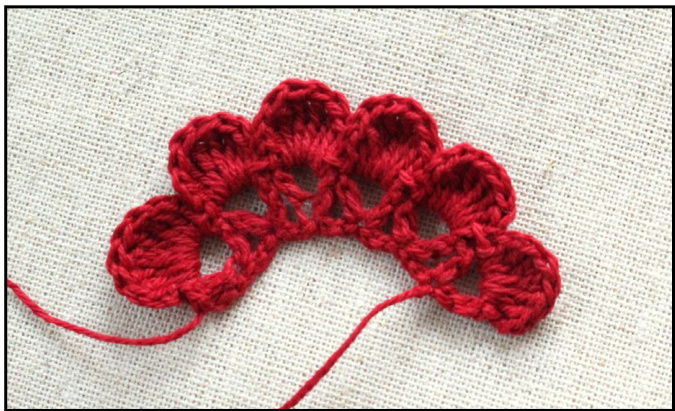
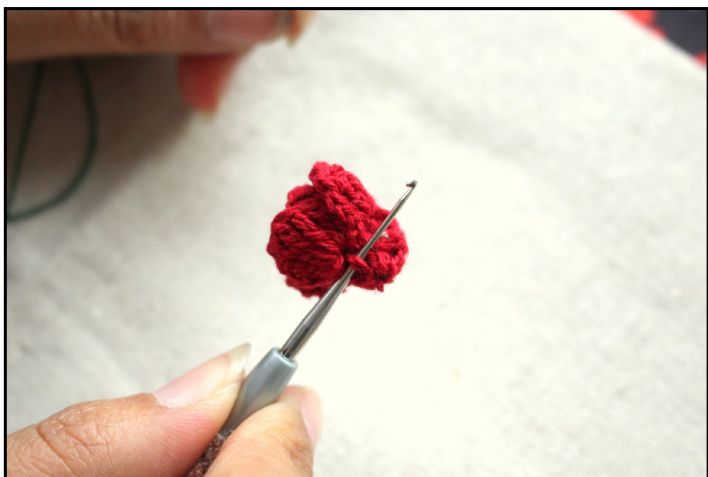
Row 3 : Sl-st to last dc, start doing your way back with, working each [] in each loop (blue arrows in photos above) - [ch 2 times, dc 5 times, Ch 2, join with sl st], and [sl-st to next loop, and continue - ch 2, dc 6 times, ch 2, sl-st], [sl-st, ch 2, dc, tc, qc 2 times, tc, dc, ch 2, sl-st], repeat [] 4 times. Cut Thread. Once finished, it should look like this :
Blossom Instructions #2
Now that we have the body of the flower, we need to bring it to the shape of the flower - starting with the smaller petal, fold it so it goes roughly inside the petal next to it, next, evenly roll the last four petals around it. See following photos :
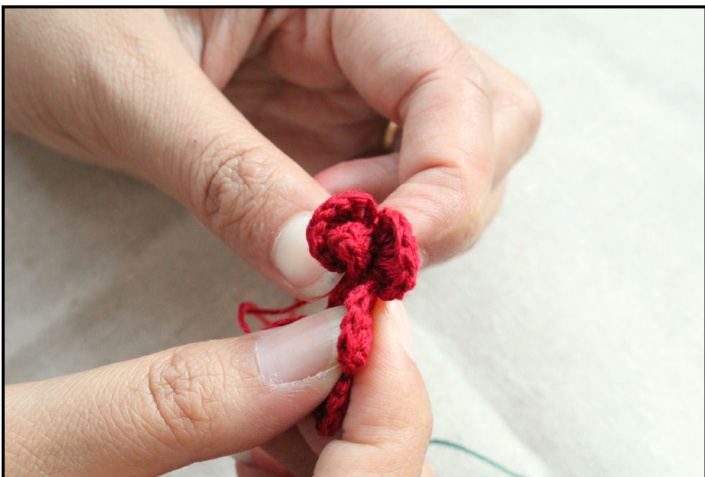
Step 1 - Start from the smallest Petal, and fold it inside the larger one (this forms the head), then surround the head with the other four petals.
Step 2 - You should get something like this.
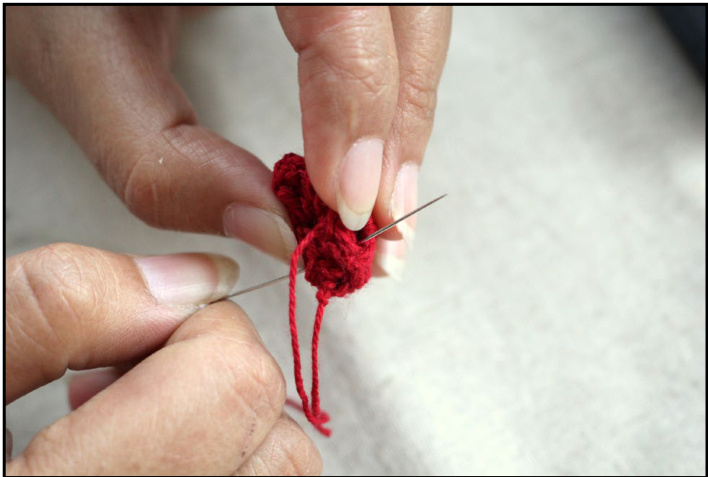
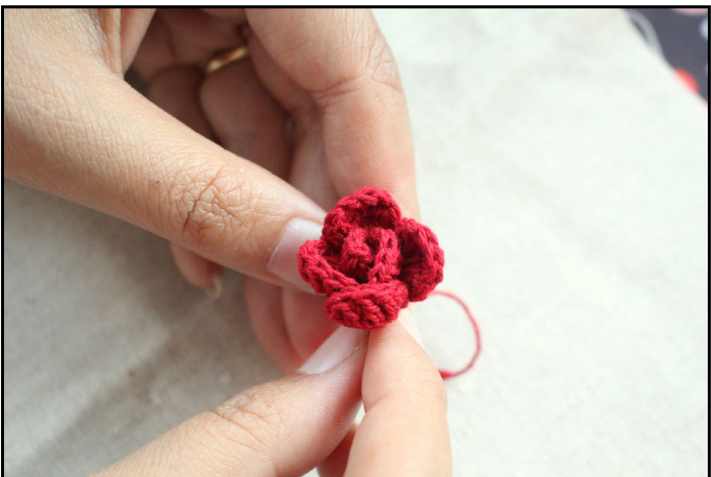
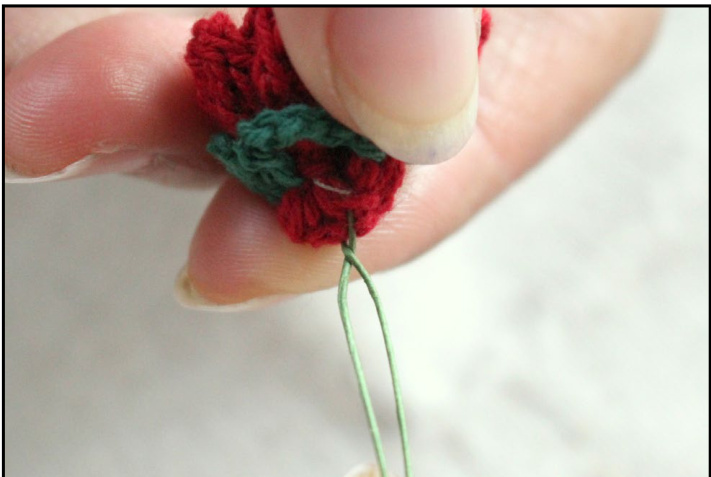
Step 3 - Sew the base of the flower.
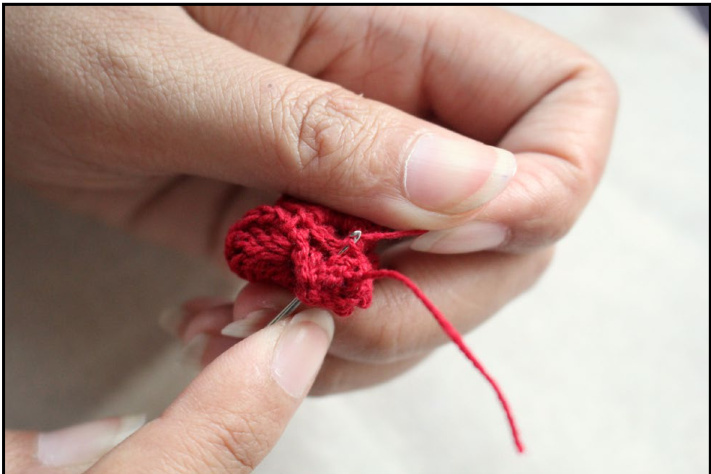
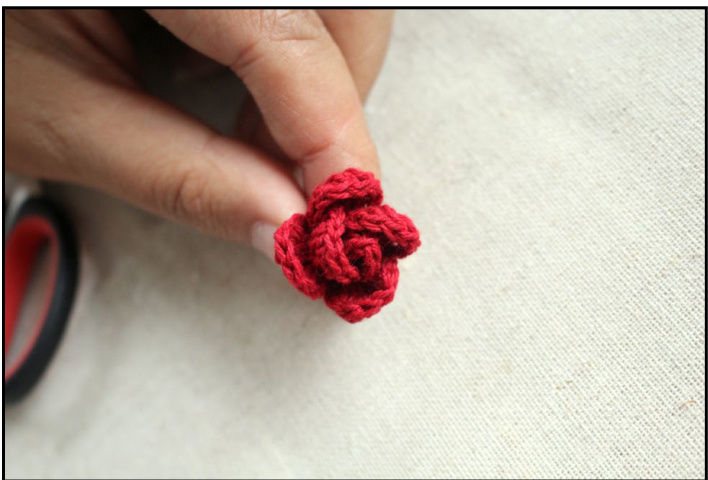
Step 4 - Pull the thread edges through the base to make it firm and hide the edges. Once you finish hiding the thread, cut it - and your flower should look similar to the photo to the right. Now, its time for the sepals, the sepals are simply being crochet to the base of the blossom, for each petal See photos in the next page.
Sepals Instructions
For the sepals, we change to green color thread (size #20 as well), and add it at the base of the blossom, anywhere we can, close to an edge of a petal. Then we Slip Stitch, Chain 6 times, and Slip Stitch to anywhere we can find next to the edge of the next petal. We repeat this 4 times for 4 sepals. See photos below:
Step 1 - Start from any loop you can find around the edge of a petal.
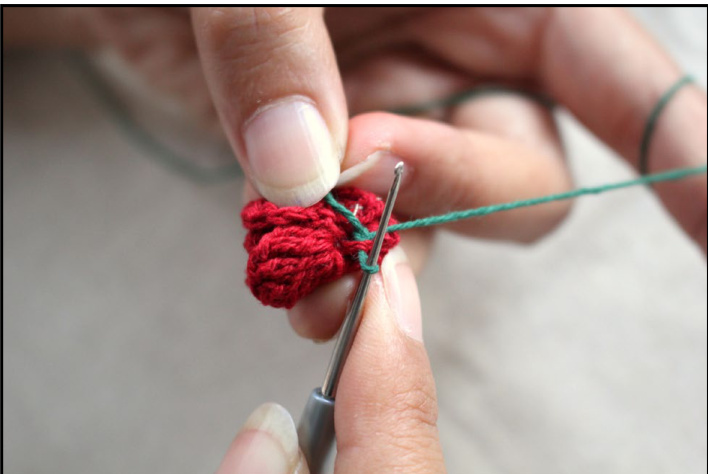
Step 2 - Draw the new thread through the loop.
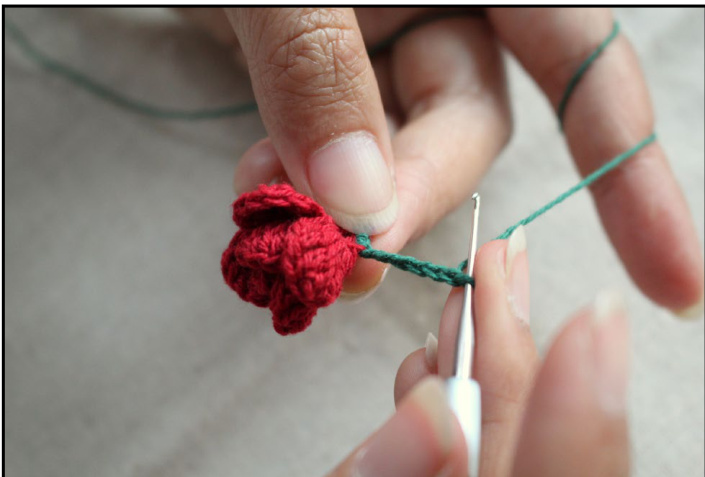
Step 3 - Chain 6 times.
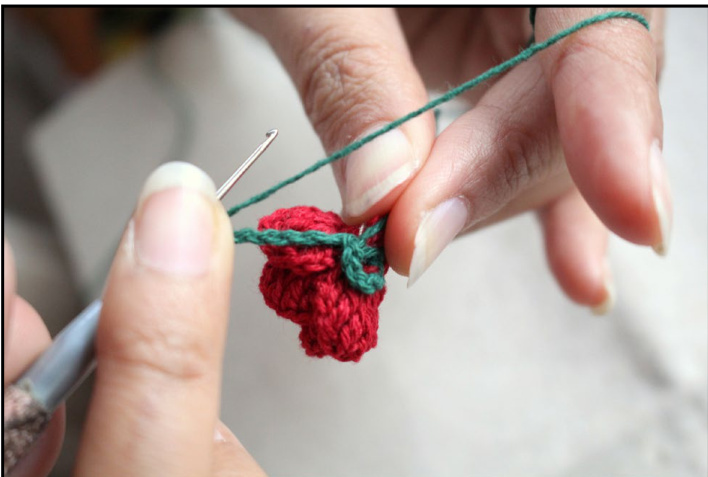
Step 4 - Slip Stitch to a loop in the next petal. and Repeat 4 times.
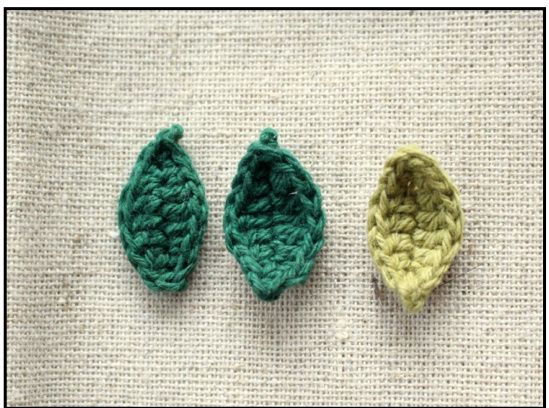
Leaf Pattern & Instructions
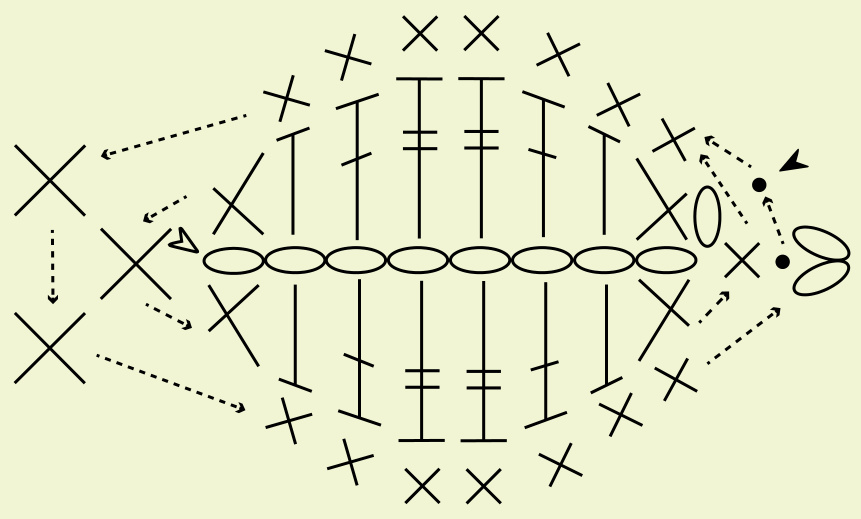
Stitch Key / Abbr.
Chain (ch) X - Single Crochet (sc) Half Double Crochet (dc) Double Crochet (dc) - Triple Crochet (tc) Start Cut
Instructions
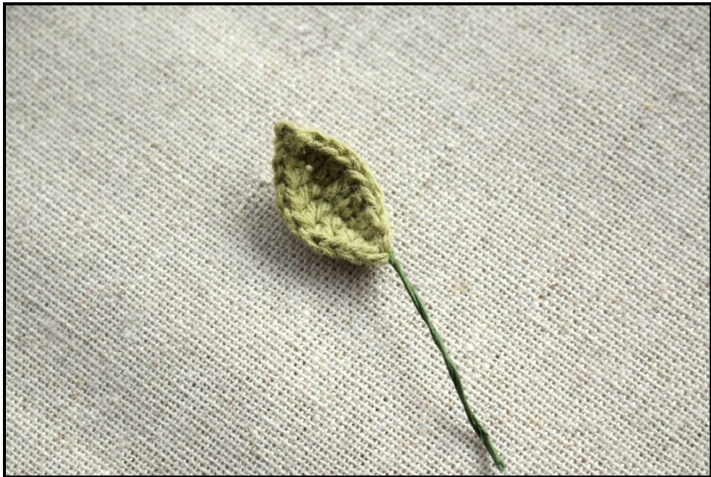
Foundation Row : Ch 9 times. Rnd 1 : Working back down the chains, skip 1 ch and work in each st - sc, hdc, dc, 2 tc, dc, hdc, sc, add another sc at the tip, and work your way back the other side - sc, hdc, dc, 2 tc, dc, hdc, sc. Rnd 2 : second row is all sc sts worked around in each st. Start in last ch of foundation row with sc, and continue with sc 8 times and keep going to the other side with 8 more sc. Finish the petal with a 2-ch picot (ch 2 and sl st to first ch), join with sl-st to 2nd st in rnd 1 and fasten off.
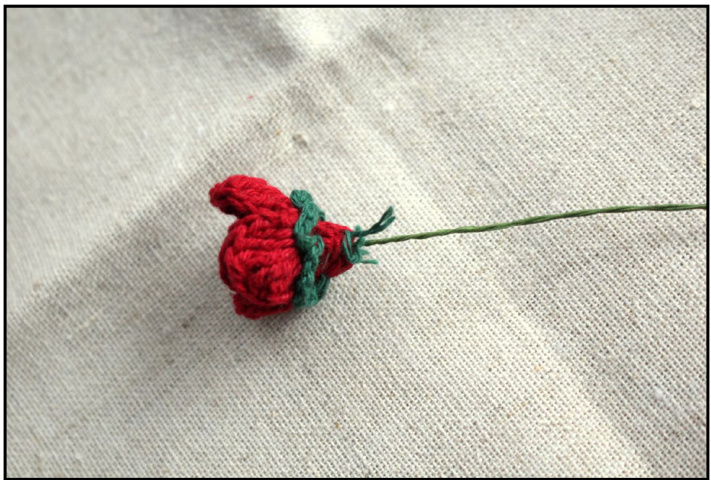
Finishing the Blossom
To make the final stem flower we'll need the blossom, the leaves (or a single leaf) floral tape and floral wire (thin gauge). Follow the photo guide below to see how to make the stem flower :
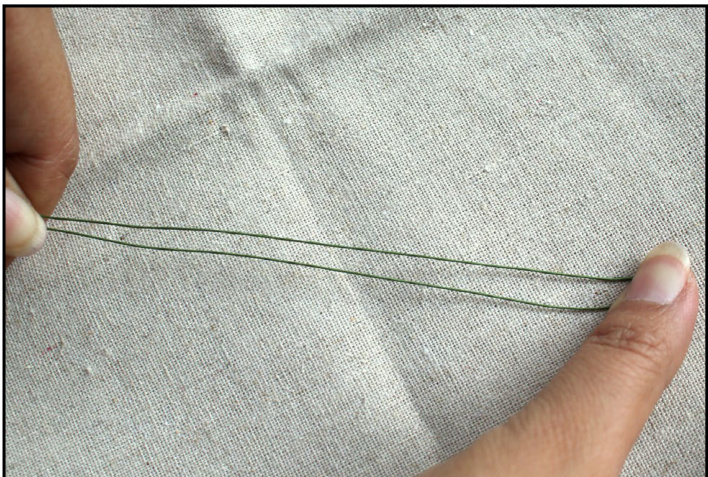
Step 1 - Fold the Floral Wire in the middle.
Step 3 - After the stick & twist.
Step 2 - Though the middle of the blossom, stick the two edges of the wire (each from a different spot), and twist the wire.
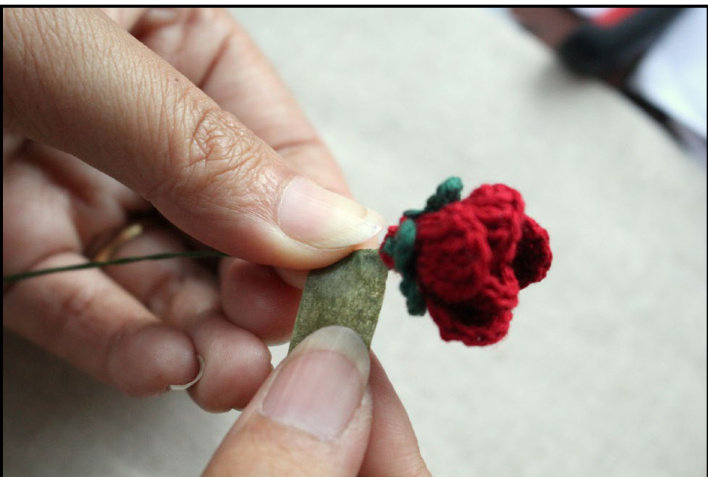
Step 4 - Use the floral tape to cover the wire and anything else you might want to cover from the blossom (parts of the base maybe, up to your preferences). Once the main stem is done - cut the floral tape and we move to the leaf.
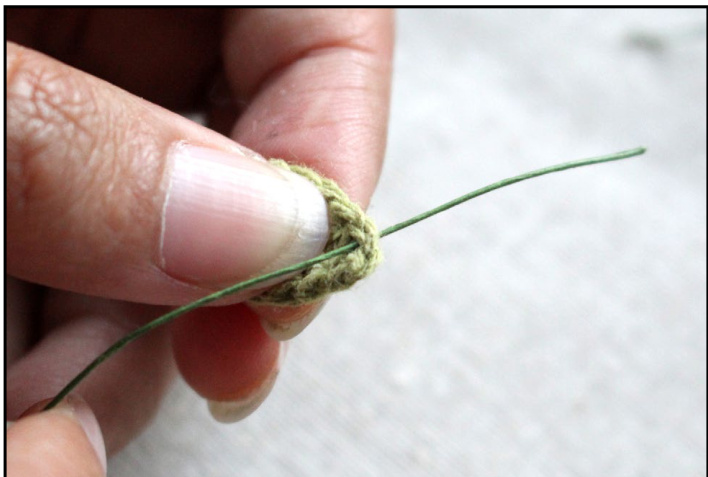
Step 5 - Use a shorter floral wire, and through the tip of the leaf, stick both edges (at different spots)
Step 6 - Pull & Twist.
Finishing the Blossom (#2)
Attach the leaf at the position your prefer, using floral tape - and fold it out a bit for an open leaf look.
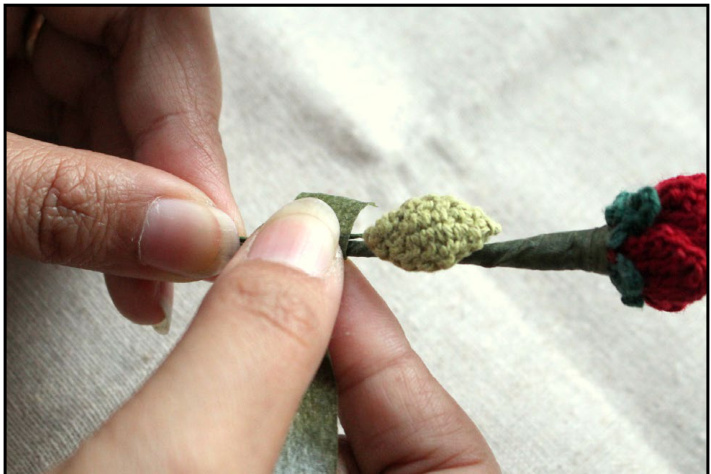
Step 7 - Using Floral Tape, attach the leaf to the main stem.
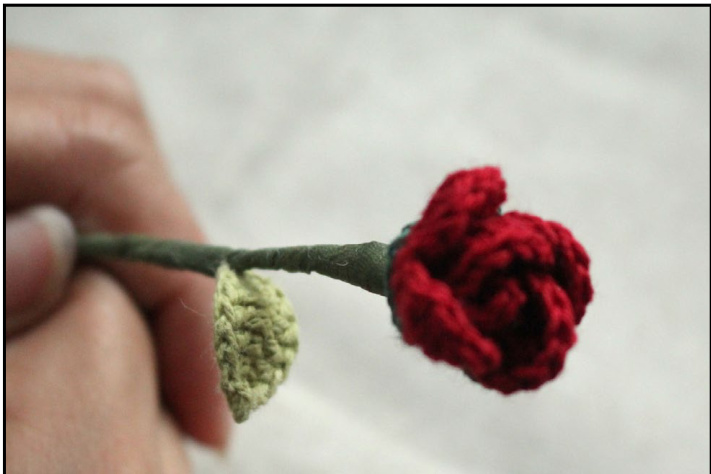
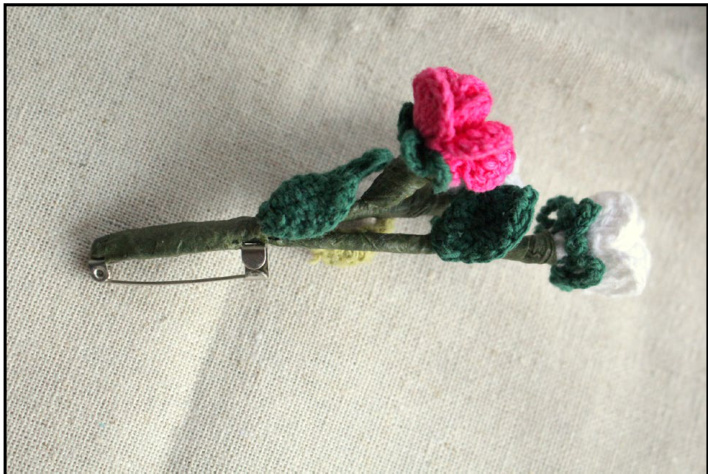
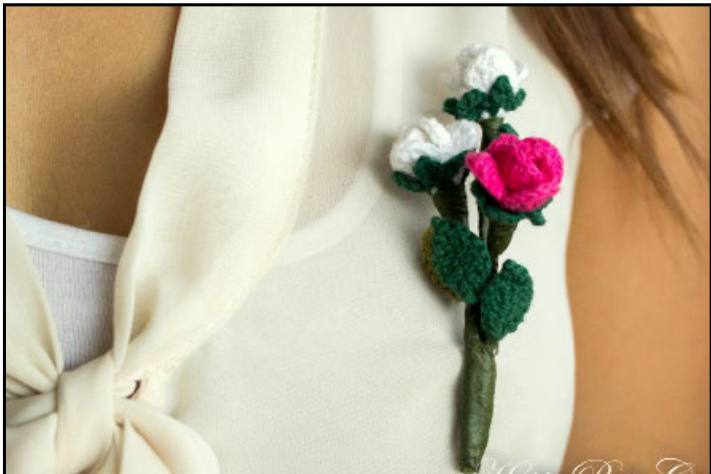
Step 8 - Open the leaf for a fresh look. and you're done! You might want to crochet a few of this, and attach a clasp (using floral tape), to get a lovely brooch / boutonniere :
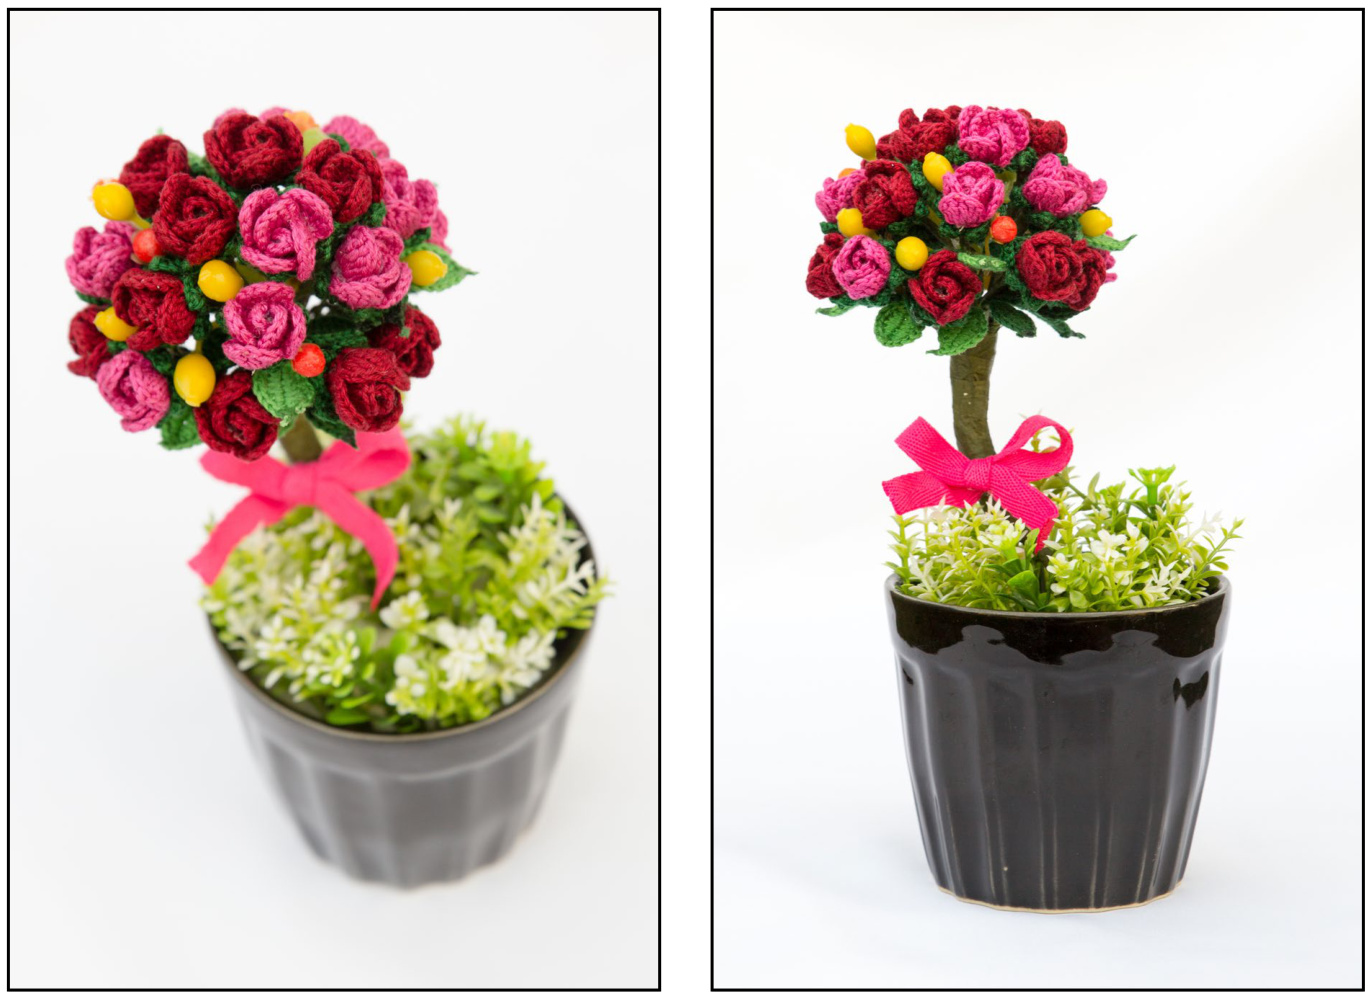
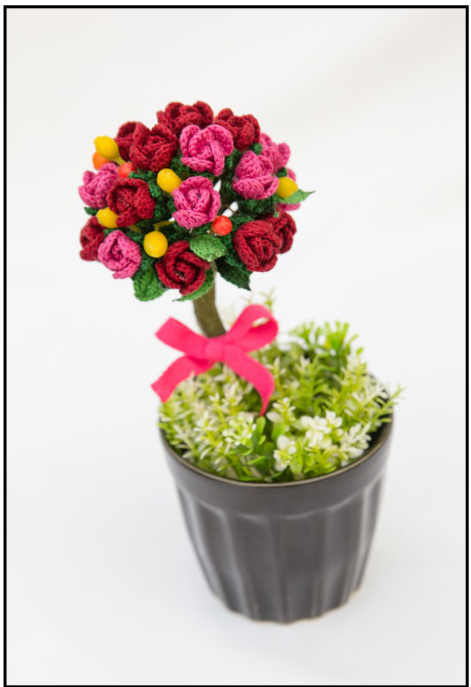
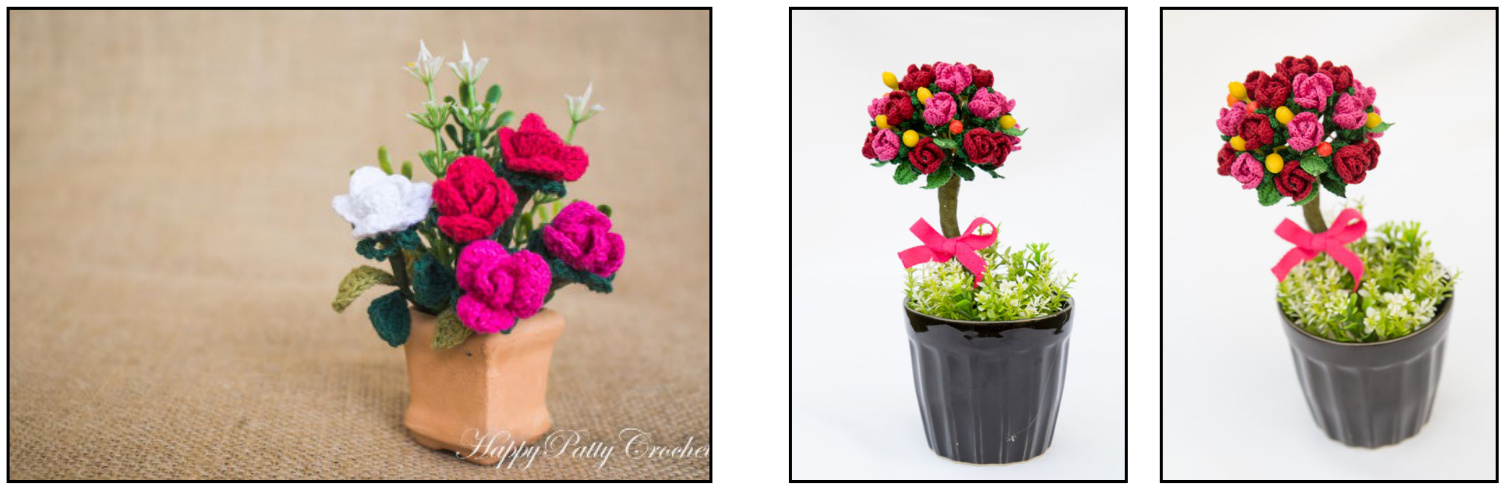
Or, crochet some more, add to a terra cota pot and make a mini arrangement, or even more to make a nice Rose Tree!
That's it :) Enjoy using this lovely Mini Stem Rose, its very versatile, and looks great in large numbers - use it for table/office decoration, as a brooch, a small applique or many other projects!
I really hope you enjoyed making this lovely mini stem Rose. If you have any question, please let me know and I'll do my best to help. Thanks and enjoy crocheting! Happy Patty :)
Copyright Notice / Terms of Use
This Pattern is my original and unique design, please do not resell, redistribute, copy or rewrite this file, its text content or the included patterns/photos. Feel free to include the finished flower in any project that you want, either for private use or for sell. If you choose to sell the flower, please include a link to my shop and credit Happy Patty Crochet as the original designer. Thank you for understanding!
Appendix Crochet Symbols and Abbreviations
| Crochet Symbol |
| abbr (UK term) |
| Short description (if needed) |