Resolution 2013
My New Years' resolution for 2013 is to actually publish the back log of patterns I've been dreaming up for years now. At the beginning of each month in 2013 I'll release a new pattern available for free as a KAL for one month; and for purchase the month after. I'll also release it as an update to this eBook. If you'd like to join the KAL for the year, download the eBook at any point and you'll get updates for all the patterns.
Contents
Freya 1 Mountain 3 Nimue 5 Leigh 8 Julia 10 Resolution - 2013 January - Freya
Freya - page 1 ①2013 Carisa Chang - Stranded
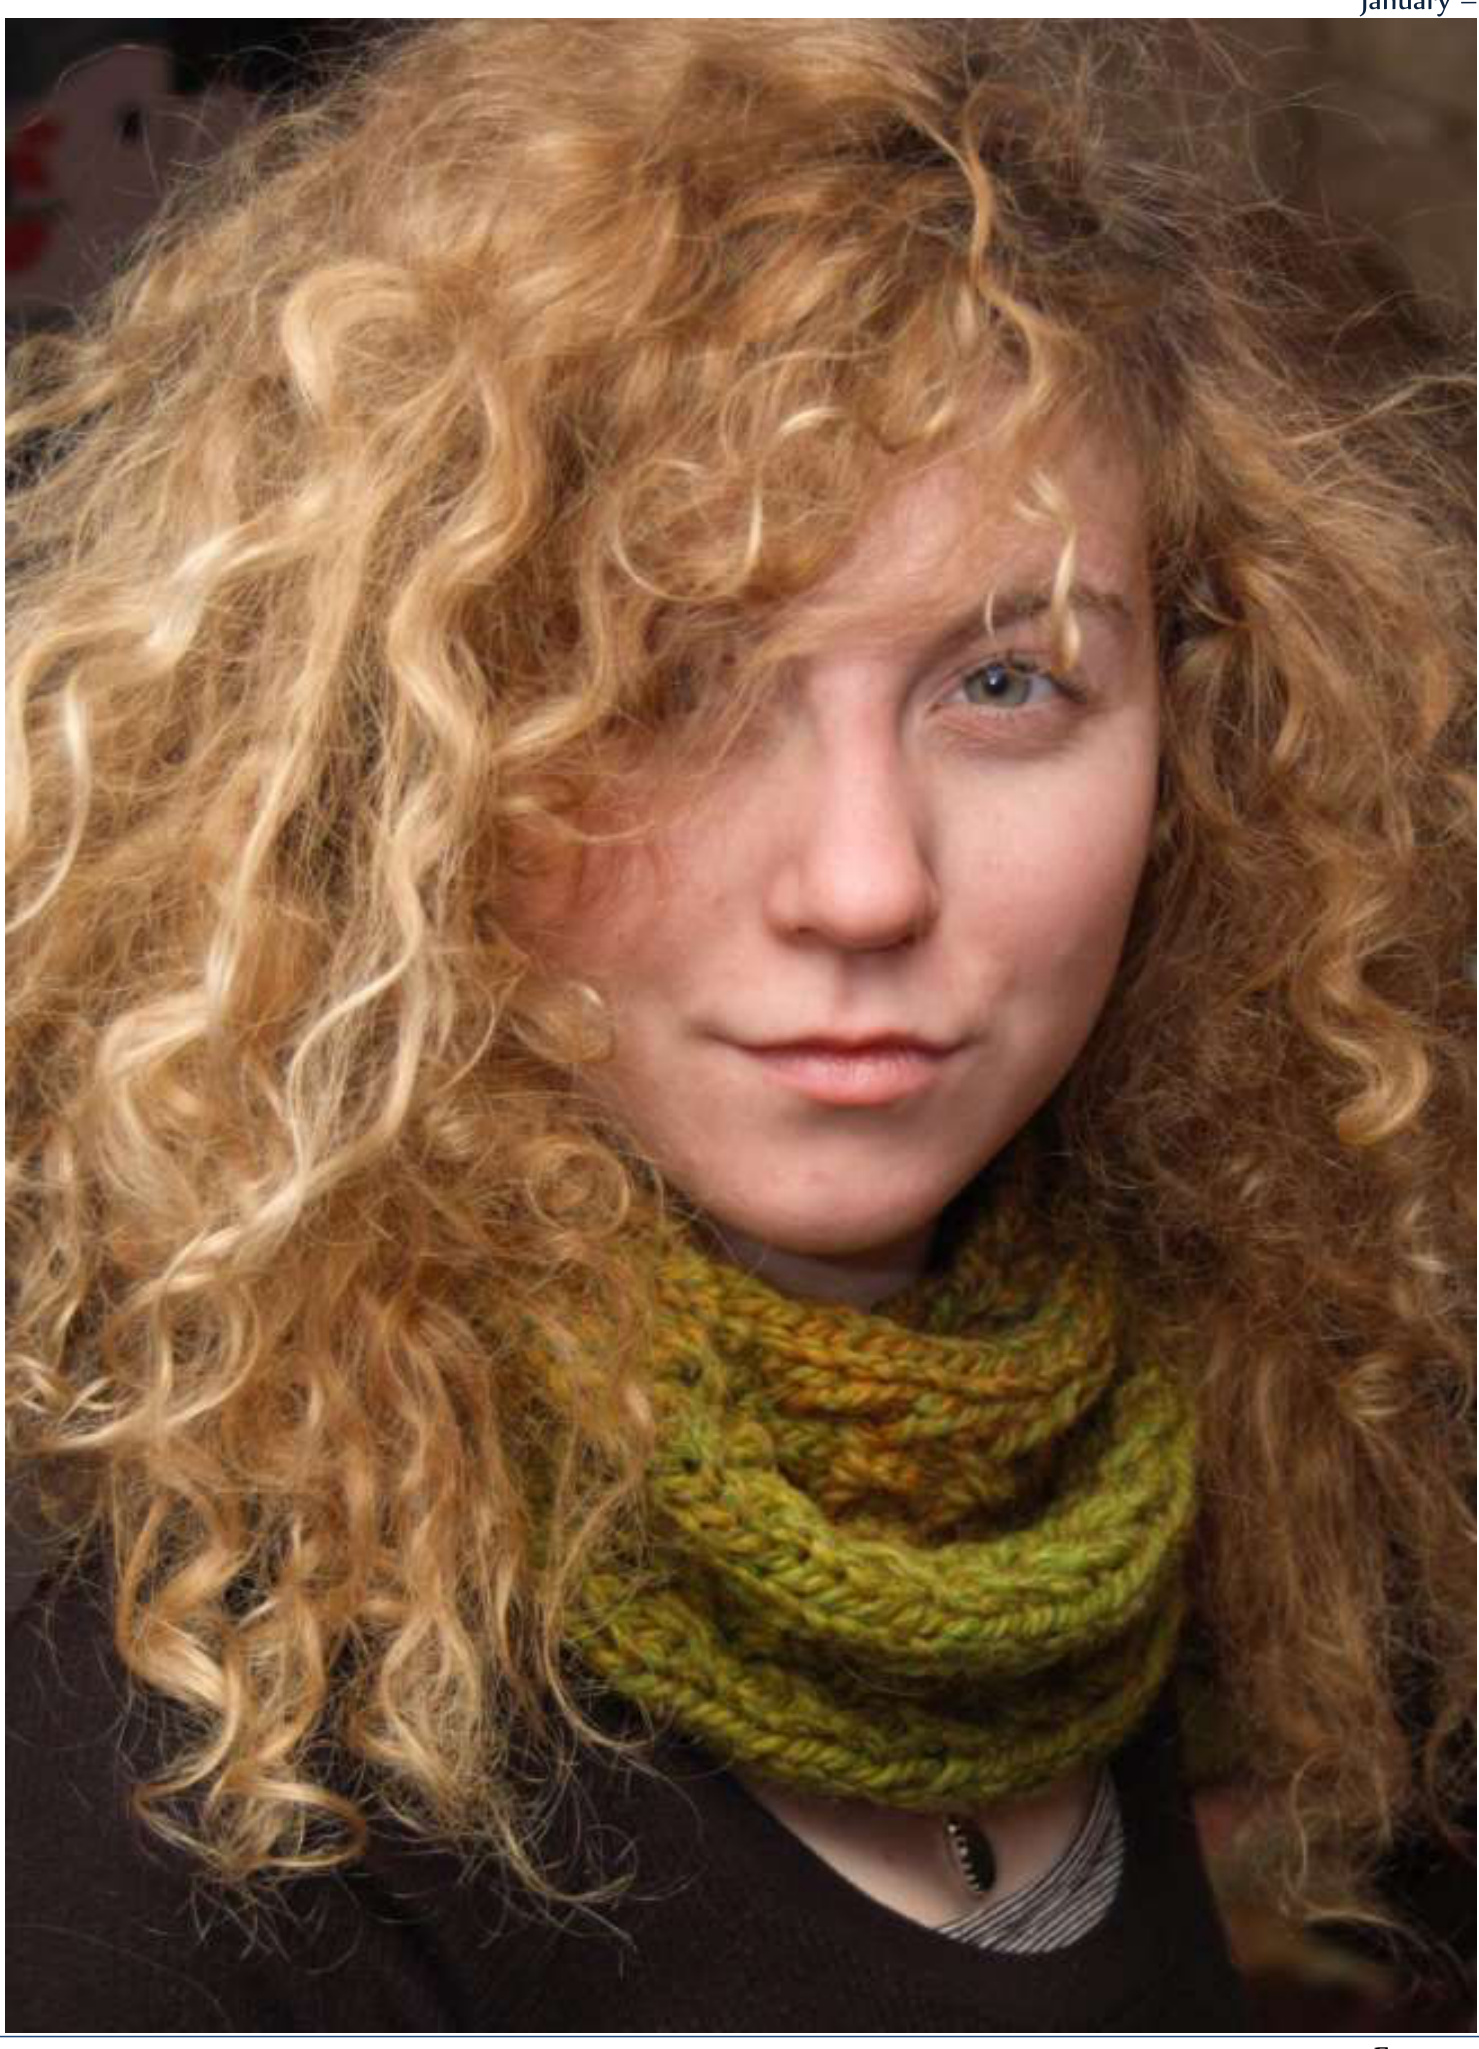
Freya
Freya is a beautifully versatile scarf designed to showcase bulky yarn in a simple lace pattern with a variety of finishing options. She is easy to knit, quick to work up, and warm on winter days and mornings and nights year-round. Freya is the first pattern in my Resolution - 2013 eBook, a series of 12 patterns released monthly in 2013. The pattern will be made available for free as a KAL on January 1st, 2013. An updated pattern with images will be uploaded after the KAL and available for purchase on February 1st, 2013. Materials: 140 yards bulky weight yarn (1 skein Cascade Covington) Size 10 knitting needles, straight or circular 3 buttons - %"-1" diameter (optional) Cast on 23 stitches. Cast on provisionally if you plan to graft ends together to form an infinity scarf. P2tog-b=p2tog tbl Row 1: \*K1, k2tog, yo, k1, yo, ssk, k1\*, (k1, rep \* to \*)twice Row 2: \*p2tog-b, yo, p3, yo, p2tog\*, (p1, rep \* to \*) twice Row 3: \*K1, yo, ssk, k1, k2tog, yo, k1\*, (k1, rep \* to \*)twice Row 4: \*p2, yo p3tog, yo, p2\*, (p1, rep \* to \*) twice Repeat rows 1-4 until you reach your desired length. I knit until I used an entire skein of Cascade Covington yarn, about 140 yards. Finish: Simple scarf: cast off. Buttoned scarf: cast off. Attach buttons at even spacing on one end of scarf - 1 button at each % of the width of the scarf, as pictured. Infinity scarf: place live stitches from provisional cast on on separate needle. Graft ends together using Kitchener stitch - Knitty.com has a particularly useful tutorial here: http://knitty.com/ISSUEsummer04/FEATthe resasum04.html Block loosely and enjoy! Resolution - 2013 February - Mountain
Mountain - page 3 2013 Carisa Chang - Stranded
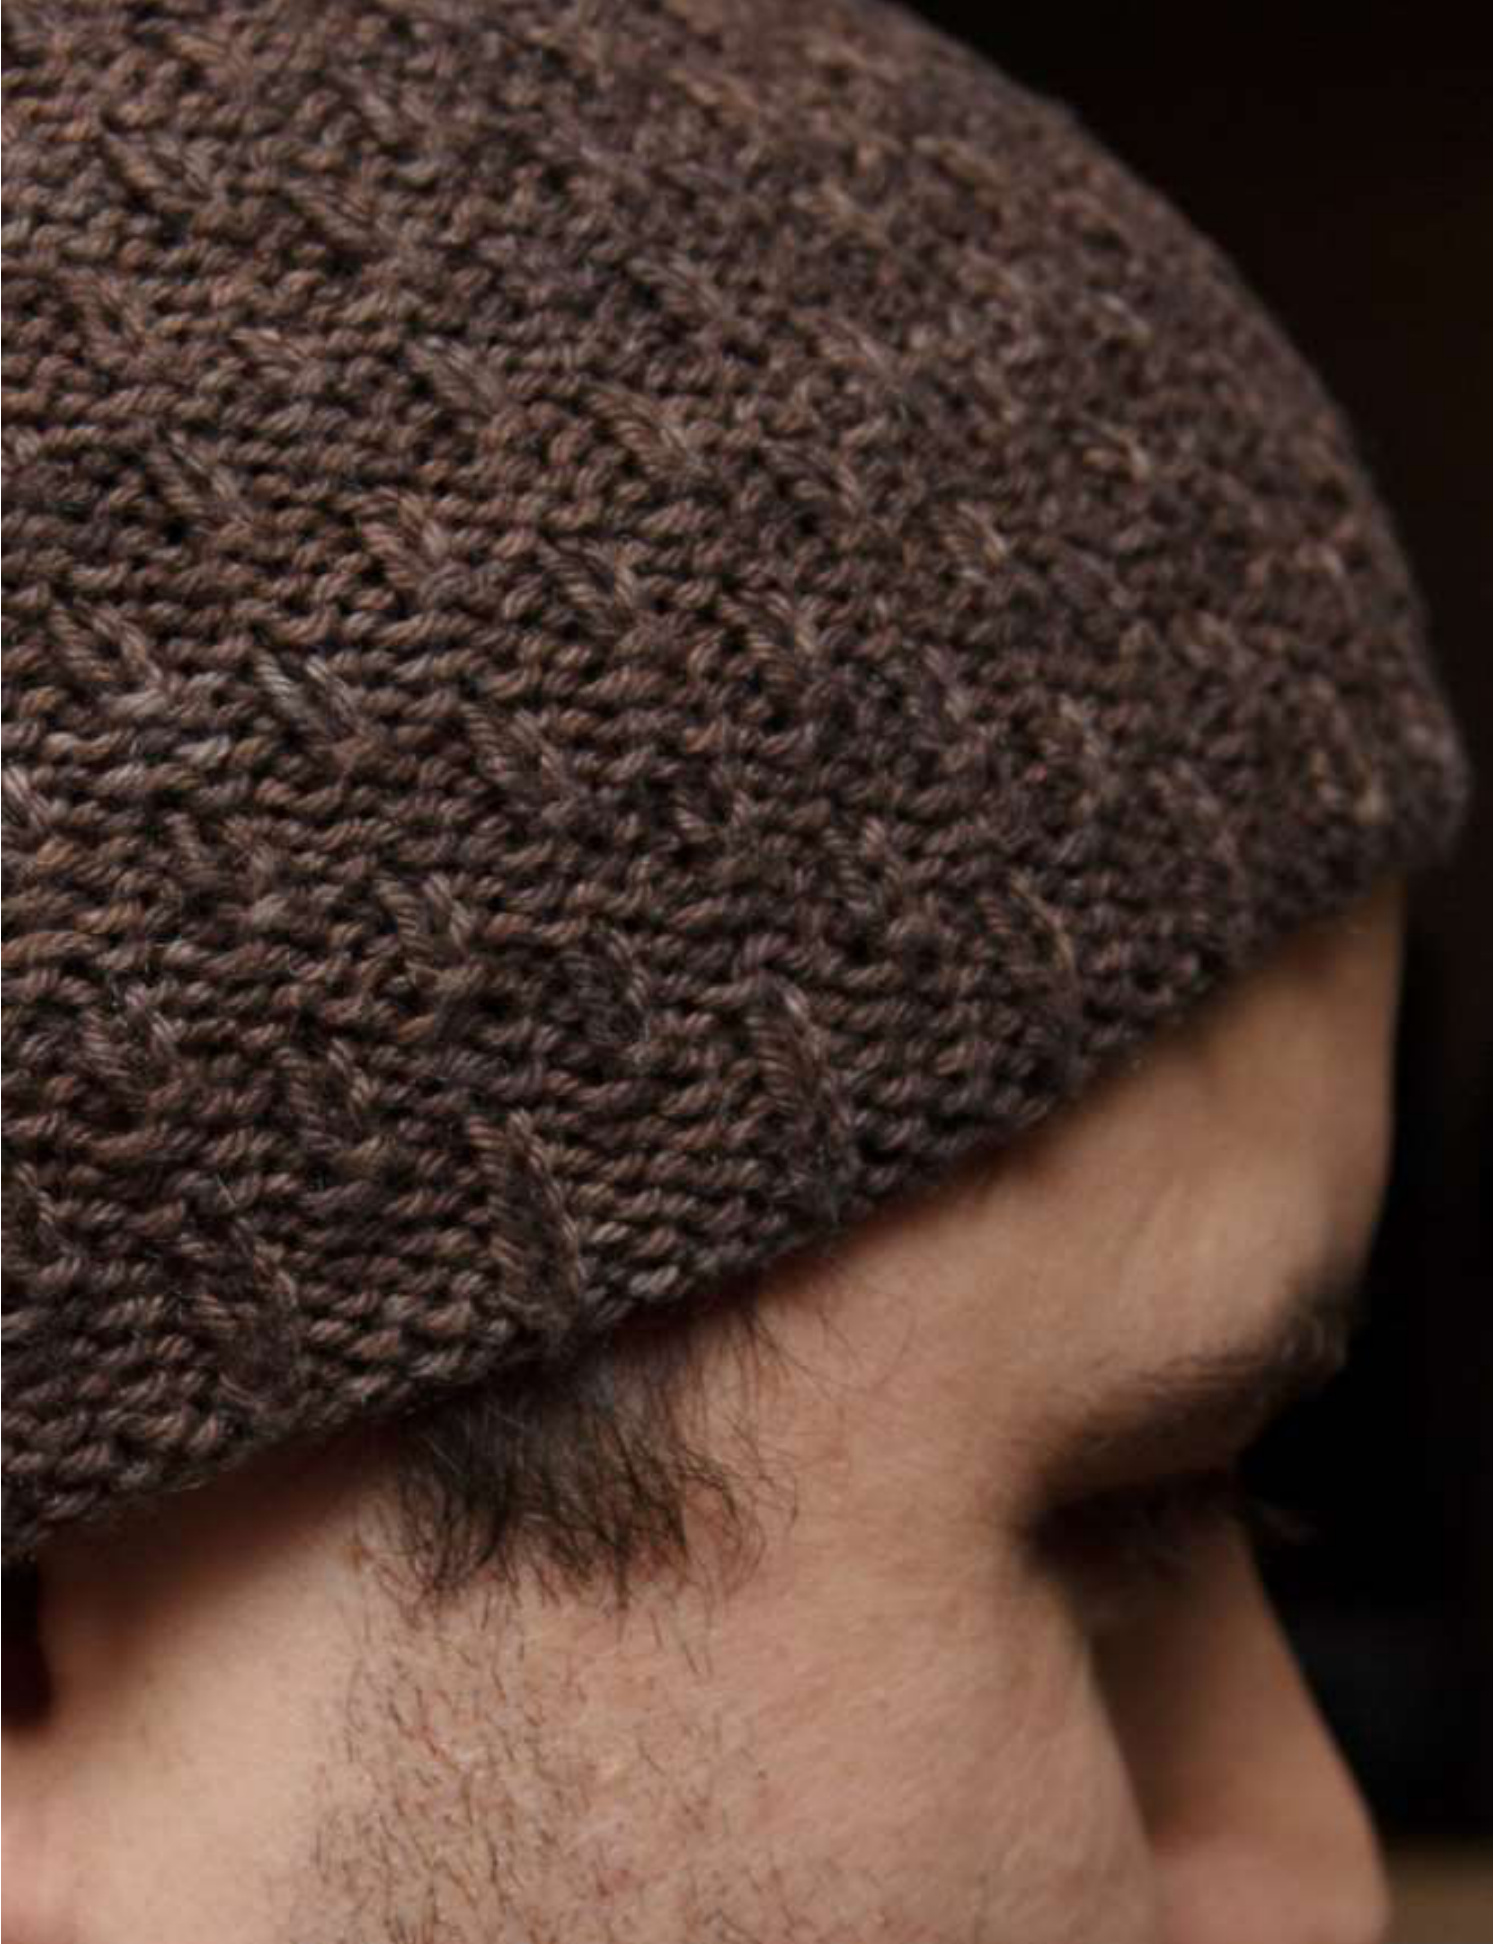
Mountain
Mountain is a simple take on the classic beanie. An overall stitch pattern is a variation on basket weave stitches, with a purl background lending some softness to the structure and intermittent knit stitches providing direction and tiny pockets of air underneath to hold in warmth. The crown decreases are worked in a no slant double decrease, pulling the pattern inward in a gentler spiral than the typical k2tog decrease method. Worked in DK weight yarn, Mountain is a warm but not-too-warm hat for brisk Fall and Spring days. Or, if you're in the Pacific Northwest, the entire year! Stitch pattern looks best in solid or slightly variegated yarn, but is lost in highly variegated yarn (such as self-striping yarn). Mountain is the second pattern in my Resolution - 2013 eBook, a series of 12 patterns released monthly in 2013. The pattern will be made available for free as a KAL on February 1"t, 2013. An updated pattern with images will be uploaded after the KAL and available for purchase on March 1st, 2013.
Materials:
120-130yds DK weight yarn - Misti Alpaca Tonos Pima Silk in Truffle used for hat in photos Size 2 US needles: DPN or long circulars for magic loop yarn needle for finishing
Gauge:
20 stitches = 3"/7.5cm in pattern Size: Adult Cast on 120 stitches. Join to work in the round. Work %-1" p3, k1 ribbing, depending on desired band width.
Stitch pattern:
Rows 1-3: \*p1, k1, p2\* repeat till end Rows 4-6: \*p3,k1\* repeat till end Work stitch pattern until hat measures 4.5-5" from cast on,endingwith Row3.Begin decrease.
Decrease:
dec = slip 1, p2tog, psso Row 1: \*dec, K1, (p3, K1) x4\*, repeat \* to \* till end Row 2: \*p1, k1, (p3, k1) x4\*, repeat \* to \* till end Row 3: \*dec, k1, (p3, k1) x3, p2\* repeat \* to \* till end Row 4, 8, 12, 16: \*p1, k1, p2\* repeat \* to \* till end Row 5: \*dec, k1, (p3, k1) x3\* repeat \* to \* till end Row 6: \*p1, k1, (p3, k1) x3\* repeat \* to \* till end Row 7: \*dec, k1, (p3, k1) x2, p2\* repeat \* to \* till end Row 9: \*dec, k1, (p3, k1) x2\* repeat \* to \* till end Row 10: \*p1, k1, (p3, k1) x2\* repeat \* to \* till end Row 11: \*dec, k1, p3, k1, p2\* repeat \* to \* till end Row 13: \*dec, k1, p3, k1\* repeat \* to \* till end Row 14: \*p1, k1, p3, k1\* repeat \* to \* till end Row 15: \*dec, k1, p2\* repeat \* to \* till end Row 17: \*dec, k1\* repeat \* to \* till end
Finishing:
Cut yarn at least 6" from hat, use yarn needle to thread yarn through the remaining stitches and pull tightly to close.Weavein ends. Block lightly. To prevent creasing while blocking you can either rotate the hat as it dries flat, or block it on a rounded object such as a ball or balloon. Resolution - 2013 March - Nimue
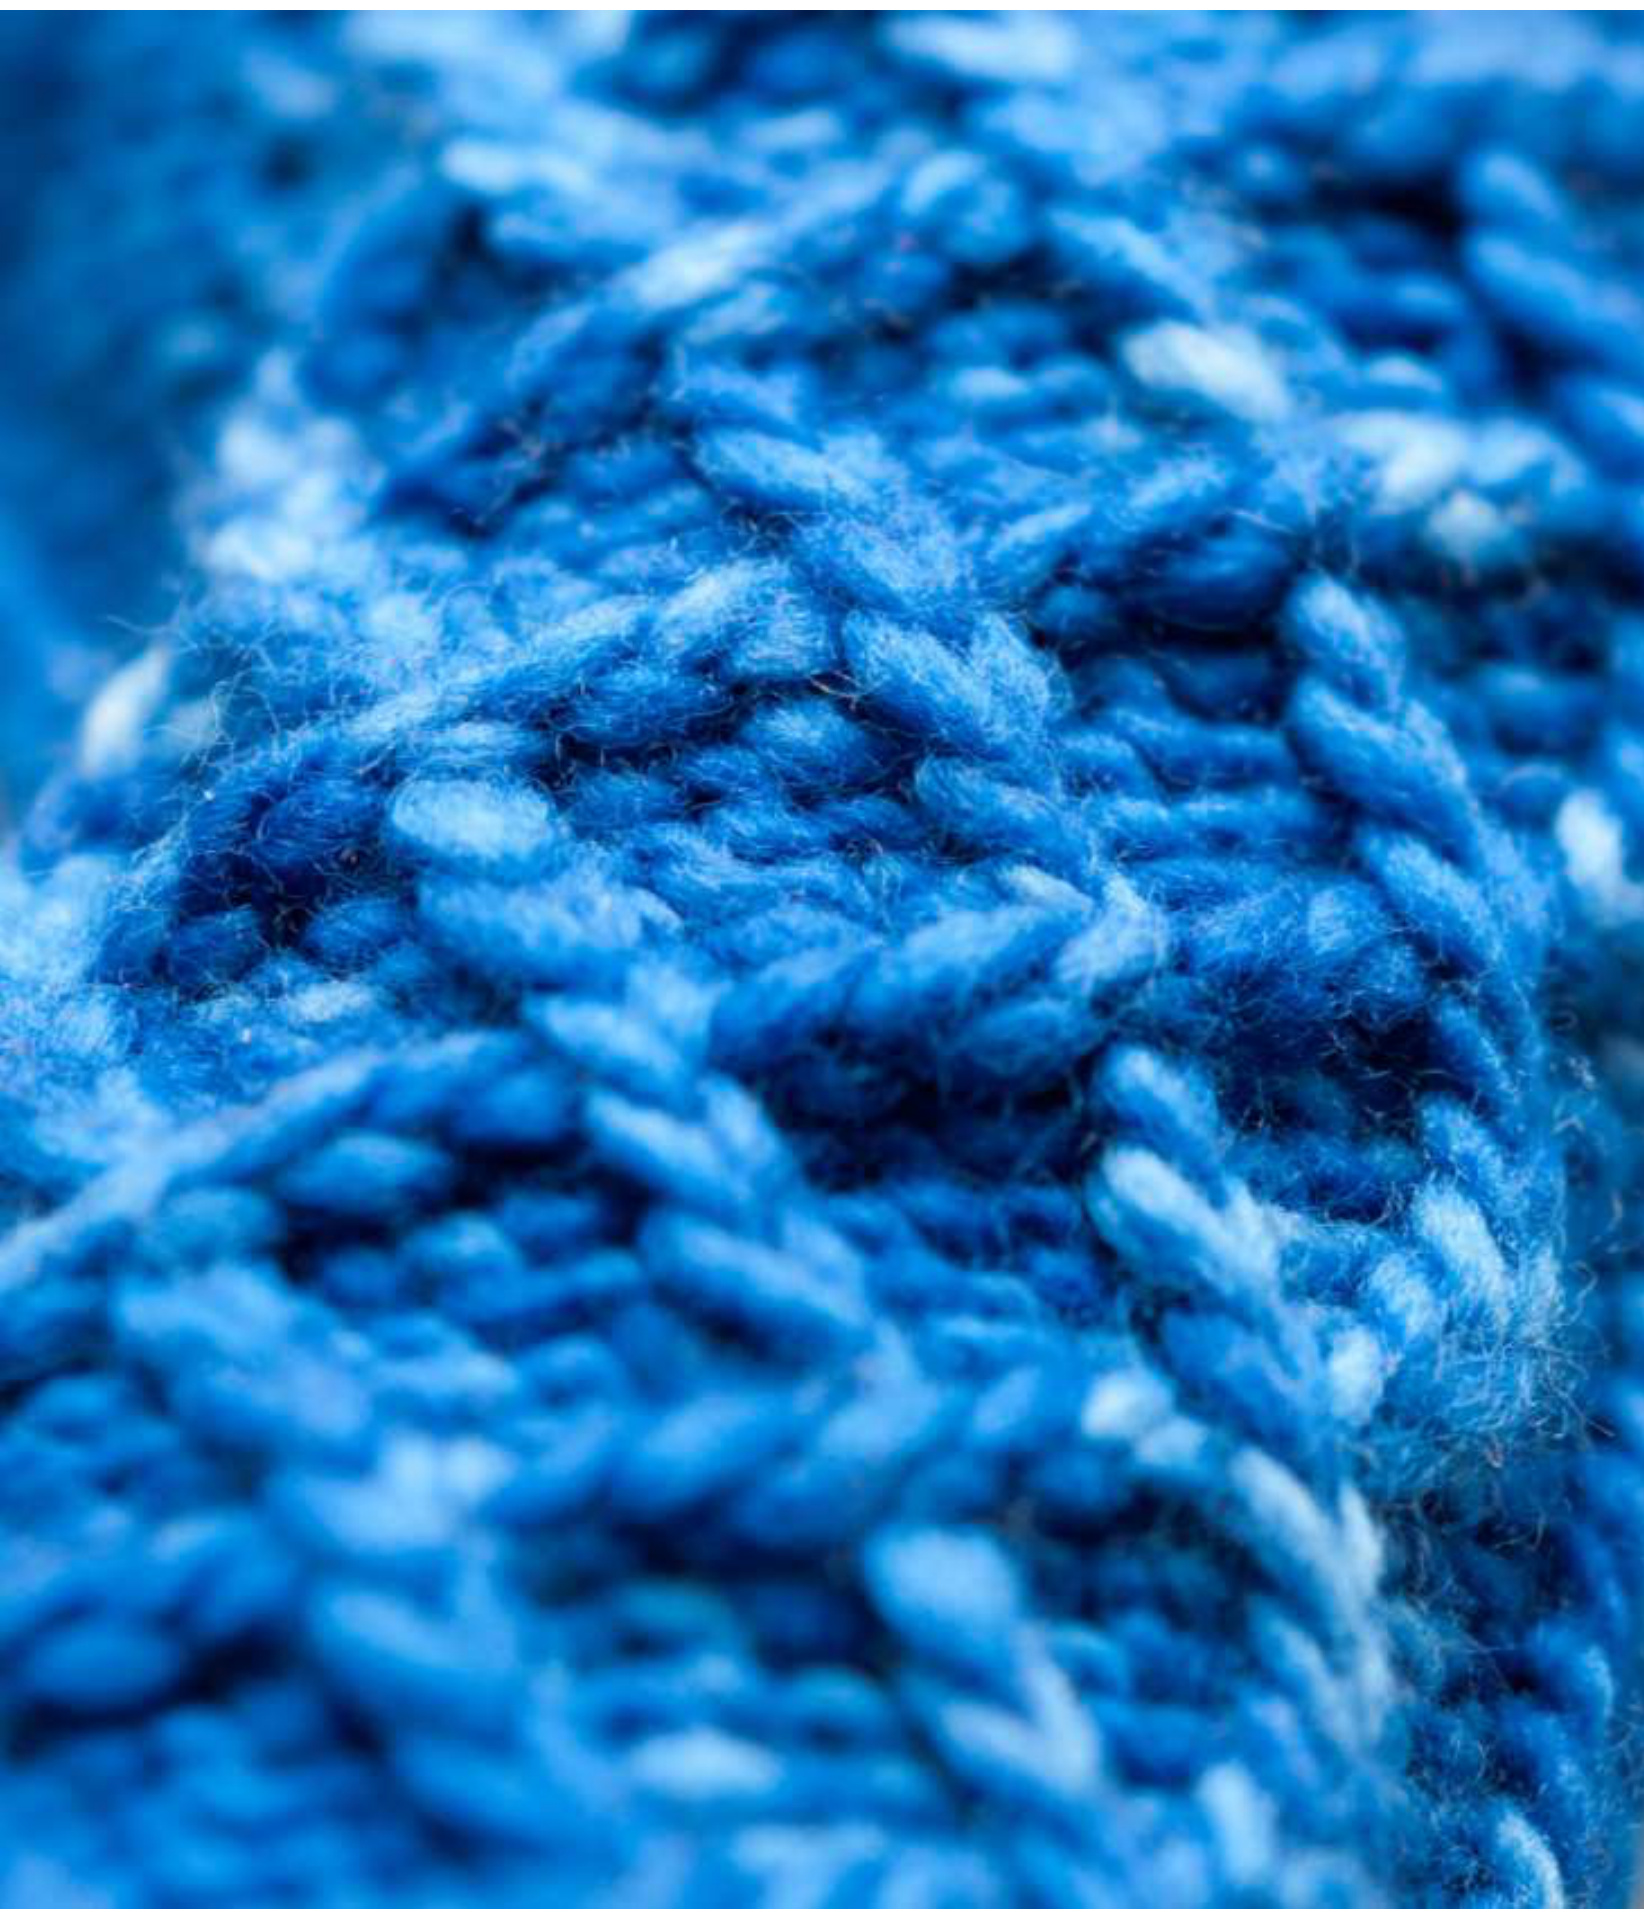
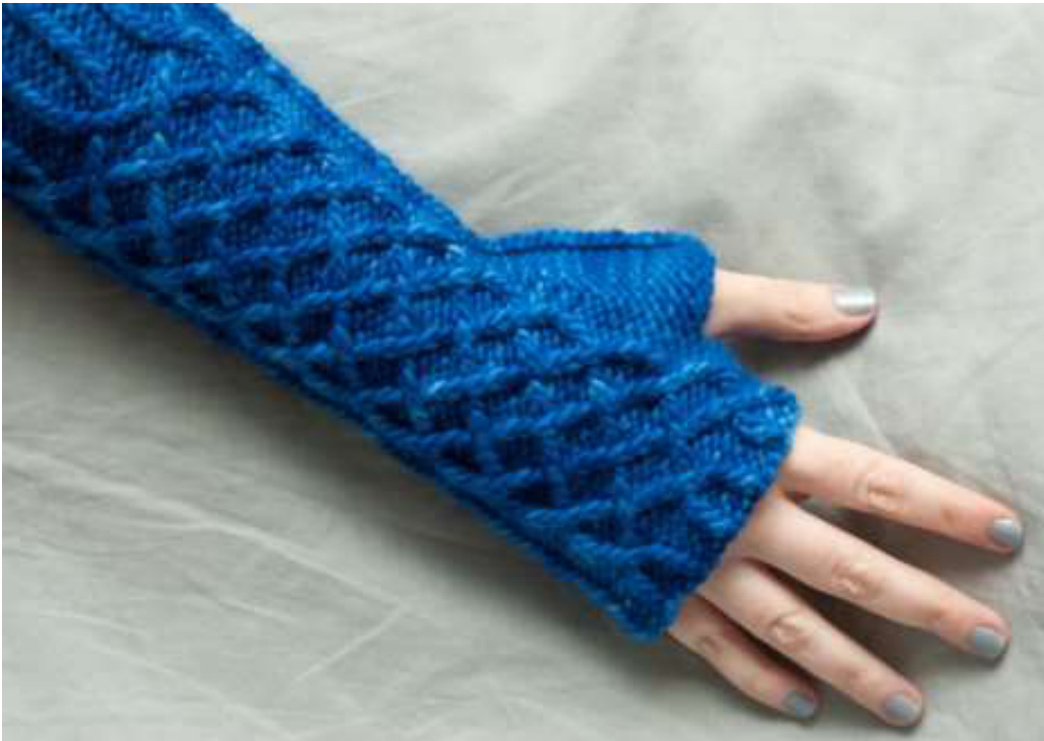
Nimue
Nimue is a set of fingerless gloves featuring intricately worked twisted stitch cables, reminiscent of delicate Celtic knotworks. Rows of twisted stitches run up the inner arm and onto the palm of the gloves, providing visual interest and flexible shaping through the wrist and hand. The cable is a deceptively simple 6 row repeat, accessible to cable beginners and experts alike. Nimue is the third pattern in my Resolution - 2013 eBook, a series of 12 patterns released monthly in 2013. The pattern will be made available for free as a KAL on March 1st, 2013. An updated pattern with images will be uploaded after the KAL and available for purchase on April 1st, 2013.
Materials:
155-165yds worsted weight yarn - Manos del Uruguay Maxima in Royal (M2445) used for glovesinphotos Size 6 US needles: DPN or long yarn needle for finishing
Gauge:
7 stitches x 8 rows = 2" in K1tbl, p2 pattern Size: XOne size fits most 7-8" palm circumference \* All K stitches are Ktbl, knit through back loop.
Thumb gusset:
Beginning on first row of repeat 6 of cable chart: R1: Work in pattern until 1 st before 7th Ktbl, PFB, K1tbl, PFB, work rest of row in pattern R2: Work in pattern until 1 st before 7th Ktbl, PM, p1, K1tbl, p1, PM, work rest of row in pattern R3, 5, 7, 9, 11: Work in pattern until marker, PFB, work in pattern until 1 st before next marker, PFB, SM, work in pattern for rest of the row R4, 6, 8, 10, 12: Work in pattern R13-18: work in pattern R19 (final round of thumb): work in pattern to first marker, remove marker, cast off in pattern until second marker, pick up and knit one stitch from before first marker, finish round in pattern
Cable chart:
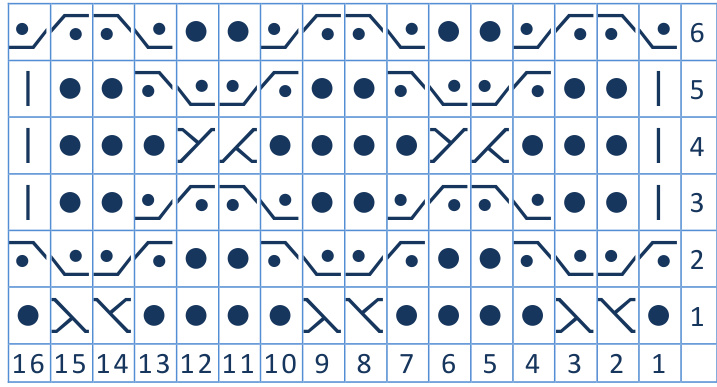
Key:
入K = KFKB: place next stitch on cable needle, hold to front. Ktbl next stitch, then ktbl stitch on cable needle Y人 = KBKF: place next stitch on cable needle, hold to back. Ktbl next stitch, then kbtl stitch on cable needle. · = PBKF: place next stitch on cable needle, hold to front. Purl next stitch, then ktbl stitch from cable needle / = KFPB: place next stitch on cable needle, hold to back. Ktbl next stitch, then purl stitch from cable needle Written cable instructions: R1: p1, KFKB, p4, KFKB, p4, KFKB, p1 R2:KFPB,PBKF,p2,KFPB, PBKF,p2,KFPB,PBKF R3: k1tbl, p2, PBKF, KFPB, p2, PBKF, KFPB, p2, k1tbl R4: k1tbl, p2, KBKF, p4, KBKF, p2, k1tbl R5: k1tbl p2, KFPB, PBKF, p2, KFPB,PBKF, p2, K1tbl R6:PBKF,KFPB,p2,PBKF,KFPB,p2,PBKF,KFPB Nimue - page 6 ①2013 Carisa Chang - Stranded Cast on 39 stitches.Divide stitches between DPNs or long circulars if using the magic circle method. Put 19 stitches on the front needle and 20 stitches on the back needle. Right Glove (cable worked on Ktbl stitches 1-6):
| Finishingrows | |
| Cablerepeat | K1tbl,p2section |
| Cablerepeat | K1tbl,p2section,endofgusset |
| Cablerepeat | K1tbl,p2section,gusset |
| Cablerepeat | K1tbl,p2 section,start of gusset |
| Cablerepeat | K1tbl,p2section |
| Cablerepeat | K1tbl, p2 section |
| Cablerepeat | K1tbl, p2 section |
| Cablerepeat | K1tbl,p2section |
| Cablerepeat | K1tbl, p2section |
| 10rwsK1tbl,p2+setuprow | |
Left Glove (cable worked on Ktbl stitches 8-13):
| Finishingrows | |
| K1tbl,p2 section | Cablerepeat |
| K1tbl,p2section,endofgusset | Cablerepeat |
| K1tbl,p2section,gusset | Cablerepeat |
| K1tbl,p2section,startofgusset | Cablerepeat |
| K1tbl, p2 section | Cablerepeat |
| K1tbl, p2 section | Cablerepeat |
| K1tbl,p2section | Cablerepeat |
| K1tbl,p2section | Cablerepeat |
| K1tbl,p2 section | Cablerepeat |
| 10rwsK1tbl,p2+setuprow | |
Written instructions:
Work 10 rows \*K1tbl, p2\*. Set up row: work in pattern, working row 6 of the cable section on the given Ktbl columns in charts above (for right glove, it is columns 1-6, for left glove 8-13). For both gloves, work 5 cable pattern repeats, continuing in K1tbl, p2 pattern for the remainder of the gloves. On the first row of the 6th cable pattern repeat, begin Thumb gusset per instructions on page 1. The thumb gusset will be worked during the next 3 cable pattern repeats (6-8). Work one more cable repeat after ending thumb for 9 repeatstotal. Work rows 1 and 2 of the cable chart. Work 2 additional rows in \*K1tbl, p2\* pattern for entire round. Bind off, trim and weave in ends.
Resolution - 2013 Leigh - page 8 @2013 Carisa Chang - Stranded
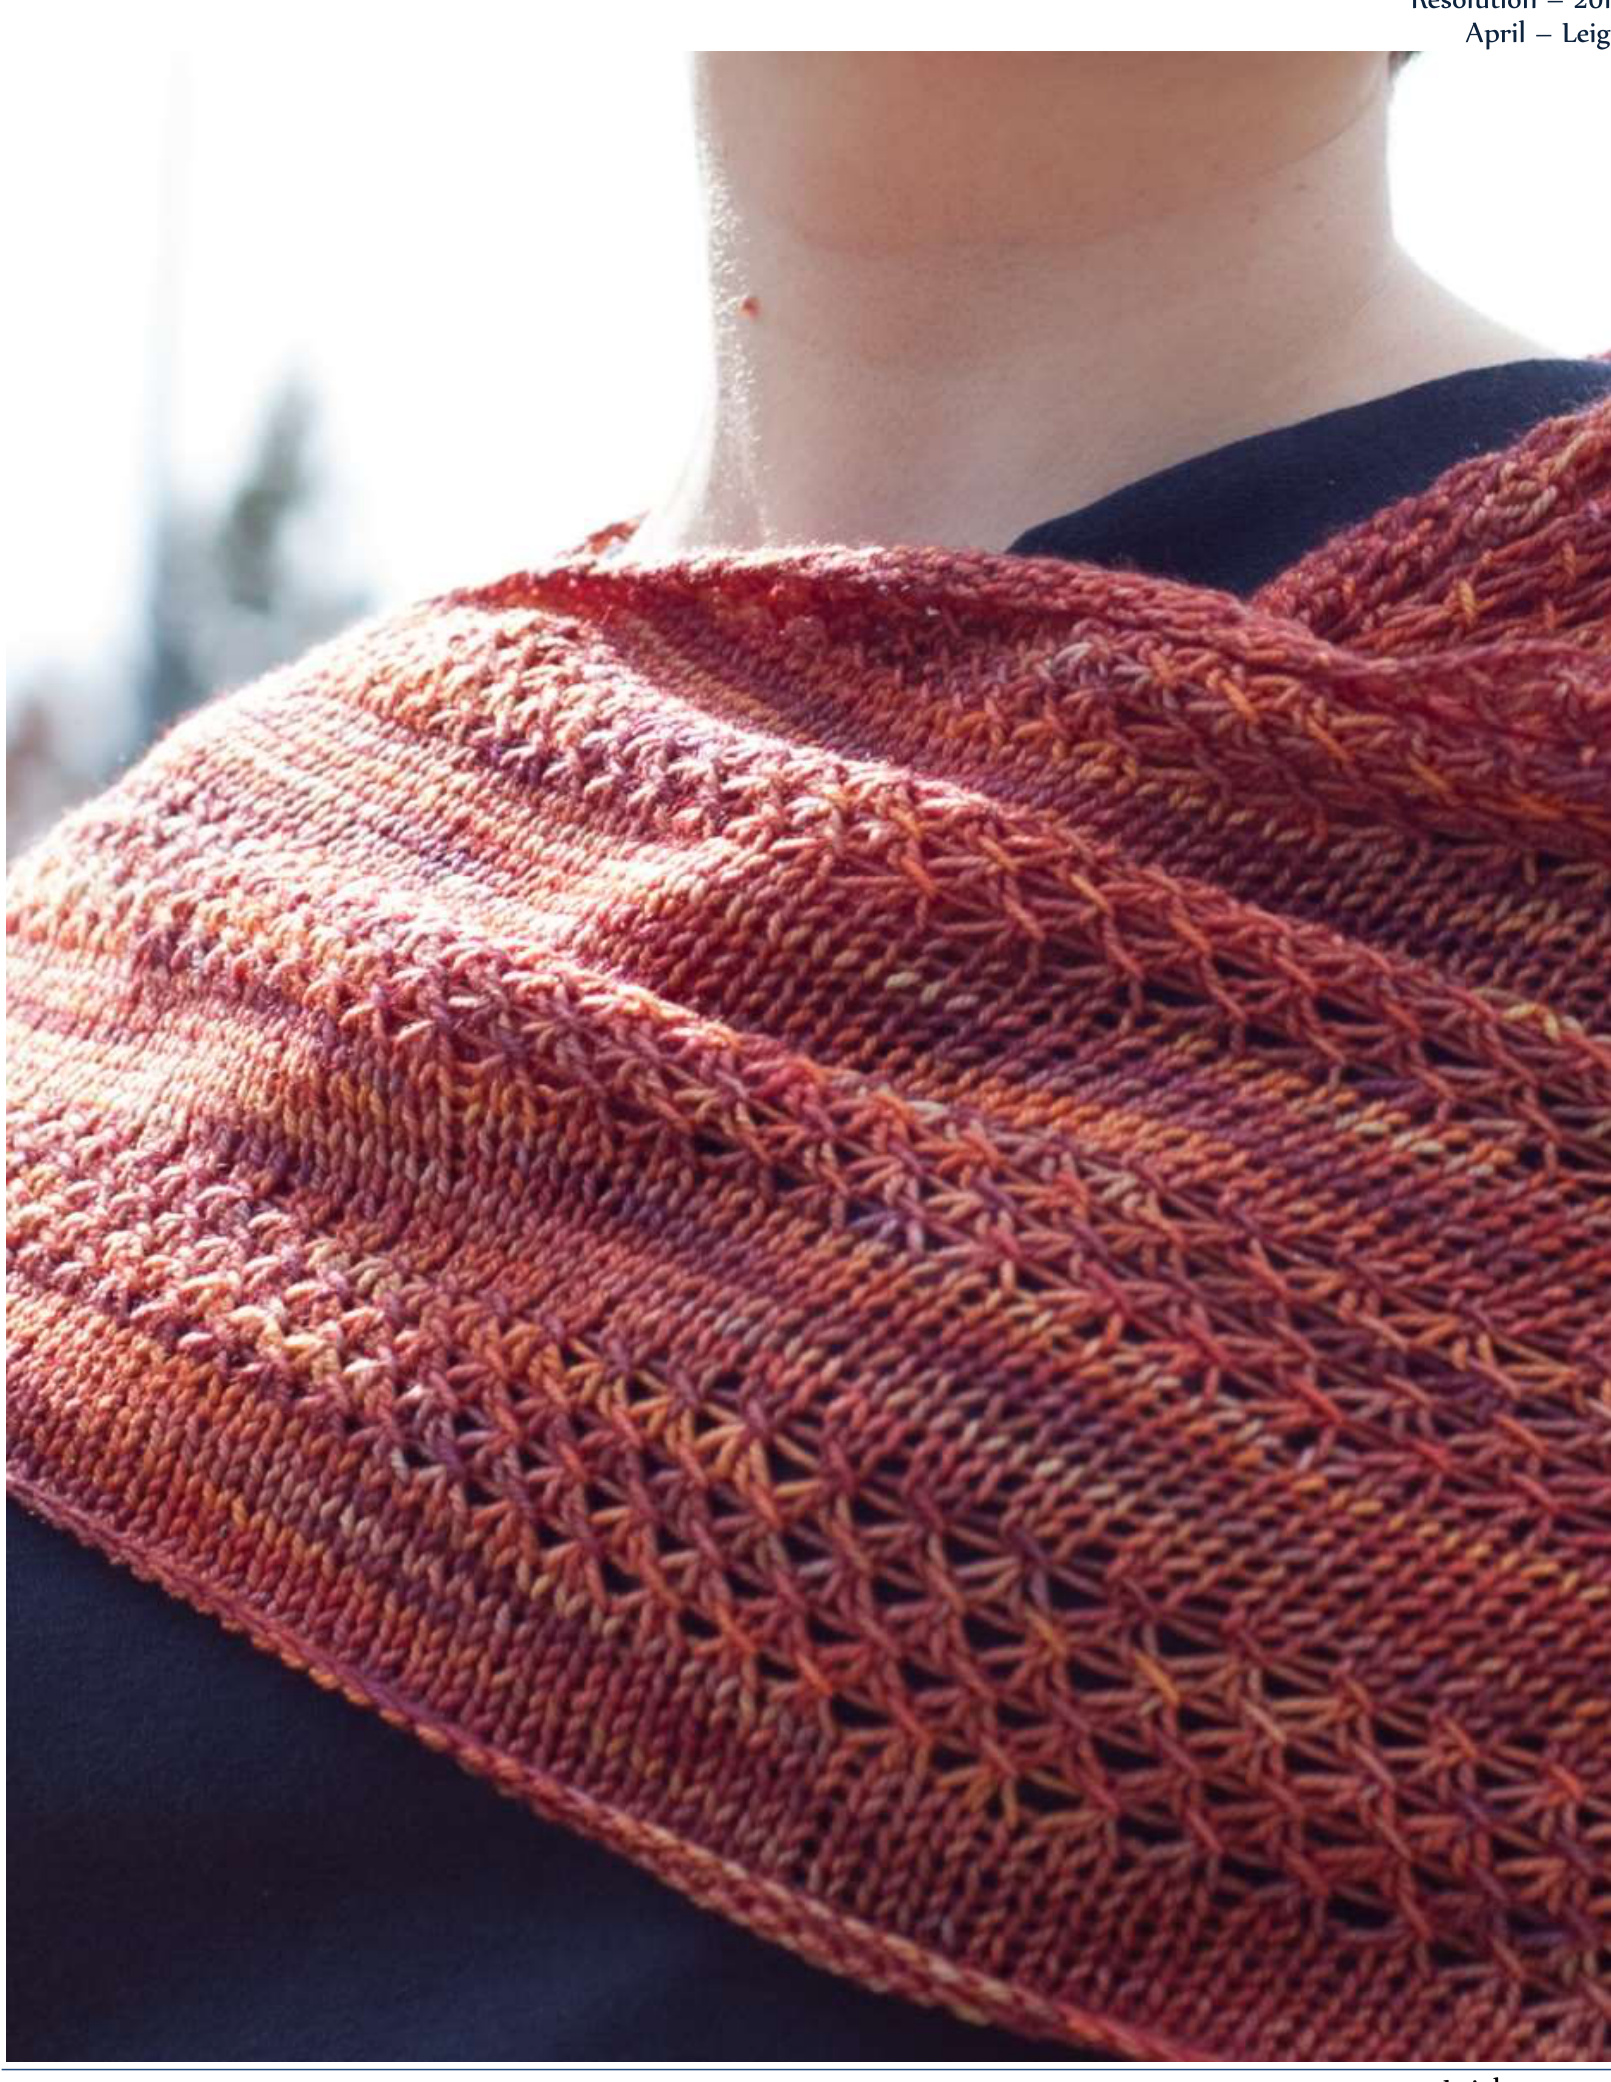
Leigh
Leigh is a gently spiraling shawl worked sideways, alternating stockinette and lace sections in a simple yet elegant design. Increases on every row and decreases on alternate rows give this shawl a slow spiral shape. Worked sideways from one tip, Leigh is infinitely resizable and can be made with as little or as much yarn as desired. For an interesting variation, use one color for the stockinette sections and another for the lace sections. tern in my Resolution - 2013 eBook, a series of 12 patterns released monthly in 201
Materials:
\* Sock/fingering weight yarn - Malabrigo Sock in 850 (Archangel) - 40 yds used in shawl pictured Circular needle, size 6/7 - 7 used for shawl pictured yarn needle for finishing Gauge: Size:
Stockinette Pattern:
Row 1: kfb, k to end. Row 2: p2tog, p to last stitch, end pfb.
Lace Pattern:
Row 1: kfb, \*yo, slip 1 purlwise, k1l, yo, psso both k and yo\*, repeat \* to \* till end. Row 2 and 4: p2tog, \*drop yo, p2\*, repeat \* to \* until end, ending with pfb. (row 2 willalways end p1, pfb) Row 3: kfb, k1, \*yo, slip 1 purlwise, k1, yo, psso both k and yo\*, repeat \* to \* till end. NOTE: be certain to include last yo in final psso, or you will not have enough stitches
Directions:
Caston3stitches. Work in stockinette pattern until there are eleven stitches on the needle. Work 8 rows in lace pattern. Alternate 8 rows stockinette and 8 rows lace until you reach your desired size (ending with a stockinette section). Weave in ends. See finishing notes.
Finishing Notes:
gh is worked in stockinette stitch, it will roll at the bottom and sides unless blocked. If you would prefer a more rigid edge, alter all even rows as follows: Begin k2tog, end kfb. es that will hold the shawl flat. I still recommend blocking to open the lace pattern.
Julia
Julia is an infinity scarf, worked in the round from the bottom up. Garter stitch stripes are pulled into an undulating wave by section of long, criss-crossed slipped stitches. It showcases variegated colorways and yarns with varied thickness particularly well. Julia can be worn in one loop, falling to mid-torso, wrapped around the neck twice for snug warmth, or wrapped once around the neck and once around the head to do double duty as a scarf and earwarmer. The photos features are made in Borroco Boboli but could be made in any single ply worsted weight yarn. Julia is the fifth pattern in my Resolution - 2013 eBook, a series of 12 patterns released monthly in 2013. The pattern will be made available for free as a KAL on May 1"t, 2013. An updated pattern with images will be uploaded after the KAL and available for purchase on June 1st, 2013.
Materials:
Worsted weight yarn 200-250yds - Berroco Boboli used inphotos Circular needle, size 7 yarn needle for finishing stitch marker
Gauge:
Size: One size
Instructions:
Cast on 168 stitches. Join to work in round. Place stitch marker at start of round. Row 1, 3, 7, 9: knit all. Row 2, 4, 8, 10: purl all. Row 5 and 11: K all stitches, wrapping yarn around needle 4 times for each stitch. You will have 4 yarn overs held in each stitch Row 6: Work Cross 8 pattern across entire row. Row 12: Work Cross 8 edge pattern, then work Cross 8 pattern until 4 stitches are left, complete Cross 8 edge pattern. Work rows 1-12 twice. Work rows 1-6. Bind off. Weave inends.
Cross 8 pattern:
Slip next 8 stitches to the right needle, dropping the extra yarn wraps. You will have 8 long loops on the right needle. Insert theleft needleinto the front of the first four (right-most) loops and pass them over the other loops and back onto the left needle. Move the remaining 4 loops back to the left needle. You will nowhave8 stitchesbackon the left needle,but withthefirst 4 now after thesecond 4. Purl all 8 stitches.
Cross 8 edge pattern:
This is worked over the end of the round. Remove stitch marker. Slip last 4 stitches of previous round to the left needle, dropping the extra yarn wraps. Slip stitches back to right needle purlwise. Slip first 4 stitches of the next round from the left needle to the right needle, dropping extra yarn wraps. Cross stitches as in the Cross 8 pattern, placing the stitches you pass over on the left needle and leaving the passed over stitches on the right needle. Replace the stitch marker between the 2 sets of 4 slipped stitches. Purl the 4 stitches on the left needle. Follow instructions until final 4 stitches. Purl final 4 stitches.


