Crocodile Stitch Clutch By Jenni with Crochet Past Bedtime
This pattern makes a clutch approximately 4 inches tall, and 8.5 inches long on the outside. It is lined with a zipper and is sturdy. A video tutorial for this pattern is available at https://www.youtube.com/watch?v=euq7CLCLsZk Difficulty level: Intermediate
Materials:
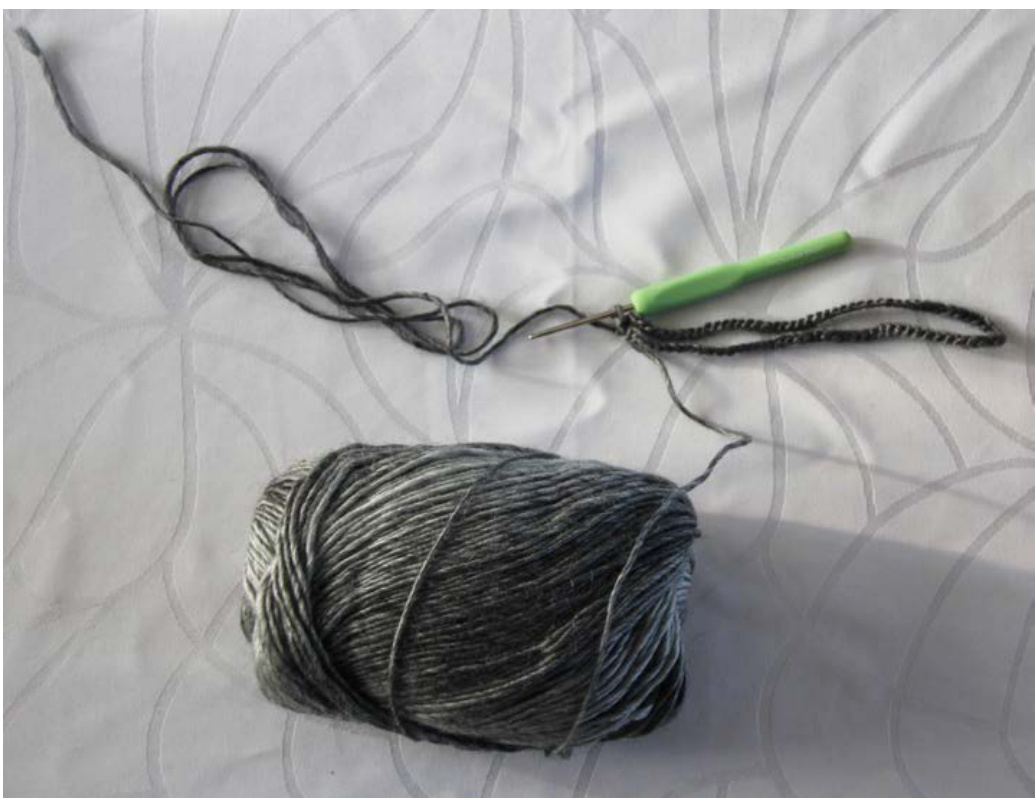
·Size 3.5 mm (E) crochet hook · 1 skein Red Heart Boutique Unforgettable yarn. Or any worsted (4) weight yarn. I suggest either using variegated yarn or 2 or 4 different shades of yarn, changing at each row. Stitch marker Fabric for the liner. I suggest something a bit heavier like corduroy or upholstery fabric, but felt or cotton work too. 8 inch zipper (or larger or smaller depending on how big you are making your clutch) 1 sheet plastic canvas Darning needle Fabric scissors 2 binder clips
Abbreviations:
St - Stitch Ch - Chain Slst -Slip Stitch Dc - Double crochet
Row 1 (bottom of clutch)
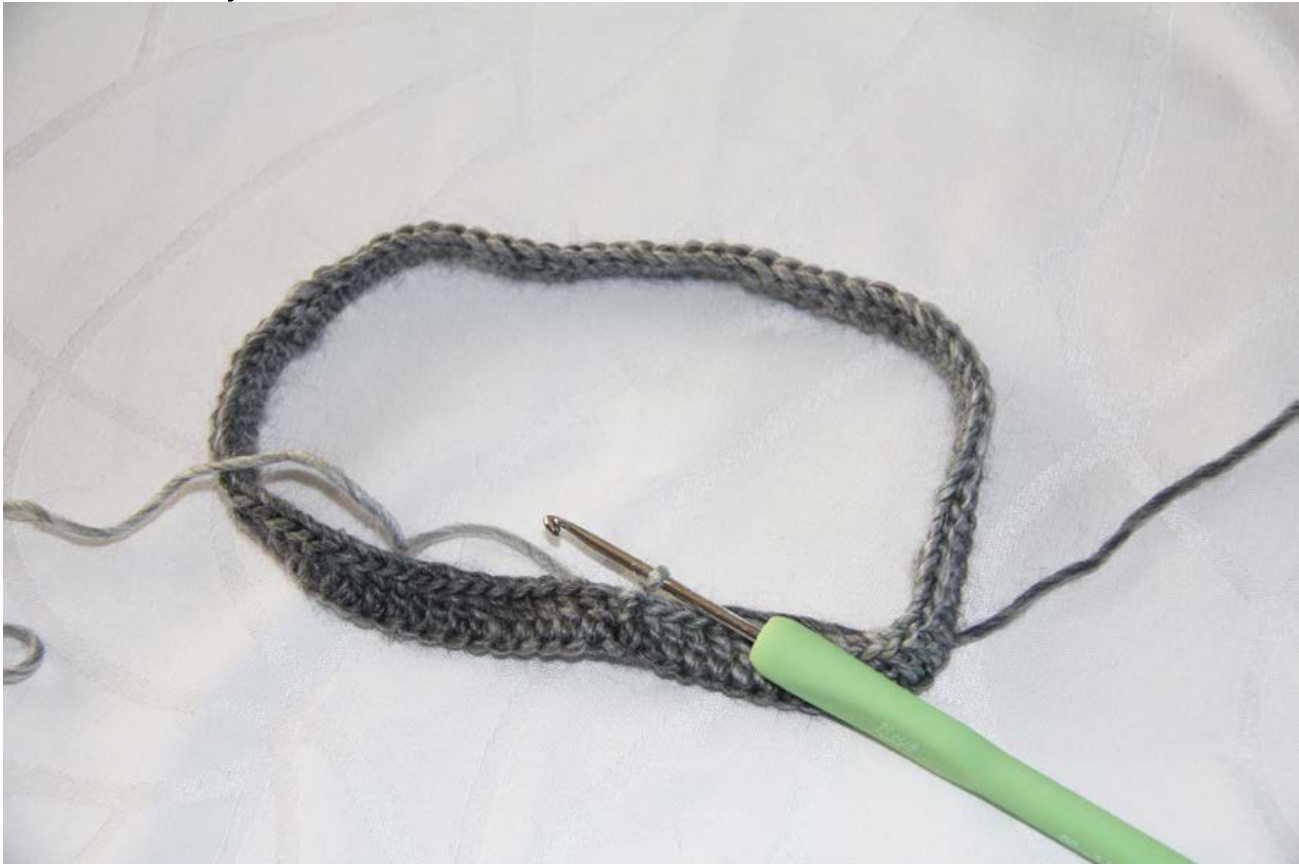
Leave approximately 35 inches (or more if you are making your clutch wider) of yarn tail when you make your slipknot. We will use this to stitch the bottom of the clutch closed. Ch 84 (If you are making your clutch larger or smaller you can add or subtract chains here, but just make sure your final number of chains is multiple of 7). Slst to the first ch. Ensure your strand of chains is not twisted.
Ch 3 (counts as first dc) and make a double crochet in each stitch all the way around (84 dc). Ensure your work is not twisted, then Slst to first ch 3.
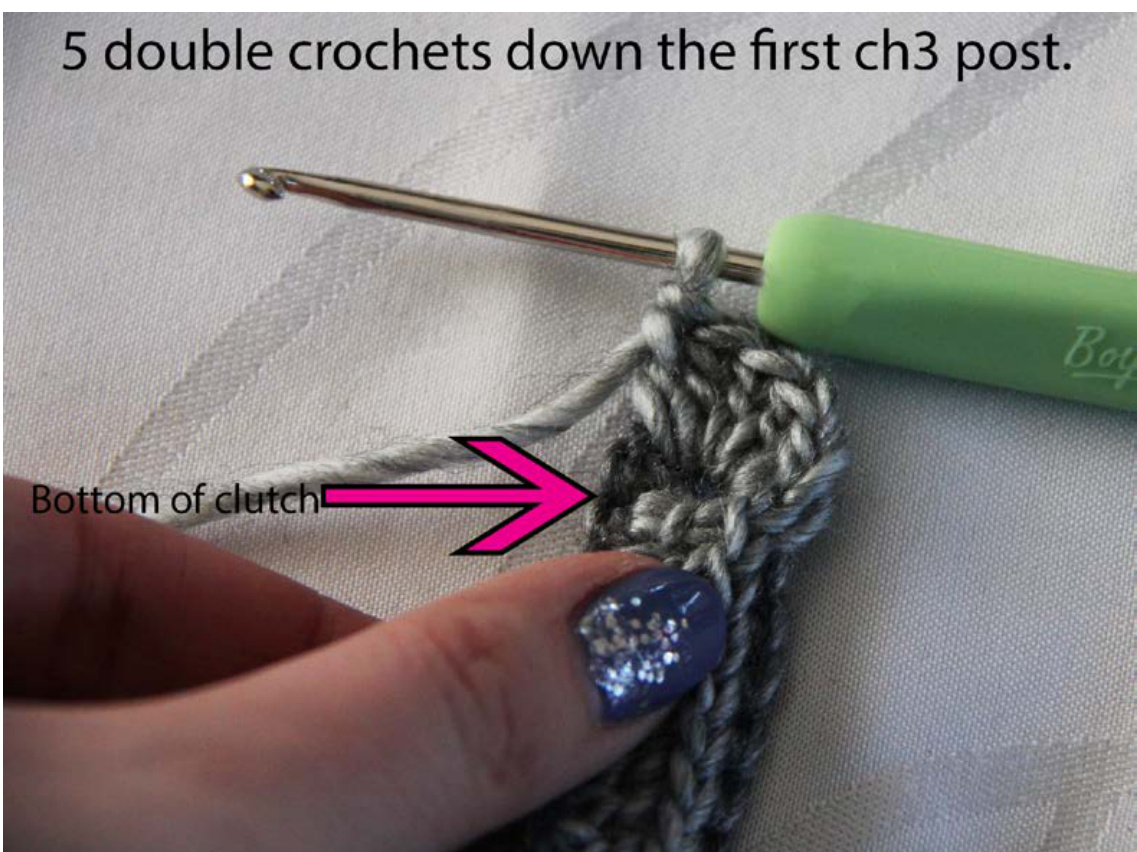
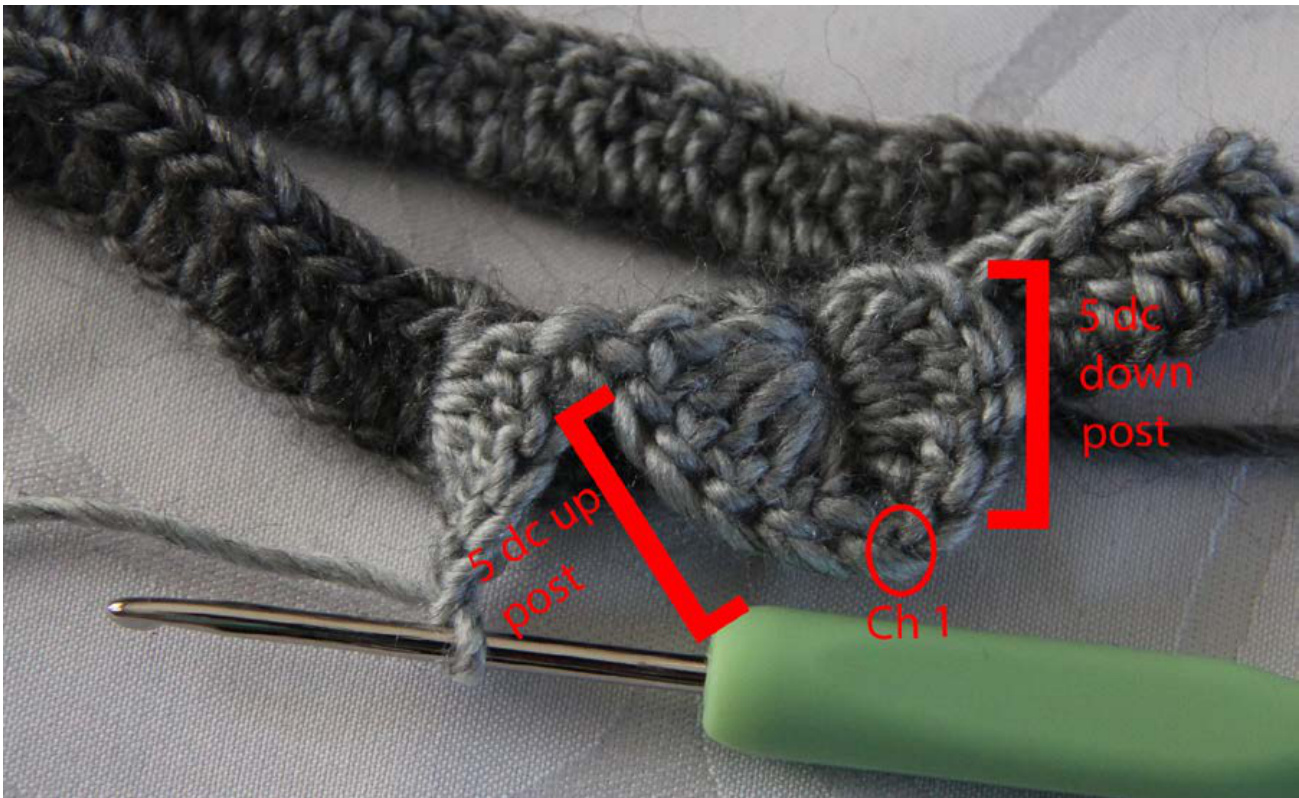
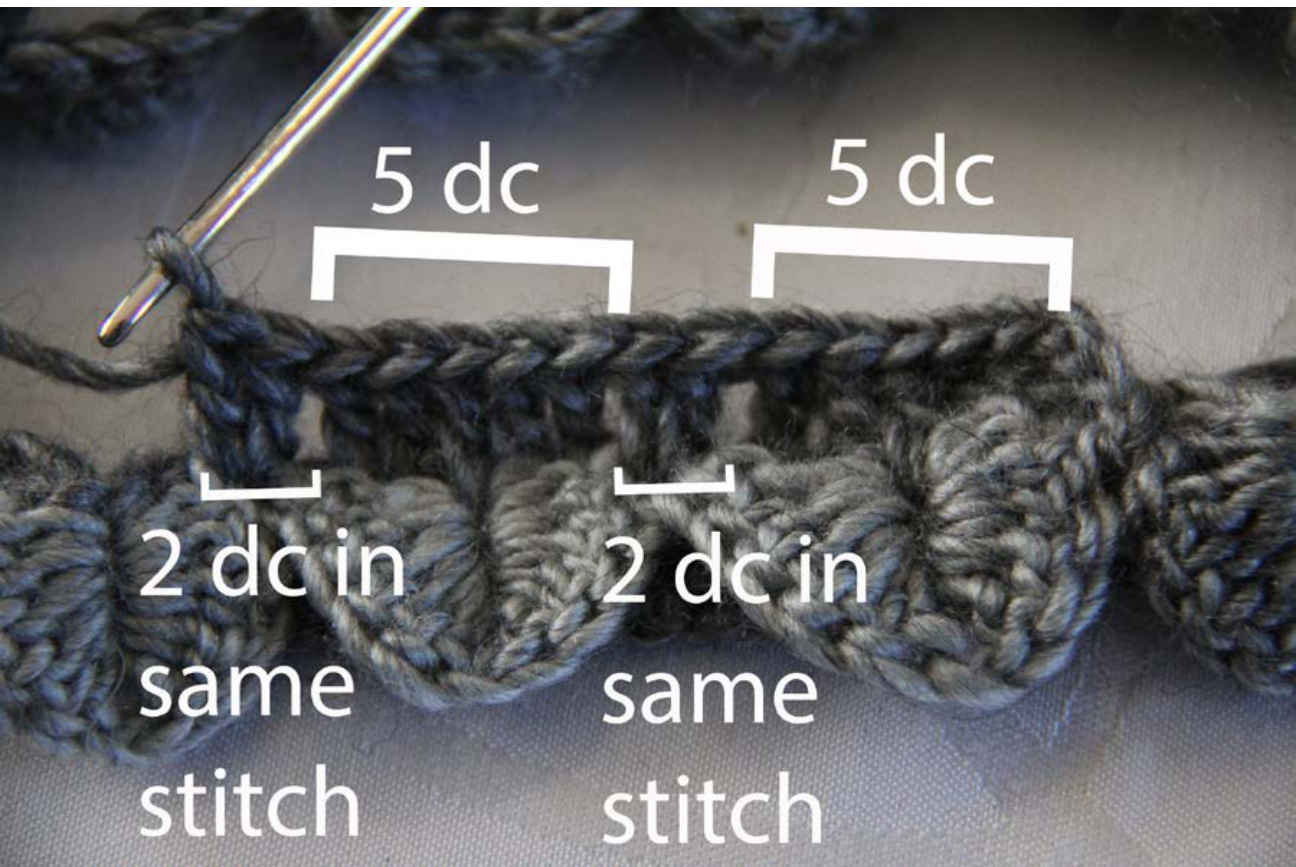
To make the first "scale" \*Make 5 dc down the ch 3 post. Ch 1.
Make 5 dc up the next dc post. Skip 5 dc posts\* and repeat from \* in the 6th and 7th dc posts. Repeat all the way around. Slst in very first dc of the first scale.
Row 2
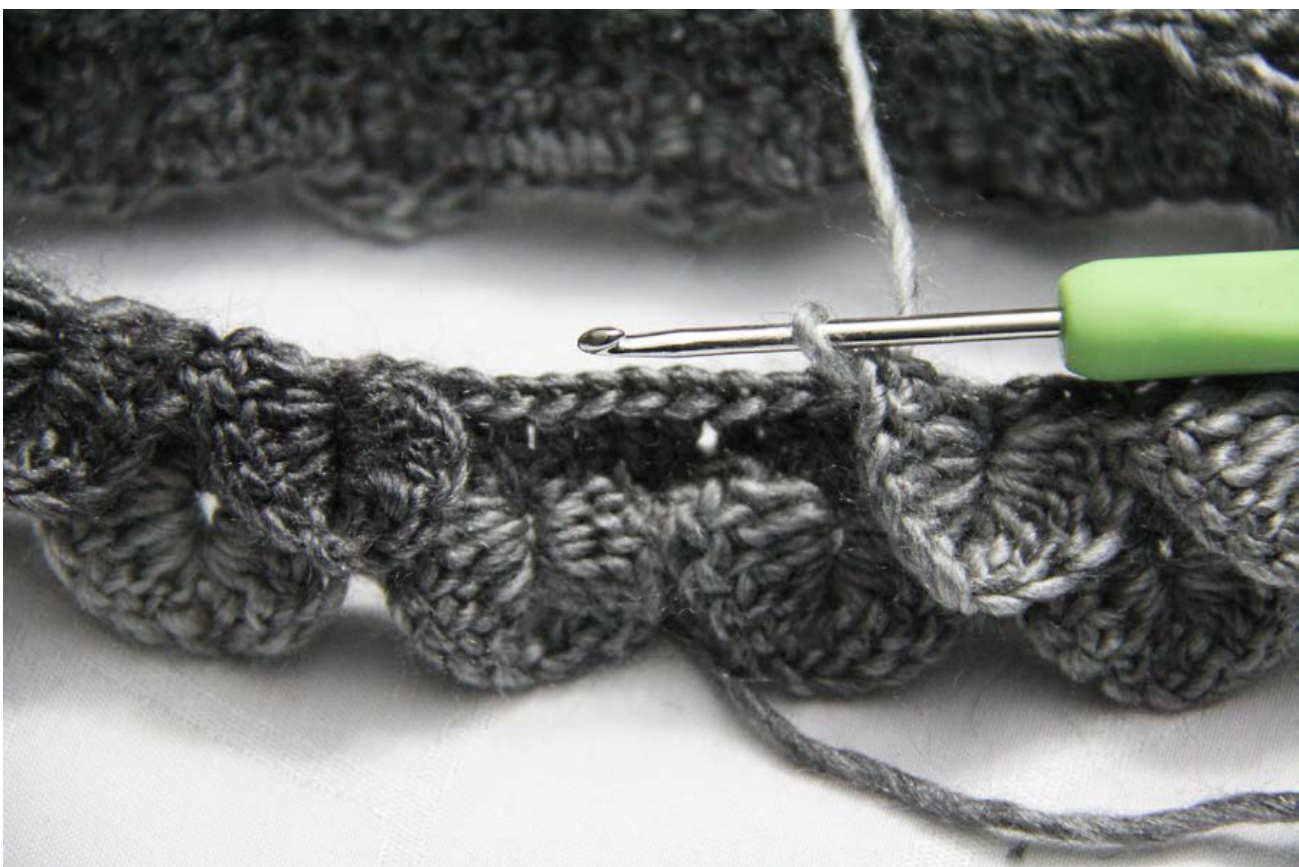
If using a new yarn for the next row, fasten off then join on in the dc between two scales of row 1. If not using a new yarn, ch 3 in the dc between the last and first scales of row 1. Dc in same st as the ch 3. You will have a ch 3 and a dc in the same stitch. 1 dc in each of the next two dc. One dc in the hole in the middle of the first scale (between the two sides of the scale). \*1 dc in each of the next two sts. Skip a stitch, and 2 dc in the next st. including the loop between the two scales. This will help to connect the "scales" layer with the dc layer. · 1 dc in each of the next two sts. 1 dc in the hole in the middle of the scale. \*
To make the first "scale" \*Make 5 dc down the ch 3 post. Ch 1. Make 5 dc up the next dc post. Skip 5 dc posts\* and repeat from \* in the 6th and 7th dc posts. Repeat all the way around. Slst in very first dc of the first scale.
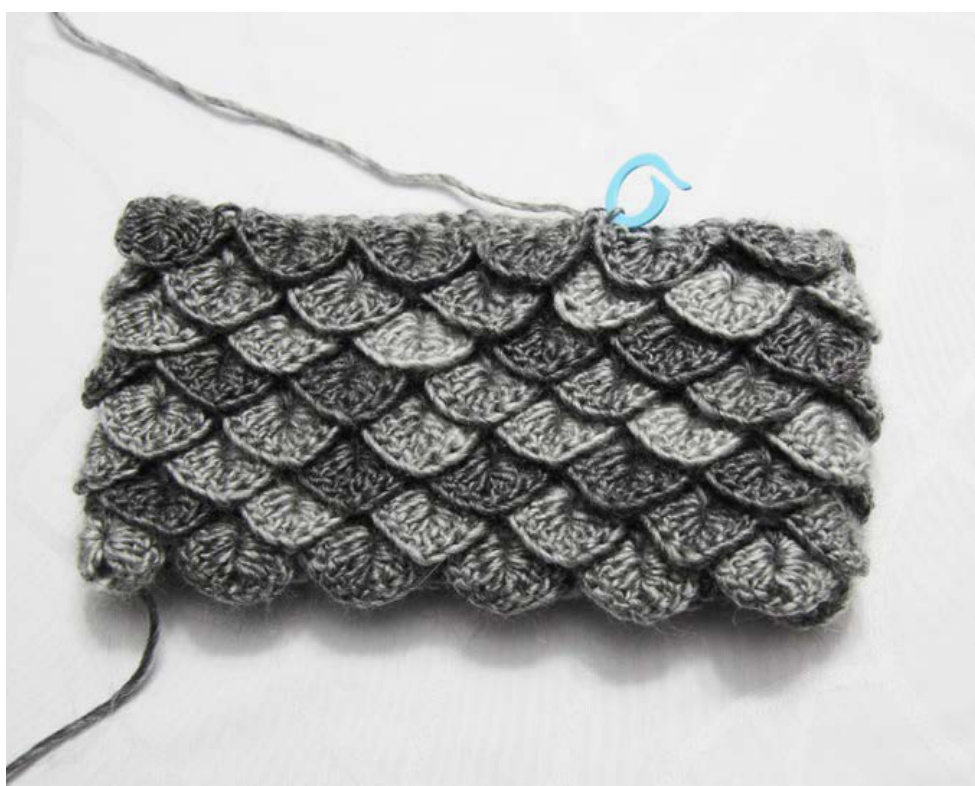
Rows 3-8
Repeat row 2. Switching yarn as you'd like. If you'd like a taller clutch, feel free to add more rows. Once you are finished, remove your hook and place a stitch marker in the loop where the hook was. Do not cut the yarn; we will be coming back here to add the zipper and liner.
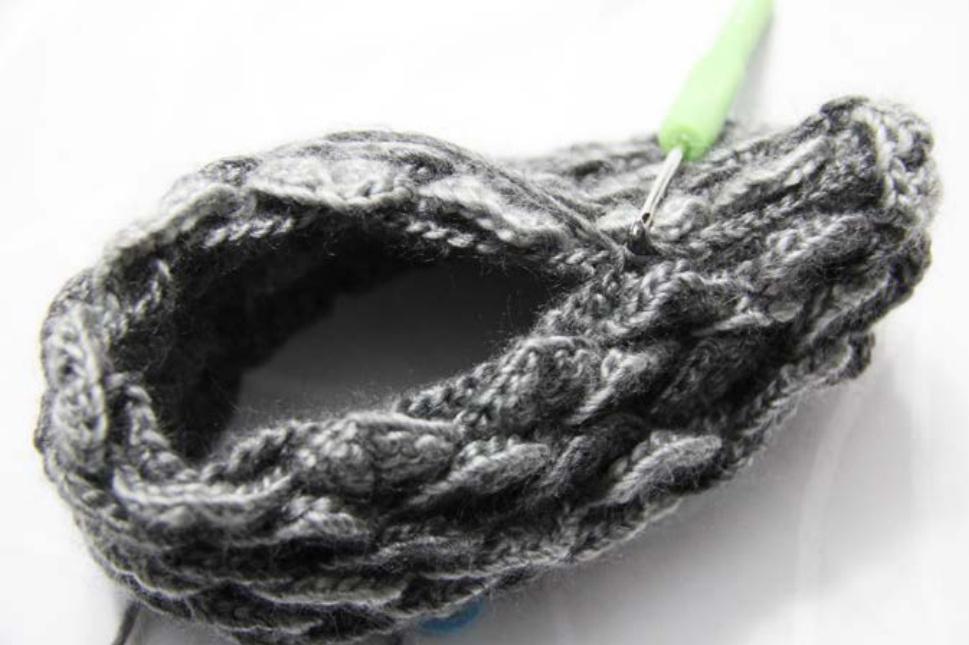
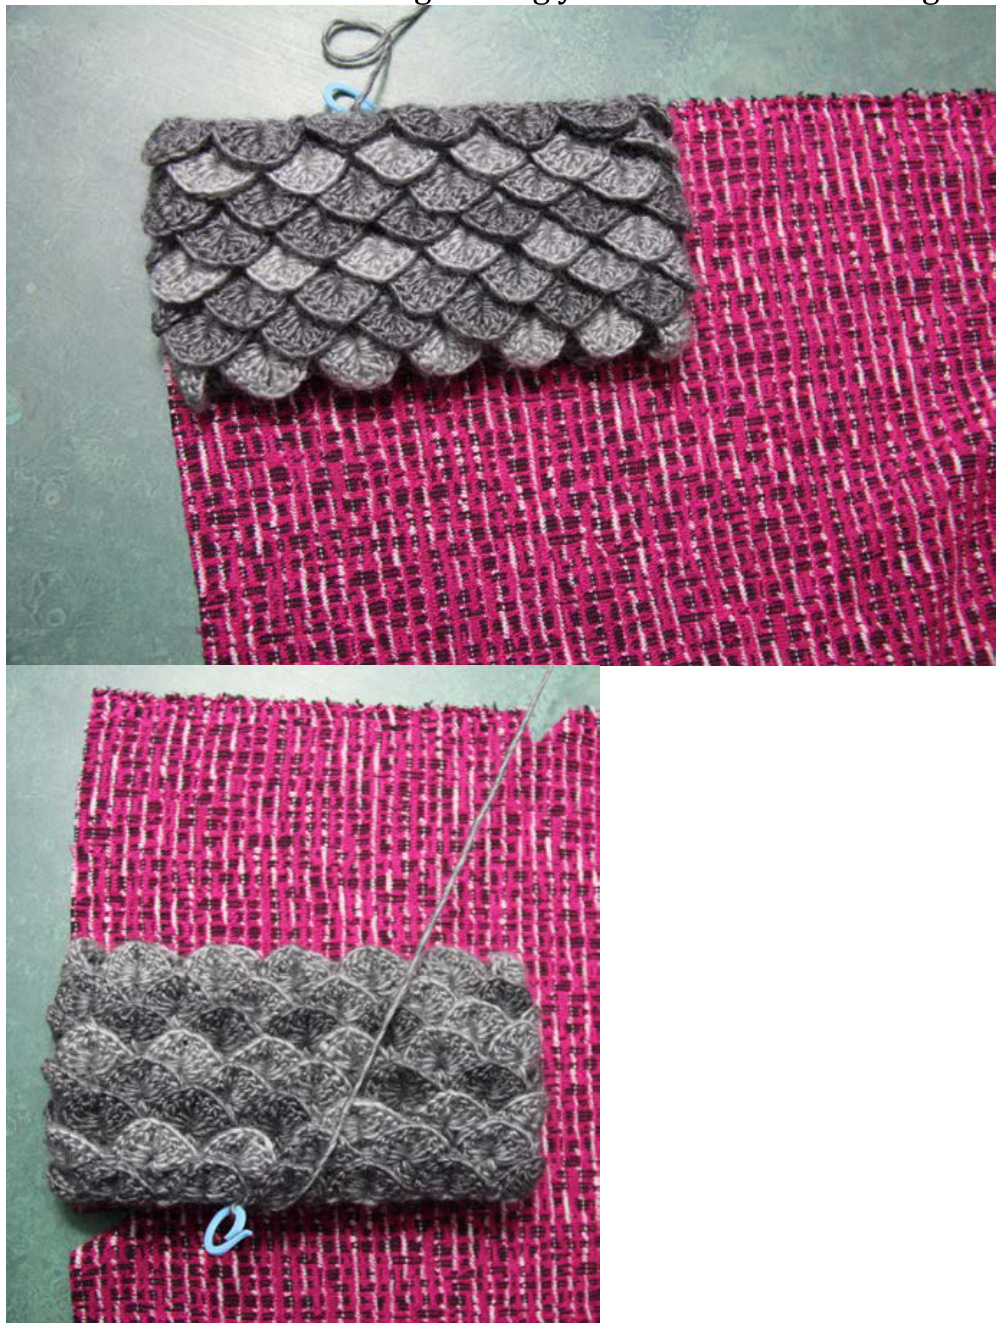
Stitching the bottom closed Using your crochet hook and the tail left when you made your first slip knot for the first ch 84, slip stitch across the bottom and weave in the end using your darning needle.
Liner
Cutting the fabric
Lay your liner fabric out and place your clutch at the top left corner. The material should not go any wider than the outside of the clutch on the top or left side. On the right side, mark the fabric with a cut or chalk at the right edge of theclutch. Flip the clutch vertically so that the bottom of the clutch stays on the fabric and the top of the clutch is now at the bottom. Cut or mark the fabric at the bottom and right corners. · Cut the fabric into a rectangle using your cuts or marks as a guide.
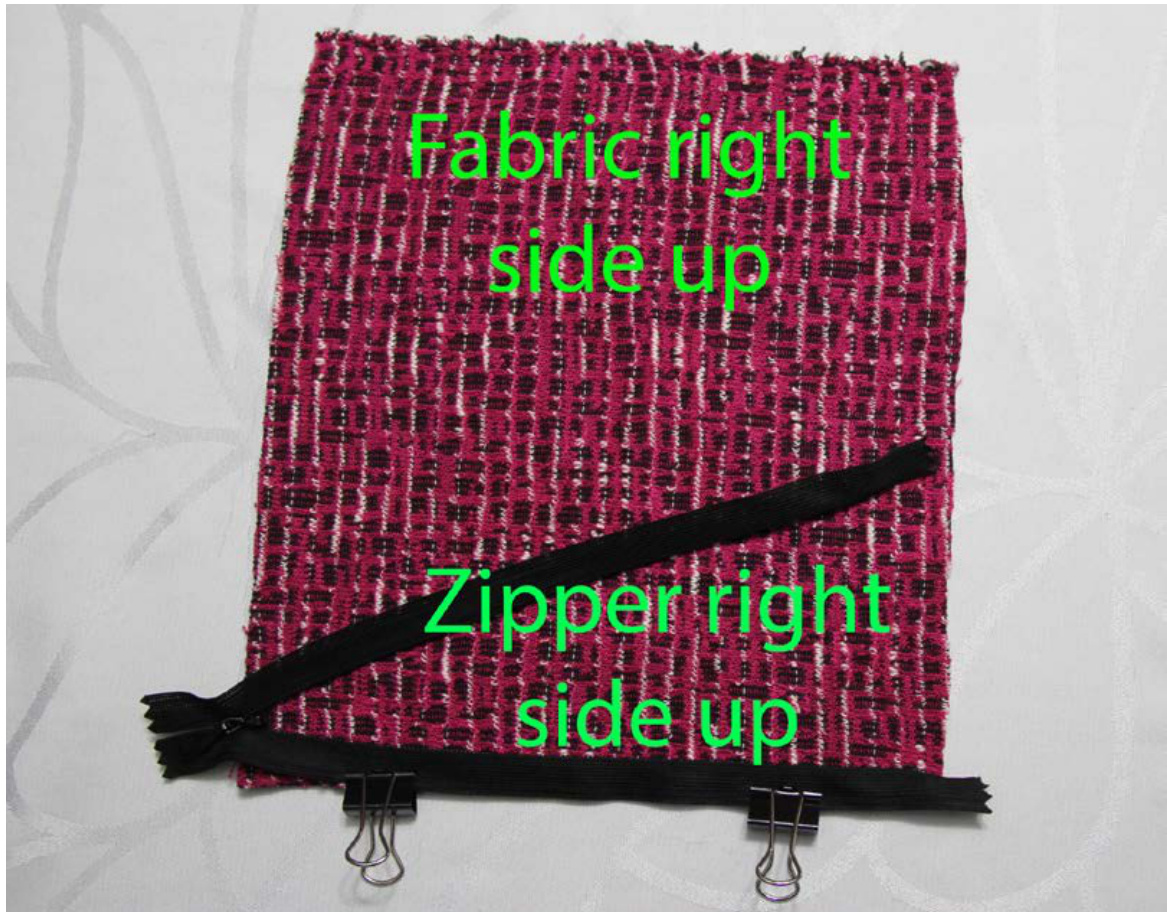
Attaching the fabric to the zipper Lay the fabric right side up and place the zipper right side up at the bottom Unzip the zipper and with the open part of the zipper to the right, clip the bottom half of the zipper to the bottom of the fabric using the binder clips If you are using one skein of yarn, find end of the yarn that is not currently attached to the clutch, and thread your darning needle. OR If you are using multiple skeins of yarn, use one that isn't currently attached to the clutch and thread your darning needle. OR Another option is to use a heavier thread that matches nicely with the yarn you are using. This is what I used in these photos. Knot your yarn/thread on the fabric (bottom) side. Stitch the bottom of the zipper to the bottom of the fabric from right to left using a backstitch, with stitches being about 1 cm long. Keep your line of stitches as straight as possible and not too close to the zipper (don't want it getting caught in the zipper). If you don't know what a backstitch is, there are lots of good tutorial: on voutube. NOTE: if you are making your backstitches with yarn and the yarn starts to feel like it is pulling apart, knot it with the knot on the fabric side, cut, and thread a new portion of yarn and continue. The yarn can become brittle from the friction of being pulled through stitches.
Once you reach the left side, unclip the zipper from the fabric, and clip the top part of the zipper to the top of the fabric, with the right side of the fabric and zipper still facing up.
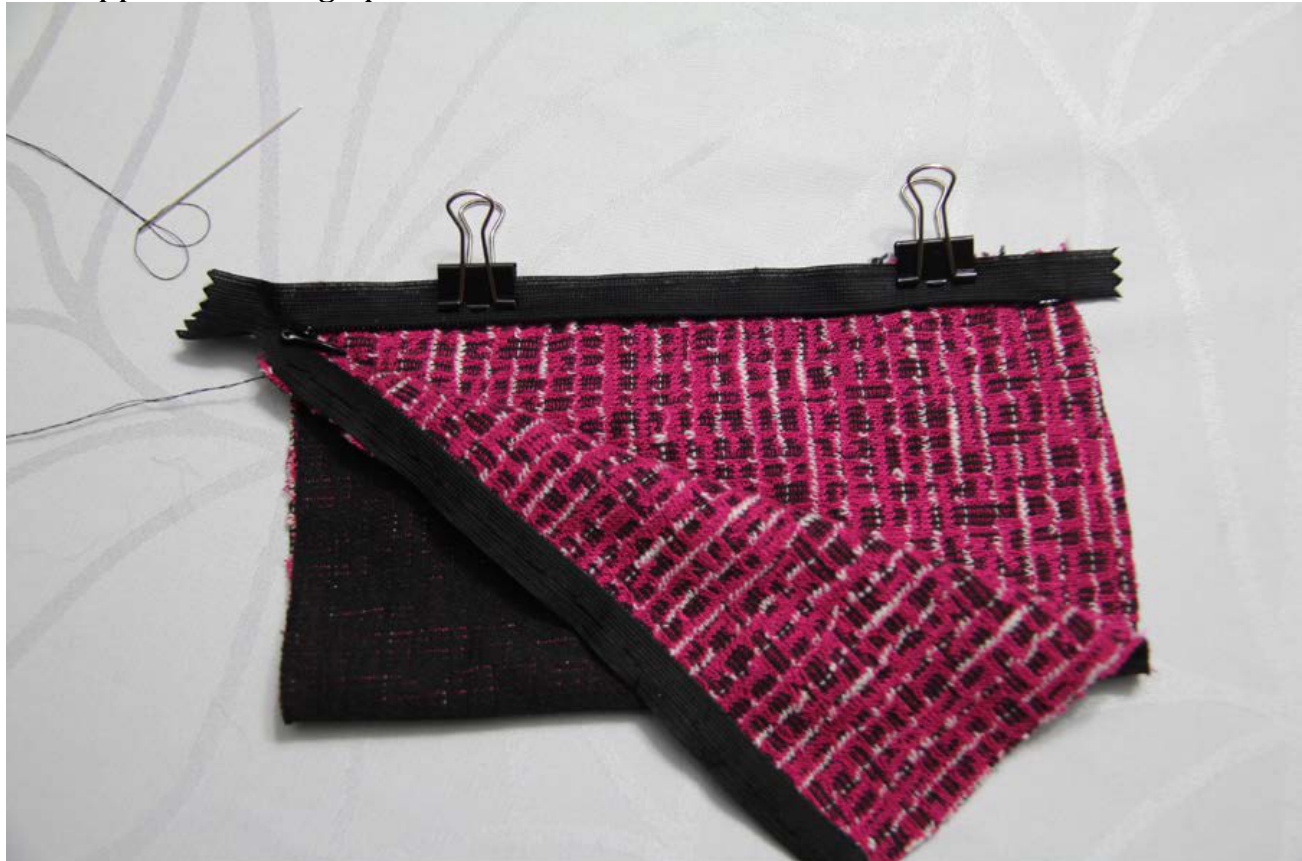
Stitch back and forth 3-5 times on the left end, between the two halves of the zipper. We want it to be well reinforced, as there will eventually be a few double crochets going through this. Backstitch the top half of the zipper to the fabric as you did the bottom half. Once you backstitched all the way across, close the zipper and stitch back and forth 3-5 times on the right end, between the two halves of the zipper. Again, we want it to be well reinforced. Stitch up and down each side of the liner to close it off I suggest using the backstitch.
Adding the plastic canvas
Place a sheet of plastic canvas on top of the liner with the corner of the canvas 1 cm in from the stitches on the side, and 1 cm in from the zipper. Cut the other two edges 1 cm in from the bottom of the liner and 1 cm in from the stitches on the other side. Using the rectangle of plastic canvas that you have cut, cut another one the exactsamesize.

Place both sheets of plastic canvas inside the clutch. If you need to trim them so they aren't sticking out the top, then do so. Place your liner in the clutch, in between the two pieces of plastic canvas
Attaching the liner
Remove your stitch marker and place your crochet hook in the same loop. \*Yarn over and put your crochet hook through the closest stitch on the top of the zipper. Complete a double crochet. Yarn over and put your hook through the next stitch of the clutch, and through the same or next stitch on the zipper (whichever it lines up with the best) and complete another dc.\* Continue from \* all the way around. Most stitches on the zipper with have two and sometimes three double crochets through them. The ends with have many double crochets through them.
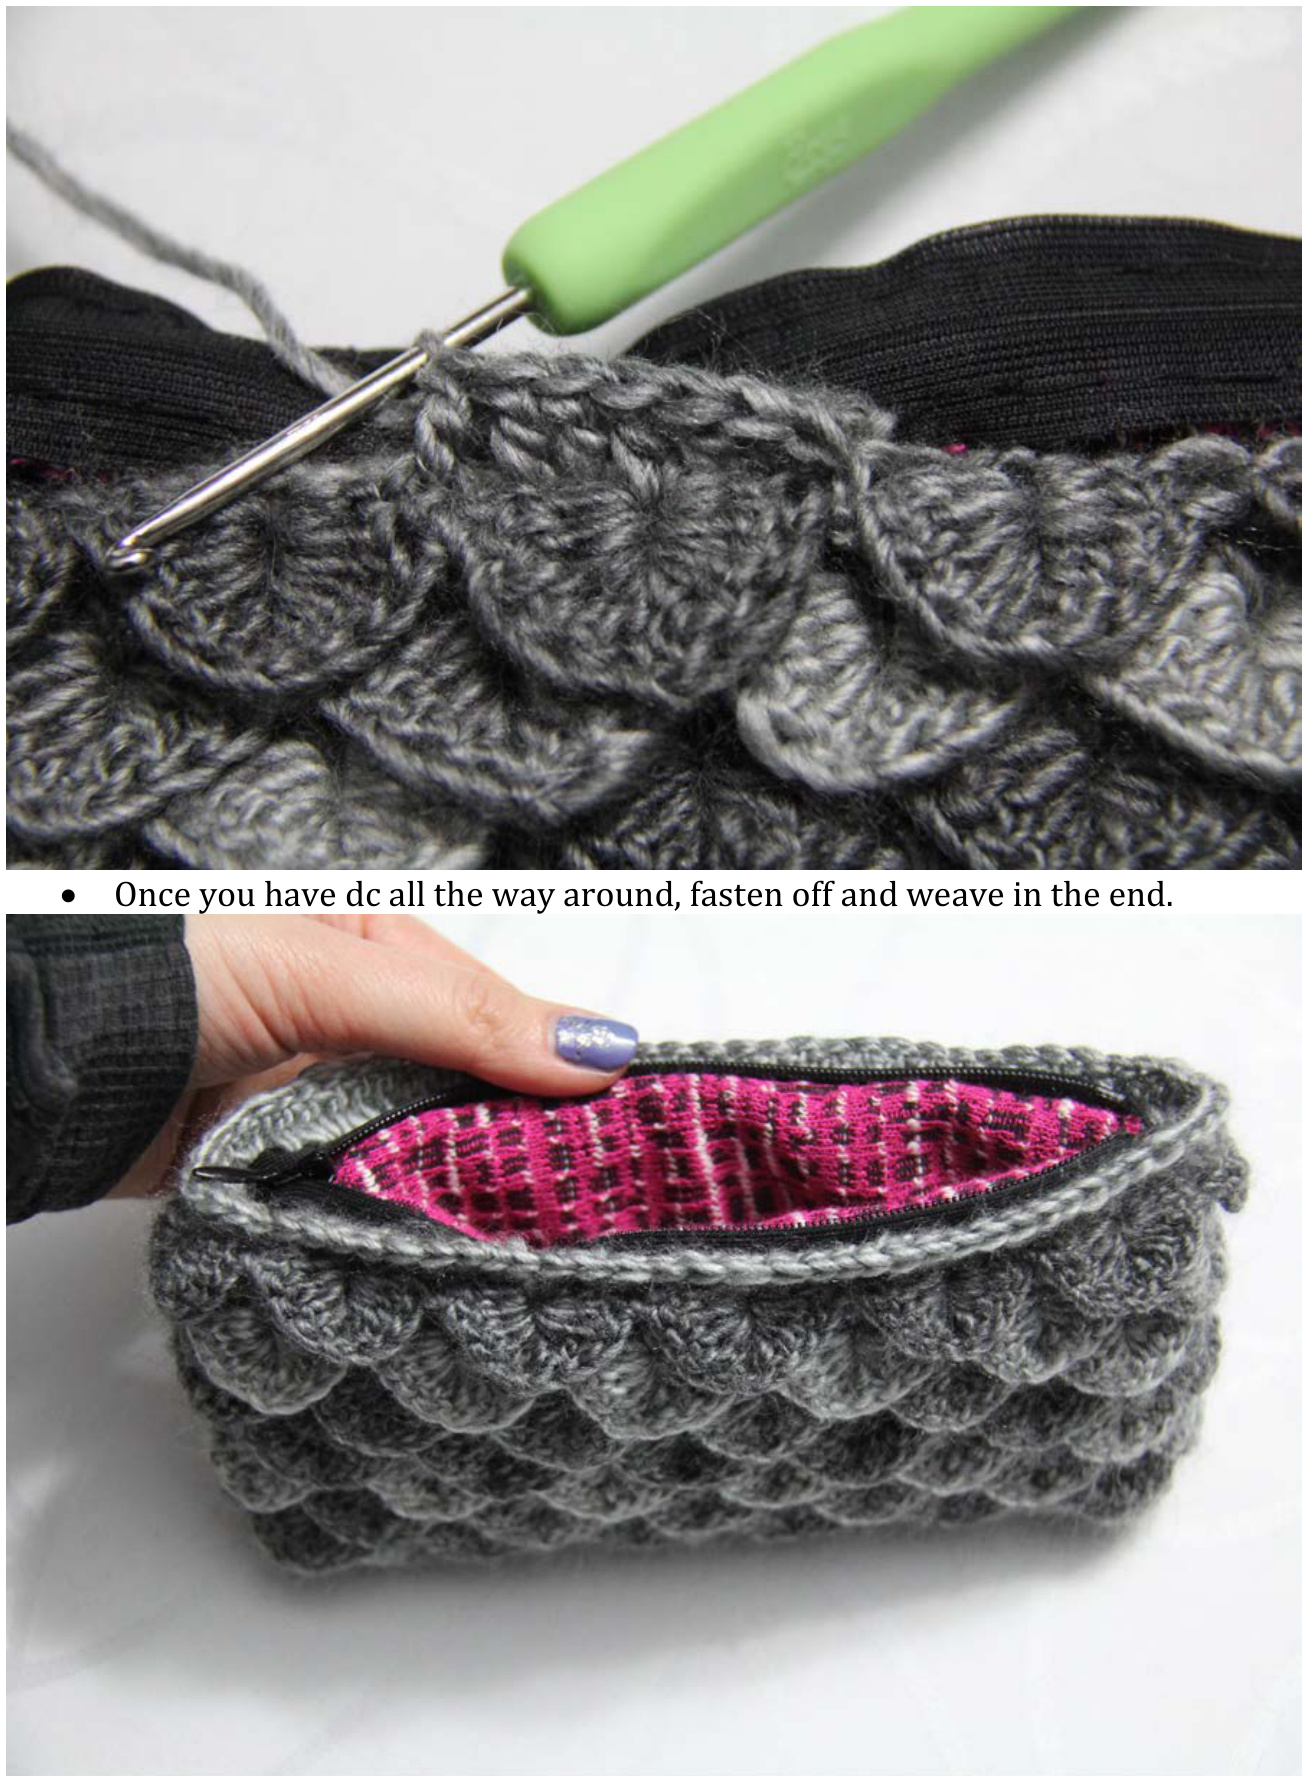
You are done! Note: If your zipper ends up being too long, simply cut a small 1" by 1" piece of fabric, fold it in half and stitch it securely to the end of the zipper using a like-coloured thread with the fold towards the inside (where the zipper will be bumping it). This will form a blocker so the zipper won't go past that point. Be sure to stitch it fairly close to the fold, then stitch another row behind those stitches. Make a wide stitch for your end double crochets to go through and reinforce it 3-5 times. Then just stuff the excess zipper in between the clutch and liner and complete your double crochets around the perimeter.


