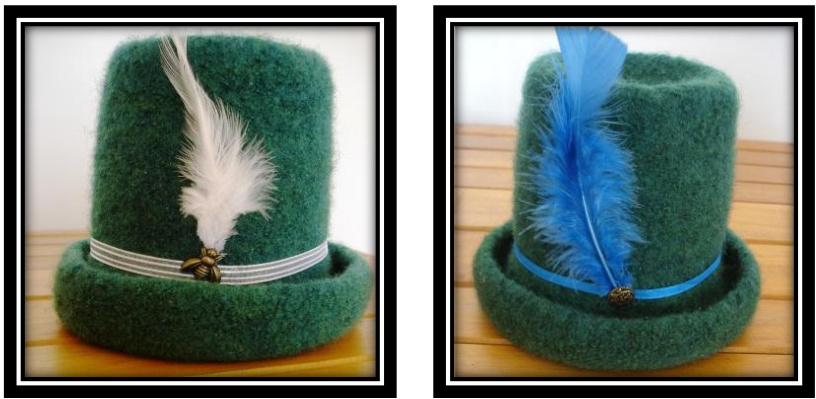
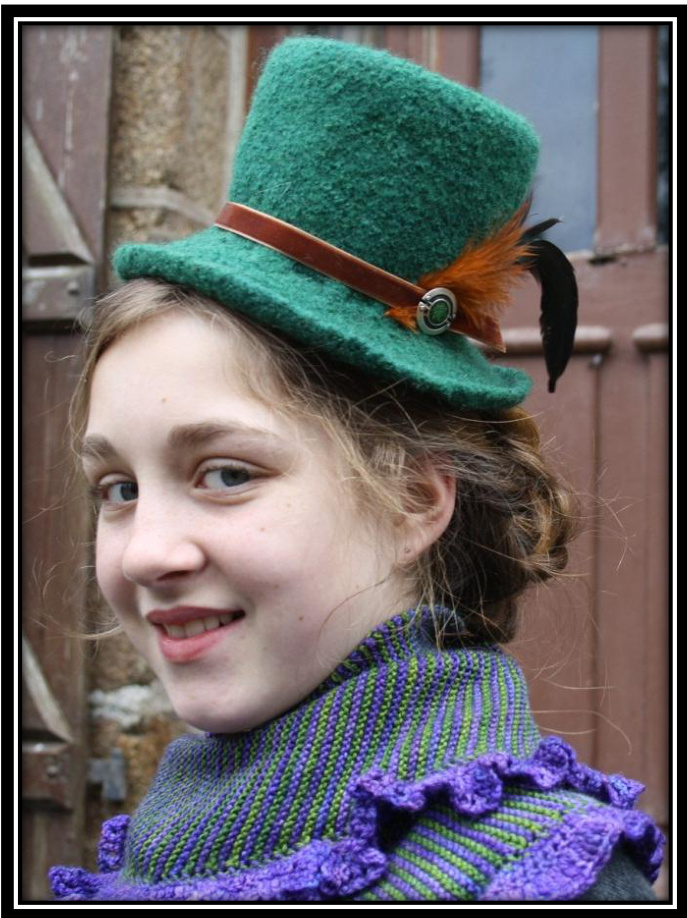
This jaunty steampunk inspired mini top hat is designed to perch becomingly on your head at a flirtatious angle, and is an open canvas for decorating to your heart's content. From feathers and ribbons, to buttons and lace, you can also needle felt directly onto the finished fabric. For the more adventurous, look for fascinator supplies at your local craft shop and take it to a whole new level of steampunk glam. The top hat is knit from the brim up. It is knit loosely and then felted, so gauge is not important, neither is size (within reason). To get a good density of fabric, use needles one or two sizes larger than you normally would use with Aran weight yarn. 1 suggest 55mm but, since felting is very forgiving, you can improvise with both gauge and the instructions ifyou wish.
Steampunk Mini Topper by Mayin T
An exclusive designforthe Tri'Coterie Tinker, Knitter, Octopod steampunk yarn club You will require: 100g Aran or Worsted weight yarn (It is important that your chosen yarn is NOT superwash!) 40cm circular needle of required size. (5.5mm or larger) and a set of DPNs for decreasing at the crown 1stitchmarker Version1. June 2012.
KNITTING - THE BRIM
Cast onioo stitches. 1 used the alternate cable cast-on (link to PDF instructions) Join to knit in the round taking care not to twist the knitting. Place a marker to indicate the start of the round. Rnd 1: K, Pi to end Rnd 2: Ki, (K2 tog, Ki8) 5 times, knit to end of round. Rnd 3 - 6: Knit Rnd 7: K5 (K2 tog, Ki7) 5 times, knit to end of round. Rnd 8 - 11: Knit Rnd 12: Kio, (K2 tog, Ki6) 5 times, knit to end of round. Rnd 13 - 16: Knit Rnd 17: K14, (K2 tog, Ki5) 5 times, knit to end of round. Rnd 18 - 21: Knit Rnd 22: K3, (K2 tog, Ki4) 5 times, knit to end of round. Rnd 23 - 25: Knit (You should have 75st). Rnd 26: K1, (k2tog,yo) to last stitch. THE RISE Rnd 27-57: Knit Rnd 58: Purl
THE CROWN
Rnd 59: K1, (k2tog) repeat to end (38 stitches) Rnd 60-68: Knit Rnd 6g: (K2tog) repeat to end (1g stitches) Rnd 70-73: Knit Rnd 74: Ki, (k2tog) repeat to end (1o stitches) Rnd 75-76: Knit Rnd 77: (K2tog) repeat to end (5 stitches) Rnd 78: Knit. Draw yarn through remaining stitches and pull tight. Sew in yarn ends.
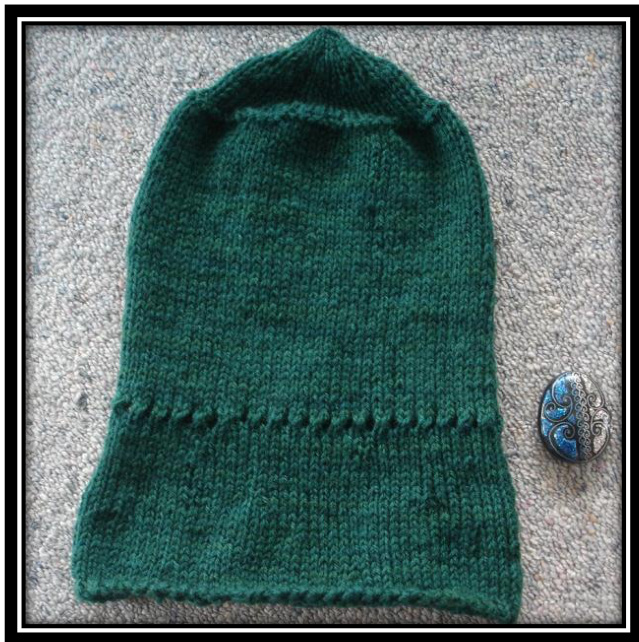
After you finish knitting your hat will look something like this.
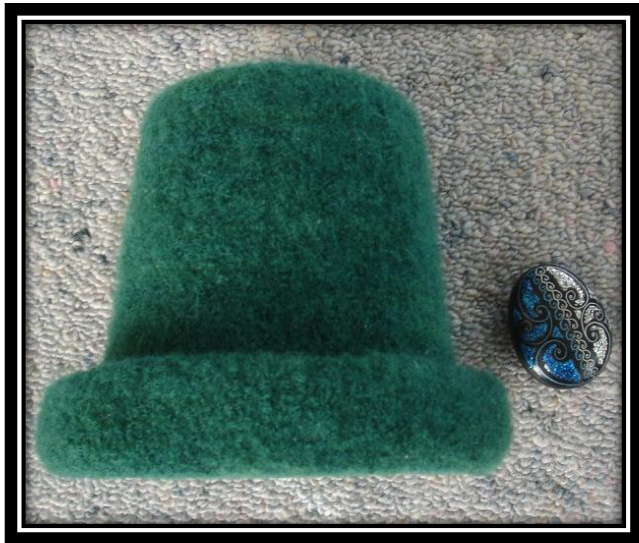
After you finish felting your hat will be much smaller!
FELTING
Next time you wash something that is not colour sensitive, such as jeans or other dark colours put your knitting in the machine with the rest of the wash. It will need to be a hot wash cycle. Examine it when you get it out and pull it about a bit to make sure bits aren't sticking together. lf you can still discern the knitting stitches it probably isn't felted enough and you will need to repeat the wash cycle. You may need to repeat this step a couple of times depending on your machine/water temperature. When you are satisfied that it isfelted suffciently you are going to have to pull it into shape - you will probably have to be quite brutal at this stage. It will make it so much easier if you can find a cylindrical shape to pull the crown over, such as an enamel food canister or plastic container. f you canfind a can of the right size that would be perfect, or possibly those plastic containers that hold cakes of blank DVDs? Ifyou have nothing else maybe a rolled up newspaper or towel would work. Just pull and tug repeatedly until you have the shape you want - use brute force if you wish for your brim to lie flat! (This is where I found the row of holes useful, even though they had closed up the fabric was thinner there and 1 was able to use a darning needle to run a thread around to hold the shape in tightly around my container).
PRETTIFYING
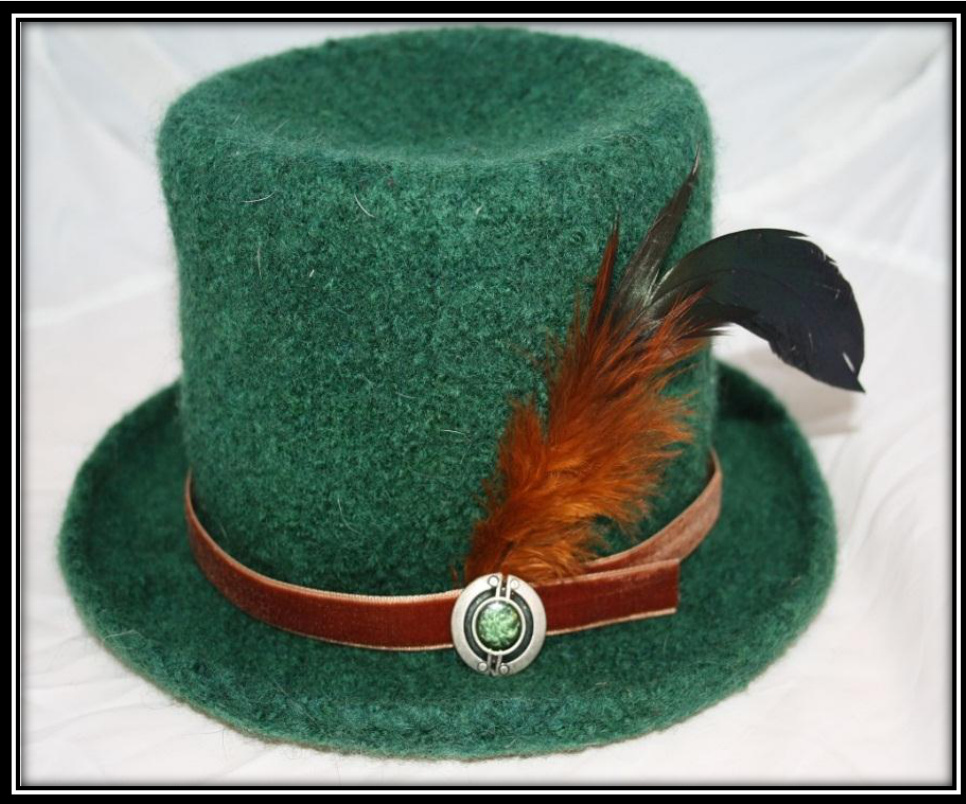
Let it dry overnight and voila! You are now ready to decorate with ribbons, feathers and felted embellishments. To use the felting needle, put a pad of foam behind your work, lay the fibre where you would like it to be and stab repeatedly with the felting needle holding it perpendicular to your work. Be careful of your fingers, the needle is barbed and it will really hurt!
This is an original design by Maylin Tan for Tri'Coterie. Find our group on Ravelry. All rights reserved. Pattern is exclusive to yarn club members until January 2013.