The Sassy Skein's Jolly Santa
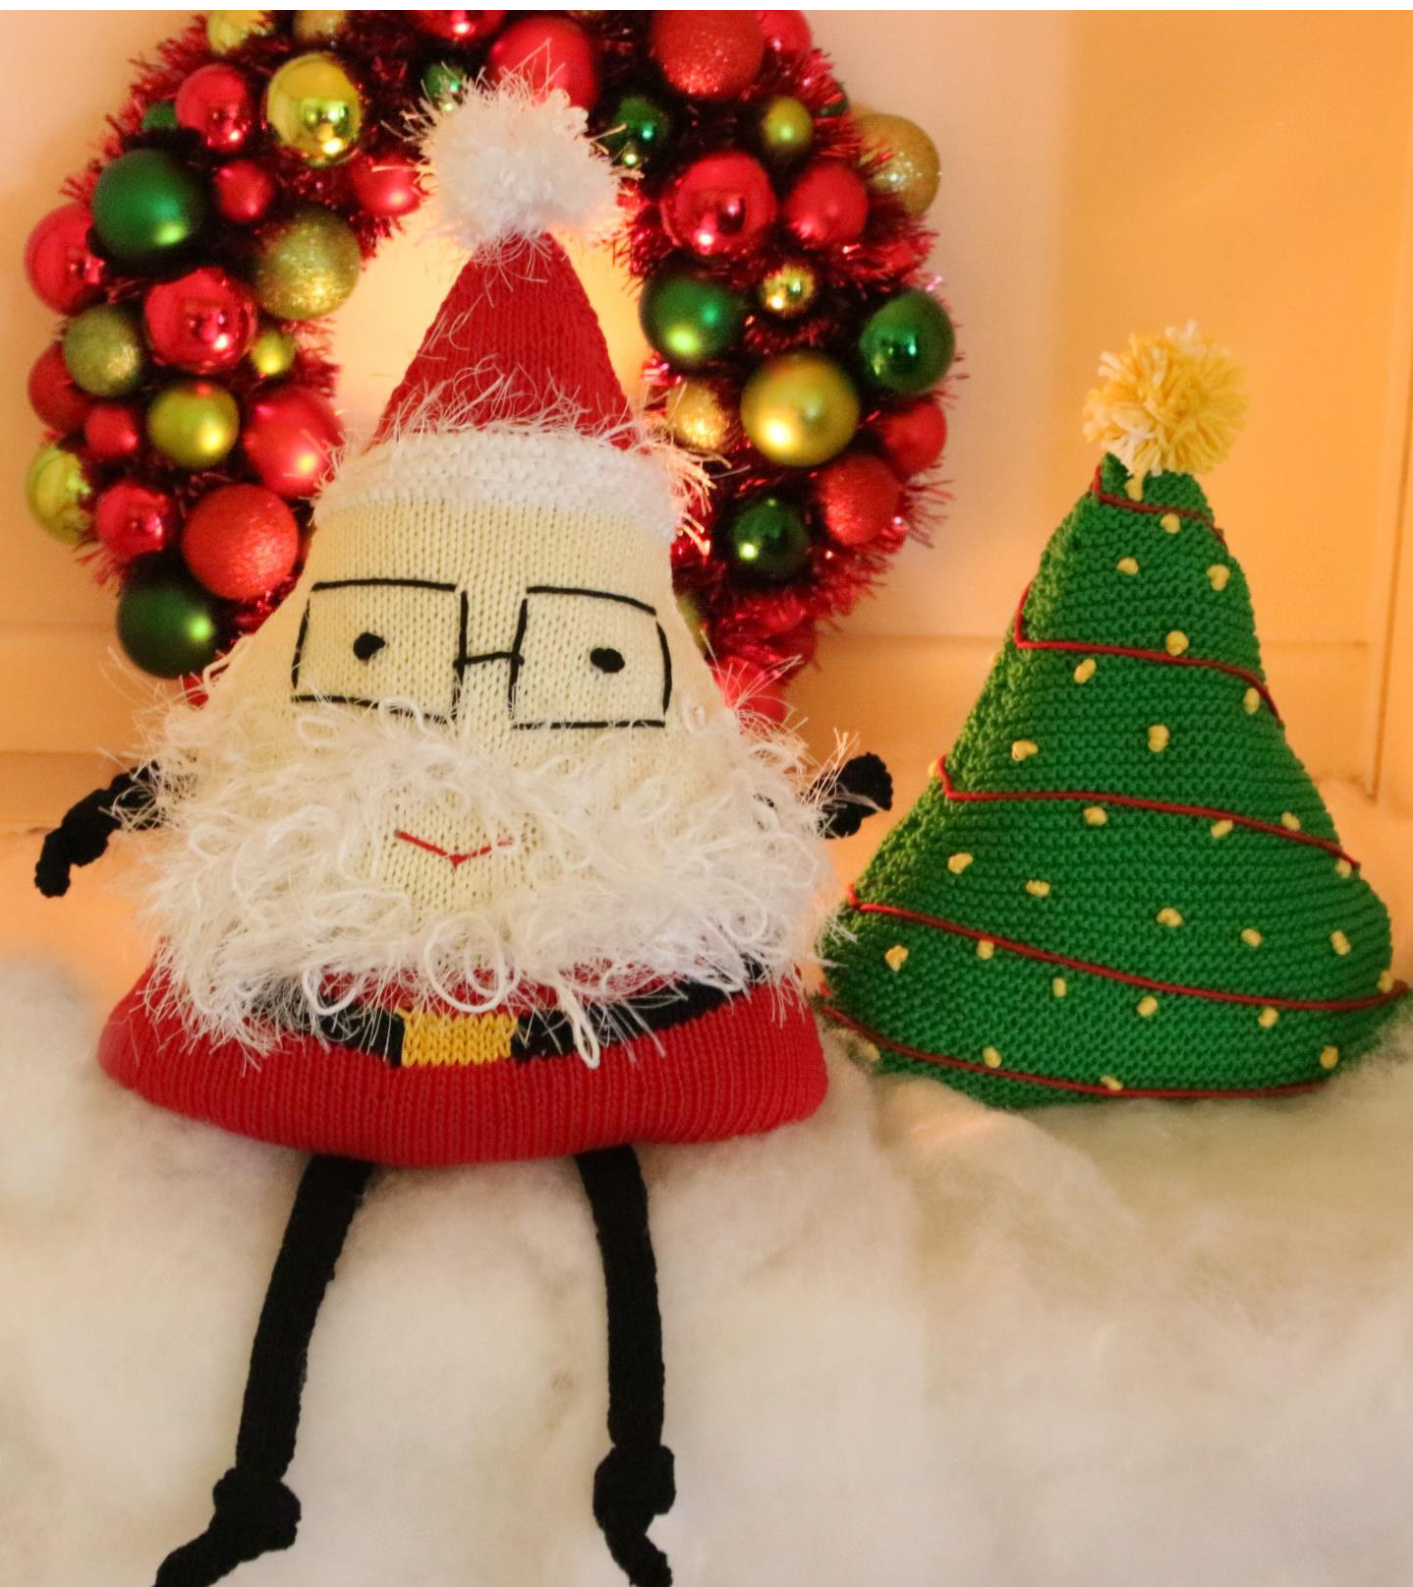
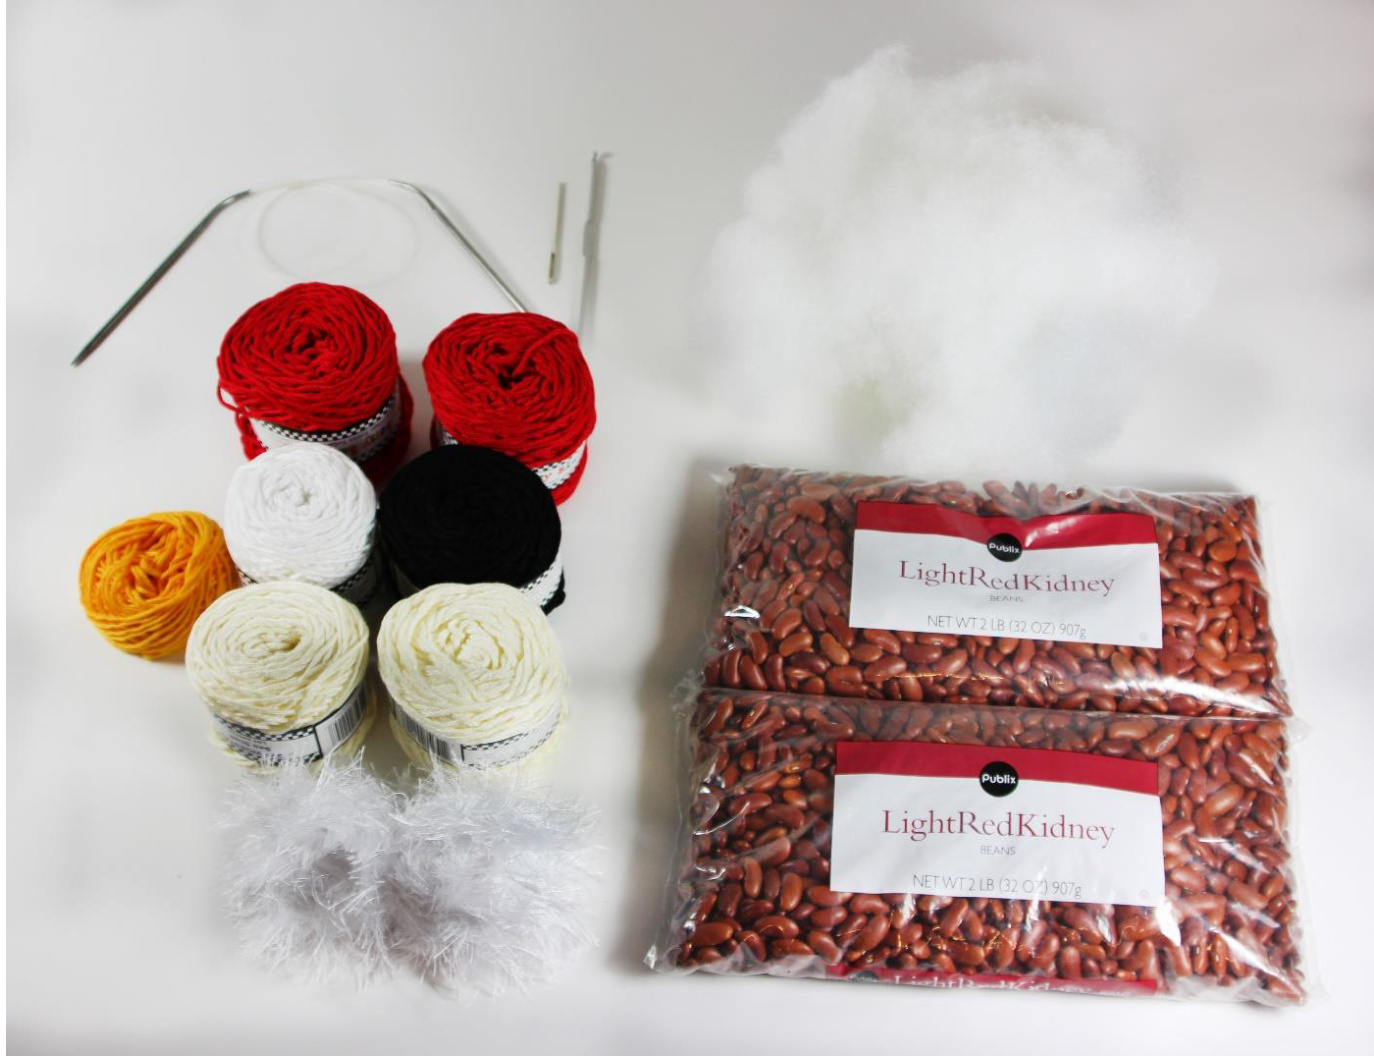
Our Santa's Finished Measurements are: Height: 15" With: 12" Deep:5" Materials: The Sassy Skein's Key West Karibbean Kotton Yarn Worsted Weight Color A- 203 Strawberry Daiquiri 2 Skeins Color B- 201 Licorice 1 Skein Color C- 211 Papaya 20 yds Color D- 224 Sea Shell 2 Skeins Color E- 202 Coconut 1 Skein White Fun fur 1 Skein Size 6 needles Tapestry needle and Crochet hook You will also need 4 Ibs of any kind of large bean (for the weight of Santa) and 3 large handfuls of pillo stuffing.
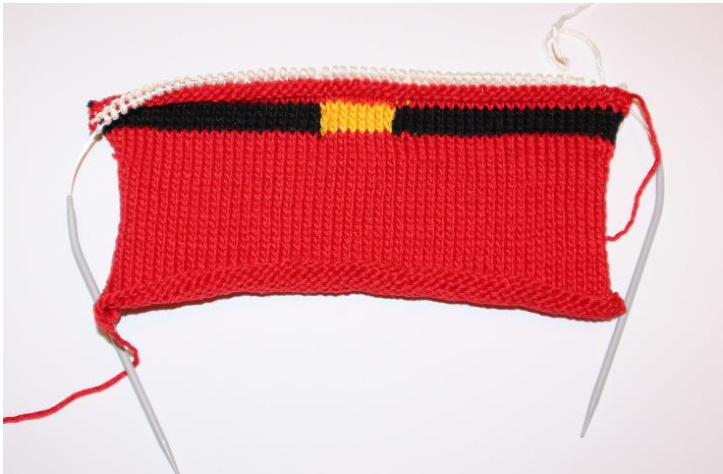
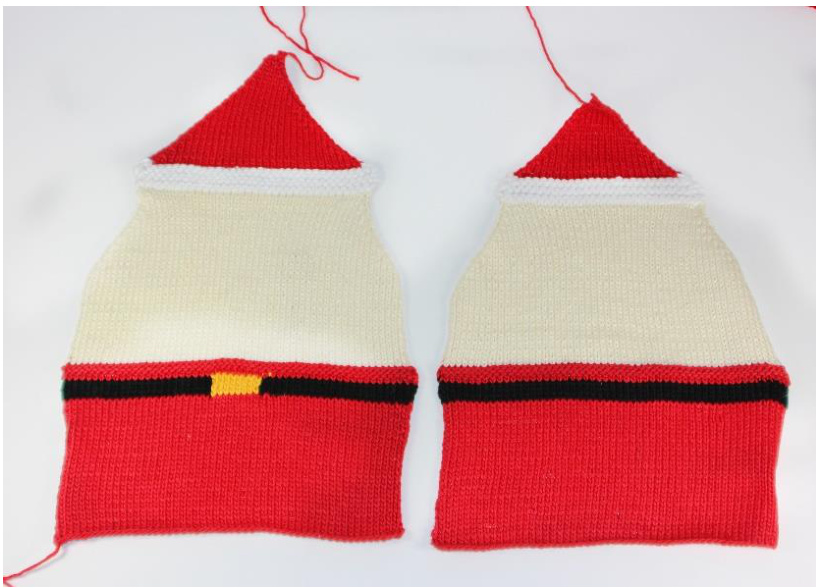
Body: Front &Back CO 54 sts in Color A work in Stockinette till piece measures 4.5" Row 1: Change to Color B K23, Change to Color C K8, Change back to Color B K23. Row 2: In Color B P23, Change to Color C K8, Change back to Color B K23. Row 3-4: repeat rows 1 &2 (^ Front of Santa, for back of piece omit Color C ( gold Buckle) and knit Rows 1-4 entirely in Color B) Row 5-6: Change to Color A Work in Stockinette sts. Row 7: (RS) Purl across row Row 8: (Ws) Knit across row
Santa Face:
Change to Color D knit in Stockinette until piece measures 8.5". On the Right side (RS) of the knitting you will begin decreasing every RS row ,K1, K2tog, knit across row until last 3 sts and, Slip Slip Knit (SSK it is a decreasing method), K1. Purling every WS row until piece measures 11".
Santa Hat:
Row 1: (WS) change to Color E ( double strand the yarn) Purl across row. Row 2: (RS) P1, P2tog, Purl across row until last 3 sts SSP, P1. Row 3-6: Repeat rows 1 & 2 On WS change to Color A Purl Row. On RS continue with decreasing pattern K1, K2tog, knit until last 3 sts and SSK, K1 until only 4 sts are left on the needle. Then BO.
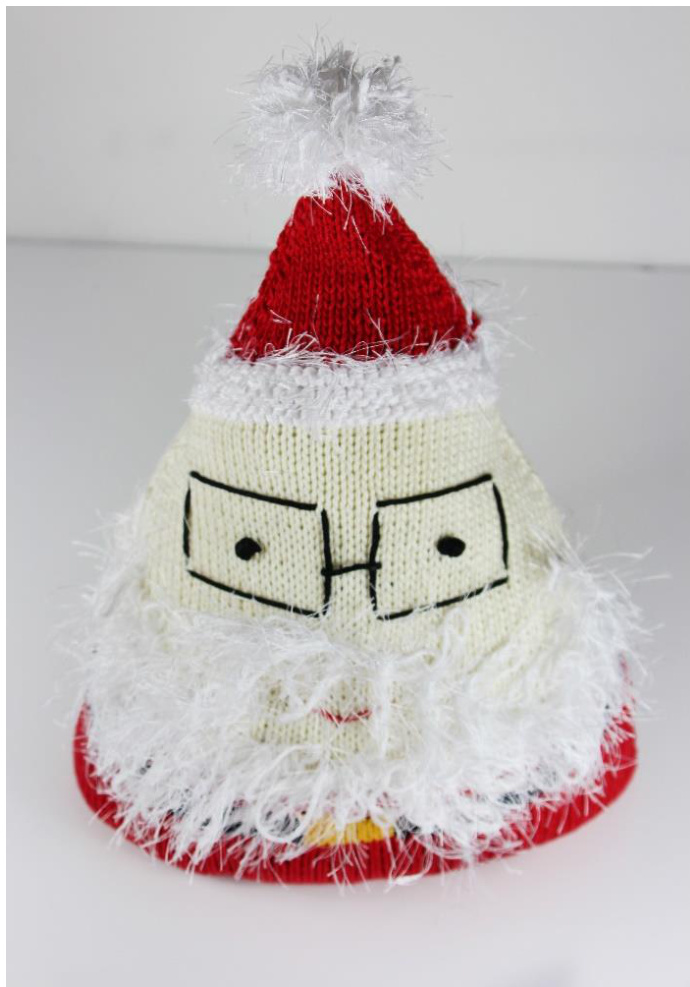
You can do any kind of fun face you want! We decided to make Santa have some cute glasses, small smile and a fun Beard. Using the tapestry needle sew your face on (you will want to do this before you sew your two sides together so you don't have any loose ends showing).
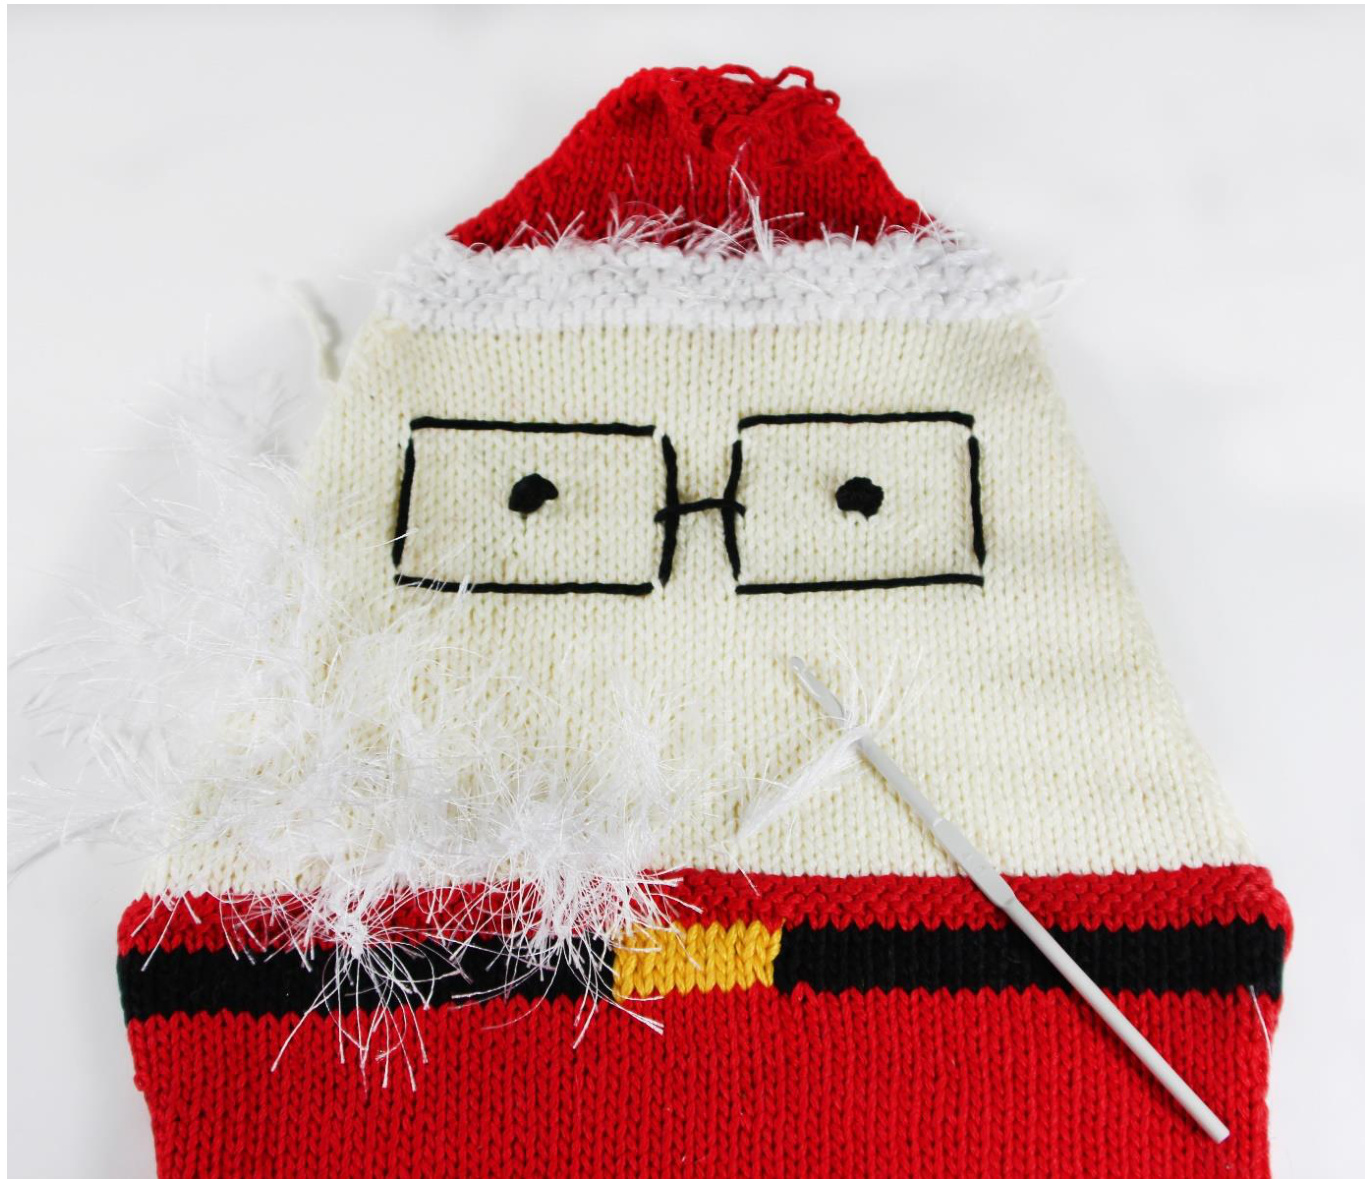
Only thing not show in the photo is a cute little smile between the beard. To add a little fun to his hat we have taken a strand of the white fun fur and weaved it through the Color E Garter sts.
Beard:
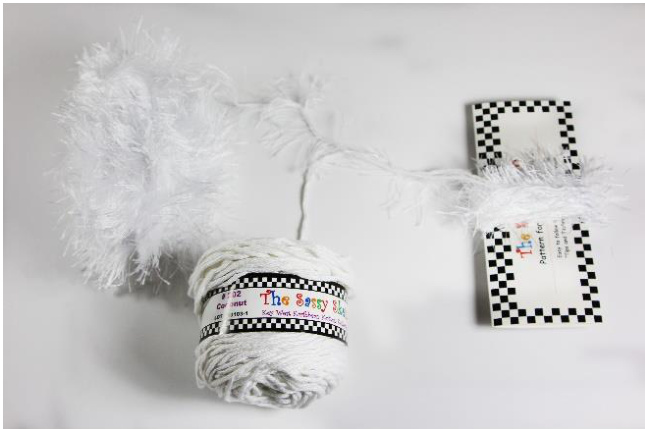
To create Santa's beard we used Lizzie Loop technique. With RS of garment facing you, take a strand of Color E and a strand of the fun fur so you are working with 2 strands at one time, and your crochet hook, beginning at one end work across , making loops about 1 ' -2" long and tying them together as shown, letting them lie in all directions. You may make the beard as full as you wish. We recommend the beard be shaped like a large smile to give the affect of a real beard, reference finished Santa.
Finishing:
Now you will want to take both body pieces, Right Sides facing each other and using a mattress seam sew the sides up until you reach the red top of the hat. Turn it inside out and pour both bags of beans into your Santa! He will expand a lot, that is why we are adding the pillow stuffing for the other half. After you have filled him up with as much stuffing as you can sew the rest of the sides together. Pom-Pom:
For this Pom-Pom you are going to double strand the Fun Fur and Color E together ( like the beard). Wind these strands of yarn all together around a 4" piece of cardboard several times. (The more winds, the fuller the pom-pom -would recommend not winding too much). Slide off the cardboard and tie around the middle tightly with strand of Color E yarn. Cut end loops. Attach to top of Santa with tail left at top of hat. Secure tightly. Trim pom-pom ends asneeded.
Arms & Legs:
To create the legs you are going to make large I-cords. In Color B CO 6 sts. After CO, do not turn work. Slide the sts to the other end of the needle; keep the yarn in the back of the needle; pull or bring the yarn behind and across the back of the sts; and knit the sts that were moved to the working end of the needle. Again, do not turn work. Slide the sts to the end of the needle, with yarn in back, and knit sts again. A circular stand of yarn will emerge. Repeat this pattern for 11" and BO. Once you have BO tie the end in a knot for feet.
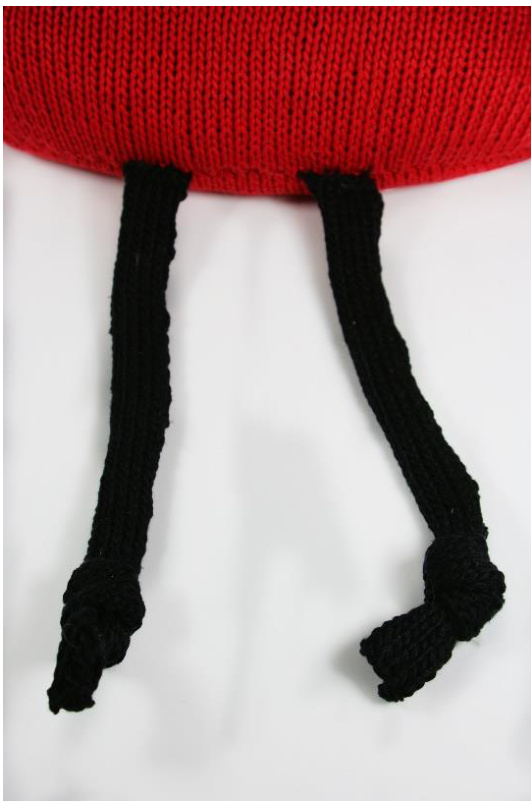
To create the arms you will do the same as the legs, you will only make them 4" and BO. Once you have BO tie the end in a knot for feet. Sew both arms and the legs onto the doll. Weave all loose endings into the doll and you're done!!
ABBREVIATIONS/TERMS
Approx approximately beg begin(ning) BO bind off co cast on cn cable needle cont continue ctr center dec decreas(e) (ing) (ed) dpn double-pointed needle est establish(ed) EOR every other row foll follow(ing) inc increas(e) (ing) K knit LH left hand P purl patt pattern psso pass slip stitch over last stitch worked PU pick up stitches RH right hand rem remain(ing) (s) rep repeat rnd(s) round(s) RS right side of work sl st slip stitch ssk slip 1 knitwise, slip 1 knitwise, K2 slipped stitches together through back loop - 1 decrease st(s) stitch(es) St st stockinette stitch tog together WS wrong side of work or garment wyib with yarn in back of work wyif with yarn in front of work time(s) yd yard yo yarn over needle to make a new stitch () work directions as a group as many times as indicated \* asterisks, starting point for repeating directions as many times as indicated
Happy Knittirg!
@all rights reserved by The Sassy Skein December, 2014


