
Espeon Ear and Jem
Materials
Red Heart Super Saver Yarn in Lavender Red Heart Super Saver Yarn in Cherry Red Tapestry Needle Scissors Size H Crochet Hook Single sheet of Felt in Orchid/Dark purple Sewing needle and lilac thread Wire cutters Measuring tape ★ Needle felting needles, wool and styrofoam. \*optional\* Pattern by: Cloudy Day Crochet. Please do not sell the pattern itself or the projects you make from it.
[Espeon Ear] Make 2.
Ch 26. sl st ends together. The tail marks the bottom of the ear. Rnd 1- Sc all. [26] sl st, ch 1 Rnd 2- Sc into same st. Sc all. [26] sk 2, sl st. Ch 1. Rnd 3-4- Scing 1st into the same ch, dec. Sc rest. [25] [24] sk 2, sl st. Ch 1. Rnd 5- Scing 1st into the same ch, (dec, sc 10) x2 [22] sk 2, sl st. Ch 1. Rnd 6-7- Scing 1st into the same ch, sc all [22] sk 2, sl st. Ch 1. Rnd 8-16- Scing 1st into the same ch, dec. sc rest [21, 20...13] sk 2, sl st. Ch 1. Rnd 17- Scing 1st into the same ch, dec. sc 4, dec, sc 5.[11] sk 2, sl st. Ch 1. Rnd 18-19- Scing 1st into the same ch, dec. sc 2. inc, sc 6 [11] sk 2, sl st. Ch 1. Rnd 20- Scing 1st into the same ch, sc 3, inc. sc 3, dec x2 [10] sk 2, sl st. Rnd 21- sl st into every other stitch. Fasten off and hide the remains inside of the ear.
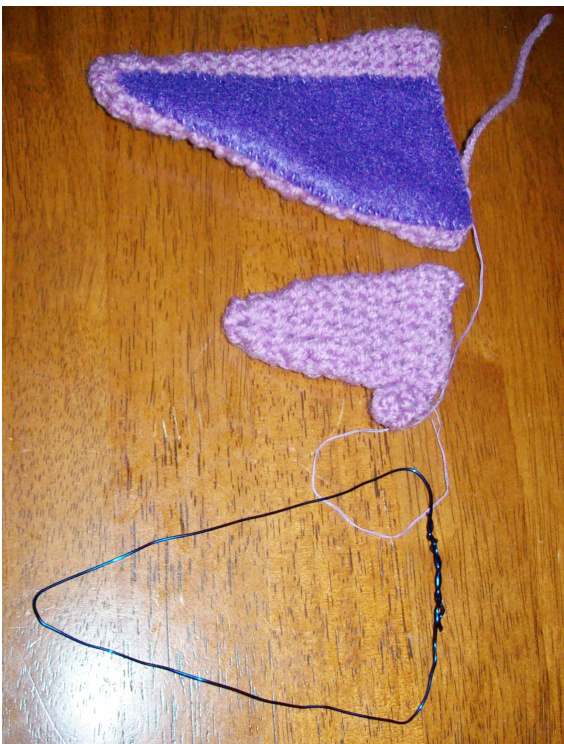
[lnner Ear] Make 2.
Trace the ear. Draw the inner ear into the picture, and cut only that piece out. This is your template. Place the template over some dark purple felt (you can keep it there for now by using some pins) and cut out two inner-ears. Sew them onto each ear using a needle and thread. MAKE SURE TO FLIP THE OTHER EAR OVER, sO ensure you don't end up with two left ears.
[Big Tuft] Make 2.
Ch 14, sl st ends tog. The tail marks the top of the tuft. Rnd 1- Sc all. [14] Sl st. Ch 1. Rnd 2- Scing 1st into same ch, dec, sc 12. [13] Sk 2, sl st. Ch 1 Rnd 3- Scing 1st into same ch, dec, sc 11 [12] sk 2, sl st. Ch 1. Rnd 4-6- Scing 1st into same ch, Sc all. [12] sk 2, sl st. Ch 1. Rnd 7- Scing 1st into same ch, dec, Sc 10. [11] sk 2, sl st. Ch 1. Rnd 8- Scing 1st into same ch, sc4, dec. Sc 5. [10] sk 2, sl st. Ch 1. Rnd 9- Scing 1st into same ch, dec, sc 2. Dec, sc 4 [8] sk 2, sl st. Ch 1. Rnd 10- Scing 1st into same ch, dec, sc 6. [7] sk 2, sl st. Ch 1. Rnd 11- Scing 1st into same ch, dec x3. Sc 1. [4] sk 2, sl st.
Rnd 12- Sl st every other st. Fasten off, then hide the tail inside of the ear. [Small Tuft] Make 2. sC 4 in magic ring Rnd 1- Inc, Sc 2. [4] Rnd 2- Sc all [4] Rnd 3- Sc 3, sl st. [3] With tapestry needle, sew this tiny tuft to the bottom of the big one, going around the open bottom.
[Wire]
Cut wire to 15" long. Fold in half. Then, using the ear as a guideline, fold the rest into a triangle shape, twisting the ends around each other to secure.
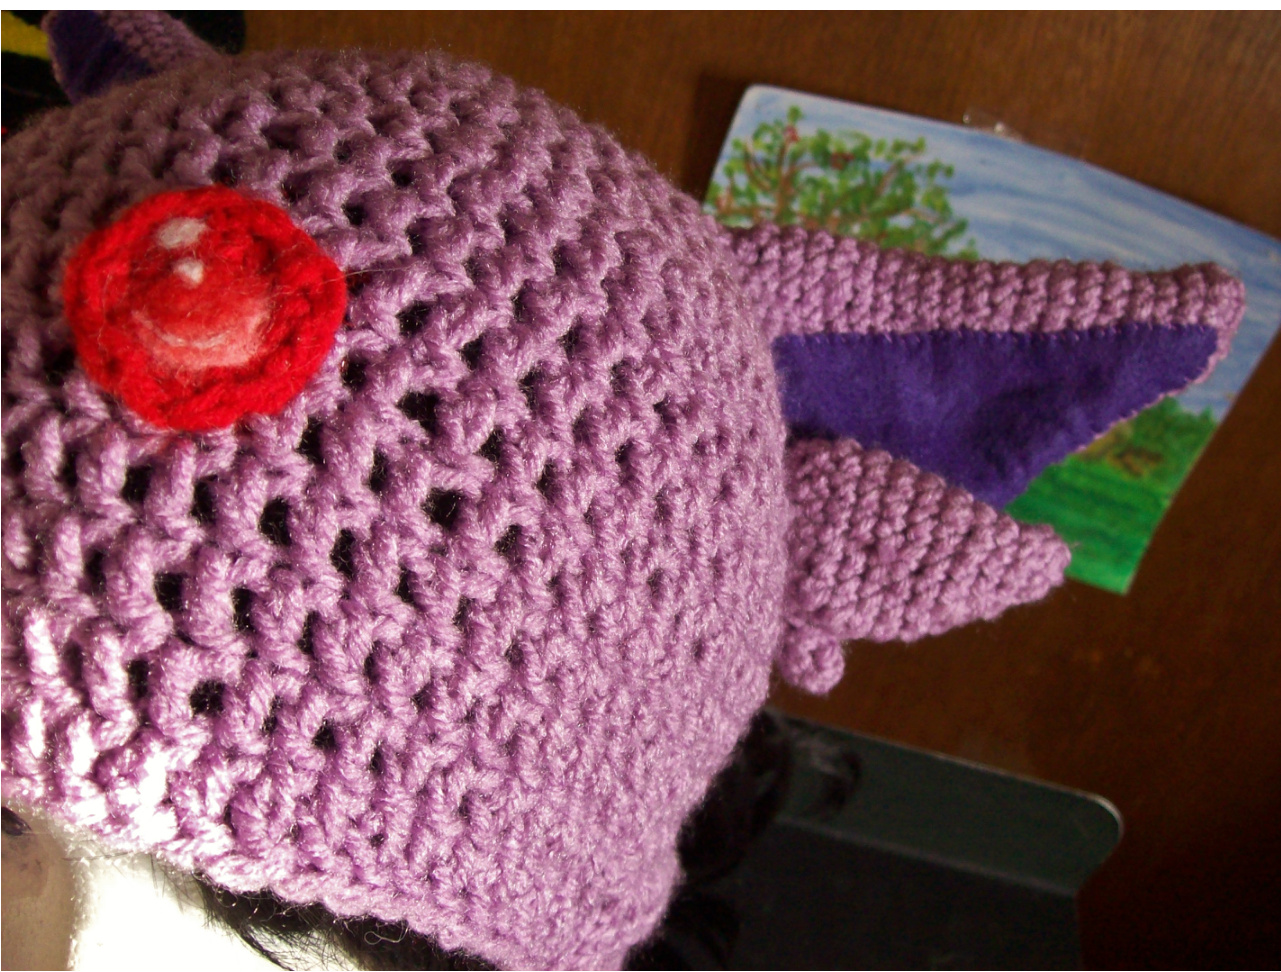
\*Ear and Jem Placement for Hat\*
Using the same-colored yarn as the ear, fasten both ears onto the 4th row from the top of a plain Hdc hat base. I like to sc the ear there temporarily with a two small pieces of yarn that I loop through to top and bottom. Wear the hat and look in the mirror, making adjustments to placement as necessary. Attach by sewing around the outside of the ear, as opposed to just sewing it all on at once straight through both sides. This helps with stability. Make sure to also sew around the wire on the bottom. It makes a protective cover while also keeping the wire firmly attached to one side of the ear. (It won't move around this way.)
[Jem]
Sc 5 in magic ring. Row 1- Inc all [8] Row 2- Sc 1, inc x4 [12] sl st and Fasten off, leaving a tail for sewing. \*Add some needle felted details! \*With a Tapestry Needle, sew the jewel right above the 4th row of a Hdc hat.


