hookabee cutie crochet amigurumi
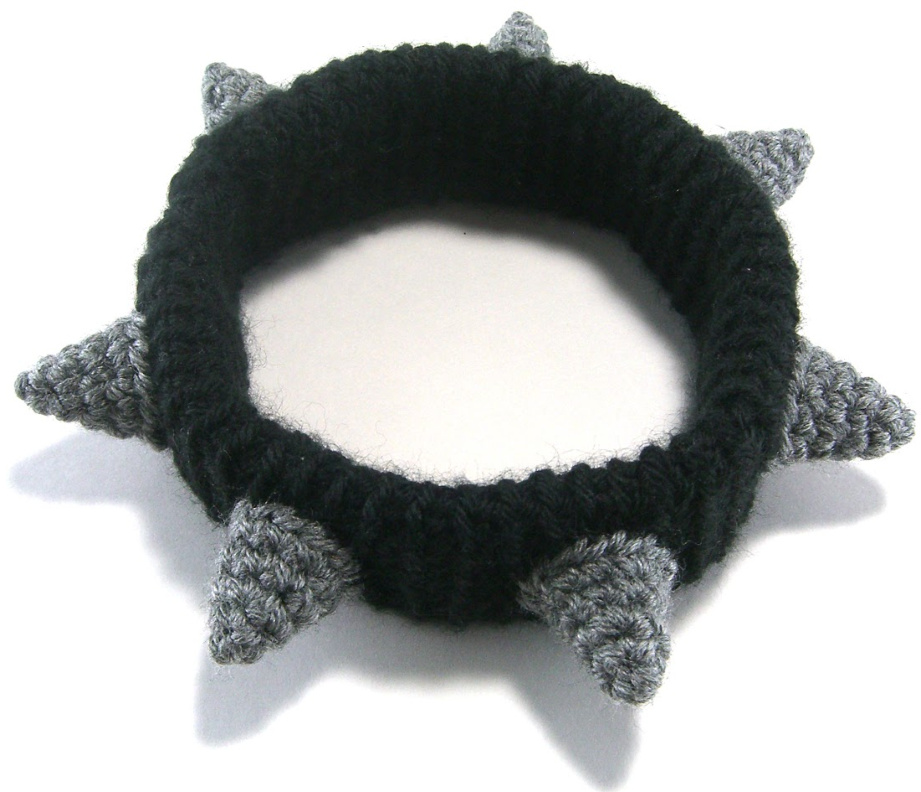
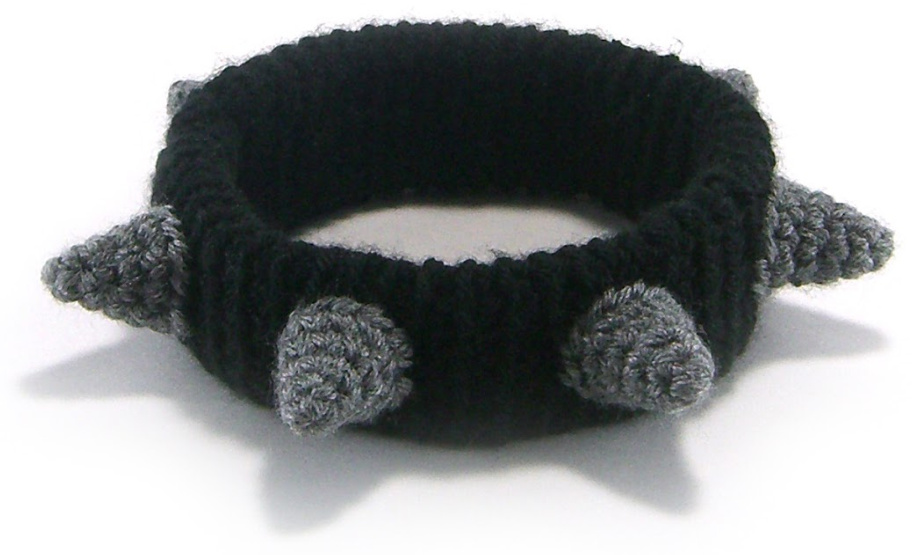
Spiked dog Collar by: Megan Barclay www.hookabee.com

Helpful notes
Gauge, yarn and size:
Gauge is not important for this pattern because you simply crochet enough rounds in the collar to fit around the neck of your dog. You can easily substitute a different yarn from the one I used, even one with a different weight, just make sure you change your hook accordingly: a finer weight yarn requires a smaller hook, and a bulkier weight yarn requires a larger hook. You want the collar to be able to stretch so that it can slip over your dog's head, so choose a yarn that has some elasticity. I would avoid using cotton. If you find the fabric of the collar is not stretching a lot, increase your hook size.
Continuous rounds:
This pattern is crocheted in the round in a continuous spiral (no joining or turning between rounds). Use your stitch marker to mark the first stitch of each round so you know when you have completed a round.
Materials:
H US (5 mm) hook E US (3.5 mm) hook Stitch marker Yarn/tapestry needle Polyester fiberfill stuffing (optional)
Yarn:
Patons Canadiana (worsted weight, 100% acrylic) - Black #10040 - Med. Grey Mix #10044 The amount of yarn needed varies according to the size of the dog you are making the collar for. For my sample, made for a small dog (toy breed), I used approximately: Black - 32 yds (29 m) Grey - 17.5 yds (16 m)

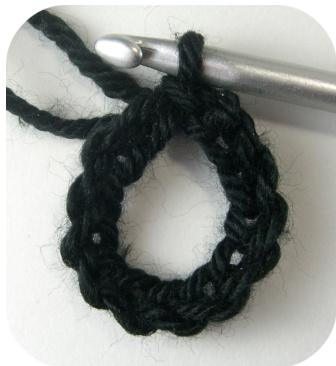
Magic ring:
The spikes in this pattern start with a magic ring. A magic ring is a great technique because it prevents a large hole from forming at the start of your pieces. If you are unfamiliar with this method, need a refresher, or you find this technique tricky, check out my tutorial: http://hookabee.com/tutorials/.

Back loop only vs. Both loops:
For the collar in this pattern, the stitches are crocheted into the back loops only. For the spikes, the stitches are crocheted into both loops. Unsure of the difference? Have a look at the following pictures: When stitches are worked through both loops (indicated by the two black lines in the photo), you insert your hook under the front AND back loops of the stitch you are crocheting into.
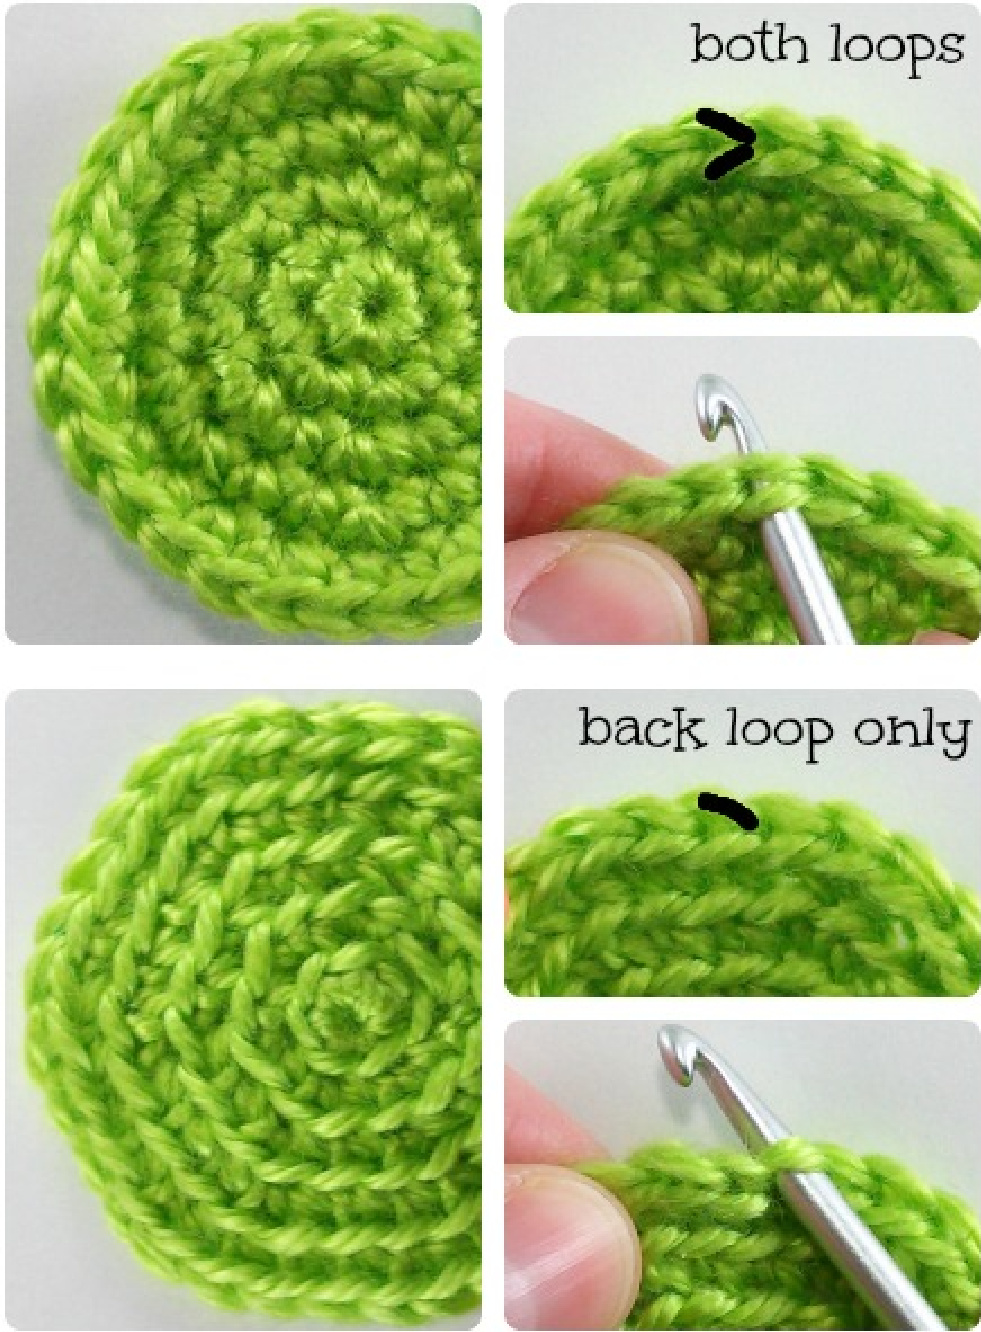
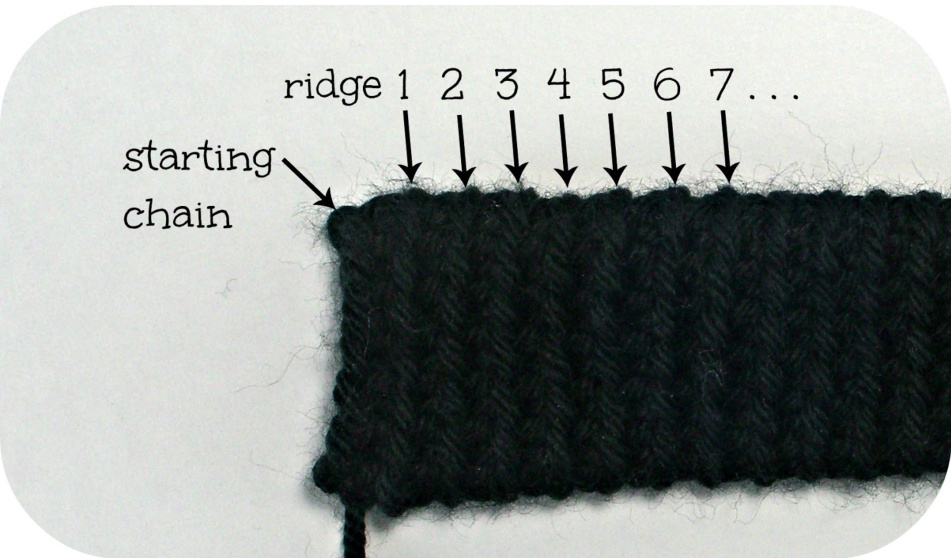
On the other hand, when stitches are worked into the back loop (indicated by the single black line in the photo), you insert your hook only under the back loop of the stitch you are crocheting into. Notice also the difference in appearance of the fabric that is created: when you work into the back loops only, the front loop remains on the surface of the fabric, creating ridges at each round. These are useful for counting rounds and attaching pieces!

The collar is crocheted into the back loops only because it creates a stretchier fabric that can be slipped over the dog's head. The spikes, on the other hand, are crocheted into both loops to create a stiffer fabric that holds its shape better - which is also the reason a smaller hook size is used!
Abbreviations:
rnd = round st = stitch ch = chain sl st = slip stitch sc = single crochet inc = increase (single crochet twice in next stitch)
Pattern
\*If you have any questions or you run into any problems, please email me and I will be happy to help! megan@hookabee.com\*
Collar:
Use H (5 mm) hook and black yarn. ch 14, sl st into first ch to make a circle - rnd l: sc in each ch around (14) Stitch into back loops only for rest of collar. rnd 2: sc in each st around (14)
Repeat rnd 2 until collar fits around your dog's neck (flatten the tube to create a flat collar). You do not need to keep track of the number of rnds you have done, so no need for a stitch marker - just continue to sc around until you have the desired length! After a few rnds


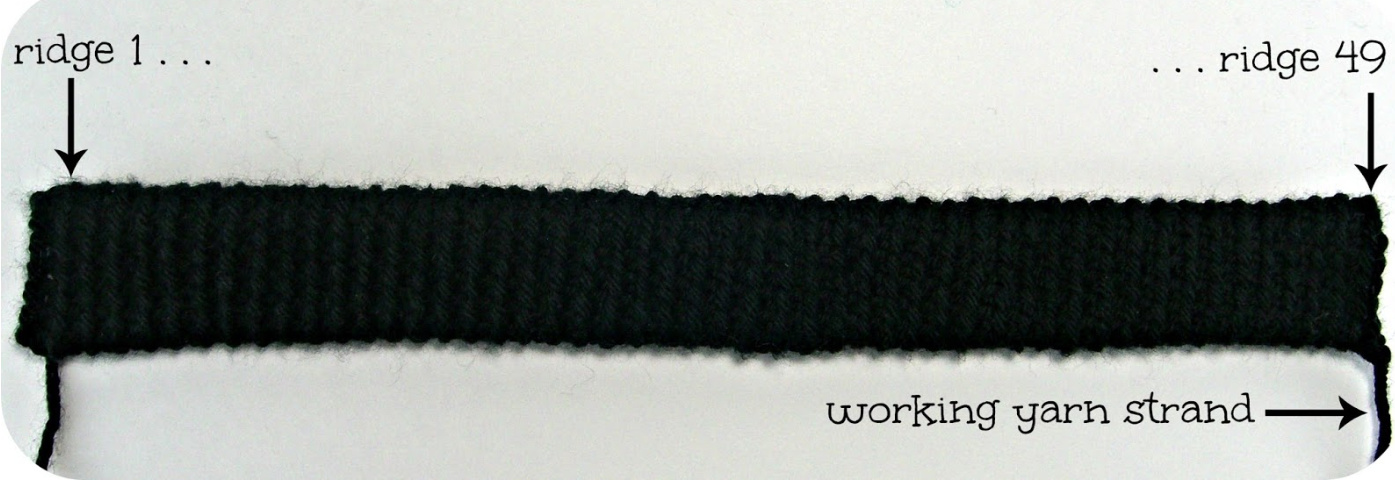
Flatten the tube so the working yarn strand is at one side (see second photo below). Count the number of front loop ridges along the collar (not including the initial chain stitches). You want the number of ridges to be a multiple of7 (ie. 49, 56, 63, 70.). If it is not, add or remove stitches until you do (making sure it still fits around the dog's neck). In my sample, I had a total of 49 ridges:
Fasten off, leaving a long tail to stitch collar closed later.
Spike:
Use E (3.5 mm) hook and grey yarn. Make as many spikes as you have multiples of 7 ridges in the collar. For example, if you had 49 ridges in the collar, make 7 spikes; if you had 56, make 8 spikes; if you had 63, make 9 spikes, etc.). For my sample with 49 ridges, I made 7 spikes.

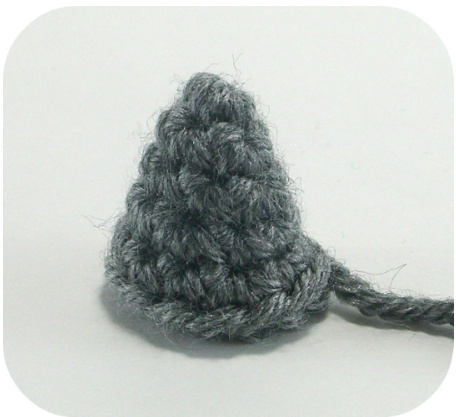
Make a magic ring, ch 1 rnd 1: 4 sc in magic ring (4) Stitch into both loops for rest of spike. rnd 2: inc, 1 sc, inc, 1 sc (6) rnd 3: 1 sc, inc, 2 sc, inc, 1 sc (8) rnd 4: inc, 3 sc, inc, 3 sc (10) rnd 5: 2 sc, inc, 4 sc, inc, 2 sc (12) Fasten off leaving a long tail to attach to collar.
Assembly:
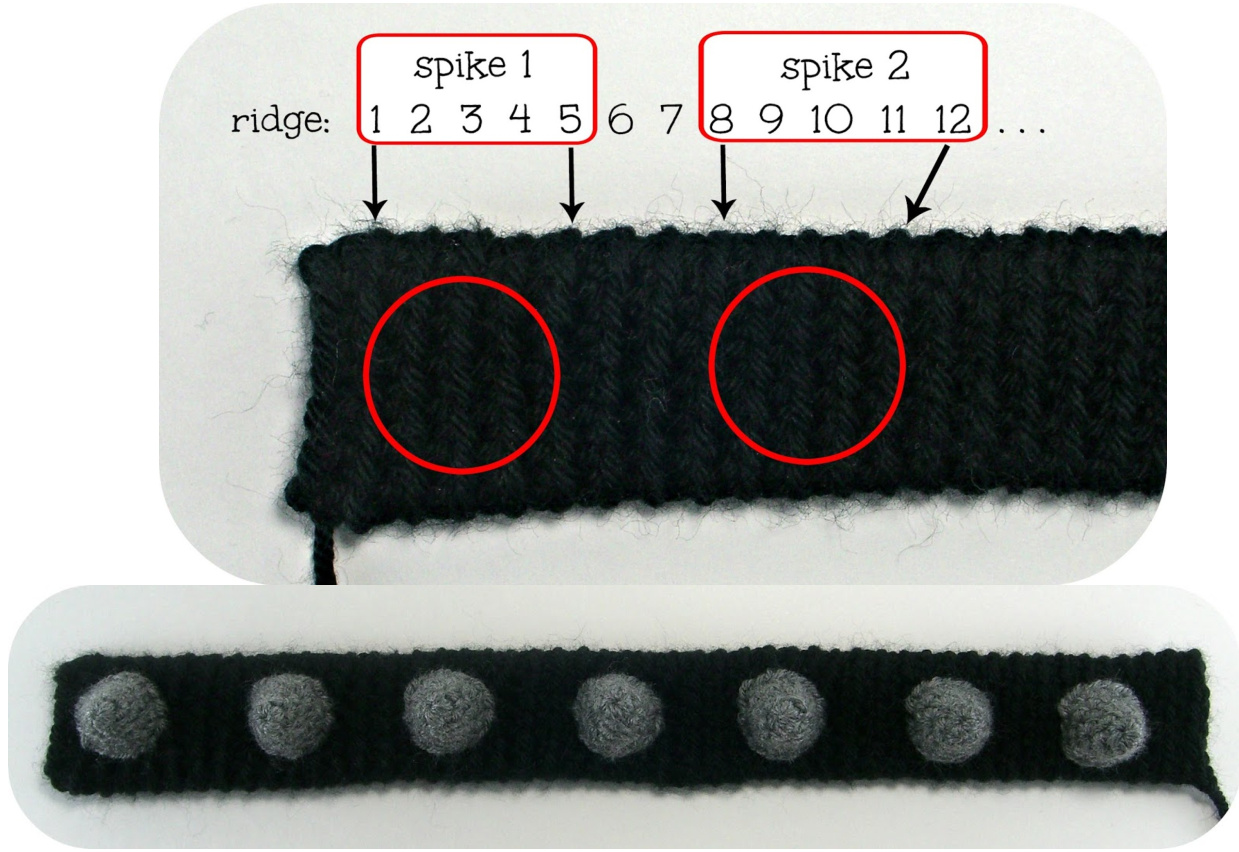
You can stuff each spike with polyester fiberfillif you wish, but this is not necessary. The spikes hold their shape better when stuffed, but they do pretty well without the stuffing, too (the spikes in my sample are not stuffed). Attach each spike along the collar. Each spike spans 5 ridges, with 2 ridges in between them. You can hide yarn ends inside the flattened tube.

Stitch the two ends of the collar together to close it in a ring.
Yay! You are done! I would love for you to share a picture of the collar, especially with it being modelled by a cutie dog. Either email me (megan@hookabee.com) or post a picture directly on facebook: (https://www.facebook.com/hookabee) or the hookabee ravelry group: (http:/www.ravelry.com/groups/hookabee)

Did you like this free pattern? If you want more patterns with step-by-step photos like this one, check out my website: Www.hookabee.com

@hookabee (Megan Barclay) - Do not copy, sell or distribute this pattern in either digital or printed format. You may sell your finished items from this pattern, but please give me credit as the pattern designer.


