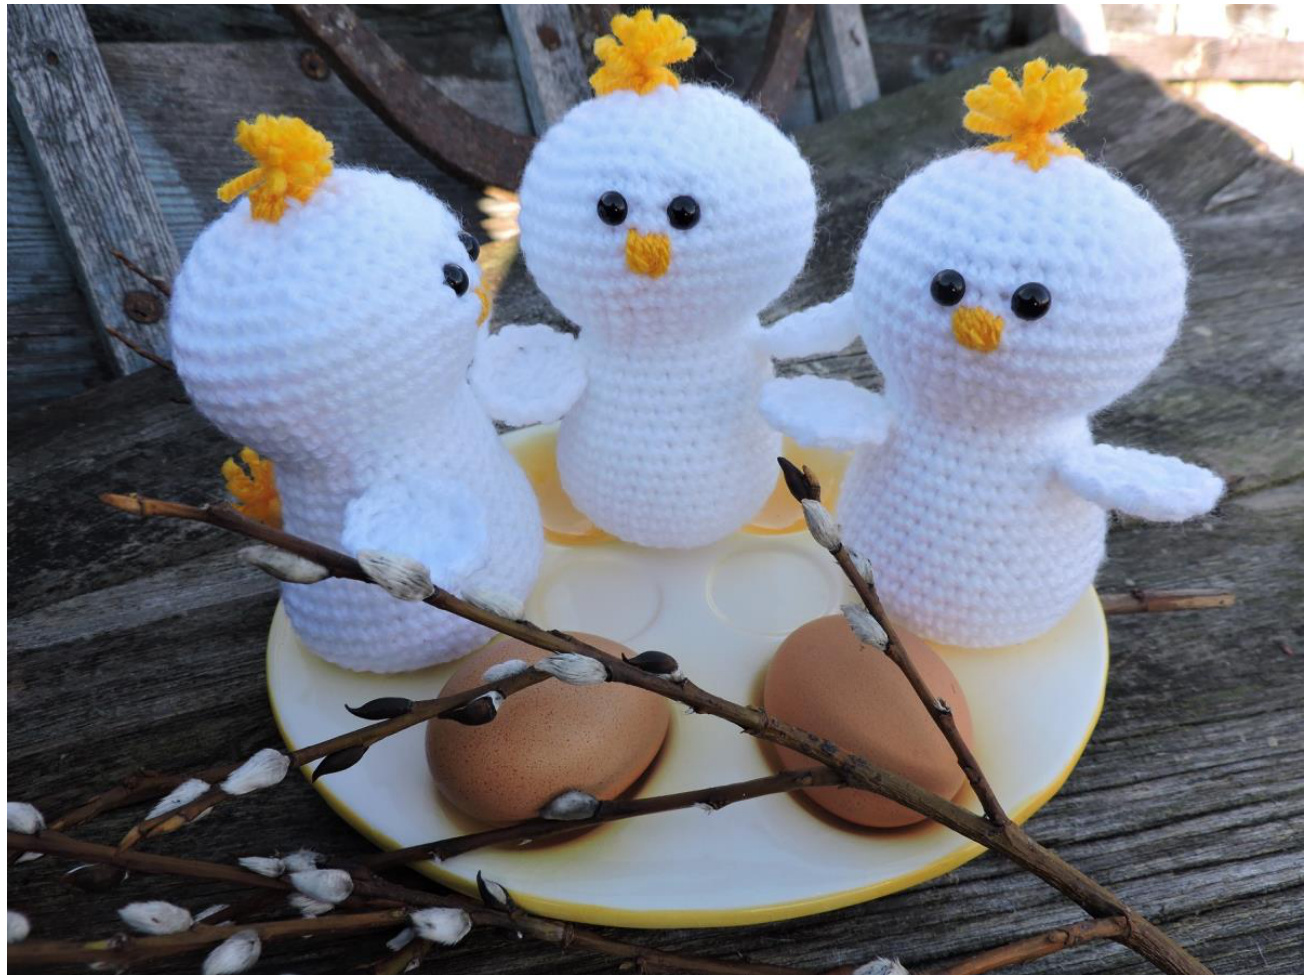
The Easter Chicks
Amigurumi Crochet Pattern
This is an original design. You are allowed to sell the finished product handmade by you if the item description states it's based on Kipre&Pahkla pattern. You may not sell the pattern. It is also prohibited to alter the instruction, make translations and distribute it on paper or electronically. Kipre&Pahkla design 2016
Skill level - easy
Finished size - The Easter Chicks is in sitting positsion and is about 11cm (4,3 inches) tall.
Supplies
1. Yarn - the example is crocheted with acrylic yarn. Color A- white Color B - yellow 2. Polyester fiberfill 3. 6mm black safety eyes 4. Crochet hook 3,0mm 5. Stitch marker 6. Darning needle
About the pattern
Work in continuous rounds. Do not join or turn unless otherwise instructed. It would be wise to use a stitch marker and place it in the first stitch of the round to mark the beginning of it. Move the marker up to the first stitch of the next round after finishing the previous one. If you need to change color, do it always at the end of the previous round. Start the last stitch of the round with the old color. Change the color right before you draw through all loops on hook to complete stitch. You can easily sew the toy together when you leave each piece a long yarn tail
Stitch explanation
Decrease (sc2tog) - Insert hook into st and draw up a loop. Insert hook into next st and draw up a loop. Yarn over, draw through all 3 loops on hook. Hdc2tog - yarn over, insert hook into next stitch, yarn over and pull up a loop. Insert hook into next stitch, yarn over and pull up a loop. Yarn over and draw through all four loops on hook.
Comments
In this pattern every detail starts with a magic ring. If you don't want to use that, you can easily start like this: Chain 2. Work 6 sc in first ch. Continue to round 2.
Abbreviations
sl st = slip stitch ch = chain sc = single crochet dc = double crochet tr = triple crochet dec = decrease inc = increase st(s) = stitch(es) rep = repeat nxt = next
PATTERN
Color A. Rnd 1: start 6sc in a magic ring (6) Rnd 2: inc 6 times (12) Rnd 3: \*sc in nxt st, inc\* rep 6 times (18) Rnd 4: \*sc in nxt 2 st, inc\* rep 6 times (24) Rnd 5: \*sc in nxt 3 st, inc\* rep 6 times (30) Rnd 6: \*sc in nxt 4 st, inc\* rep 6 times (36) Rnd 7 - 10: work around (36) Rnd 11: \*sc in nxt 4 st, dec\* rep 3 times, sc in nxt 18 st (33) Rnd 12: \*sc in nxt 3 st, dec\* rep 3 times, sc in nxt 18 st (30) The part without the decreases is the backside of the bird! Rnd 13: work around (30) Rnd 14: \*sc in nxt 2 st, dec\* rep 3 times, sc in nxt 18 sc (27) Rnd 15: work around (27) Rnd 16: sc in nxt 3 st, \*sc in nxt st, dec\* rep 3 times, sc in nxt 15 st (24) Rnd 17 - 18: work around (24) Fill the body with fiberfill. Add stuffing as the work progress. Rnd 19: sc in nxt 2 st, \*sc in nxt 2 st, dec\* rep 3 times, sc in nxt 10 st (21) Do not cut the yarn, continue to crochet the head. Rnd 20: sc in nxt st, \*sc in nxt 4 st, inc\* rep 4 times (25) Rnd 21: \*sc in nxt 3 st, inc\* rep 6 times, sc in nxt st (31) Rnd 22: sc in nxt 2 st \*sc in nxt 5 st, inc\* rep 4 times, sc in nxt 5 st (35) Rnd 23: \*sc in nxt 4 st, inc\* rep 7 times (42) Rnd 24 - 27: work around (42) Rnd 28: \*sc in nxt 5 st, dec\* rep 6 times (35) Rnd 29: \*sc in nxt 4 st, dec\* rep 6 times (30) Rnd 30: \*sc in nxt 3 st, dec\* rep 6 times (24) Attach the safety eyes between round 26 and 27, leave between the eyes 2 stitches apart. Fill the head with fiberfill. Add stuffing as the work progress. Rnd 31: \*sc in nxt 2 st, dec\* rep 6 times (18) Rnd 32: \*sc in nxt st, dec\* rep 6 times (12) Rnd 33: \*dec\* rep 6 times (6) sl st into next st; fasten off; finish stuffing.
WING (make 2)
Color A.
Rnd 1: Ch 3, in third chain from hook make 3 dc, 3 tr, 3 dc, sl st in first dc (9). Rnd 2: Ch 1, sl st in first stitch, \*ch 1, sl st in nxt st\*, rep between \* until you reach the tr at the tip of the wing, into the tr make (sl st, ch 2, sl st); repeat instructions between \* to end, join in first sl st. fasten off and leave a yarn tail for sewing wing to the body.
TUFT AND TAIL
Color B.
With 6 doubled up lenghts of yarn make 6 tassels placing in between stitches on first round of chicks head. Pull yarn through gap, feed ends through loop, pull tight.
FINISHING THE CHICKS
Sew wings, make tuft and tail to the the bird's head and body. The chicks peak is embroidered.


