Rockford
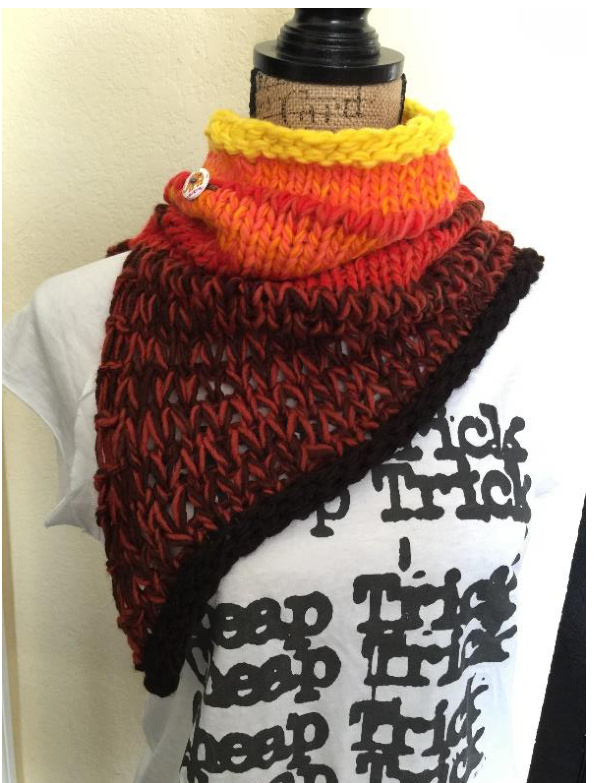
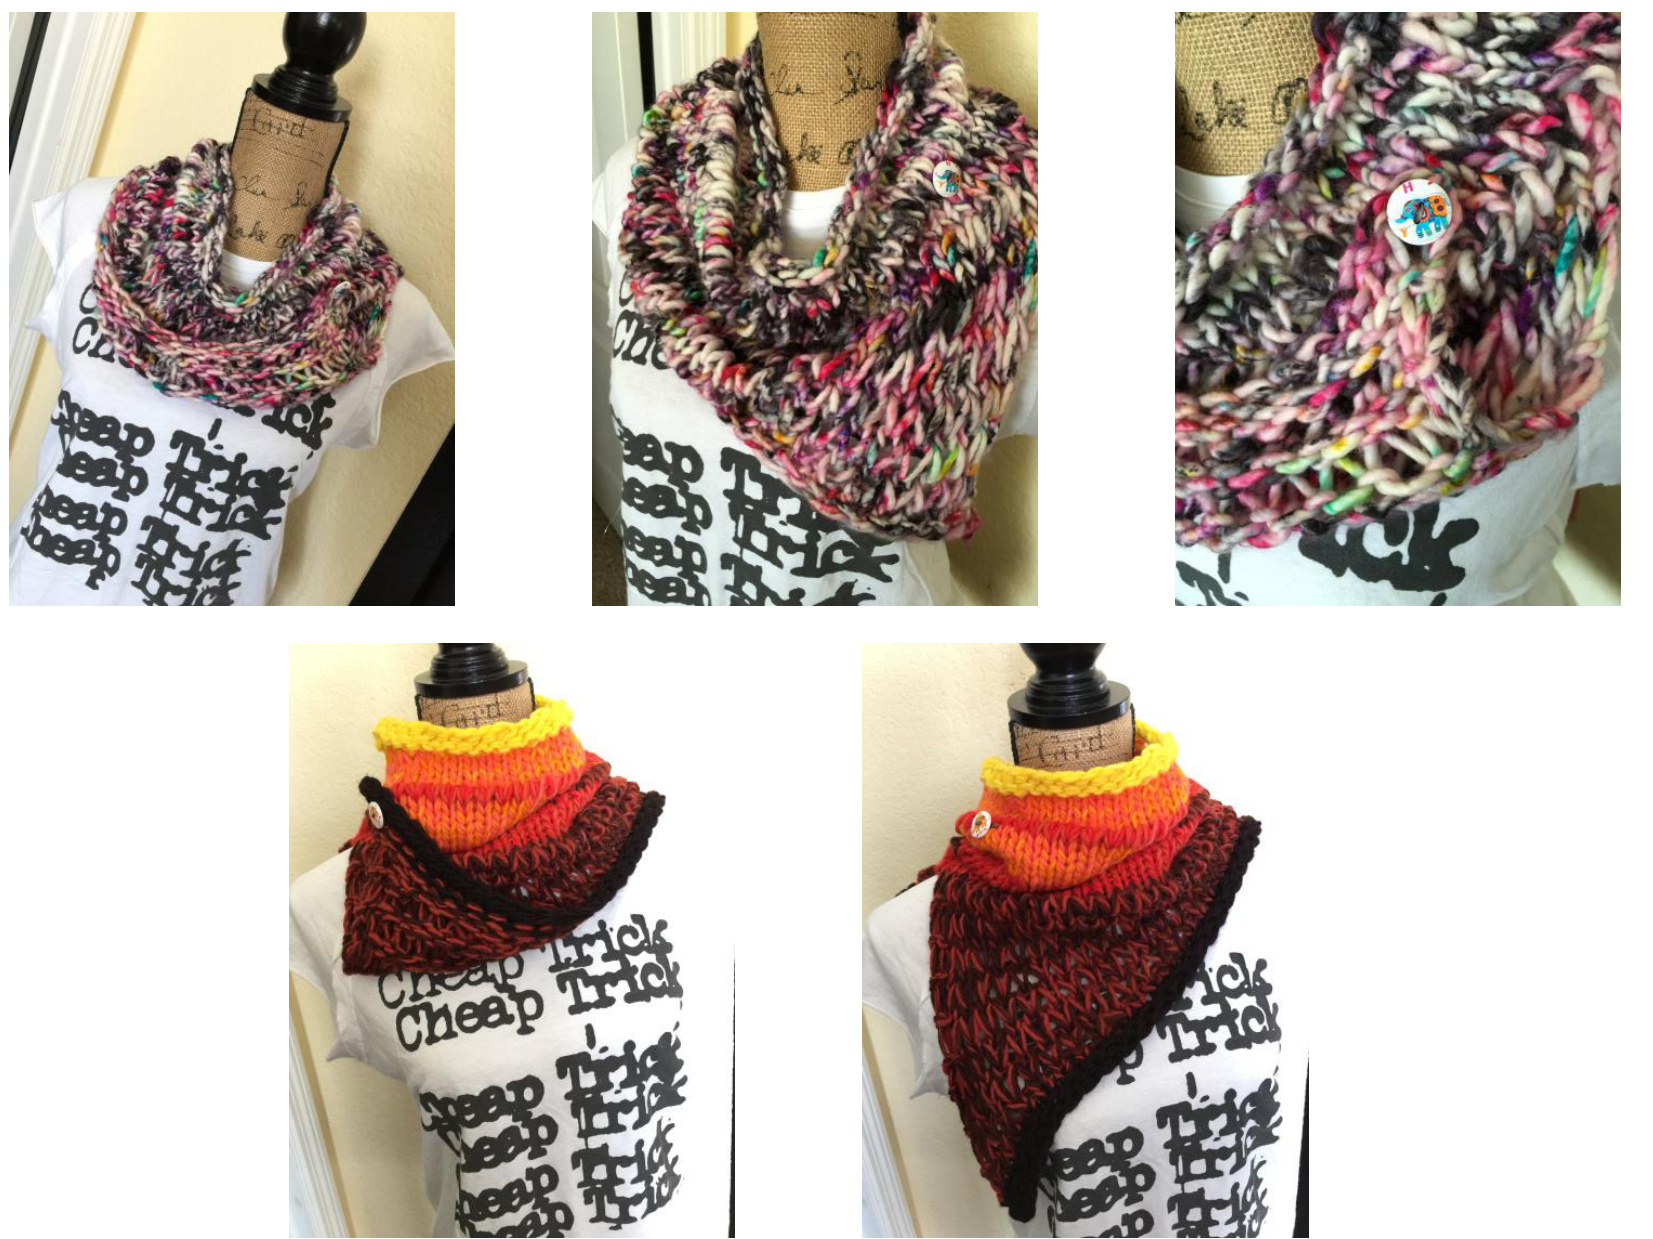
An edgy cowl with multiple options, Asymmetrical shaping, drop stitches, play with colors...make it funky, make it fun!
Materials
Yarn: Worsted or DK held double 125 - 275 yds/60 - 140g Bulky 76 yds/100g 1 St Marker Tapestry Needle or crochet hook for weaving in ends Blocking Supplies US 15 Circular Needles l6 - 20"
Sizing
■ Kids: 7 inches (Shown in worsted weight held double} Adult Short: 15 inches (Shown in bulky weight) Long: l9.5 inches {Shown in worsted weight held double) \*Measured from top edge to bottom point
Gauge
Approximately 2 sts/inch stockinette stitch
Notes
Kids and Adult sizes have separate directions. @2015 OrangeJellyfishDream by Sarah Raasch. orangejellyfishdream@gmail.com Follow the same directions no matter the yarn weight. ■ Repeat the first section as many times as you'd like for extra length. ■ Use contrasting/coordinating colors ■ Great stashbuster ■ Multi-color variegated, speckled or solids...anything will be beautiful ■ Mix different colors for the drop stitch rows or alternate for stripes Repeat directions marked with an asterisk (\*) Place a stitch marker at each turn to easily keep track for the next turn
Glossary
■ k -knit p - purl ■ yo - yarn over ■ RS - right side ■ WS - wrong side k2tog - knit 2 together ■ sllp - slip l purlwise ■ pm - place marker st(s) - stitch(es)
Helpful Links
YouTube Tutorial for Jogless Stripes
Directions
Cast on45sts Join in the round, pm at the start of the round ■ Round l: k to end ■ Round 2: p to end ■ Rounds 3-5: k all ■ Round 6: \*yo, kl\* to end of round ■ Round 7: k all sts and drop yo's Rounds 8-10: k all Repeat Rounds 6-l0 one (three) more times At this point, stop knitting in the round and begin to work flat Row 1 (WS): k2, p to the last 2 sts, k2 ■ Row 2 (RS): k2, \*yo, k1\* to the last 2 sts, k2 ■ Row 3: k2, p sts and drop yo's, k last 2 sts ■ Row 4: k2, \*yo, kl\* to 5 sts before the end of the row, turn Row 5: sllp, p sts and drop yo's, k last 2 sts
> Follow here for shorter version
. Row 6: k2, \*yo, kl\* to l0 sts before the last turn, turn Row 7: sllp, p sts and drop yo's, k last 2 sts Repeat Rows 6-7 two more times
Finishing
Row l (Rs): k all, k2tog at gaps from turns Row 2 (wS): k all
Stretchy Bind off (knit loosely or with larger needles):
kl, \*kl, slip 2 stitches back to left needle and k2tog through the back loops\*, repeat for all stitches and fasten off when you reach the end.
Follow here for longer version
Row 6: k2, \*yo, kl\* to 5 sts before the last turn, turn Row 7: p sts and drop yo's, k last 2 sts Repeat Rows 6-7 five more times Finishing Row l (Rs): k all, k2tog at gaps from turns Row 2 (wS): k all Stretchy Bind off (knit loosely or with larger needles): kl, \*kl, slip 2 stitches back to left needle and k2tog through the back loops\*, repeat for all stitches and fasten off when you reach the end.
Kids
Caston35sts Join in the round, pm at the start of the round Round l: k to end Round 2: p to end Round 3: k to end
Repeat Round 3 until you reach 4 inches At this point, stop knitting in the round and begin to work flat Row l (wS): p all ■ Row 2 (RS): k until 5 sts remain, turn ■ Row 3: sllp, p until last 2 sts, k2 ■ Row 4: k until l0 before last turn (15 sts remain), turn ■ Row 5: sllp, p until last 2 sts, k2 ■ Row 6: k until 10 before last turn (25 sts remain), turn Row 7: sllp, p until last 2 sts, k2
Finishing
@2015 OrangeJellyfishDream by Sarah Raasch. orangejellyfishdream@gmail.com Row l (Rs): k all, k2tog at the gaps from the turns Row 2 (wS): k all
Stretchy Bind off (knit loosely or with larger needles):
kl, \*kl, slip 2 stitches back to left needle and k2tog through the back loops\*, repeat for all stitches and fasten off when you reach the end.
Finishing
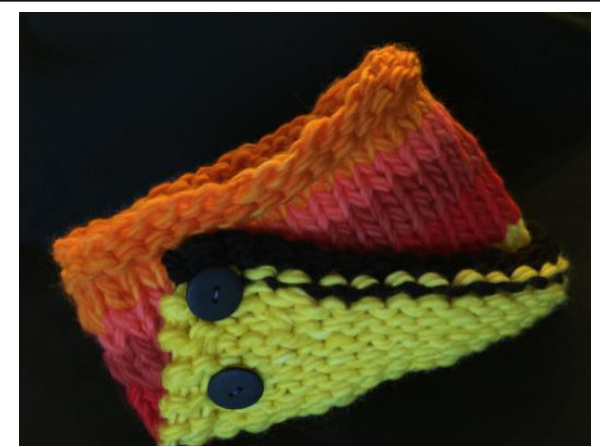
Embellishments Add a button towards the top edge of the cowl, on the same side as the point from your finishing edge. Fasten though a drop stitch opening. Add a button through both iayers for fixed positioning.
Blocking
Wet block. Gently pin to desired measurements being careful to not stretch too much widthwise.
his pattern is for personal use only. Thanl
@2015 OrangeJellyfishDream by Sarah Raasch. orangejellyfishdream@gmail.com


