Serape Bag Recipe
A Simple Knits design I had a wild idea to crochet a bag out of Noro Kureyon sock yarn. As nutty as it may sound, I made it entirely in single crochet to make the most of the long color run. This Noro colorway (92B) reminded me of the vivid colors in a Mexican serape. My ball of Noro Kureyon sock yarn was overweight at 4.3 oz — not the 3.5 oz/100 gms the label states. A normal ball contains 459 yards. I'm guessing I used about 550 yards. With a sock weight yarn, I used a size G (4 mm) crochet hook, 4 stitch markers, a swivel clasp and 1 yard of 5/8" ribbon. If you use a heavier yarn, use a larger hook. The pattern is written as a recipe to help you make a bag any size you like with whatever weight of yarn you have on hand. Use any feltable wool yarn (not superwash) for this project. (For a synthetic or non-feltable yarn, make the bag as large as you want with a crochet hook that will give a dense fabric.) It is constructed in a seamless spiral from the oval bottom to the top of the bag. (Start with a square or rectangle if you prefer.) Handle eyelets are added near the top of the bag and a few more rounds are worked. Once you're done, throw it in the washer with hot water and a little soap to felt it.
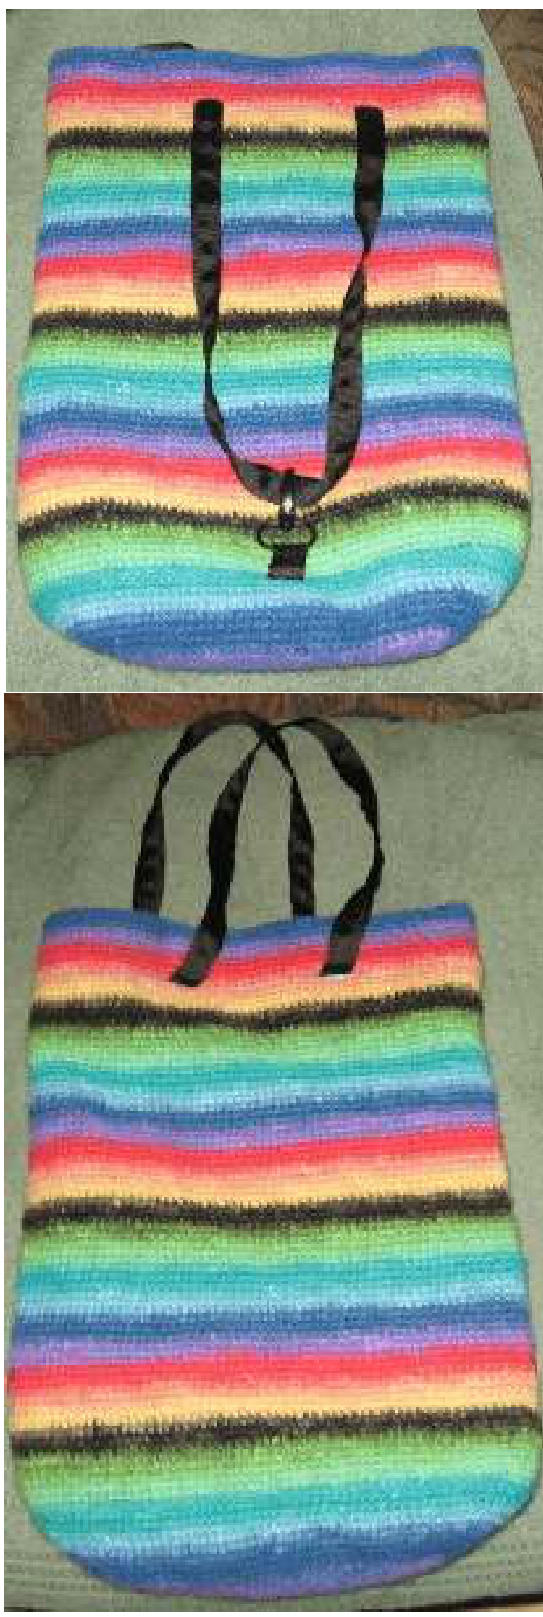
Once your bag is dry, thread the handles through the eyelets and add a clasp at the bottom of the bag. Pull up the handles to close the bag and carry it as a tote or pull the handle to one side and attach it to a swivel clasp to carry it as a shoulder bag. I lined my bag and added some pockets. My bag shrank more in width than length. If I make it again, I will make it wider and shorter. You may wish to felt a 4"x4" swatch and felt it before you make the bag. Use this information to determine the size to make your pref-felted bag for the bag size you wish to have after felting. I used black grosgrain ribbon for the handle and a little extra for a loop to hold the clasp. You may crochet a tab to attach the clasp to the bottom edge of the bag. Instead of purchased ribbon and a swivel clasp, you could use I-cord or crochet a 1 yard chain with doubled yarn or work several rows of sc for a handle and a carbenier clip for the clasp. 2011 Vicki Mikulak All rights reserved. For personal, non-commercial use only. Questions? simple.knits@yahoo.com Revised 2/5/2011
Materials:
550 yards Noro Kureyon sock yarn\* Size G (4 mm) crochet hook 4 split ring stitch markers 1 swivel clasp (or carbinier clip) 1 yd 5/8" wide black grosgrain ribbon Yarn needle \*overweight ball, yardage is estimated. Gauge: 5 sc & 6 rows = 1" (not felted) Finished size: 14" tall x 24" around (unfelted) 13"x 22" (felted) Key: ch = chain sC = single crochet st(s) = stitch(es) Note: To determine how much your project will shrink, first make sC a 4"x4" swatch. Wash it in hot water with soap to see how much it shrinks. Use this information to decide how big to make the bottom and sides for the size bag you want.
Oval bottom:
Ch35. Sc in all but the last ch. In last ch, work 3 sC. Sc in bottom of the chain. End 3sc in last ch. Place a marker to show the beginning. Now begin to work in sc spirals. (Do not join with slip stitch!) At each end of the oval, work 2 extra sc. Place markers at these locations, if needed. Sc in a spiral until you complete 10 rounds from marker. Mine was 4" across the narrow part and 120 sc. (Larger bag, continue until bottom is as big as you like.) Next round (turning ridge)#: Work in the back loop only for 1 sc spiral to form a turning ridge to transition to the sides. Work the sides in sc spiral until the bag is 12" tall (or as tall as you like). Want a rectangular bottom instead? Make a chain as wide as you want the bottom. Sc in each stitch. Work back and forth in rows until the piece is as wide as want. Work 1 sc round around the piece to begin the sides. At each corner, you'll need to work 3sc. Then go to the turning ridge#. Handle hole round: Lay the bag flat and place the 4 split ring stitch markers where you would like the handle holes to be. (Two [or more] per side.) Next round: Sc to the 1st st marker (not stitch that marker is in), ch4, skip 4sc, sc to 4sc before the 2nd marker, ch4, skip 4sc, sc to 3rd marker, ch4, skip 4sc, sc to 4 sc before the 4"h marker, ch4, skip 4sc, sc to beginning of round. On the next spiral round, sc in each sc (work 4sc over the ch4 space). Keep spiraling until you run out of yarn or until you are at least 1-2" above the handle holes. Slip st in the last sc. Pull yarn out of last stitch. Weave in all ends.
Finishing:
Fold the bag in half from top to bottom to locate the side center point. Place a locking stitch marker at the bottom at the turning ridge (or securely tie a piece of yarn here). Felting: Then felt the bag. Place it in the washer set for hot water with a little detergent and a pair or two of old blue jeans for agitation. Tie the bag inside a pillow case to keep it from shedding and clogging up the machine. When the bag has felted enough, remove it from the washer. Drape it over a waste basket/box inside a plastic bag to dry. Swivel clasp: Securely sew the clasp where you placed the marker at the turning ridge. Line the bag to make it more stable to sew on the clasp or sc a narrow tab to thread through the clasp and sc this to the bag. The clasp must be secured to hold the weight of the filled bag. Handles: Take 1 yard piece of ribbon and weave it through the top eyelets. Sew/tie ends together. This ribbon closes the bag, is used as a tote bag handle, or can be hooked to the swivel clasp as a shoulder bag. Other Handle Suggestions: Instead of ribbon, crochet a handle. Chain a 1 yard long handle with doubled yarn or work several rows of sc into a chain base. Another option would be I-cord.


