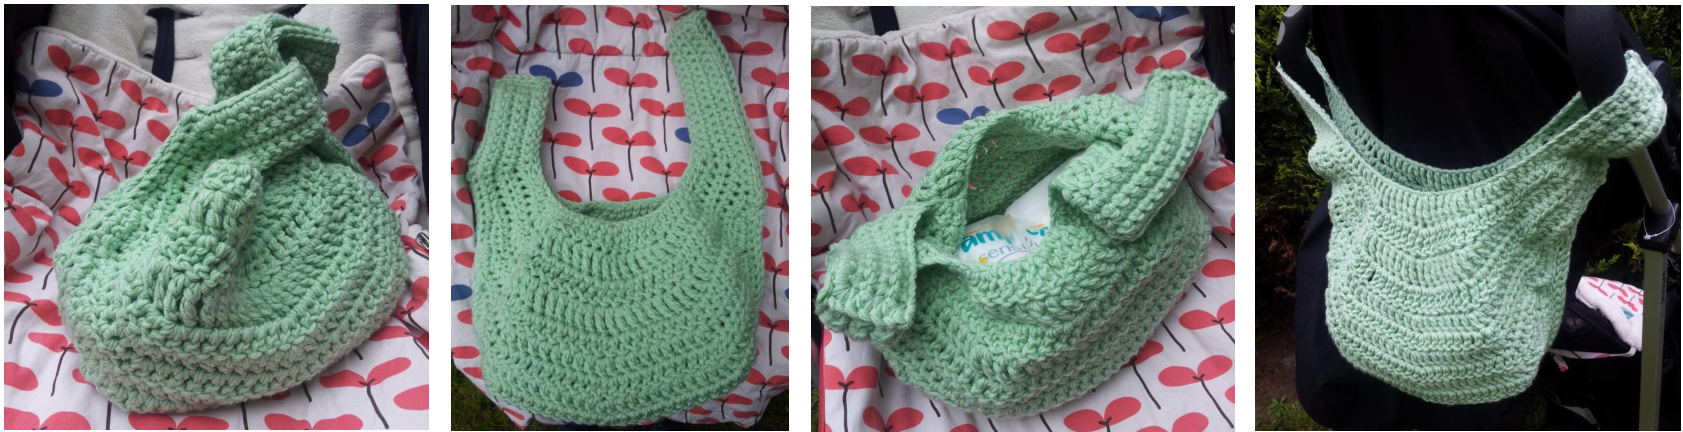
Aunty Dollie Crochet Bag
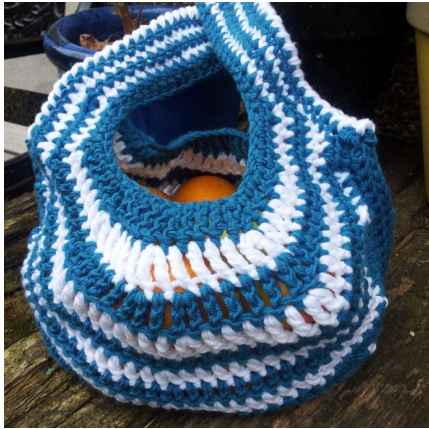
Another Random Pattern by Dedri Uys She is a simple little bag with tons of humility. And despite her apparent disability\* she is a very hard-working little thing.
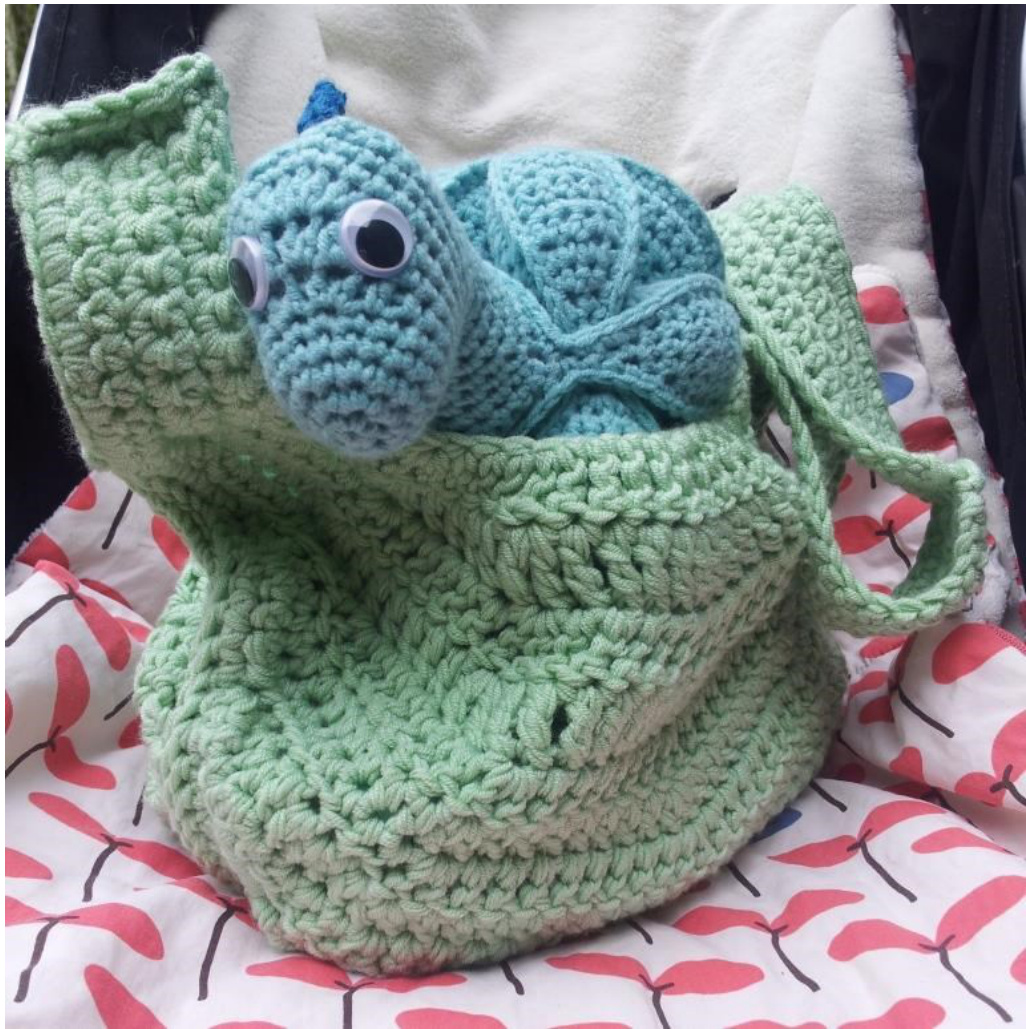
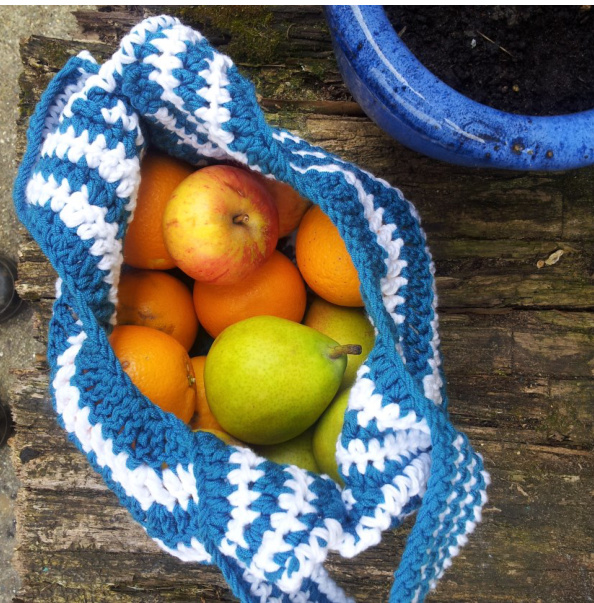
I would like to introduce you to my Aunty Dollie Bag. She is not above carrying your toilet rolls home from the shop, and should you need someone to help you raid your neighbour's apple tree in the dead of night, she will be more than willing and completely able. Take her to the beach stuffed with suntan lotion and a big fat book and she will be in her element. But what she loves most of all, what makes her litle baggy heart expand more than anything else in the world, is being filled to the brim with all sorts of kiddy goodies and flung over the handle of a stroller in an almost careless fashion. So go ahead...maker her and use her well! xxx Dedri \*This bag is loosely based on a pattern my mom found between my late great grandma's stuff. The handles are lopsided because you loop the long one through the short one to close the bag.
Materials
7mm Crochet Hook 2 strands of Double knit yarn or 1 strand of Chunky Yarn (approx. 200g) Yarnneedle The initial ch-1's in each row/round are NOT counted as a stitch. ? Although the sl st's are counted as st's, they are not included in the st counts in parenthesis. ● All instructions between asterisks should be repeated the number of times stipulated. So \*dc inc, dc x 4\* x 2, will mean: dc inc, dc x 4, dc inc, dc x 4. This pattern employs short rows to form part of the body of the bag. This just means that these rows do not begin and/or end at the traditional beginning and/or end of a row. Where possible I have quoted landmarks (like increases on the previous row) as an aid to help you confirm that you are still on the righttrack. ? A helpful hint: Apart from where the pattern changes in round 3, the majority of your increases will fall between the 2 stitches of the increases in the previousround.
Abbreviations
US Terminology used.
| Blo | Back Loop Only |
| Ch | Chain |
| Dc | Double Crochet |
| Dc Inc | Double Crochet Increase |
| Flo | Front Loop Only |
| Hdc | Half-doubleCrochet |
| Hdc Inc | Half-double Crochet Increase |
| Sc | Single Crochet |
| Sc inc | Single Crochet Increase |
| Sl st | Slip Stitch |
| St | Stitch |
| Tr | TrebleCrochet |
| Tr Inc | TrebleCrochetIncrease |
Instructions
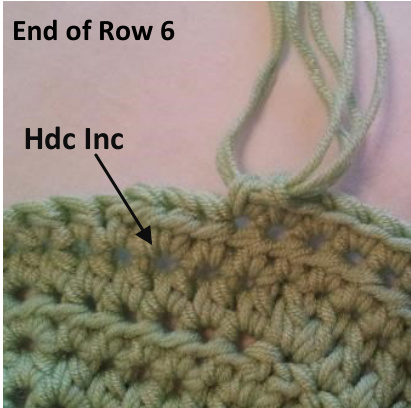
1. Chain 50. Sc in the 2nd ch from the hook and the next 14. Hdc inc, hdc x 3. Dc inc, dc x 3. \*Tr inc, Tr x 3 st's\* x 2, tr inc. Dc x3, dc inc. Hdc x3, hdc inc. Sc x 9 st's. Ch 1 and turn.{56} 2. Sc in the first 9 st's. Hdc inc, hdc x 4. Dc inc, dc x 4. \*Tr inc, tr x 4\* x 2, tr inc. Dc x 4, dc inc. Hdc x4, hdc inc. Sc in the last 16 st's. Ch 1 and turn. {63} 3. Sc in the first 16 st's. Hdc inc, hdc x 5. Dc inc, dc x 5. Tr inc, tr x 4, tr inc, tr x 1, tr inc, tr x 4, tr inc. Dc x 5, dc inc. Hdc x 5, hdc inc. Sc in last 10 st's. Ch 1 and turn. {71} 4. Sc in the first 10 st's. Hdc inc, hdc x 6. Dc inc, dc x 6. Tr inc, tr x 5, tr inc, tr x 2, tr inc, tr x 5, tr inc. Dc x 6, dc inc. Hdc x 6, hdc inc. Sc in last 17 st's. Ch 1 and turn. {79} 5. Sc in the first 21 st's. Hdc inc, hdc x 6. \*Dc inc, dc x 6\* x 4, dc inc. Hdc x 6, hdc inc. Sc x 15. Don't ch 1. Just turn. {86} 11. 6. Short row: Skip the first st and sl st in the next 16. Sc x 6. Hdc inc, hdc x 7. \*Dc inc, dc x 7\* x 2, dc inc. Hdc x 7, hdc inc. Sc x 6 and turn. {50} The last sc should fall in the 2nd st before the hdc increase in the previous row. "Steps" formed by the beginning and ends of
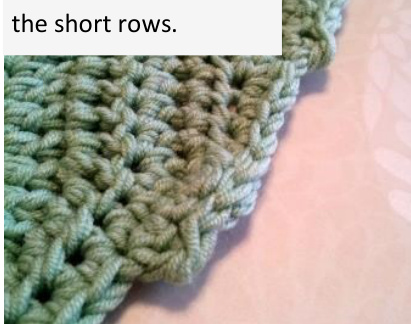
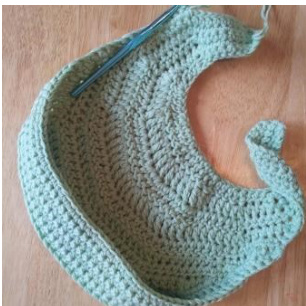
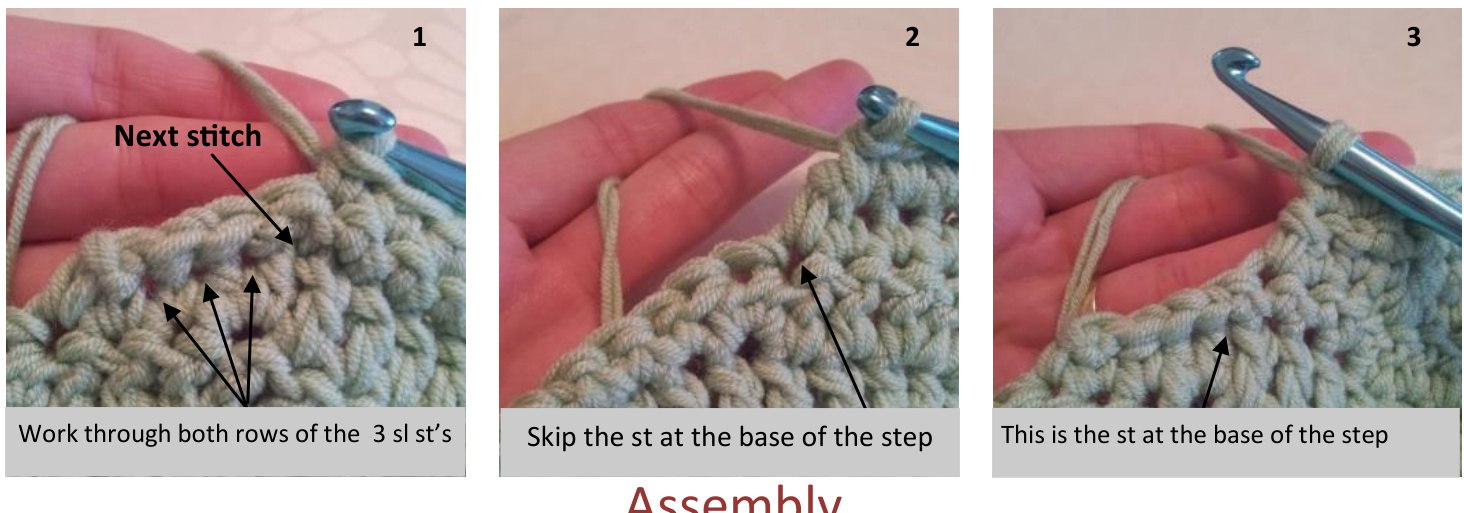
Short row: Skip the first st and sl st in the the next 3 st's. Sc x 2. Hdc inc, hdc x 8. \*Dc inc, dc x 8 st's\* x 2, dc inc. Hdc x 8, hdc inc. Sc x 3 and turn. {47} 3. Short row: Skip the first st. Sl st x 3. Sc x 3. Hdc inc. Dc x 5, \*dc inc, dc x 9 st's\* x 2, dc inc, dc x 5. Hdc inc. Sc x 3 and turn. {44} The last stitch in row 8 should fall in the stitch before the hdc increase in the previous row. Short row: Skip the first st. Sl st x 3. Sc x 3. Hdc inc. Dc x 2, \*dc inc, dc x 10\* x2, dc inc, dc x 2. Hdc inc. Sc x 3 and turn. {40} 10. Short row: Skip the first st. Sl st x 3. Sc x 3. Hdc inc. Dc x 11, dc inc, dc x 11. Hdc inc. Sc x3 and turn. The last st should fall in the stbefore the hdcincrease intheprevious round.{34} Short row: You will now start shaping the bottom of the bag. Skip the first st and sl st x 3. Sc in blo of the next 25 st's and turn. Please note, when making the second side of the bag, sc in the flo of those 25 st's, not the blo. The last stitch should fall in the stitch before the hdc increase in the previousrow.{25} 12. Short row: Skip the first st and sl st in the next st. Sc x 22. This will bring you to the sl st's in the previous row. When you get to the sl st's, both here and later in the pattern, you willneedtoworkoverthe slst and into thestbelowit,so through both rows. It is far easier than trying to get into the sl st's. So, sc through both rows of the next st (see photo 1). Now sc through both rows of the 3 sl st's. This will bring you to the "step" at the beginning of Row 11. Skipping the st at the base of the step, which already contains a st, sc in the next 4 st's of row 9 and turn (see photo 2). {30} 13. Short row: Skip the first st and sl st in the next st. Sc x 29. This will bring you to the "step" at the beginning of row 12. Skipping the st at the base of the step (which already contains a st), sc x 4. This should bring you to the 3 sl st's. Turn.{33} 14. Short row: Skip the first st and sl st in the next st. Sc x 32. This will bring you to a step, followed by 4 sl st's. You will notice that this step is particularly high. Sc through both rows of the st at the base ofthe step (see photo 3) and then sc through both rows of the 3 sl st's. This will bring you to another step. Skipping the st at the base of the step (which already contains a st), sc x 4. This should bring you to the 3 sl st's. Turn. {40} 15. Short row: Skip the first st and sl st in the next st. Sc x 39. (Step) Sc through both rows of the st at the base of the step and the next 3 sl st's. (Step) Skipping the st at the base of the step (which already contains a st), sc x 4. This will bring you to the 3 sl st's. Turn. {47} 16. Short row: Skip the first st and sl st in the next st. Sc x 46. (Step) Sc through both rows of the st at the base of the step and the next 2 sl st's. (Step) Skipping the st at the base of the step (which already contains a st), sc x 4 and turn. {53} 17. Short row: Skip the first st and sl st in the next st. Sc x 52. (Step)Sc through both rows of the st at the base of the step and the next 3 sl st's. (Step) Skipping the st at the base of the step (which already contains a st), sc x 4. (Step) Sc through both rows of the next 6 sl st's. Ch 1 and bind off. This is your first side done. You might notice that it looks an awful lot like one of those food catcher bibs! Repeat these instructions for the second side, remembering to work into the flo where indicated in round 11. When you get to the end of the second side, don't bind off!
Assembly
Place the first side on any flat surface (table, floor, whatever) with the “lip" at the bottom pointing towards you. Make sure that the ridge formed by working into the blo's in round 11 is pointing out, not in. Now place the second side of the bag (the one that hasn't been bound off) inside the first side, lining up the short handle with the short handle of the first side and the long handle with the long handle of the first side. Tuck the "lip" inside the "lip" of the first side.
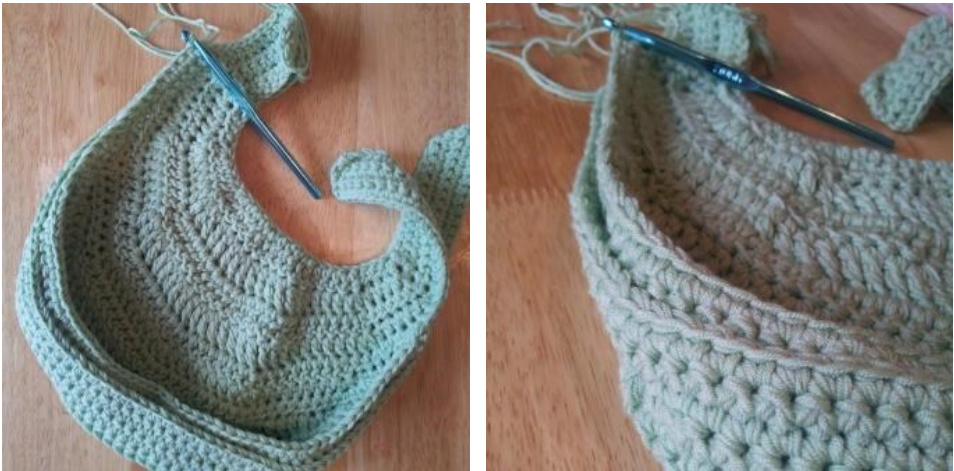
Now insert your hook through the blo of the first st of the top layer (second side) and through the flo of the first st of the bottom layer (first side). Make a sl st. Continue making 65 more sl st's in the same fashion, working through the blo of the top layer and the flo of the bottom layer into every st around. This should bring you to the "step" on the other side. Ch 1 and bind off. )u can always sl st through both loops of both layers, but that will yield a thicker, more visible sea Working into the blo/flo like this yields an (almost) flat seam.
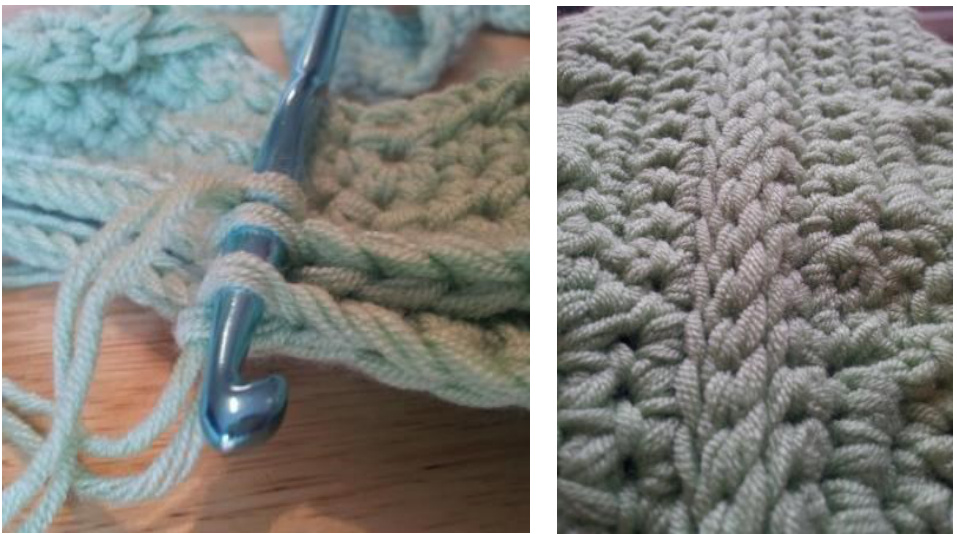
Now you are going to crochet the tops of your handles together and sc around the outside of each handle. You can change colours for this part if you prefer. With a slip knot already on your hook and starting from the inside edge of the short handles, sc into each of the 6 rows (through both layers) of the short handle. Ch 1 and fold the handle open (see photo below). Turning your work through 90 degrees (so that you are working into the st's of the last row of the handle), sc in the first st of the outside of the handle (which already contains a st). Continue all the way around the outside of the handle, working through both rows of the sl st's, until you get back to the seam at the top. Join to the first st with a sI st and bind off. You should have 24 sc's in total, but i doesn't matter if you work a few more or less. Close the long handle in the same way, but only working 5 sc's across the top and 44 around. And as there are no sl st's in the last row of the long handles, you will be working into every st of the last round, not over the sl st's as before. When you have finished, work away any tails of yarn.

I hope you enjoy making, and using, your Aunty Dollie Bag. Please feel free to contact me should you have any questions! Dedri This pattern was updated 29/5/2013. Thank you Jo Clark for your enthusiasm about this bag (and your stroller bag idea x). dedri@lookatwhatimade.net Www.lookatwhatimade.net Www.facebook.com/lookatwhatimade @Dedri Uys 2011 - All Rights Reserved
Appendix
Adapting the bag so that both handles are equally long:
1. Chain 55. Sc in the 2nd ch from the hook and the next 14. Hdc inc, hdc x3. Dc inc, dc x3. \*Tr inc, Tr x3 st's\* x2, tr inc. Dc x 3, dc inc. Hdc x 3, hdc inc. Sc in the last 14 st's. Ch 1 and turn. {56} Sc in the first 14 st's. Hdc inc, hdc x 4. Dc inc, dc x4. \*Tr inc, tr x 4\* x2, tr inc. Dc x 4, dc inc. Hdc x 4, hdc inc. Sc in the last 16 st's. Ch 1 and turn. (63} 3. Sc in the first 16 st's. Hdc inc, hdc x5. Dc inc, dc x 5. Tr inc, tr x4, tr inc, tr x 1, tr inc, tr x4, tr inc. Dc x 5, dc inc. Hdc x 5, hdc inc. Sc in last 15 st's. Ch 1 and turn. [71} 4. Sc in the first 15 st's. Hdc inc, hdc x6. Dc inc, dc x6. Tr inc, tr x5, tr inc, tr x2, tr inc, tr x5, tr inc. Dc x6, dc inc. Hdc x6, hdc inc. Sc in last 17 st's. Ch 1 and turn. {79} 5. Sc in the first 21 st's. Hdc inc, hdc x 6. \*Dc inc, dc x 6\* x4, dc inc. Hdc x 6, hdc inc. Sc x 20. Don't ch 1. Just turn. {86} 6. Short row: Skip the first st and sl st in the next 21. Sc x 6. Hdc inc, hdc x 7. \*Dc inc, dc x 7\* x2, dc inc. Hdc x 7, hdc inc. Sc x 6 and turn. 50} The Ilast sc should fllinthe 2nd st before the hdc increase in the previous row. mm Work the rest of the pattern as written. When you get to row 17, omit the last 6 sc's! A good tip is to fold the bag in half before you bind off and just double check that the first and last st's of round 17 line up (give or take a st).
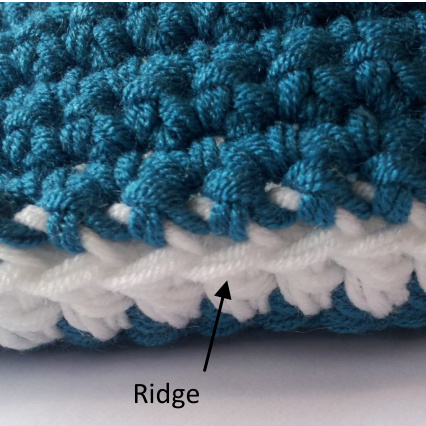
When it comes to crocheting the handles together, you will need to remember that both handles are now long, so adapt accordingly. Please remember to make sure that the ridges formed by working into the blo/flo in round 11 are facing OuT, not in (see photo).
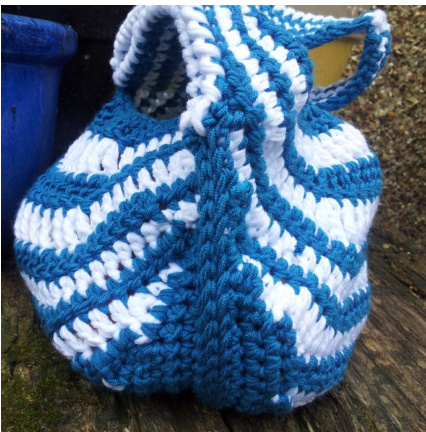
Making a Striped Bag
2 colours, decide what colour you want the base of your bag to be. That will be your main colou Start with your main colour. For rows 1 - 5, change colour before the ch 1 at the end of each row. For rows 6 - 11, change colours on the last yarn over of the first sc of each row (not the sl st's). Work rows 12-17 in Main Colour. If you are using multiple colours, use the same instructions as above, making sure that you change to the colour you want to use for your base on the last yarn over of the first sc of row 11.