BELLWREATH
The Holiday Ornament
SUPPLIES
Hook: US size 4 (2.00 mm) Yarn: Small amount, sock weight We used Premier Wool-Free Lace: Holiday Pine .75" bell optional Ribbon optional Hairspray or other method to stiffen the final product We used the cheapest “super hold" option we could find Tapestry needle or similar large-eye needle
ABBREVIATIONS
ch chain SC single crochet rnd round we will use this when crocheting in rounds, as opposed to crocheting in rows sl st slip stitch st stitch
Crochet Instructions
The wreath is worked in the round, starting with a long base chain to create the hole in the center. All rounds are joined (ie after the final stitch of the round, you will slip stitch into the frst stitch). It is likely that as you crochet, the wreath will have a tendency to curl or "bubble" up; this is normal, and will be dealt with by pressing and stiffening the wreath later.
Base Chain
Ch30; join with a sl st in the first ch spot (30 ch spots)
Rnd 1
Ch1, sc in same ch spot as joining; sc in each of the next four ch spots, 2 sc in next ch spot [sc in each of next five ch spots, 2 sc in next ch spot] 4 times; join with sl st in first sC of Rnd 1 (35 sc)
Rnd 2
Ch1, sc in same sc as joining, and in each sc around; join with sl st in first sc of Rnd 2 (35 sc)
Rnd 3
Ch3, sl st in same sc as joining; [ch3, sl st in next sc] 34 times; ch3, sl st in frst sc of Rnd 2 (36 ch3 loops)
Finish
finish off, weaving in end
Assembly
Pressing
To get the wreath to lay flat, it may be necessary to press it. Many yarns, including the one we used, specify to not iron them. This is especially true of acrylic yarns, since acrylic has a low melting point. We got around this by wetting the wreath under a running tap, then covering the wreath with a washcloth before pressing it. Lay out the wreath as flat as possible, place a pressing cloth over the wreath, then set the iron straight down on top. Press down on the iron and hold it in place for a minute or so. If the wreath still doesn't lay flat on its own after the first time you press it,try again.
Stiffening
If using hair spray, place the wreath on a flat surface with the side that looks better facing toward you. Spray liberally, making sure to get the whole surface of the wreath. Allow at least an hour to dry. We placed our wreaths on some scrap cardboard in order to keep hairspray from spraying onto other surfaces.
Finishing
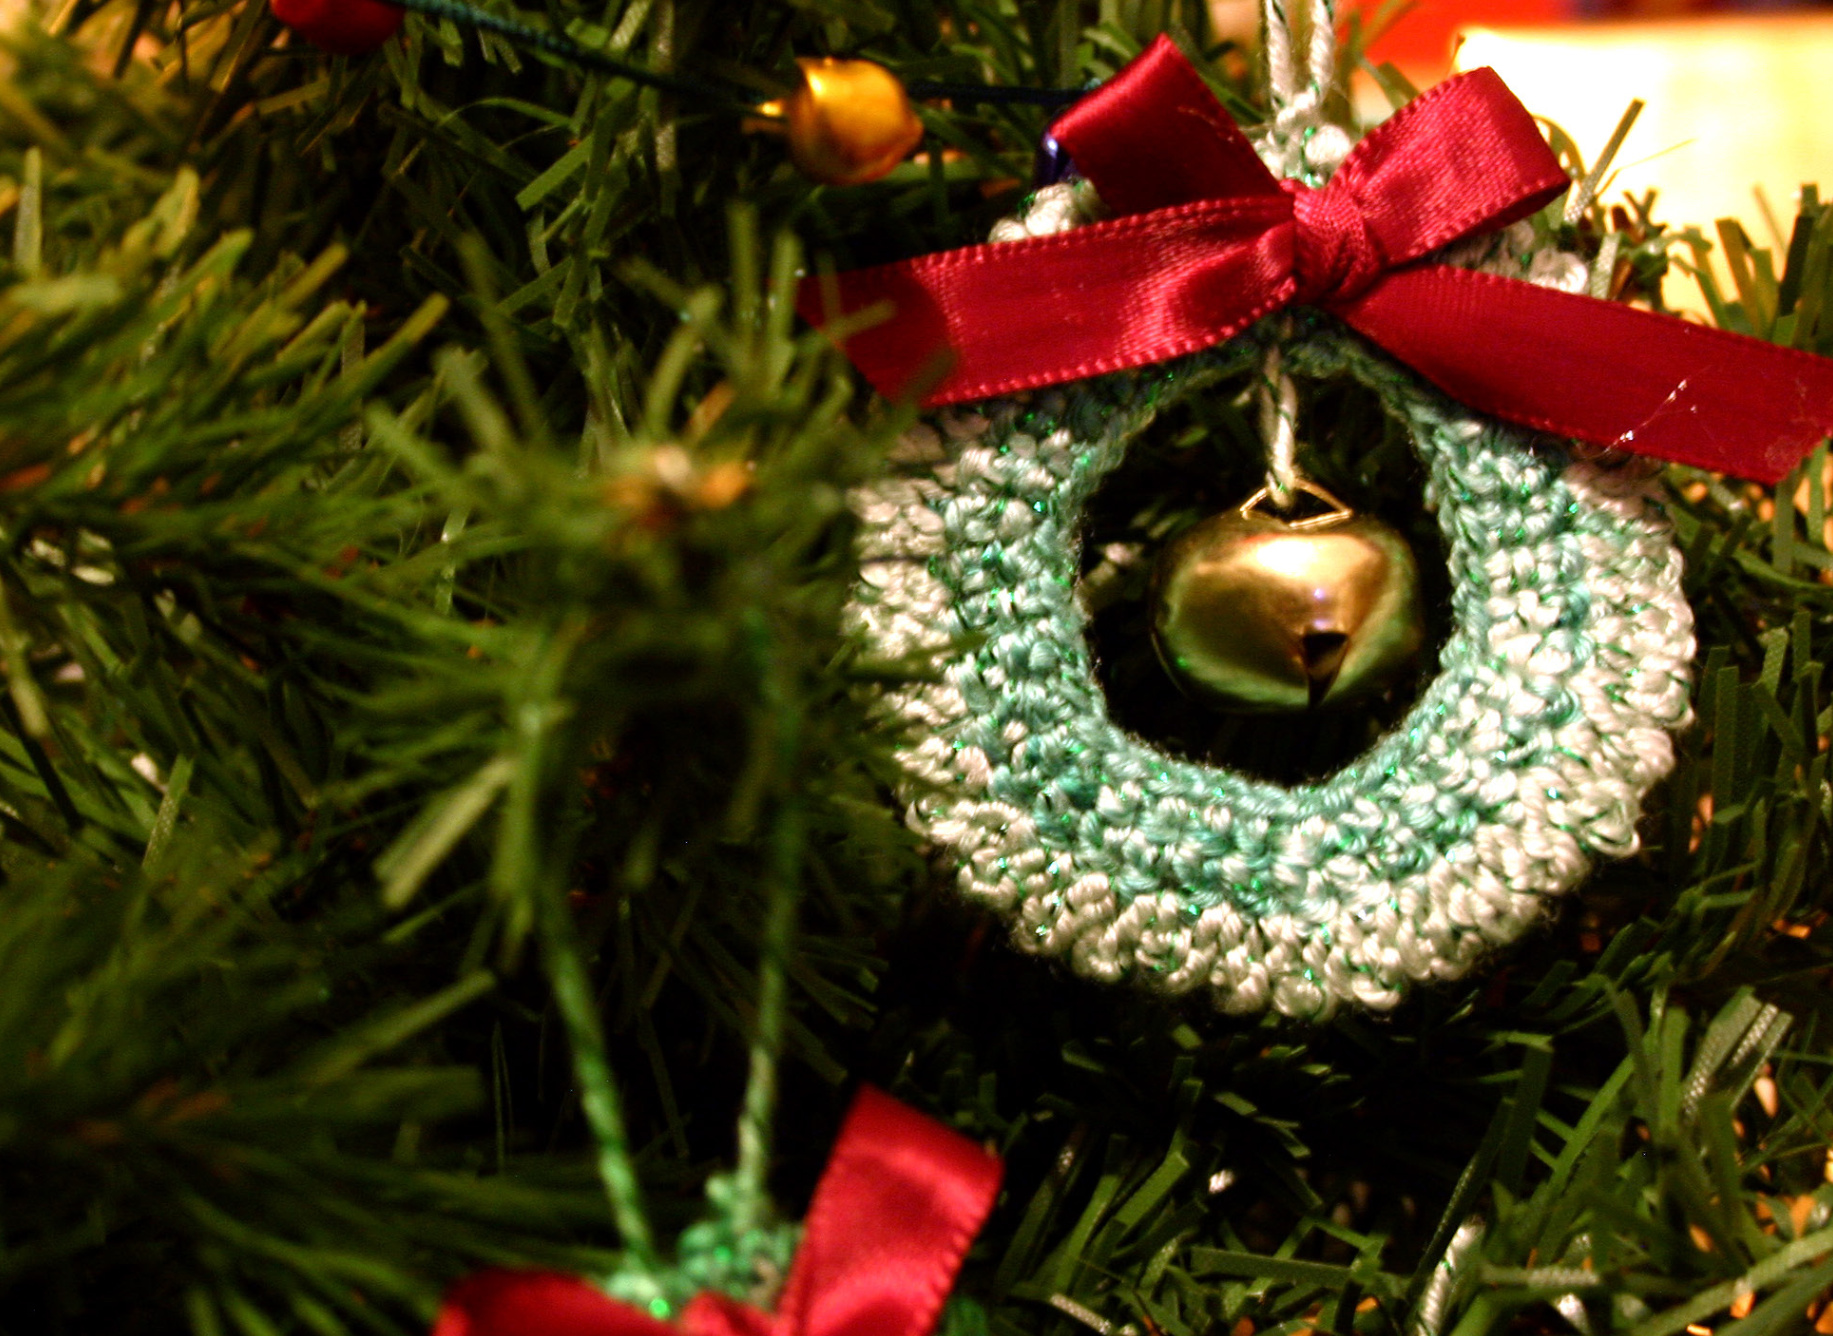
Thread a piece of yarn through your wreath. Tie an overhand knot in the yarn to create a loop for hanging it up. Then, add the final details to make your wreath look fabulous. We hung a 3/4" bell in the center of the wreath using the tail left from where we began the base chain. Then we tied a bow out of 3/8" ribbon and hot glued it to the wreath.
License Information
This pattern is licensed for personal use only. One user per license. You may not distribute or resell this license. In other words, you may use this pattern to create for your personal use orto create gifts for your friend(s) and/or family member(s). This pattern is only for use by one individual. om this pattern are not to be sold without written permission from the autho If you have any questions about this license, or are interested in licensing this pattern to create items for charity or to sell for profit, or if you have any other questions or concerns, please contact the author at princeandpeddler@gmail.com.


