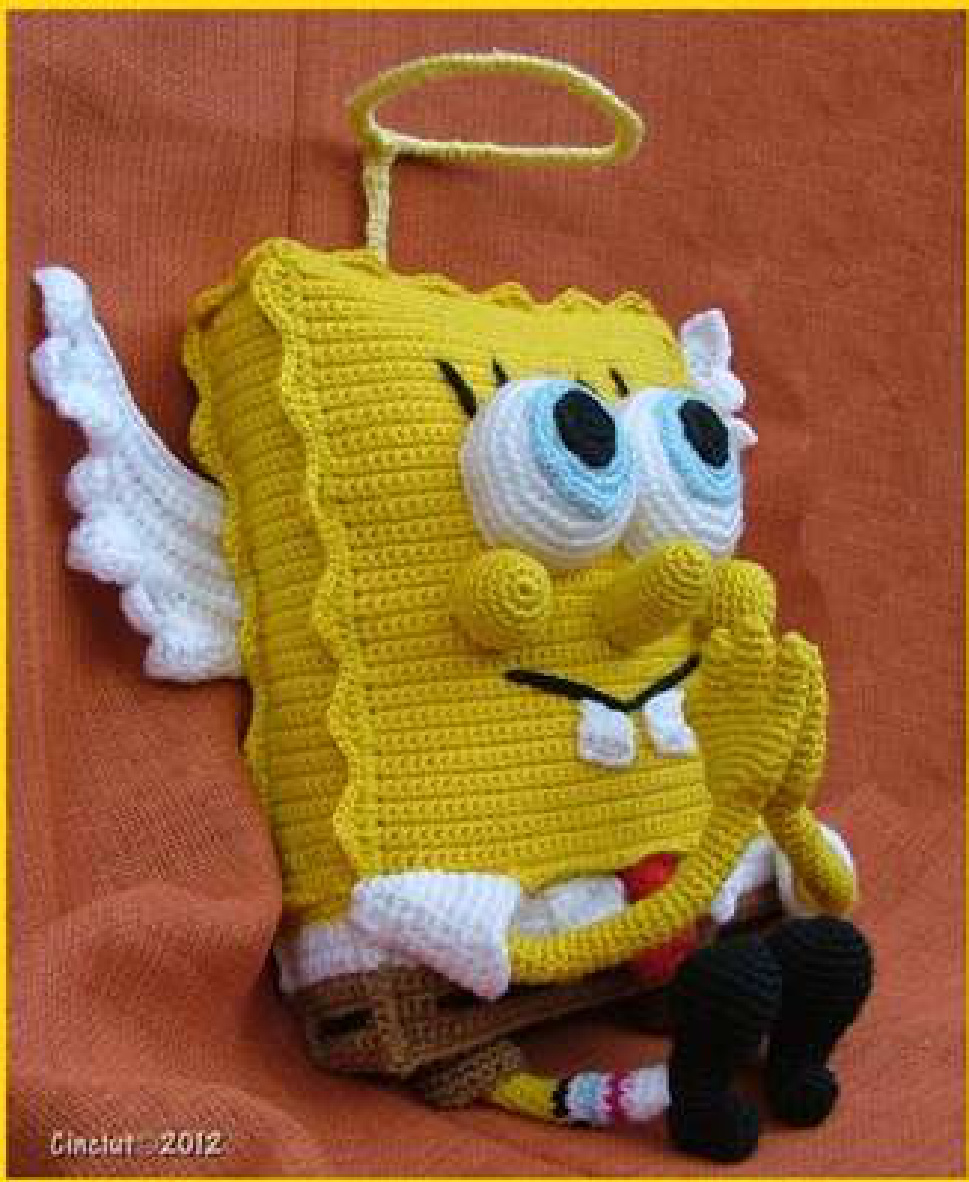
Holy Spongebob

Materials:
3mm hook 100% acrylic yarn 1.7 oz = 142 yd (50g = 130m) balls, knitting needle 3.5-4, see colors below 3 skeins of yellow yarn 2 skeins of white yarn 1 skeins of light brown yarn small quantity of black yarn small quantity of azure yarn small quantity of red yarn small quantity of purple yarn 2 white chenille stem 3 yellow chenille stem polyester fiberfill stitch marker tapestry needle lightweight plastic (l used the plastic from the lid of plastic food container), or lightweight cardboarc
STITCH EXPLANATION/ABBREVIATIONS (US crochet terms used):
ch =chain sl st = slip stitch · sc = single crochet · hdc=half double crochet · dc = double crochet · tr = treble crochet (also known as triple crochet) · bo = bind off sc2tog = sc decrease (Insert hook into the front loop of next two stiches, yarn over, draw through the 2 front loops, finish with sc) sc3tog = sc decrease (lnsert hook into the front loop of next 3 stiches, yarn over, draw through the 2 front loops, finish with sc) [] () = work directions in brackets the number of times specified, this means that when it is written for example: “(sc in first 3 sts, 2 sc in next st) repeat twice" this means you have to repeat instructions in brackets twice in total bklp: back loop ftlp: front loop rnd(s) =round(s) rw(s) = row(s) st(s) = stitch (es) mr = magic ring Notes: Work in continuous rnds; do not join or turn unless otherwise instructed. Use a stitch marker or colored yarn between the last st of one rnd and first st of next rnd. Flip the end of the yarn to the front on one rnd then to the back of next rnd. Continue for each rnd. Leave yarn tail for sewing pieces together at the end. Before sewing all pieces of doll on body, l suggest you to pin all part together to be sure they are in correct position. To end amigurumi dolls in the correct way I warmly suggest you to visit the very nice tutorialonPlanetJune (www.planetjune.com) at www.planetjune.com/finish
HEAD\BODY:
This part is worked in rows. With brown yarn ch 45, starting in second ch from hook Rw 1: sc each ch, ch 1 turn (44 sts) Rws 2-9: sc each st, ch 1 turn (44 sts) Rw 10: in bklp only, sc each st, ch 1 turn (44 sts) Rws 11-16: sc each st, ch 1 turn (44 sts) change to white yarn Rws 17-19: sc each st, ch 1 turn (44 sts) change to yellow yarn Rw 20: in ftlp only, 2sc in first st, sc each st, 2 sc in last st, ch 1 turn (46 sts) Rw 21: sc each st, ch 1 turn (46 sts) Rw 22: in bklp only, sc each st, ch 1 turn (46 sts) Rws 23-76: sc each st, ch 1 turn (46 sts) Rw 77: in bklp only, sc each st, ch 1 turn (46 sts) Rws 78-88: sc each st, ch 1 turn (46 sts) Rw 89: sc first 22 sts, \* ch 2, skip next 2 sts \*, sc last 22 sts, ch 1 turn (44 sts + 2 chs) \* this is optional, it forms the hole where to insert the chenille stem if you want to add the halo. If you don't want to make a Holy Spongebob, just sc each st. Rw 90: in ftlp only, sc each st and make 2 sc in the hole formed by 2 chs of previous rw, ch 1 turn (46 sts) Rws 91-144: sc each st, ch 1 turn (46 sts) Rw 145: in bklp only, sc each st, ch 1 turn (46 sts) Rw 146: sc each st, ch 1 turn (46 sts) Rw 147: in ftlp only, sc2tog, sc next 42 sts, sc2tog, ch 1 turn (44 sts) change to white yarn Rws 148-150: sc each st, ch 1 turn (44 sts) change to brown yarn Rws 151-156: sc each st, ch 1, turn (44 sts), do not cut yarn nor bind off fold one yellow chenille stem to form a halo and insert it into the hole formed in rw 89 (Fig 1)
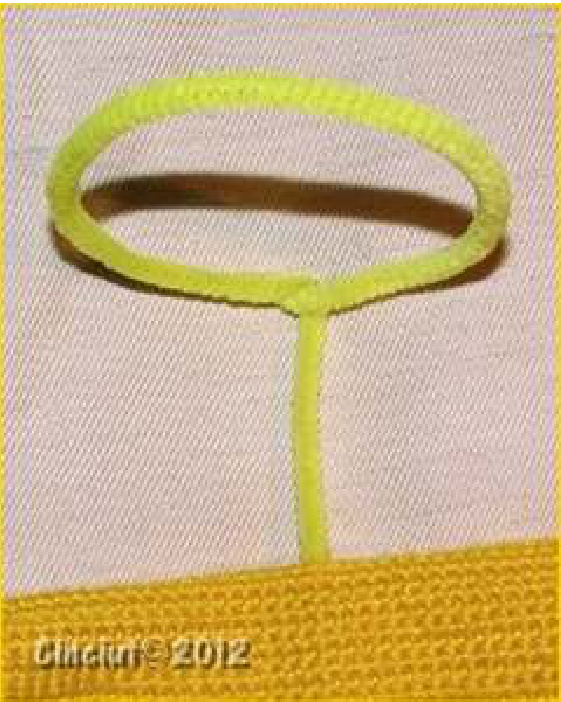
With yellow yarn, sew the chenille stem in the internal part of body to make it stay in place. Use the internal stitches as shown inFig 2.
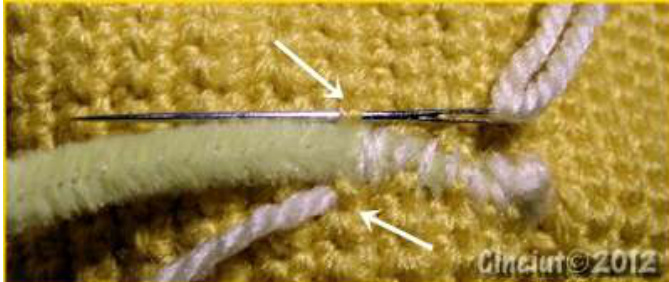
Fig 2 When you arrive at the end of upper part of body, you will have to cover the external part of chenille stem with yarn: sc over entire length of stem (halo) fasten off with ss, cut the yarn and glue ends of yarn to hold in place. Rw 157: in ftlp only, sc each st together with opposite chs of rw 1 to join (44 sts)
SIDE OF BODY (make two):
Rw 1: join brown yarn to base and sc 10 sts (1 st for each rw of base) ch 1, turn (10 sts) see Fig 3 Rws 2-7: sc each st, ch 1, turn (10 sts) change to white yarn Rws 8-10: sc each st, ch 1, turn (10 sts) change to yellow yarn Rw 11: in ftlp only, 2sc in first st, sc next 8 sts, 2 sc in last st, ch 1 turn (12 sts) Rw 12: sc each st, ch 1, turn (12 sts) Rw 13: in bklp only, sc each st, ch 1, turn (12 sts) Rws 14-66: sc each st, ch 1, turn (12 sts) Rw 67: in ftlp only, sc each st together with top part of body to join (12 sts) Close opening with slst along lateral part of body side and body itself.
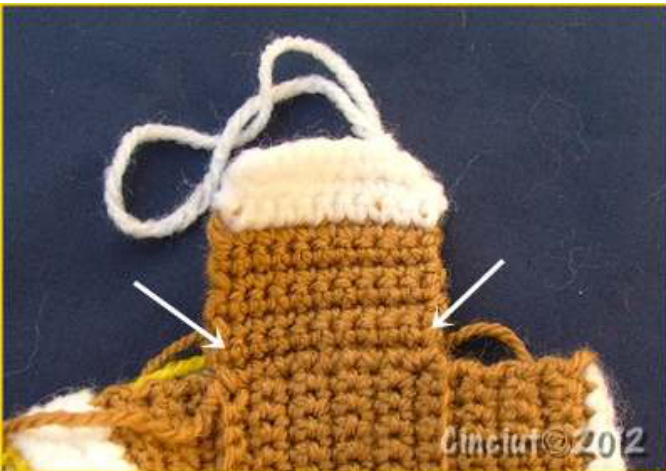
Fig 3
BODY SIDE EMBELLISHEMENT:
With yellow yarn, randomly repeat the sequence: (sc, hdc, 2 dc, hdc, sc, 4 slst) and (sc, 2 hdc, 2 dc, 2 hdc, sc, 4 slst) using ftlp of base, side and top of square face and for boy lateral part use holes of rws.
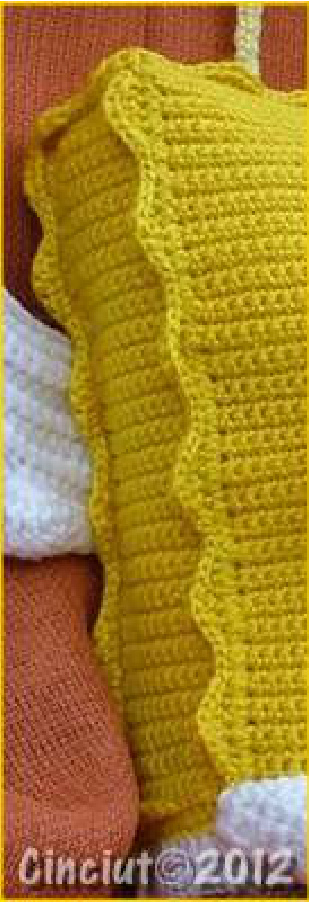
Fig 4
EYE (make two):
Withwhiteyarnstart a mrwith8sc Rnd 1: 2 sc each st around (16 sts) Rnd 2: (sc in first st, 2 sc in next st) repeat 8 times (24 sts) Rnd 3: (sc in first 2 sts, 2 sc in next st) repeat 8 times (32 sts) Rnd 4: (sc in first 3 sts, 2 sc in next st) repeat 8 times (40 sts) Rnds 5-8: sc each st around (40 sts) end with sl st leaving long tail for sewing IRIS: With azure yarn start a mr with 8 sc Rnd 1: 2 sc each st around (16 sts) Rnd 2: (sc in first st, 2 sc in next st) repeat 8 times (24 sts) Rnd 3: (sc in first 2 sts, 2 sc in next st) repeat 8 times (32 sts) end with sl st leaving long tail for sewing PUPIL: With black yarn start a mr with 8 sc Rnd 1: 2 sc each st around (16 sts) end with sl st leaving long tail for sewing Sew black piece (pupil) on azure (iris) and azure (iris) on white, stuff eyes and sew in place. Sew eyebrow with black yarn.
ARM/HAND (make two):
With yellow yarn, start a magic ring with 4 sc Rnd 1: 2 sc in each st around (8 sts) Rnds 2-32: sc each st around (8 sts) insert chenille stem folded in half and twisted (see Fig 5)

Rnd 33: 2 sc in first st, sc next 2 sts, (2 sc in next st) repeat twice, sc next 2 sts, 2 sc in last st (12 sts) Rnd 34: 3 sc in first st, sc next 4 sts, (3 sc in next st) repeat twice, sc next 4 sts, 3 sc in last st (20 sts) Rnd 35: sc first st, 2 sc in next st, sc next 6 sts, 2 sc in next st, sc next 2 sts, 2 sc in next st, sc next 6 sts, 2 sc in next st, sc last st (24 sts) Rnd 36: sc2tog, sc next 8 sts, (sc2tog) repeat twice, sc next 8 sts, sc2tog (20 sts) Rnds 37-40: sc each st around (20 sts) do not cut yarn start little finger: Rnd 1: sc first 3 sts (Fig 6; 1), turn, sc 3 sts (the last 3 sts of previous round) (Fig 6; 2) (6 sts) Rnds 2-4: sc each st around (6 sts) (Fig 6; 3) end waving in and out to close opening. Start middle finger: join yellow yarn in fourth st of round 40 (next to little finger), start in same st of joining (Fig 6; 4) Rnd 1: sc 3 sts, turn, sc 3 sts (the last 3 sts of previous round before little finger) (Fig 6; 5) (6 sts) Rnds 2-5: sc each st around (6 sts) end waving in and out to close opening. Start forefinger: join yellow yarn in seventh st of round 40 (next to middle finger), start in same st of joining Rnd 1: sc 3 sts, turn, sc 3 sts (the last 3 sts of previous round before middle finger) (6 sts) Rnds 2-4: sc each st around (6 sts) end waving in and out to close opening. Start thumb: join yellow yarn in last st of round 40, start in same st of joining Rnd 1: sc, 2 sc in last hole between sts of rnd 39 (Fig 6; 6), turn, 2 sc in first hole between sts of rnd 39 (Fig 6; 7), sc last st of rnd 40 Rnds 2-3: sc each st around (6 sts) end waving in and out to close opening.
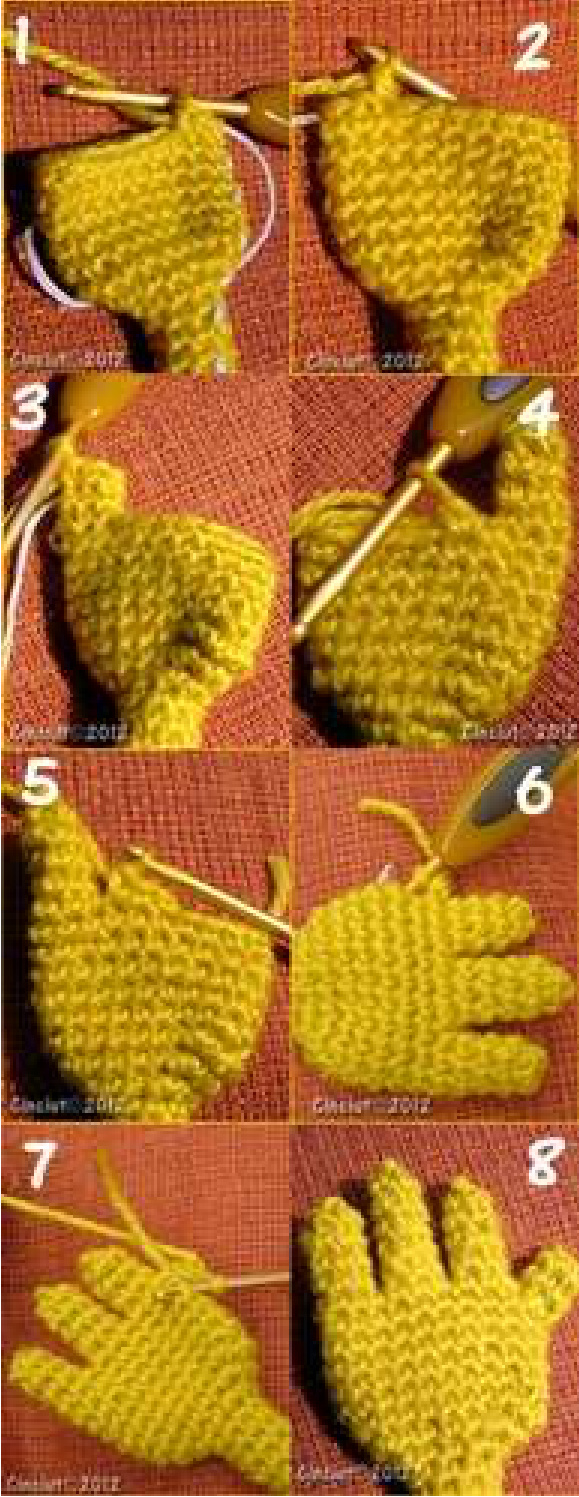
Fig 5 Fig 6
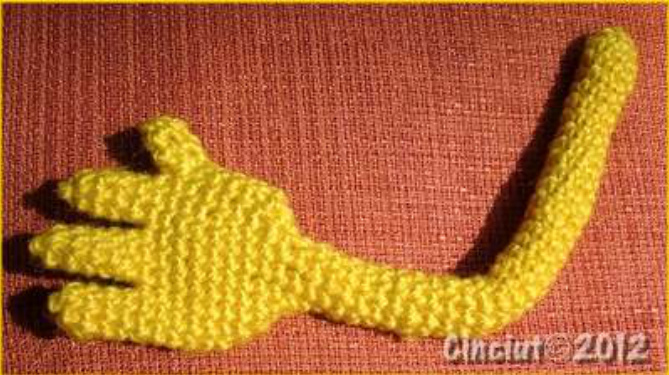
Fig 6
SLEEVE CUFF (make two):
With white yarn, start a magic ring with 8 sc Rnds 1-2: sc each st around (8 sts) Rnd 3: (sc in first st, 2 sc in next st) repeat 4 times (12 sts) Rnds 4-5: sc each st around (12 sts) Rnd 6: (sc in first 2 sts, 2 sc in next st) repeat 4 times (16 sts) Rnds 7-8: sc each st around (16 sts) Rnd 9: (sc in first 3 sts, 2 sc in next st) repeat 4 times (20 sts) end with sl st leaving long tail for sewing. Sew on top of arm. Fold arm as you prefer, pin it on body in correct position, firmly sew on body. TIE: With red yarn ch 7, starting in second ch from hook Rw 1: sc each ch, ch 1, turn (6 sts) Rw 2: sc2tog, sc next 2 sts, sc2tog, ch 1, turn (4 sts) Rw 3: (sc2tog) repeat twice, ch 1, turns (2 sts) Rw 4: 3 sc each st, ch 1, turn (6 sts) Rw 5: 2 sc first st, sc next 4 sts, 2 sc last st, ch 1, turn (8 sts) Rw 6: 2 sc first st, sc next 6 sts, 2 sc last st, ch 1, turn (10 sts) Rw 7: sc2tog, sc next 4 sts, sc2tog, ch 1, turn (8 sts) Rw 8: sc2tog, sc next st, sc2tog, sc next st, sc2tog, ch 1, turn (5 sts) Rw 9: sc2tog, sc next st, sc2tog, ch 1, turn (3 sts) Rw 10: sc3tog bo leaving long tail for sewing. Pin it on body in correct position.
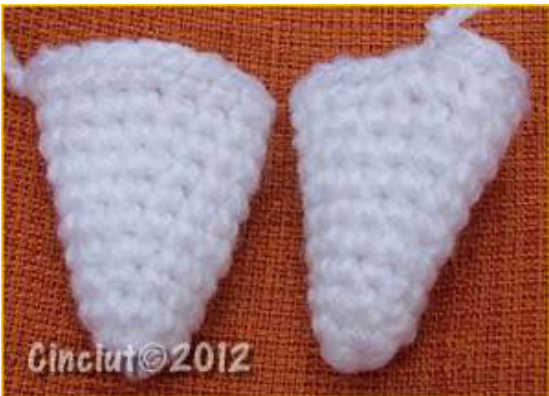
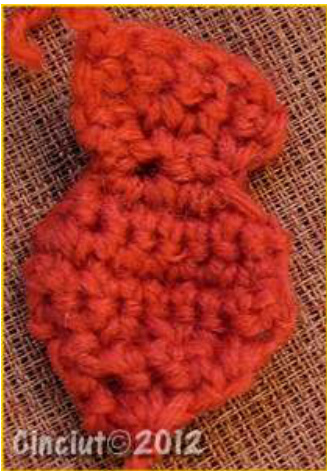
Fig 8
COLLAR (make two):
With white yarn ch 7, starting in second ch from hook Rw 1: sc each ch, ch 1, turn (6 sts) Rw 2: sc2tog, sc next 2 sts, sc2tog, ch 1, turn (4 sts) Rw 3: (sc2tog) repeat twice, ch 1, turns (2 sts) Rw 4: sc2tog (1 st) bo leaving long tail for sewing. Pin it on body next to tie, sew on body, sew tye.
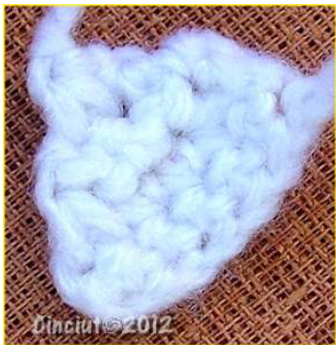
Fig 9
NOSE:
With yellow yarn, start a magic ring with 5 sc Rnd 1: 2 sc in each st around (10 sts) Rnd 2: (sc first st, 2 sc next st) repeat 5 times (15 sts) Rnd 3: sc each st around (15 sts) Rnd 4: sc first 7 sts, 2 sc in next st, sc last 7 sts (16 sts) Rnds 5-9: sc each st around (16 sts) Rnd 10: sc first 7 sts, sc2tog, sc last 7 sts (15 sts) Rnds 11-13: sc each st around (15 sts) end with sl st leaving long tail for sewing, pin it on face in correct position, sew on face.
CHEEK (make two):
With yellow yarn, start a magic ring with 9 sc Rnd 1: 2 sc in each st around (18 sts) Rnds2-7:sceachst around (18sts) end with sl st leaving long tail for sewing, pin it on face in correct position, sew on face. Sew smile with black yarn.
TOOTH (make two):
With white yarn ch 5, starting in second ch from hook Rw 1: sc each ch, ch 1, turn (4 sts) Rws 2-3: sc each st, ch 1, turn (4 sts) bo leaving long tail for sewing, pin it on face in correct position, sew on face.
PANT (make two):
With brown yarn ch 20, join with sl st to form a ring Rnds 1-4:sc each st around (20 sts) end with sl st leaving long tail for sewing. Pin on base of body in correct position.
LEG (make two):
M2L - doppelte links gerichtete Zunahme = make two left, d.h. in den Querfaden der vorletzten Reihe so Nadel heben, rechtes Maschenglied liegt vorne, dann rechts verschrankt abstricken, Maschenzunahme zeigt Rnds 2-11: sc each st around, change to black yarn (8 sts) zeigt nach links, danach nochmals in den Querfaden der letzten Reihe von hinten einstechen, M auf die linke Rnd 14: sc each st around, change to white yarn (8 sts) Rnd 15: sc each st around, change to purple yarn (8 sts) Rnd 16: sc each st around, change to white yarn (8 sts) Rnds 17-21: sc each st around (8 sts) end waving in and out to close opening. Pin on base of body inside pants, sew legs, sew pants.
SHOE (make two):
With black yarn, start a magic ring with 6 sc Rnd 1: 2 sc in each st around (12 sts) Rnd 2: 2 sc in first st, sc next st, (2 sc next st) repeat twice, sc next 4 sts, (2 sc next st) repeat twice, sc next st, 2 sc in last st (18 sts) Rnd 3: (2 sc in first st) repeat twice, sc next 2 sts, (2 sc next st) repeat twice, sc next 6 sts, (2 sc next st) repeat twice, sc next 2 sts, (2 sc next st) repeat twice (26 sts) Rnds 4-6: sc each st around (26 sts) Rnd 7: (sc2tog) repeat twice, sc next 2 sts, (sc2tog) repeat twice, sc next 6 sts,(sc2tog) repeat twice, sc next 2 sts, (sc2tog) repeat twice (18 sts) Rnd 8: sc each st around (18 sts) Rnd 9: sc2tog, sc next st, (sc2tog) repeat twice, sc next 4 sts, (sc2tog) repeat twice, sc next st, sc2tog (12 sts) Rnds 10-11: sc each st around (12 sts) Rnd 12: sc first 10 sts, ch 4, skip last 2 sts (10 sts) stuff shoe Rnd 13: skip first 2 sts, sc next 8 sts (8 sts) Rnd 14: 4 sc in hole formed by 4 chs, sc next 8 sts (12 sts) Rnd 15: sc each st around (12 sts) Rnd 16: sc2tog around (6 sts) end waving in and out to close opening.
HEEL (make two):
With black yarn, start a magic ring with 4 sc Rnd 1: 3 sc in each st around (12 sts) Rnd 2: in bklp only, sc each st around (12 sts) Rnd 3: sc each st around (12 sts) end with sl st leaving long tail for sewing, pin it on base of shoe, sew on shoe. Insert leg into hole of shoe, sew shoe on leg (Fig. 9).
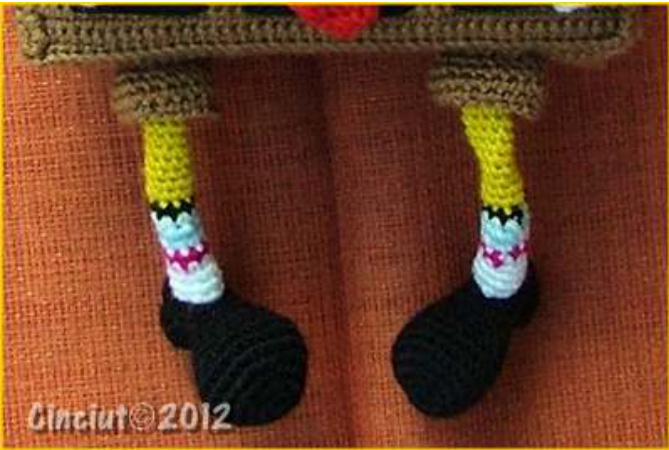
Fig 10
LEFT WING:
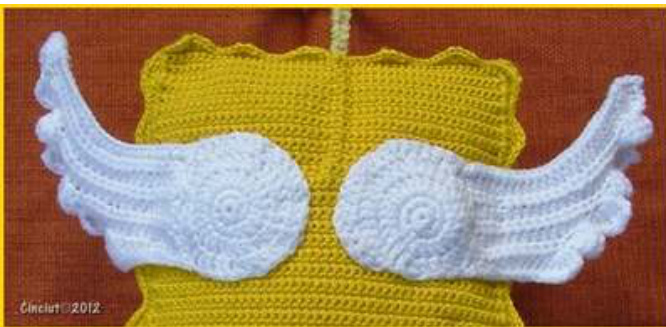
With white yarn, start a magic ring with 8 sc Rnd 1: 2 sc in each st around (16 sts) Rnd 2: (dc in first st, 2 dc in next st) repeat 8 times (24 sts) Rnd 3: (dc in first 2 sts, 2 dc in next st) repeat 8 times (32 sts) Rnd 4: (dc in first 3 sts, 2 dc in next st) repeat 8 times, (40 sts)continue with ch26 Rw 5: sc each ch along a white chenille stem, slst on ring, ch 1, turn (25 sts), cut remaining length of chenille stem Rw 6: hdc first 24 sts, 5 tr in last st, ch 1, turn (29 sts) Rw 7: slst first 6 sts, ch 4 (count as one tr), 4 tr in same st, sk next 2 sts, sc next st, hdc next 20 sts, sk 2 sts on ring and slst on next st of ring, ch 1, turn (26 sts, slsts not counted) Rw 8: hdc first 19 sts, 5 tr in last st, ch 1, turn (24 sts) Rw 9: slst first 6 sts, ch 4 (count as one tr), 4 tr in same st, sk next 2 sts, sc next st, hdc next 15 sts, sk 2 sts on ring and slst on next st of ring, ch 1, turn (21 sts, slsts not counted) Rw 10: hdc first 14 sts, 5 tr in last st, ch 1, turn (19 sts) Rw 11: slst first 6 sts, ch 4 (count as one tr), 4 tr in same st, sk next 2 sts, sc next st, hdc next 10 sts, sk 2 sts on ring and slst on next st of ring, ch 1, turn (15 sts, slsts not counted) Rw 12: sc first 2 sts, hdc next 3 sts, dc next 3 sts, tr next 2 sts, 5 tr in last st, ch 1, turn, slst to ring (15 sts) end with sl st leaving long tail for sewing, pin it on back of body in correct position.
RIGHT WING:
With white yarn, start a magic ring with 8 sc Rnd 1: 2 sc in each st around (16 sts) Rnd 2: (dc in first st, 2 dc in next st) repeat 8 times (24 sts) Rnd 3: (dc in first 2 sts, 2 dc in next st) repeat 8 times (32 stS),TURN Rnd 4: (dc in first 3 sts, 2 dc in next st) repeat 4 times, (20 sts) continue with ch 26 Rw 5: sc each ch along a white chenille stem, slst on ring, ch 1, turn (25 sts), cut remaining length of chenille stem Rw 6: hdc first 24 sts, 5 tr in last st, ch 1, turn (29 sts) Rw 7: slst first 6 sts, ch 4 (count as one tr), 4 tr in same st, sk next 2 sts, sc next st, hdc next 20 sts, sk 2 sts on ring and slst on next st of ring, ch 1, turn (26 sts, slsts not counted) Rw 8: hdc first 19 sts, 5 tr in last st, ch 1, turn (24 sts) Rw 9: slst first 6 sts, ch 4 (count as one tr), 4 tr in same st, sk next 2 sts, sc next st, hdc next 15 sts,sk 2 sts on ring and slst on next st of ring, ch 1, turn (21 sts, slsts not counted) Rw 10: hdc first 14 sts, 5 tr in last st, ch 1, turn (19 sts) Rw 11: slst first 6 sts, ch 4 (count as one tr), 4 tr in same st, sk next 2 sts, sc next st, hdc next 10 sts, sk 2 sts on ring and slst on next st of ring, ch 1, turn (15 sts, slsts not counted) Rw 12: sc first 2 sts, hdc next 3 sts, dc next 3 sts, tr next 2 sts, 5 tr in last st, ch 1, turn, slst to ring (15 sts) end with sl st leaving long tail for sewing, pin it on back of body in correct position. Sew both wings.
Please help me improving the pattern reporting me any error. Enjoy your Songebob and if you like show me yours adding your project on Ravelry! Thank you \*\*COPYRIGHT NOTICE\*\* All patterns are the result of hard work done with all my heart and they are under copyright, if you do crafts I'm sure you will respect my work. All patterns are intended for personal use only. Other uses are strictly prohibited. - you are not allowed to sell, copy, modify, translate in any language, any part or the whole tutorial and/or selling it or claim it as yours.Thesame forall thepictures. -On the contrary you CAN SELL the finished products(unless they are from copyrighted characters) created thorough the pattern provided that you made it by handmade, give me credits, please add a link to:
http://www.ravelry.com/designers/sabrin a-boscolo
and you don't produce large numbers of finished products. - Any items for sale must state in the item description that they are based on my pattern (by "Cinciut") and with a link to: http://www.ravelry.com/designers/sabrin a-boscolo - List your finished products with your own pictures, you are not allowed to use any of my pictures.