Colour-your-own Fair Isle Tam
Ruskin's Notes
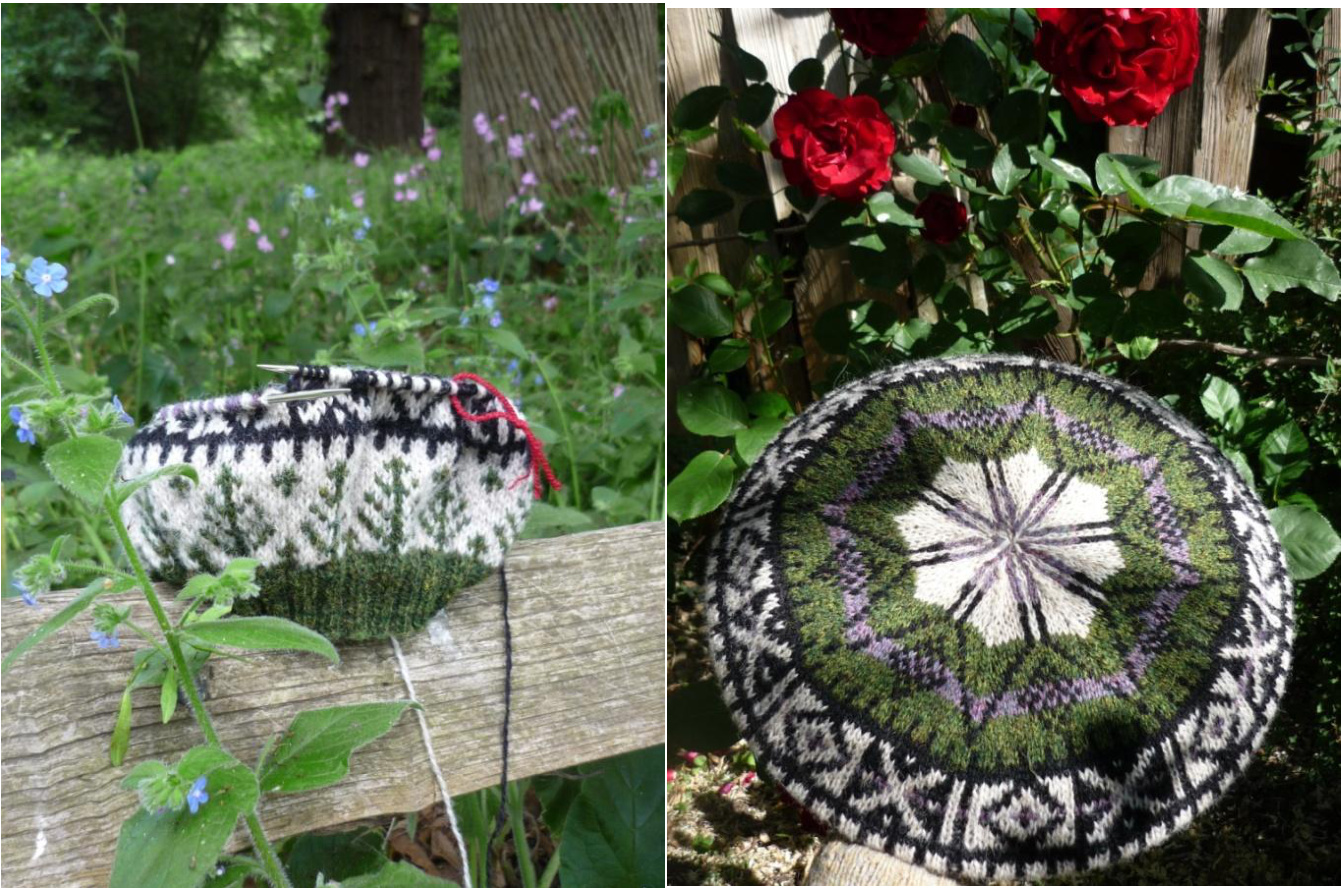
This is a basic pattern for any eight-point Fair Isle tam using Jamieson's Shetland Spindrift yarn (a 2 Ply yarn that knits up like 4 Ply). This yarn is traditionally used for Fair Isle knitting. Its huge colour range creates infinite pattern possibilities. I hope my pattern willallow knitters to adapt traditional Fair Isle patterns such as those recorded in Sheila McGregor's ^Traditional Fair Isle Knitting' to their own authentic tams. A tam is structured like a straight tube then decreased at the top. It is after blocking over a dinner plate (about 25cm diameter, 10 inch) that is takes on its distinctive shape. Wet your tam in warm water with a tiny amount of shampoo added, squeeze gently to remove excess water, then stretch over your plate (the base of the plate to the top wheel of the tam). Stand on a vase or upturned bowl and leave to dry completely. Abbreviations k = knit p = purl m1 = make one, To do this: pick up the horizontal strand of yarn that runs between the two stitches in the row below with your right needle; transfer this stitch onto the left needle. Now knit into the back of this strand on the left needle and remove as usual.
Needles
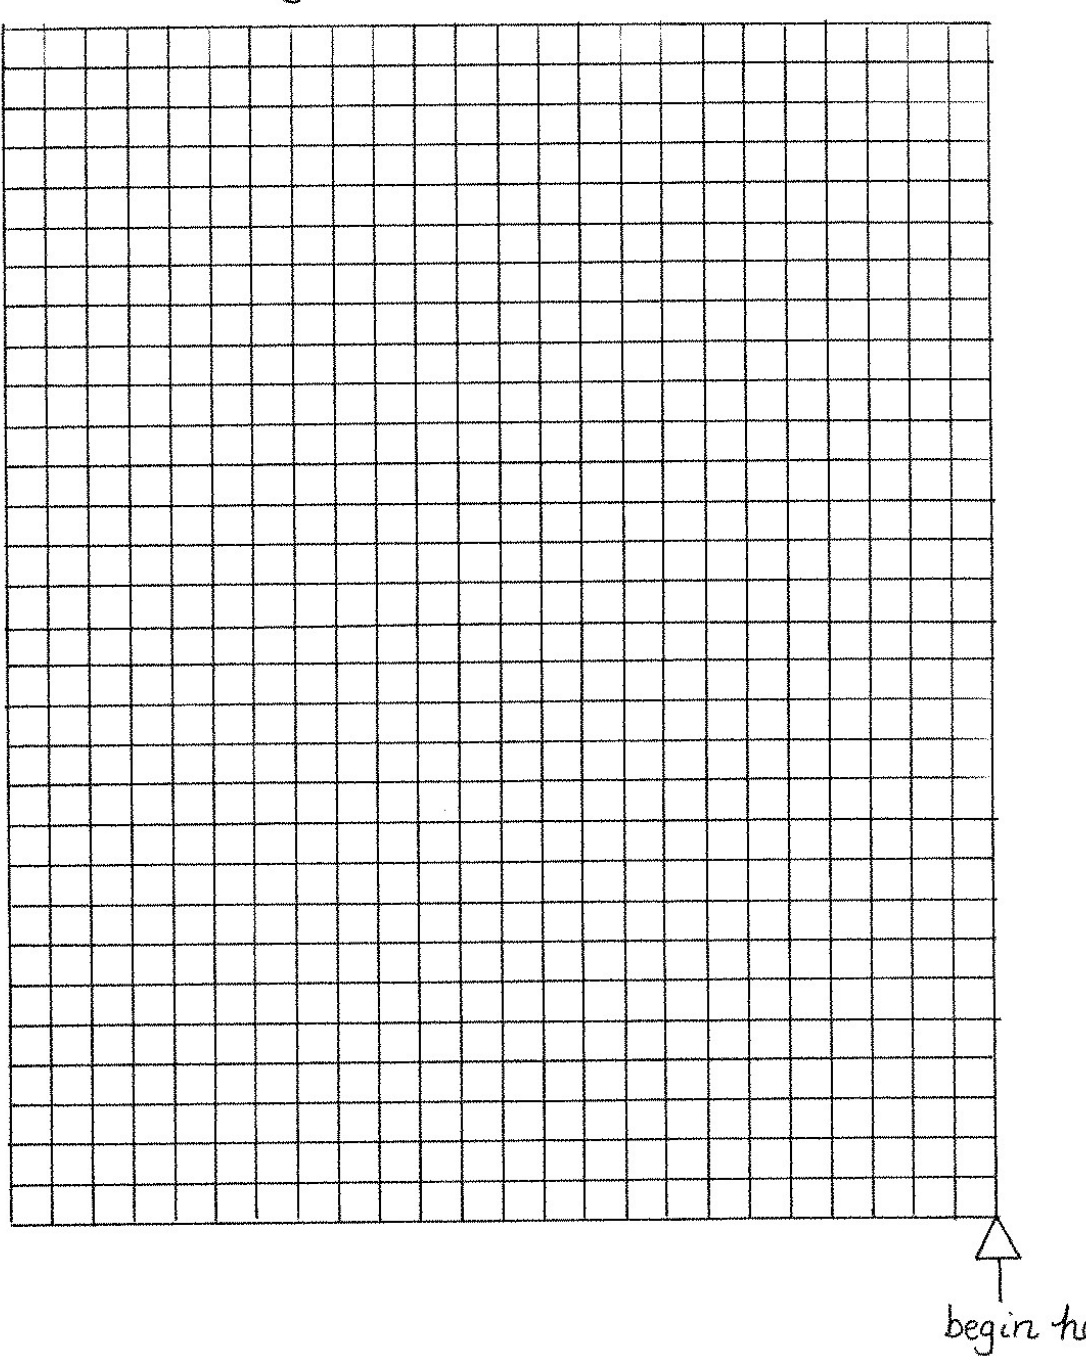
2mm (US size 0) double pointed needles (or circular of length 40cm, 16 inches) 3mm (US size 2.5) circular needle of length 40cm, 16 inches 3mm (US size 2.5) double pointed needles Ribbing Begin by casting on 144 stitches onto your 2mm (size 0) needles. If using dpns, divide stitches evenly, 36 on each needle. Knit 2, purl 2 for 2.5cm (1 inch) Body Change to 3mm (US size 2.5) circular needles. Over the next row \*k3, m1\* until you have 192 stitches in total. Next row: Knit, placing markers at 24 stitch intervals, dividing your work into 8 equal sections. Use scrap yarn of all one colour with a different colour to denote the beginning of the round. Now knit Chart 1 beginning at the arrow. Each row of the chart is repeated 8 times.
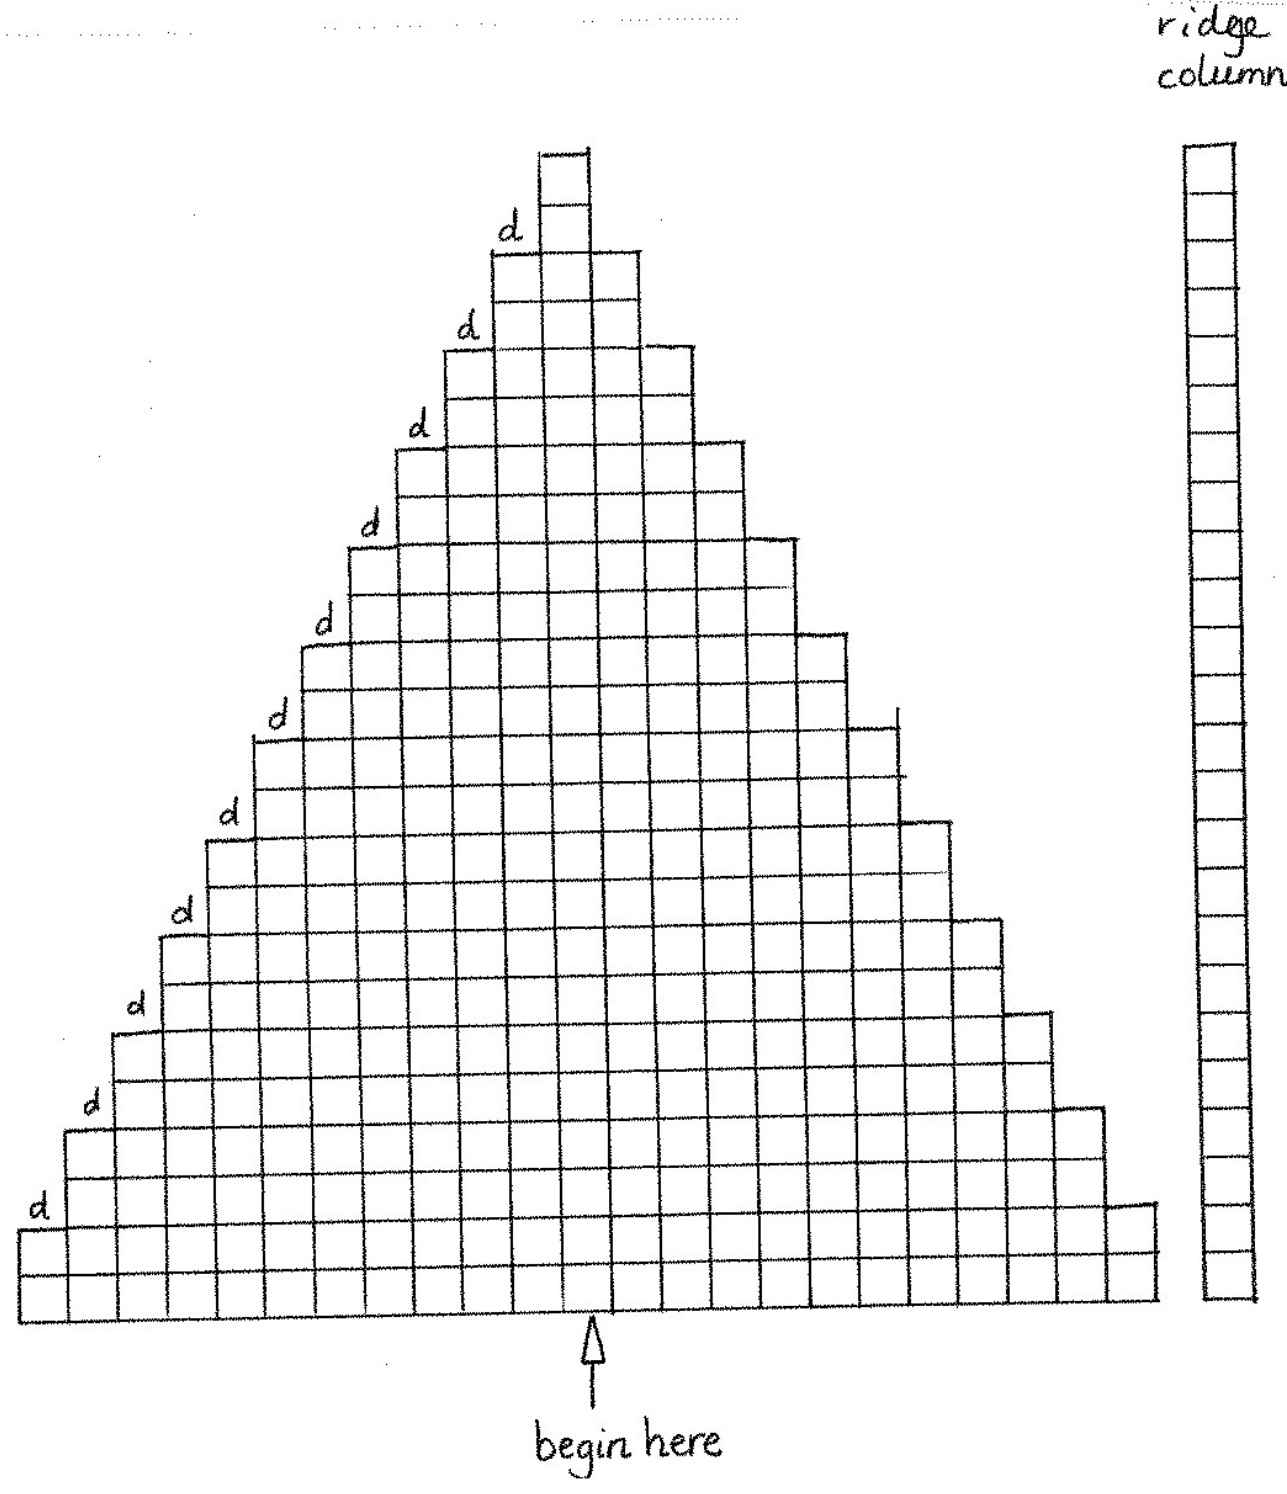
You are now ready to begin the wheel / decrease pattern. You begin each section with the centre stitch indicated by the arrow. The double decreases are worked with the two edges stitches of the triangular chart, with the ridge column stitch in the middle. I have denoted a decrease row with the letter 'd'. To make the double decrease: Slip 2 stitches knitwise together (second stitch is always the ridge), knit 1 , then pass the 2 slipped stitches over the knitted stitch.
Weave in ends. Block over a dinner plate as described


