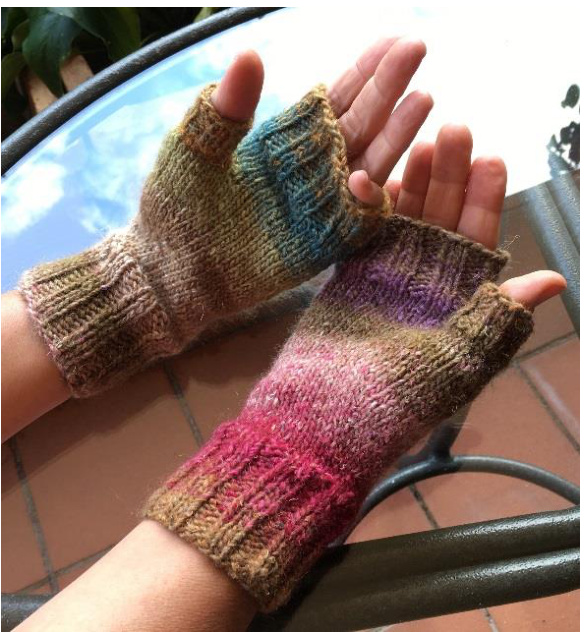
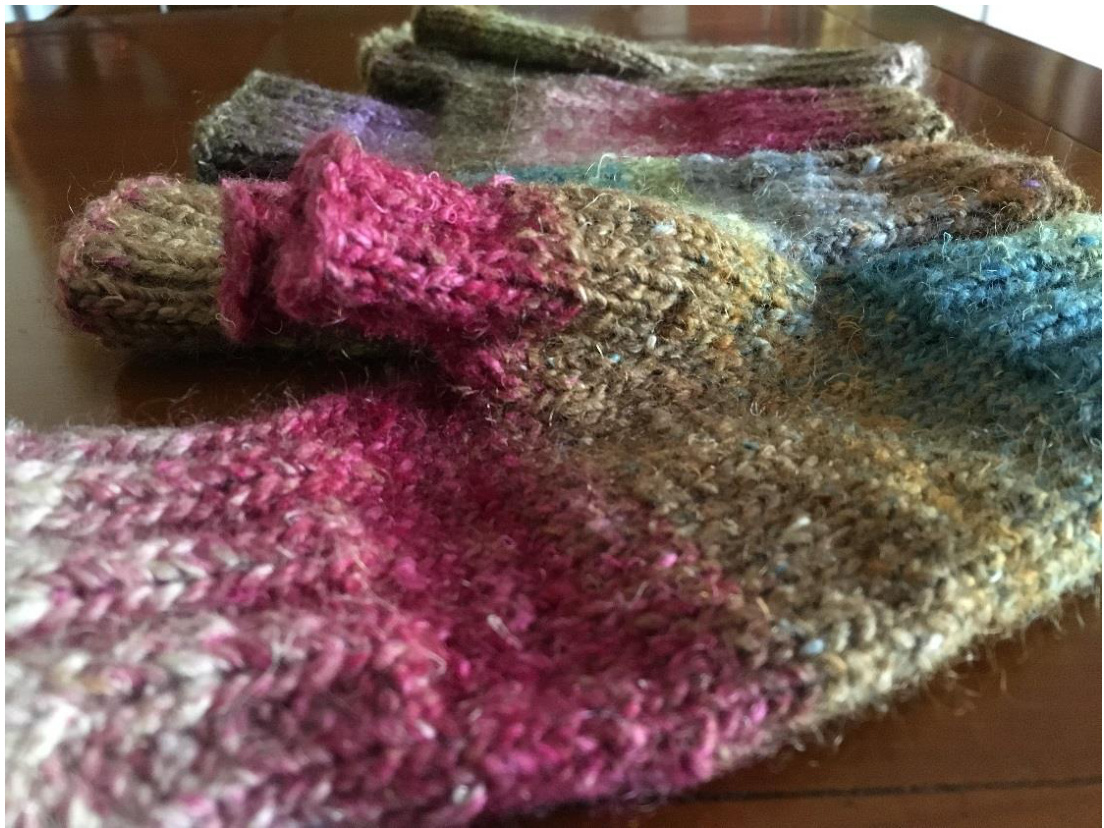
Noro Silk Garden Fingerless Mitts
Virginia Burrow (December 2015) I made up my pattern as I went along using parts of other glove patterns(made for much finer wool) and a fairbit of trial and error. I have written up my notes fairly loosely so I canrememberwhatIdidfornexttime.Feelfreetofollow along, but please bear in mind I'm no pattern writer It's a simple pattern -I have made several pairs of these and hopefully these instructions should work for other knitters! If you encounter errors please let me know. Prior experience in knitting in the round is assumed.. Needles: 3.75mm circular (80cm) for magic loop method (or DPNs if preferred) Wool: Noro Silk Garden (10ply) - I was able to just get a pair of medium mitts from one 50g ball. The larger mitts took approx.35g each.
Medium(ladies) Gauge: 21sts/29 rows per 4" on stocking stitch worked in the round Sizes: Medium (ladies) (Large (mens) - my hands are 7.25 inches around the palm, measured just above the thumb. The medium size is a perfect fit for me, but they have reasonable stretch and would be fine for slightly smaller or larger hands. The mens size fits an 8.25 inch hand, give or take.
FIRST (RIGHT) MITT:
Cuff:
Cast on 36 (40) sts using long-tail cast-on, work one row of K2P2 rib, join as for circular knitting and work 16 (17) more rows of rib Work 3 rows of plain knitting before starting gusset shaping for the thumb.
Gusset Shaping: (same for both sizes)
Row 1 - K2, M1, K1, M1, Knit to end of row Rows 2&3 - Knit to end of row Row 4 - K2, M1, K3, M1, Knit to end of row Rows 5&6-Knit to end of row Row 7 - K2, M1, K5, M1, Knit to end of row Rows 8&9 -Knit to end of row Continue increasing in the same manner, increasing the number of stitches between the M1s by two every third row, until you have 13 stitches between the M1s (this will starting the thumb division.{50 (54) stitches} be a total of 7 "increase" rows). Work 4 more rows of Knit after the final increase row before
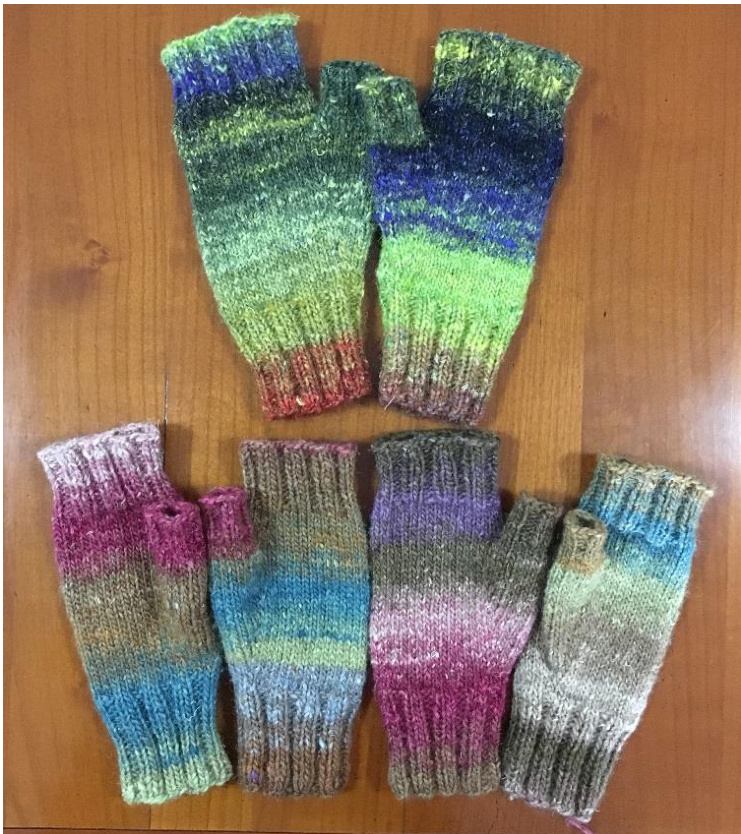
top-large (mens) mitts,bottom-medium (ladies) mitts
Divide for thumb and knit hand:
K2, place next 15 stitches onto a piece of thick scrap yarn, cast on 3 stitches (e-cast-on) to close the hand, knit to end of row {38 (42) stitches} Knit one row K1, SSK, K1, K2tog, knit to end of row {36 (40) stitches} Knit 7 (8) more rows. K2P2 rib 11 (12) rows, cast off loosely in rib (normal cast off, don't use an extra stretchy bind off method but do keep it loose so that finger movement won't be restricted)
Thumb:
Transfer 15 stitches from scrap yarn back onto needles, pick up and knit 3 (4) sts across gap using new yarn, knit to end of the 15sts {18 (19) stitches} Knit across the picked up stitches and again to the end of the row (ie. end of the 15 sts) SSK, K1 (SSK, K2, K2tog) knit to end of row {17 (17) stitches} K2tog (K1, K2tog), knit to end of row {now there are 16 sts on the needles -for both sizes} Knit 1 row (2 rows) K2P2 rib for 6 (7) rows, cast off loosely in rib
Finishing:
)le at thumb yarn join if necessary, join gap in the cuff and darr
SECOND (LEFT) MITT:
You can work the second mitt exactly the same as the first, and it seems most people making fingerless mitts do, however I find the K2 at the beginning of each row in the gusset shaping section creates a little ridge when using the magic loop method which tends to make it look like it should be worn on the right hand, so I prefer to create a mirror image and reverse the gusset shaping and thumb division for the left mitt by starting the gusset shaping 2 stitches from the end of the row rather than the beginning. ie:
Cuff:
Cast on 36 (40) sts using long-tail cast-on, work one row of K2P2 rib, join as for circular knitting and work 16 (17) more rows of rib \*see note at end - you can make your mitts truly symmetrical by doing the left mitt in P2K2 rib instead if preferred Work 3 rows of plain knitting before starting gusset shaping.
Gusset shaping (left mitt):
Row 1 - K33 (37), M1, K1, M1, K2 Rows 2&3 - Knit to end of row Row 4 - K33 (37), M1, K3, M1, K2 · Rows 5&6 - Knit to end of row Row 7 -K33 (37), M1, K5, M1, K2 · Rows8&9-Knittoendofrow Continue increasing in the same manner, increasing the number of stitches between the M1s by two every third row, until you have 13 stitches between the M1s (this will be a total of 7 "increase" rows). Work 4 more rows of Knit after the final increase row before starting the thumb division. {(50 (54) stitches}
Divide for thumb and knit hand (left mitt):
K33 (37), place next 15 stitches onto a piece of thick scrap yarn, cast on 3 stitches (e-cast-on) to close the hand, K2 {(38 (42) stitches} Knit one row K32 (36), SSK, K1, K2tog, K2{36 (40) stitches} Knit 7 (8) more rows K2P2 rib 11 (12) rows, cast off loosely in rib (normal cast off, don't use an extra stretchy bind off method but do keep it loose so that finger movement won't be restricted)
Thumb and finishing as per first mitt above
\*Note: Although the instructions above create a mirror image of the "body" of the hand, the cuff ribbing is not mirrored, resulting in a very slightly asymmetrical pair of mitts. I was happy to leave it at that, but if you want a totally mirrored version, cuff and all, you'll need to start the cuff of your left mitt with P2 instead of K2. I did intend to do mine like that but for each pair I forgot! Maybe next time
Happy knitting and enjoy your luxurious Noro silk/mohair/wool mitts! And remember to gently hand-wash and air-dry them rather than throwing them in the machine @
@Virginia Burrow 2015
If you encounter any errors please contact me so I can make corrections burrowvirginia@gmail.com


