Calcifer the Toaster Crochet Plushie
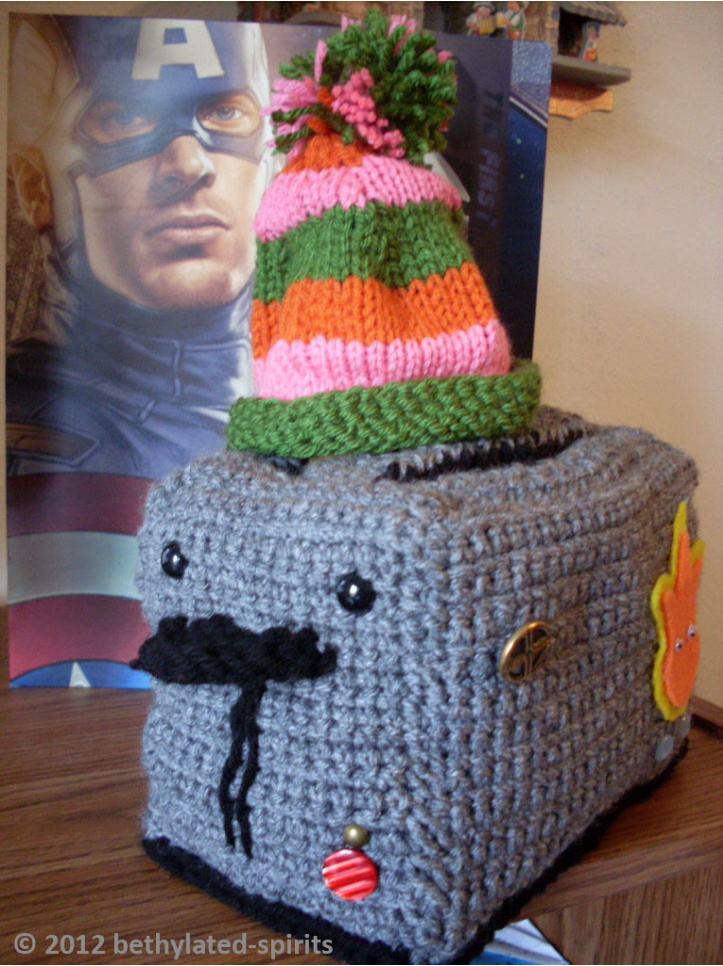
"We're busy. It's normal that things are going to get a little messy."' He pulled up the plans and studied them.“Hey, it's a toaster!" "What?' Steve asked. "Nothing, never mind, no problems here, why the hell did I think I needed plutonium isotopes on a toaster, really, even for me, that's overkill, so much more subtle to just go with a more stable electron pulse and the result's the same and no one likes radioactive toast." He pointed a screwdriver in Steve's direction. "No one." —Some Things Shouldn't Be a Chore by Scifigrl47 A caveat: I've provided row counts where I could and tried to make the instructions clear, but like Tony Stark in the story, I mostly fabricated this little guy while hyped on caffeine and sleep deprivation, and some of what I did I had to figure out through reverse engineering. Consider this pattern more as a set of guidelines, and keep in mind that you might have to fiddle around a bit to get the results you want.
Basic Toaster
Materials:
1 skein Red Heart Super Saver (medium worsted) in Grey Heather (GRAY) · wind one smallish ball of GRAY (about the size of a tennis ball) to use when the pattern splits to make the toaster slots. 1 skein Red Heart Super Saver (medium worsted) in Black (BLACK) crochet hook US size H/8 (5.00 mm) yarnneedle 12 mm safety eyes fiber-fill toy stuffing iauge is about 4sc x 4sc per inch, but matters much less than actual measurements
Abbreviations
ch = chain st = stitch st st = stockinette stitch sC = single crochet sl st = slip stitch rep = repeat dc = double crochet k2p2 = knit 2 purl 2 k2tog = knit 2 together
Toaster Ends and Top w/ Slots (1 piece)
In GRAY, make slip knot, place on hook. ch 16. R1: sc into both loops of 2nd chain stich from hook. sc into both loops of each chain to the end of the row (15 sc total). ch 1. R2: turn work. sc into 1st sc, continue across row (15 sc total). ch 1. R3-28: rep R2 until work measures about 7". Split for top w/ slots Place markers in 4"h, 6th, 10"h, and 12th scs.
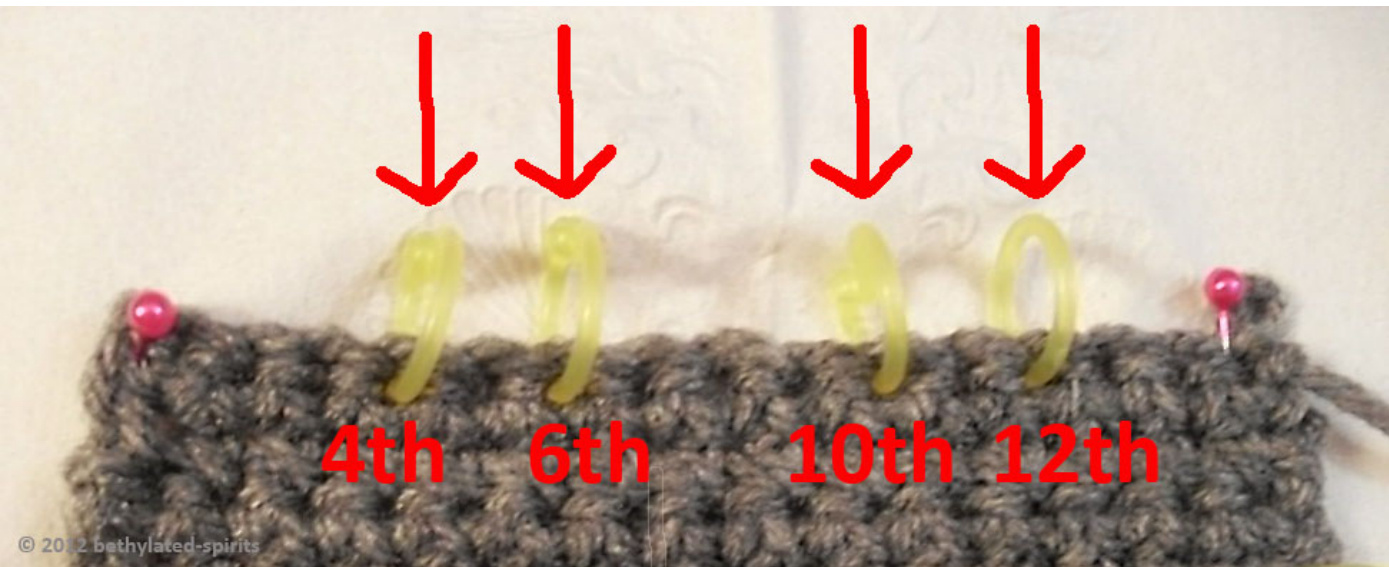
Marker placement Right side of toaster slots: R29: turn work, sc into 1st sc, sc into next sc 2 more times (3sc total). ch 1. R30-54: rep R29 (25 rows from start of slot, about 6"). Don't fasten off; hold yarn with safety pin or closeable stitch marker. Center of toaster slots: R29 (again): Join yarn from the ball you made earlier in the sc after the 2nd stitch marker from right. ch 1. sc into the same st as joining. (sc into next sc) 2 times. ch 1. R30: turn work, (sc into next sc) 3 times. ch 1. R31-53: rep R30 (do not do the final ch 1 on the last row). Fastenoff. Left side of toaster slots: R29 (again): Join yarn from the ball you made earlier in the sc after the 4th stitch marker from right. ch 1. sc into the same st as joining. (sc into next sc) 2 times. ch 1. R30: turn work, (sc into next sc) 3 times. ch 1. R31-53: rep R30 (do not do the final ch 1 on the last row). Fasten off.
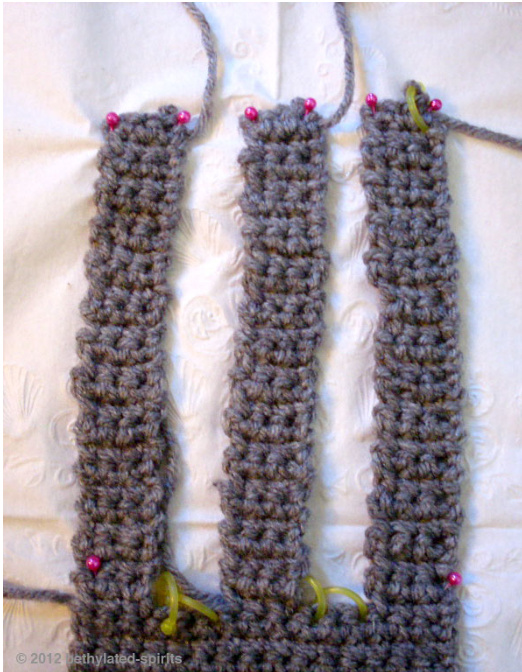
Completed toaster slots Rejoin for other end of toaster. Pick up the yarn from the Right side of toaster slots, ch 3. sc into 1st sc of Center of toaster slots, (sc into next sc) twice. ch 3. sc into 1st sc of Left side of toaster slots, (sc in next sc) twice, ch 1. R55: turn work. sc into 1st sc, continue across row (15 sc total). Be sure to sc through both loops of chain sts across gaps. ch 1. R56-82: turn work. sc into 1st sc, continue across row (15 sc total). ch 1. Measure: Make sure that the length of this end, from the end of the toaster slots to the last row, matches the length of the first end. Fasten off.
Toaster Sides (make 2)
In GRAY, make slip knot, place on hook. ch 27. R1: sc into both loops of 2nd chain st from hook. (sc into next sc) 26 times. ch 1. R2: turn work, sc into 1st sc, continue across row (26 sc total). ch 1. R3-22: rep R2 Measure: Sides are approximately 6"w x 8"l, but you should measure against the length of your particular toaster for fit. Allow for about 1-1/2" on either end of the toaster slots, and measure the width of the toaster sides against the length of the toaster ends. Fasten off.
Toaster Bottom
In GRAY, make slip knot, place on hook. ch 16. R1: sc into both loops of 2nd chain st from hook. sc into next sc 15 times. chain 1 R2: turn work, sc into 1st sc, continue across row (15 sc total). ch 1. R3-31:repR2 Measure: Toaster Bottom should be same length as width of Toaster Sides. Fasten off. bottom is approx 4-1/2" x 8"
Pockets for Toaster Slots (make 2)
In BLACK, make slip knot, place on hook. ch. 27. R1: sc into both loops of 2nd chain st from hook. sc in next sc 26 times. chain 1 R2: turn work, sc into 1't sc, continue across row (26 sc total). chain 1. R3-29: rep R2 until piece is 6-1/2" long, or slightly longer than the toaster slots. Measure: Each piece is approx 6-1/2" x 8". When sewn up, it should be one half to two-thirds the width of a toaster side. Fasten off. Fold in half lengthwise, sew up side seams, weave in ends, and turn right side out.
Toaster Lever
In BLACK, ch 2, make 3 sc in 2"d ch from hook. chain 1 R1: turn work, 2sc in each of the 3 sc (6 sc total), chain 1 R2: turn work, sc in 1t sc, 2sc in next sc (sc in next sc, 2sc in next sc) twice. (9 sc total) chain 1 R3: turn work, sc in 1st sc, 2sc in next sc (sc in next sc, 2sc in next sc) 3 times, sc in last sc. Fasten off, leaving long tail for sewing.
Embellishments
Cap's Shield
You can (and probably should) alter the stitch repeats for the Embellishments depending on your yarn sCrap yarn in RED, WHITE, and BLUE G/6 crochet hook (4.00 mm) yarnneedle white star-shaped button, sewing needle & thread, scrap 1 In BLUE, begin magic loop. ch 3, dc 10 times in magic loop, sl st to join. ch 2, sc in same st as join. (2sc in next sc) 10 times. sl st to join. fasten off. Join RED and ch 2. 1 sc in same st as join. (2sc in next sc, sc in next sc twice;) rep around. join w/ sl st. fasten off. Join WHiTE and ch 2. (sc in next 3 sc, 2sc in next sc) rep around. join w/ sl st. fasten off. Join RED and ch 2. (sc in next sc) rep around. join w/ sl st. Fasten off, leaving long tal for sewing. Sew on star button.
Iron Man's Arc Reactor
Materials: Scarp yarn in BLACK and LIGHT BLUE G/6 hook (4.00 mm) yarnneedle In LIGHT BLUE, begin magic loop. ch 3, dc 9 times in magic loop, sl st to join. ch 2, sc in same st as join (2sc in next sc) 9 times. sl st to join. Fasten off. Join BLACK and ch 2. 1 sc in same st as join. (2 sc in next st), rep around, sl st to join. Ch 3, dc in same st. [Change to LIGHT BLUE, (2 dc in next sc) 3 times. Change to BLACK, carrying yarn across back of work, 2dc in next sc.] rep color changes 4 times. Change to LIGHT BLUE, 3 dc in next 2 sC, change to black, join w/ sl st Still in BLACK, ch 2, sc in same sc, then sc around. join w/ sl st. Fasten off.
Repulsors (make 2)
Materials: black and light blue scrap yarn G/6 hook (4.00 mm) yarn needle In LIGHT BLUE, begin magic loop w/ ch 3, dc 9 times in magic loop, sl st to join. ch 2, 1sc in 1st stitch. (2sc in next sc) 9 times. sl st to join. Fasten off. Join BLACK. Ch 2, 1 sc in same st. (2 sc in next st), rep around, sl st to join. Fasten off.
Calcifer Cutie Mark
Materials: orange and yellow felt templates (see below) googly eyes glue gun or craft glue You can draw your own templates or use the ones at the end of this document. Make 2, 1 slightly larger than the other. Pin larger template to yellow felt and cut out. Pin smaller template to orange felt, and cut out. Glue smaller shape onto larger. Glue on googly eyes.
Toaster Assembly
Put the pieces together in whatever order works best for you. This is what worked best for me. I used whip stitch or variations thereon for 90% of the seaming. 1.Weave in ends. 2. Toaster sides: in GRAY, sew on sides in whip stitch. Make sure they line up across the toaster top!
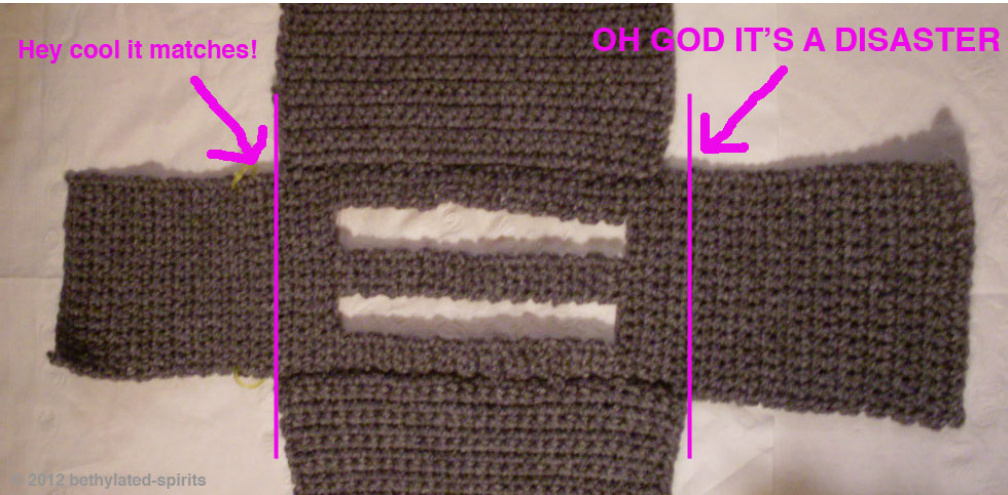
Iended upripping out the wholetoastersideand doingit over.Blargh. 3. Toaster lever and lever slots: in BLACK, sew on lever and embroider lever slide lines. 4. Toaster pockets: in GRAY, sew in toaster pockets. This was tricky; fake it tillit looks good with either whip or blanket stitch, in gray or black. 5. Lever End of toaster: in GRAY, sew the Lever End of the toaster to the sides. 6. Eyes, embellishments, etc.: Attach safety eyes, Cap's Shield, Arc Reactor, Calcifer cutie mark, and Repulsors. 7. Arc Reactor End of toaster: in GRAY, sew the Arc Reactor End Along the way, your unfinished of the toaster to the sides. toaster may look distressingly 8. Sensor Arrays (buttons): sew on with button thread. I used shapeless and baggy, but scraps of felt as backing on the inside of the toaster to give a firm don't worry. The single crochet anchor for the button thread. edgingwith which you attach 9. Attach bottom and add stuffing: In BLACK, starting at one thetoasterbottomcoupled corner, attach bottom using single crochet on the right side with judicious stuffing will bring (outside) of the toaster body. When two of the four sides are it all together. done, stuff with fiberfill and smoosh it around until you start getting a toaster-ish shape. DON'T OVERSTUFF. You want to leave room for the toaster pockets to expand when you put Pop-Tarts in, and you want to make sure you can plump Calcifer into toasterishness when necessary. When you've got the approximate shape you want, complete single crochet around the bottom, adding fiberil and shaping as necessary. Fasten off. Weave in ends by hiding them inside. 10. Introducing your toaster to your other appliances: You are on your own. Be particularly careful around the coffee machine and breadmaker.
Accessories
Pop-Tart
Materials: scrapyarn inBEIGEandPINK US 8 knitting needles US F5/3.75 mm crochet hook yarnneedle Pastry (make 2) In BEIGE, CO 16 R1: knit R2: purl R3-30: rep rows 1 & 2 until piece measures about 5-1/2" Icing (make1) In PINK, make slip knot, place on hook, ch 13 R1: sc in back loop of 2"d st from chain on hook, sc across in back loops, ch 2 R2: turn work, sc across in back loops, ch 2 R3-15: rep rows 1 & 2 until piece measures about 4". Fasten off. Assembly: With right sides facing, sew the BEIGE pieces together along one long side in beige. Turn right side out and attach icing using PINK, centering it. Turn again so that wrong side faces out and sew up the other long end. Turn right side out one more time and sew up short ends with whip stitch. Weave in ends, hiding the loose bits in the middle of the “pastry."
Ski Hat a la Thor
Ivialenlais: SCrap yarn in GREEN, ORANGE, and PINK US 8 dpns (you can start on a US 8 16" circular, but the decreases start quickly enough that for me it was easier just to do it all on dpns) yarnneedle In GREEN, CO 60. Divide sts between dpns, join to work in the round. K2, P2 rib for 1-1/2", the switch to stocking st for My pattern notes for the hat as it another 1" or so. Break GREEN. appears the photo were Join PINK, work 1" st st. Break PINK. completely incomprehensible even Join ORANGE, work 1/2" st st. Break ORANGE. to me, so I made up a different Begin decreases. one for this pattern. An ugly ski hat Join GREEN. R1: (k10, k2tog) 5 times. R2: Work 1 row plain. is Toasterverse canon, so don't R3: (K9, k2tog) 5 times. R4: Work 1 row plain. Break worry about being perfect! GREEN. Join PINK. R5: (k8, k2tog) 5 times. R6: Work 1 row plain. R7: (k7, k2tog) 5 times. Break PINK. Join ORANGE. R8: (k6, k2tog) 5 times. R9: (k5, k2tog) 5 times. R10: (k4, k2tog) 5 times. Break ORANGE. Join GREEN. R10: (k3, k2tog) 5 times. R11: (k2, k2tog) 5 times. R12: (k1, k2tog) 5 times. R13: k2tog around. You should now have 5 sts on 3 needles. Break yarn, leaving long tail. Put tail on yarn needle and draw through remaining sts, pulling them off the dpns. Wrap through remaining sts one more time and draw tight. Weave in ends. Make pom-pom. A good & simple diy pom-pom tutorial can be found here. Attach pom-pom to top of hat andweave inends.
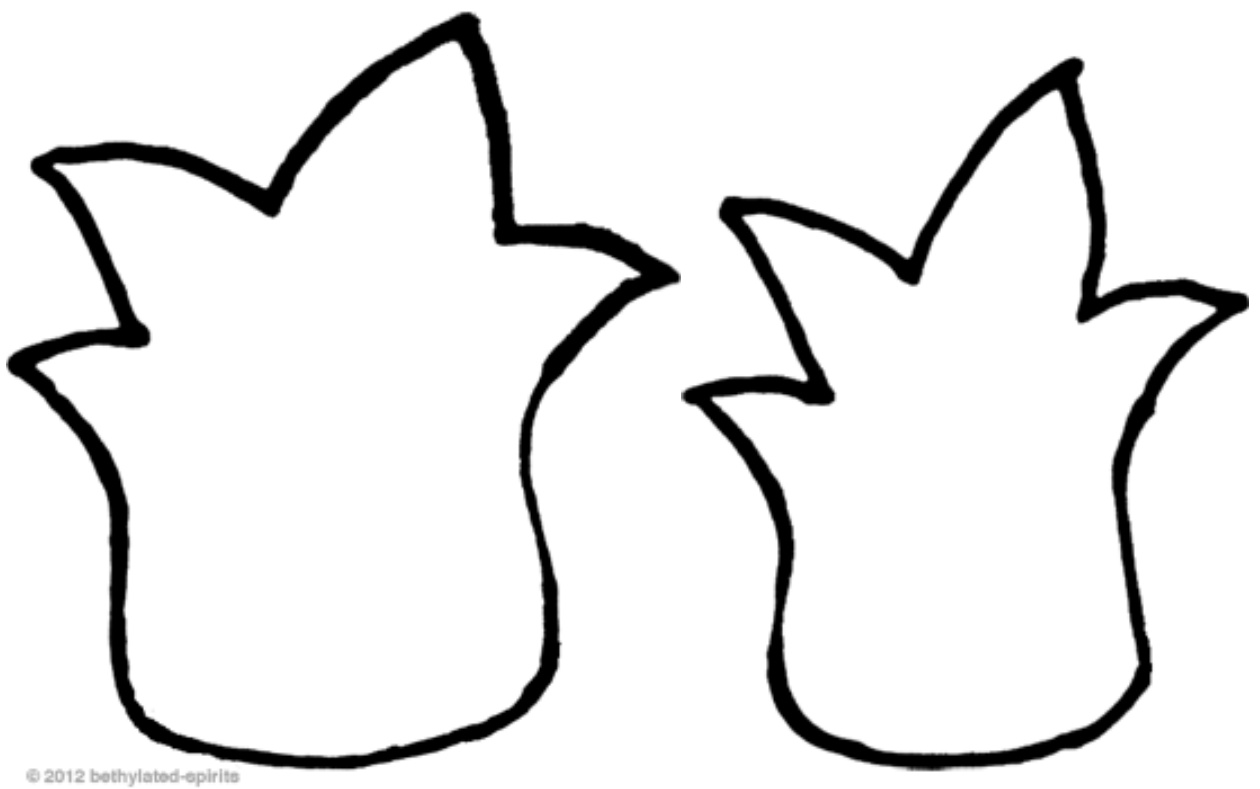
Calcifer cutie mark templates


