PIE
Tasty and Terrifed
SUPPLIES
Hooks: US size 4 (2.0 mm), size E (3.5 mm) Main Color (MC): approximately 8 grams, light weight (level 3) Weused Red Heart AnneGeddesBaby:Teddy Contrast Color (CC): approximately 3 grams, Medium weight (level 4) We used Lion Brand Fishermen's Wool: Nature's Brown 1 pair 9mm safety eyes A 1.75" diameter circle cut from heavy cardstock or a cereal box A small piece of brown or black felt, cut in the shape of a mouth Tapestry needle or similar large-eye needle
ABBREVIATIONS
blo back loops only SC single crochet ch chain sl st slip stitch dc double crochet st stitch rnd round
Top Crust
Hook: size 4 (2.0 mm) The top crust is worked from the center out. Rnd 1 start with a magic ring in MC; 6 sc in magic ring (6 SC) Rnd 2 2 sc in each sc around (12 sc) Rnd 3 [sc in first st, 2 sc in next st] repeat 6x; sl st in first st of rnd 3 (18 sc) Rnd 4 ch2 (doesn't count as a dc) [dc in first two st, ch2, dc in next st] repeat 6x (18, 6 ch2 spots sc) Rnd 5 [sc in first two dc, 2 sc in ch 2 spot, 2 sc in next dc] repeat 6x (36 sc) Rnd 6 [sc in frst five st, 2 sc in next st] repeat 6x (42 sc) Rnds 7-8 sc around (42 sc) Rnd 9 [sc in first st, 3 dc in next st, sc in next st] repeat 14x; sl st in first sc of rnd 9 (70 sts)
Finish
finish off leaving a long end for sewing.
Bottom Crust
Hook: size 4 (2.0 mm) The bottom crust is worked starting at the bottom center. Rnd 8 is worked in BLO to give a sharp corner with a flat bottom to the pie Rnd 1 start with a magic ring in CC; 6 sc in magic ring (6 SC) Rnd 2 2 sc in each sc around (12 sc) Rnd 3 [sc in first st, 2 sc in next st] repeat 6x (18 sc) Rnd 4 [sc in first two st, 2 sc in next st], repeat 6x (24 sc) Rnd 5 [sc in frst three st, 2 sc in next st], repeat 6x (30 sc) Rnd 6 [sc in frst four st, 2 sc in next st], repeat 6x (36 sc) Rnd 7 [sc in first five st, 2 sc in next st], repeat 6x (42 sc) Rnd 8 working in BLO, sC around (42 sc) Rnd 9 sc around (42 sc) Rnd 10 [sc in first six st, 2 sc in next st], repeat 6x (48 sc) Rnd 11 [sc in first seven st, 2 sc in next st], repeat 6x (54 sc) Finish finish off, leaving a long end for sewing.
Filling
Hook: size E (3.5 mm) The filling is worked from the center out. This piece goes under the top crust, so as to give the appearance of pie filling beneath the holes. Rnd 1 start with a magic ring in CC; 6 sc in magic ring (6 SC) Rnd 2 2 sc in each sc around (12 sc) Rnd 3 [sc in frst st, 2 sc in next st] repeat 6x (18 sc) Rnd 4 [sc in frst two st, 2 sc in next st] repeat 6x (24 sc)
Rnd 5
[sc in first three st, 2 sc in next st] repeat 6x (30 sc) Rnd 6 [sc in frst four st, 2 sc in next st] repeat 6x (36 sc)
Finish
finish off, leaving a long end for sewing.
Assembly
Filling
Place your cardboard circle in the bottom of the bottom crust. It should be sized so that its edge lines up with the bottom of rnd 8 (where you worked in BLO). Adjust the size of your circle if necessary. Begin sewing the filling to the top edge of the bottom crust. When you have reached about % of the way around, stop to place the safetyeyes.
Safety Eyes
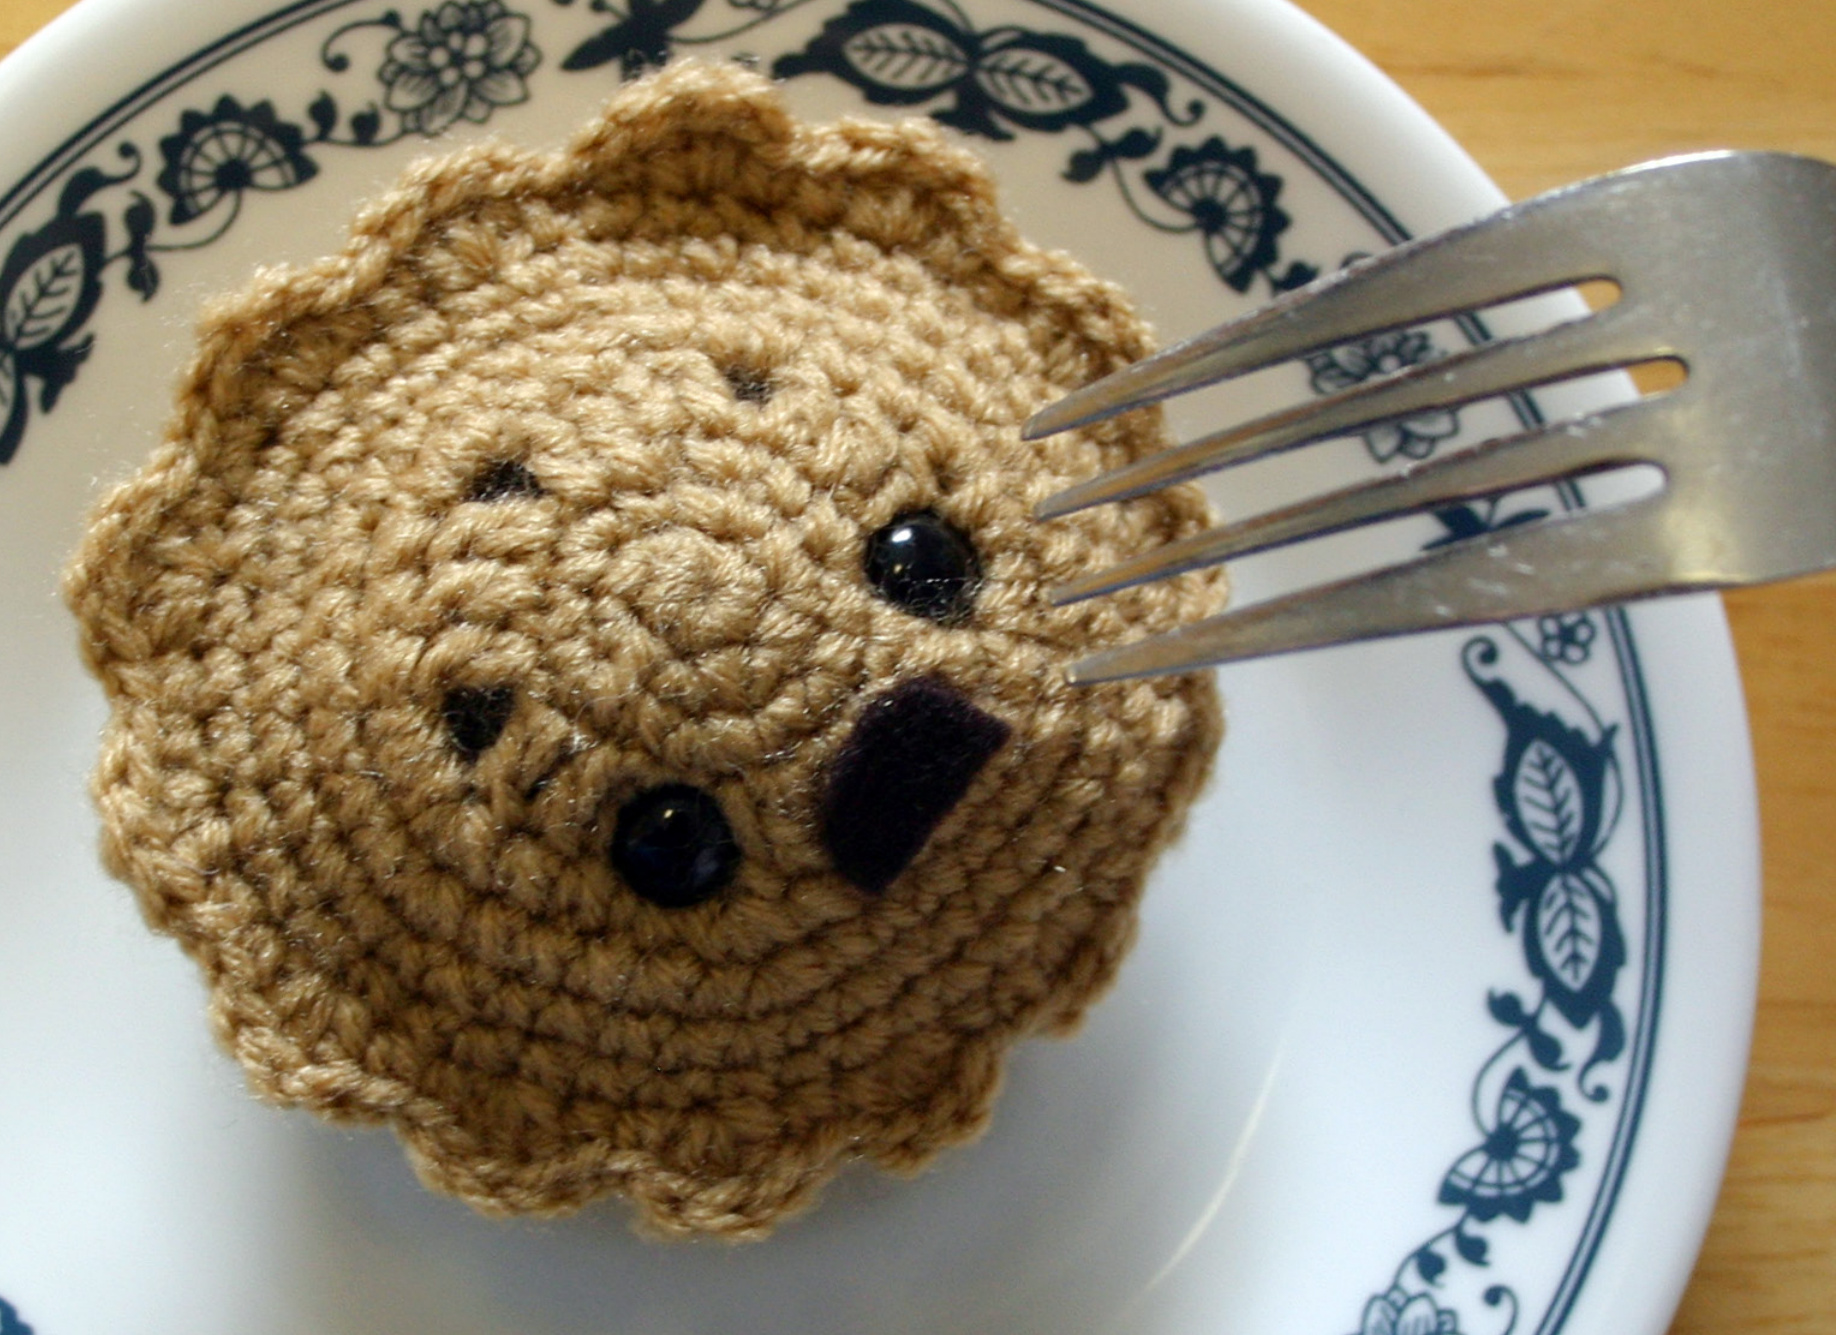
Place the safety eyes through the top crust as desired. We placed them through two of the holes in the top crust, with a hole in between left open. This is also a good time to cut your felt mouth and set it in place to get an idea of how the face will look. We made a screaming face, but you can make yours happy or however you wish. Carefully place the top crust over the filling, centering it so that the scalloped edges of the top crust just overhang the bottom crust. Press the safety eyes through the flling layer (again, checking that your top crust is centered), then press the washers on.
Top Crust
Once the safety eyes are secured, sew the top crust to the bottom crust. Carefully match the scalloped edges to the top of the bottom crust as you go. Begin sewing at the same point where you started sewing on the filling layer and pause in the same place where you stopped on the filling layer
Stuffing and Finishing Off
Stuff the pie frmly, so that the top bulges up. Finish sewing around the filling layer to close the gap. Weave in the end left from sewing. Finish sewing on the top crust and weave in the ends from sewing. If you have not already, cut a mouth out of felt and glue it in place.
License Information
This pattern is licensed for personal use only. One user per license. You may not distribute or resell this license. In other words, you may use this pattern to create for your personal use orto create gifts for your friend(s) and/or family member(s). This pattern is only for use by one individual. om this pattern are not to be sold without written permission from the autho If you have any questions about this license, or are interested in licensing this pattern to create items for charity or to sell for profit, or if you have any other questions or concerns, please contact the author at princeandpeddler@gmail.com.


