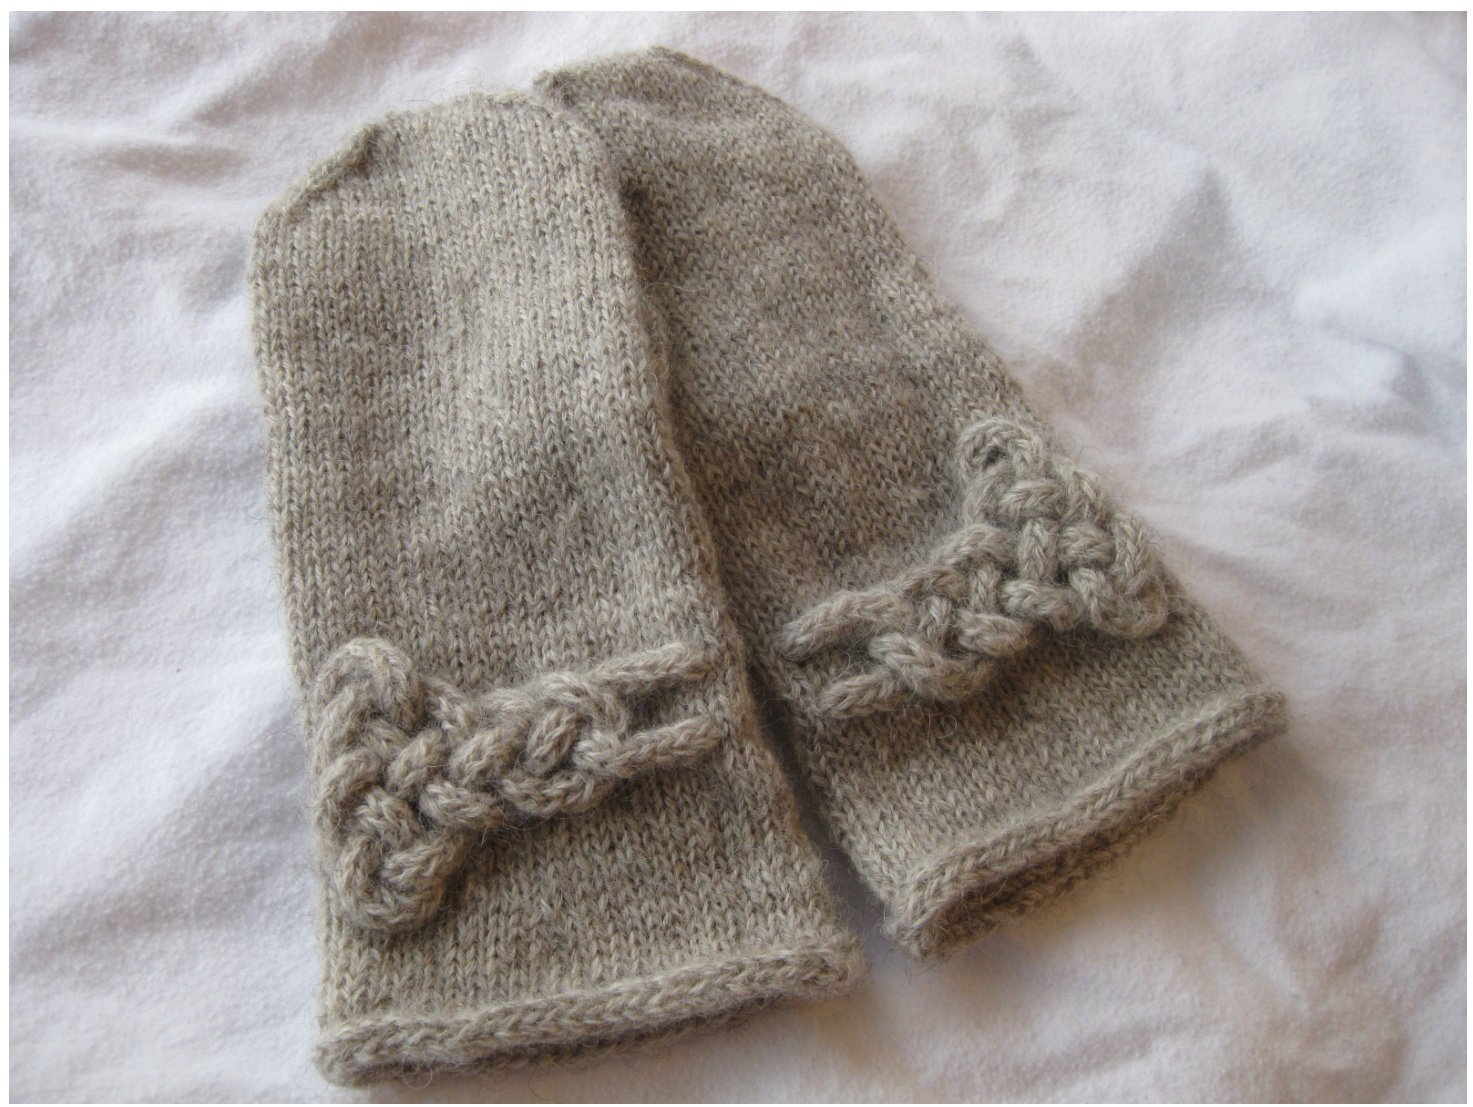
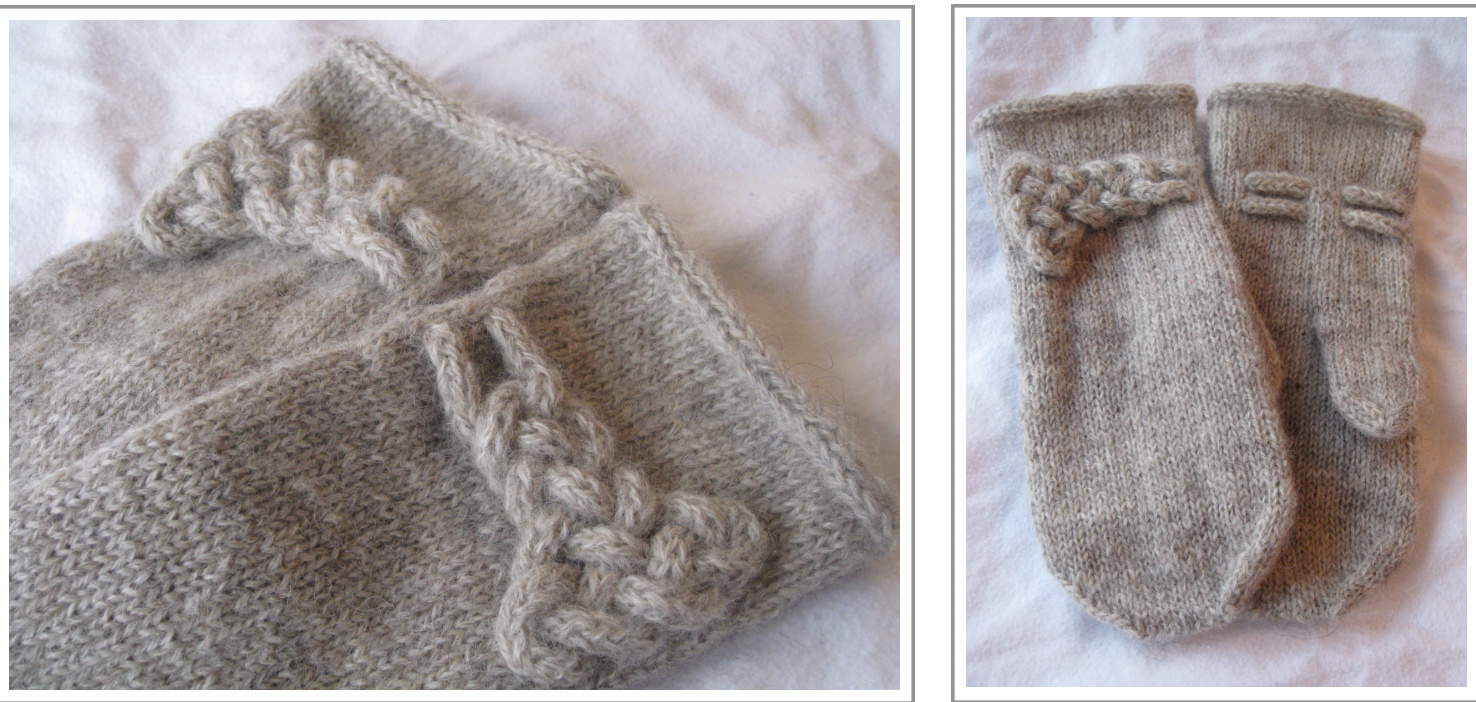
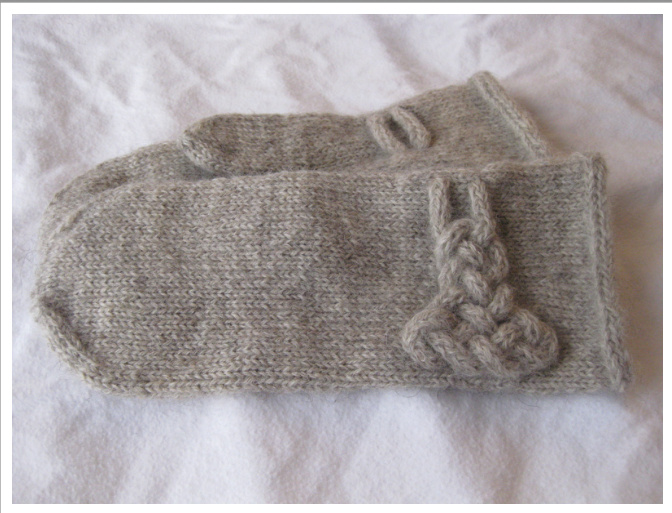
Mors du Cheval
mittens with a Viking knot in i-cord \~75 g of worsted weight non-superwash yarn
The original mittens used 2 strands of 2-ply Shetland. The yarn was spun from roving purchased from Briana MacEwan at Call of the Wool (www.callofthewool.com). Meedles set of 3.5 mm / US 4 double-pointed needles Motions waste yarn for provisional cast on stitch holder Jechniques Provisional cast on Picking up stitches Attached i-cord I-cord Gauge 6 sts per inch / 12 sts per 5 cm over stockinette stitch Measurements before fulling 10" / 25 cm from cuff to tip 81/2 / 21.5 cm circumference after fulling 91/2" / 24 cm from cuff to tip 8" / 20 cm circumference Abbreviations dpn double-pointed needles sts stitches rnd round st st stocking stitch k knit rem remaining
Notes
In order to make the most of yarn with a Very Finite Yardage, i.e. handspun, I cast on provisionally and knit from the wrist to the tip; worked the thumb; nearly died of boredom knitting 300+ rows of i-cord; then picked up the stitches from the provisional cast on and knitted the cuff to the length that the remaining yarn allowed. If you're not worried about running out of yarn and find the provisional cast on too finicky, it's not difficult to reverse-engineer the cuff so as to knit the entire mitten in a single uncomplicated piece.
I've noted measurements in number of rounds as well as inches/cm in case, like me, you are working with a limited amount of yarn and can't afford to knit one more round than necessary.
Hand
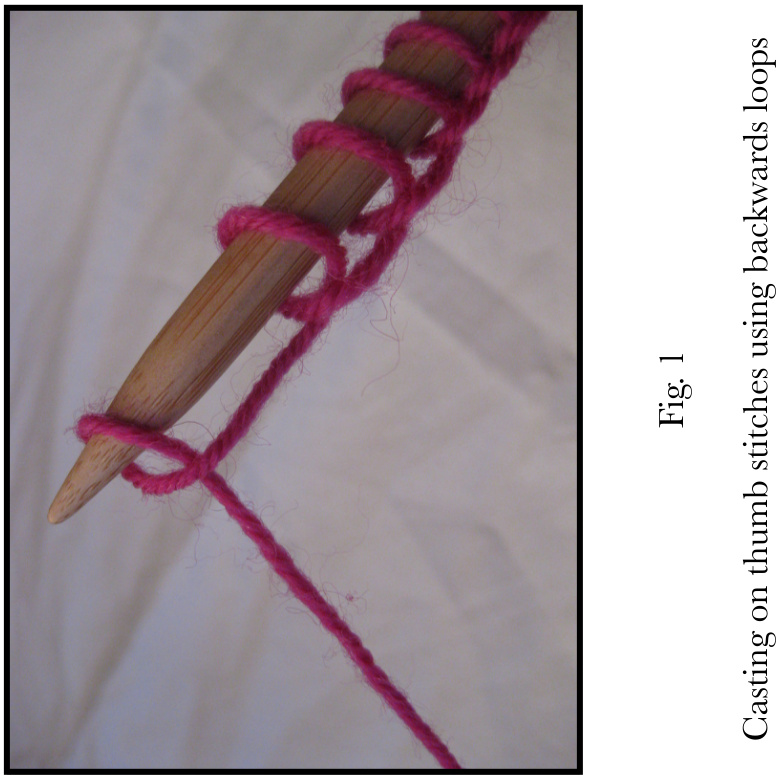
Using 3.5 mm dpns, provisionally cast on 48 sts. Join in a rnd and work 2 rnds (\~2/2?" / 6 cm) st st. On the next rnd, mark the thumb: Right thumb K 1, place the next 9 sts on a holder, cast on 9 sts over the sts on holder (see Fig. 1), k to end of rnd. Left thumb K to last 10 sts, place the next 9 sts on a holder, cast on 9 sts over the sts on holder, k 1. Work 30 rnds (\~4" / 10 cm) st st from the thumb sts. Then work Chart 1. Graft rem sts.
Jhumb
Put the 9 sts from the holder on to a needle, pick up 11 sts (1 at each corner and 9 along the cast-on sts) = 20 sts. Work 15 rnds (\~2" / 5 cm) st st, then work Chart 2. Draw up rem sts.
Cuff
Undo the provisional cast on = 48 sts. Join in a rnd and k 1 rnd. Then work as follows: Rnd 1: Inc 2 sts evenly spaced. Rnds 2-7: K. Rep Rnds 1-7 once more = 52 sts. Now work the i-cord edging: Provisionally cast on 3 sts and work attached i-cord around the cuff.
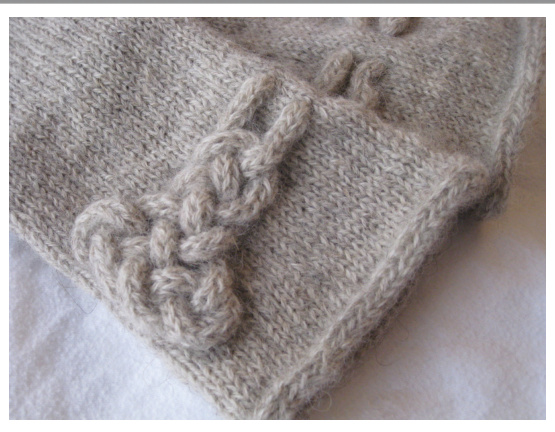
Knot
Make 2. With 3.5 mm needles, cast on 3 sts and knit 175 rows of i-cord. Lay the knot - see photo tutorial. To demarcate the wrist, pull the i-cord directly through the fabric and tack down the ends. Sew the knot in place.
Julling
I fulled the mittens very lightly by soaking them in cold water for 20 minutes, squeezing out the water in a towel, and then putting them in the dryer for 5 minutes at a time. This pattern is licensed under the Creative Commons Attribution-NonCommercialShareAlike 3.0 Unported License. For more information about what this license entails, see http://creativecommons.org/licenses/by-nc-sa/3.0/deed.en US If you have questions, comments, or otherwise desire to contact me, you can e-mail me at lanja.samsdottir@gmail.com or send a Ravelry PM to Lanechka. Not being the world's greatest correspondent, it may take me a few days to get back to you, but rest assured that I'm glad to hear from you - even (especially?) if you're writing to point out any much-dreaded errata ;-)
For musings on new designs, meditations on stashbusting, and general goofiness, you can visit my blog: www.NewNorwegian.wordpress.com.
Mors du Cheval Knot
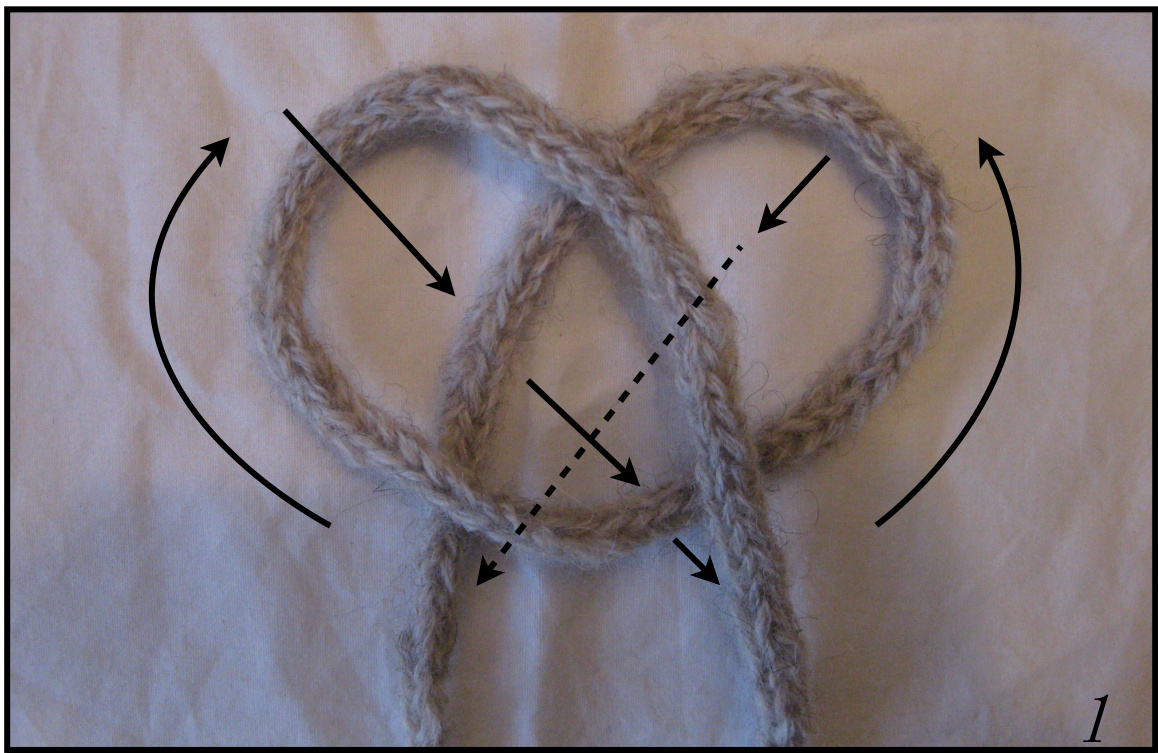
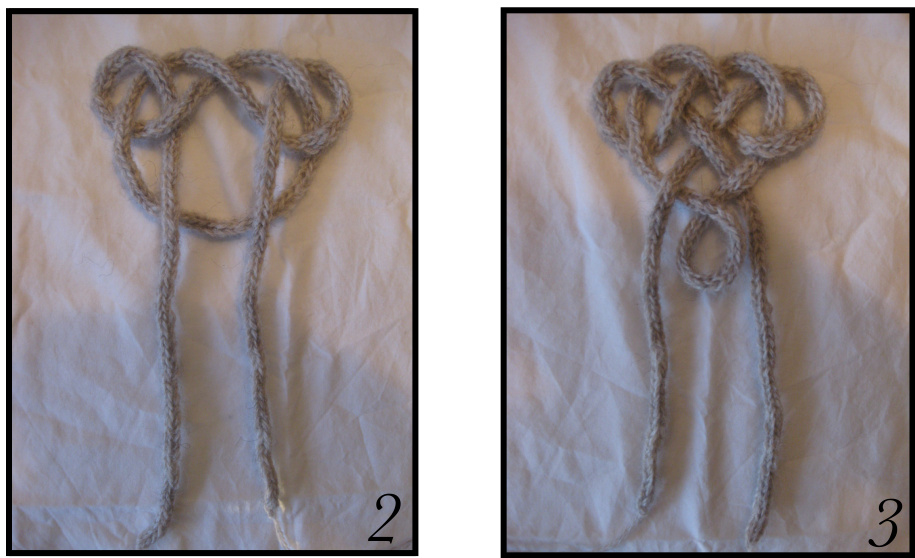
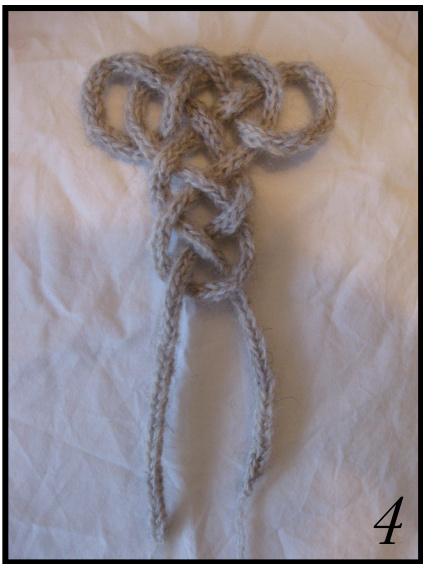
After Step 4, adjust the tension of the knot. You can loosen or tighten the loops depending on the length of your i-cord.


