Knoteh Scarf by Janis Cortese
Copyright @ 2010 Janis Cortese. All Rights Reserved. One of the nicest and most popular crocheted scarf patterns around is the Boteh Scarf available at InterweaveCrochetfor\$5. Being a tinkerer, I discovered this pattern by finding pictures of finished scarves online and promptly reverse-engineered it, although I can't tell you how, sorry. You can download the pattern at the link above. In the process of reverse-engineering it however, I began thinking about how to do the same thing in knitting. And that, I can tell you about.
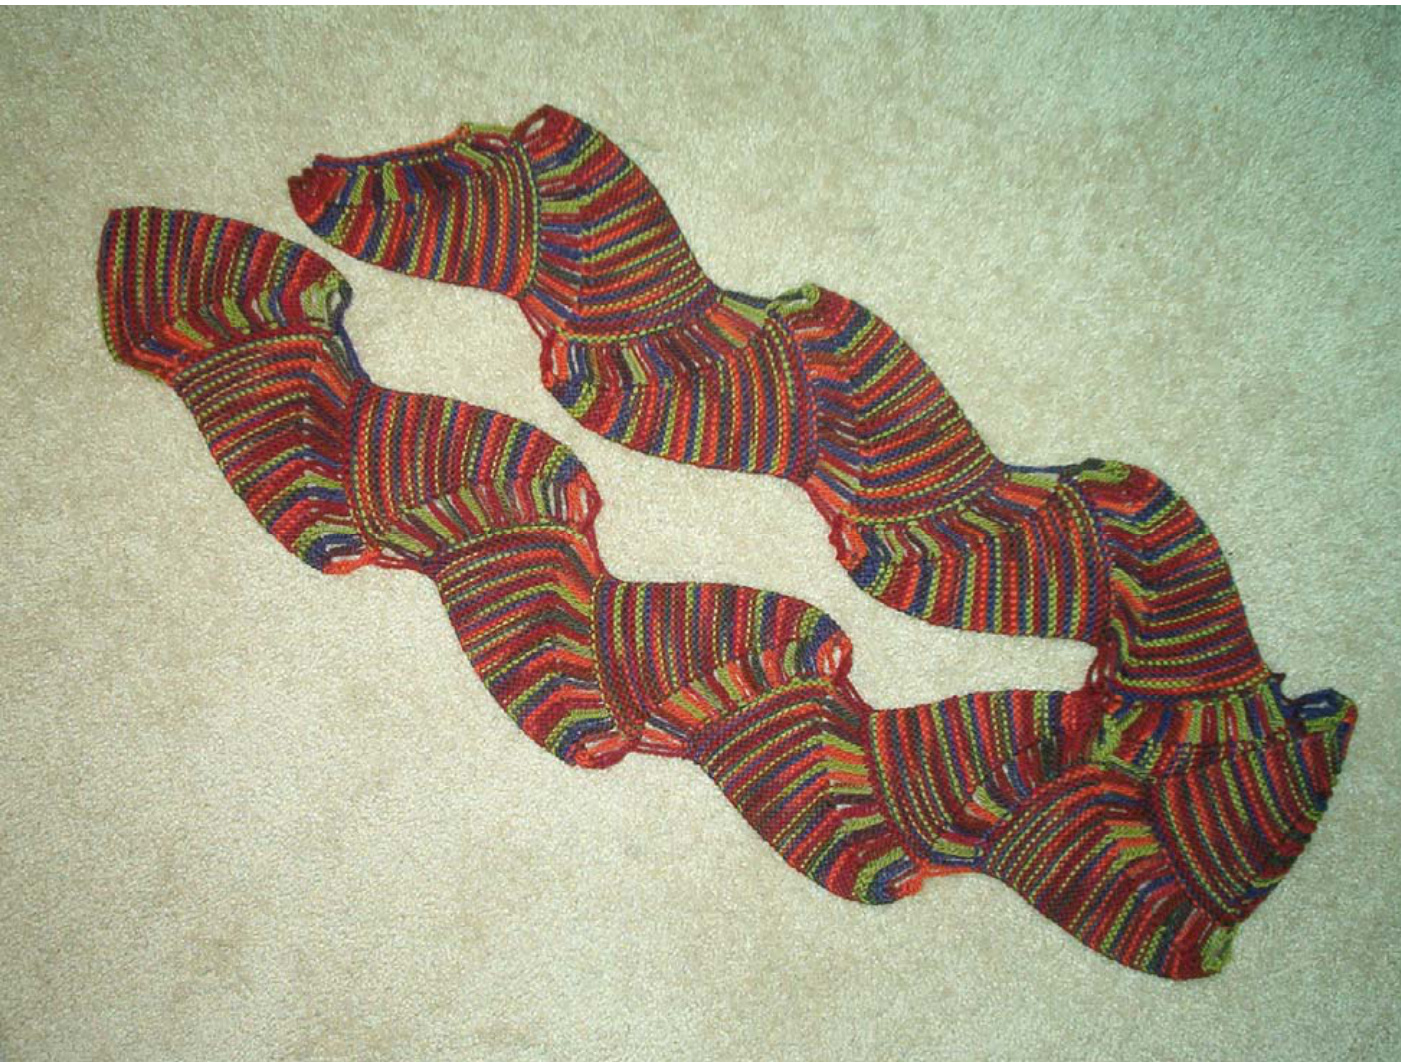
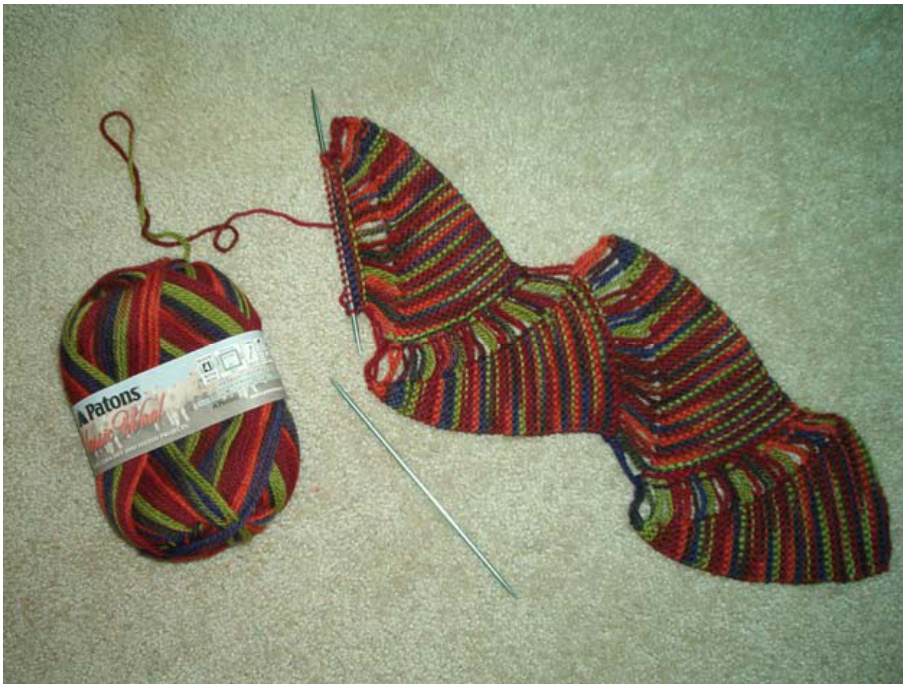
[Figure 1] It's slower than the crocheted version, which works up almost absurdly fast, and like most scarves is fairly gauge-ecumenical. You'll see from the pictures below that I used dpns to knit with, but that isn't for any particular reason. For a pattern of relatively narrow width like this, two dpns simply function as a convenient, pocket-size set of straight needles. Circulars and straights will work just fine. I used about a skein of Patons Classic wool (223 yds) in the Harvest colorway on size 4 needles, but since this is such a gauge-agnostic pattern, pretty much any combination of your favorite yarn and needles will do, and of course, you can make it as long as you like. It would make a great one-skein project for the much-beloved-but-pricey Koigu. In other words, the gauge and materials list for this project is as follows: Gauge: Whatever. Yarn: Whatever. Needles: Whatever. I like patterns like that. @ Just about the only thing I wouldn't use is thin yarn with thick needles. (That laceweight that you love with the size 15 needles? Probably not so much.) The body of the scarf shown below is garter stitch, but moss and seed stitch will work well also. Just about any stitch pattern that does not curl and is fairly equally stretchy both horizontally and vertically will work fine.Have fun!
Directions
Using the long-tail method, cast on 2 stitches, place a marker, and cast on 20 more.
Knitting a Triangle:
Row 1: Knit to marker, stop and turn. (Do not slip and wrap an extra stitch or any of those other clever things you may do when working a short row - just stop and turn.) Row 2: Knit to end of row. Row 3: Knit to marker, slip marker, knit 2. Row 4: Knit 2 stitches to marker, slip marker, k2tog and knit to end of row. Repeat these rows until you have completed a k2tog and have only three stitches on the needle in total. Do not slip the first stitch of every row. Now, the fun part happens. Those two stitches to one side of the marker? You'll be dropping them to make 20 nice long loops that you will pick up and use to knit the next section!
Picking Up Stitches to Make the Next Triangle:
Step 1: Drop those two stitches and unravel them along the side of the triangle, all the way down. Again, you should have 20 long loops when you're done, plus the one live stitch remaining on your needle.
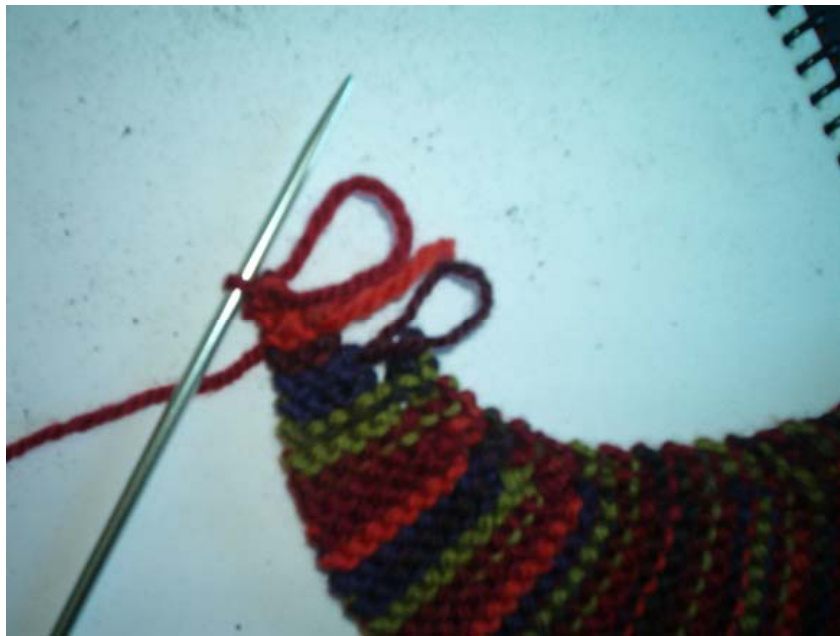
[Figure 2] Step 2: Remove your needle from that one live stitch, and using a crochet hook, pull the topmost loop through it. Take the working yarn, and tug on it a bit to tighten that stitch around the topmost loop.
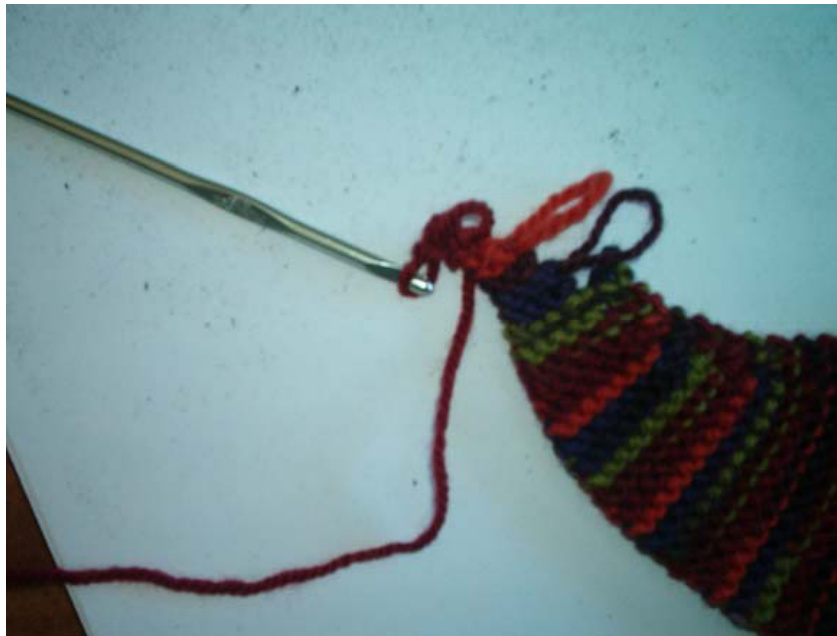
[Figure 3] Step 3: Pick up those 20 long loops and using the working yarn and the over-the-thumb method, cast on three more stitches. The innermost of these stitches will have one long leg; that's exactly as you want it. (Be sure to keep that long leg loose! It can tighten up inadvertently.)
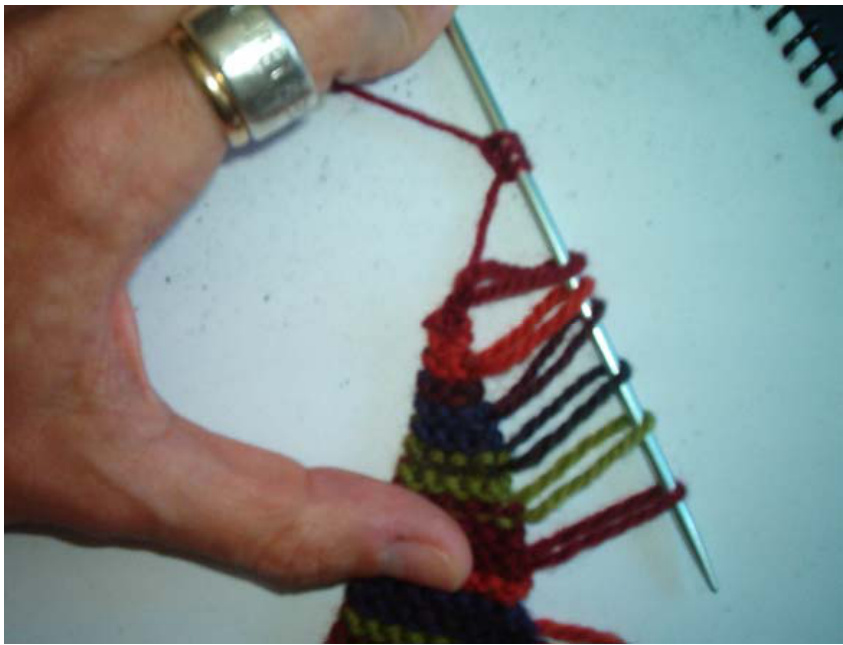
[Figure 4] Step 4: Using the working yarn, knit the first two of the newly cast-on stitches and place marker. Step 5: Knit the next cast-on stitch - the one with the very long leg - together with the first long loop. Knit to end of row. Once again, you should be back to 2 stitches, a marker, and 20 more stitches on your needle for a total of one marker and 22 stitches. Tug down gently a bit on each of the long loops to set them in place. Now, begin again with Row 1 of Knitting a Triangle and keep going for as long as you like!
[Figure 5] When you've run out of yarn, tripped over the scarf, heard the captain announce that the descent into your destination airport has begun, or just gotten bored, it's time to finish.
Finishing the Scarf:
.fter having completed the last triangle, follow Steps 1 and 2 of the previous section Finishing Step 3: Pick up the 20 long loops and using the working yarn, cast one only one stitch using the over-the-thumb method. Finishing Step 4: Knit the cast-on stitch together with the first long loop. Knit to end of row. Finishing Step 5: Knit to end of row. Finishing Step 6: Cast off loosely however you like. A sewn cast-off works well for this since it's forgiving and there aren't too terribly many stitches over which you have to do it, but just about any cast-off will be fine. Block lightly. There you have it! Again, the example scarf was done in garter stitch, but any stitch that's the same on both sides, doesn't curl, and is equally forgiving horizontally and vertically should be fine. Mix and match, and see what happens! You can also make the triangles more or fewer than 20 stitches in width, or make the dropped area more or fewer than two stitches wide, although 2 stitches seems to work particularlywell. And if you like to crochet, be sure to visit the link above and purchase the Boteh Scarf pattern from InterweaveCrochet!


