Bullion PhotoTutorial by Donna Kay Lacey
Bullions are a wonderful way to add texture and interest to your projects. As an added bonus, they are quite fun to make. This photo tutorial will walk you through the process of making a bullions.
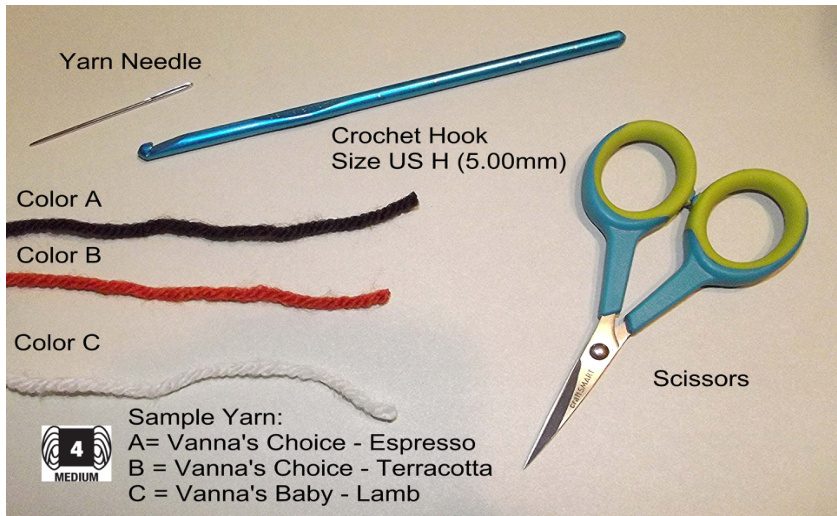
Materials:
For this block, we will be using Vanna's Choice yarn and a size H (5.00 mm) hook, however, bullions can be made with any weight yarn from thread to bulky (although I have never made a bulky bullion I'm sure it could be done). Just be sure to use a hook that is the correct size for the weight of yarn or thread you are using. In this tutorial, I will write the pattern as you would normally see it written in red, then we will break it down step by step.
Beginning Written Instructions:
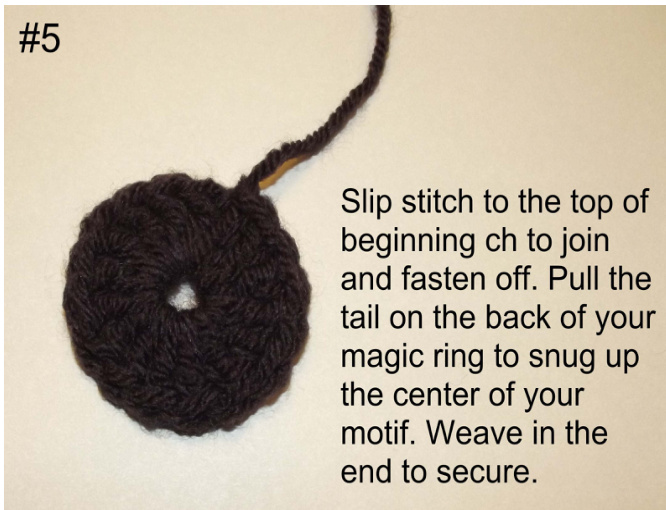
1 color A, magic ring, ch 3 (as dc), 15 dc in ring, sl st to top of beginning ch 3. (16 dc
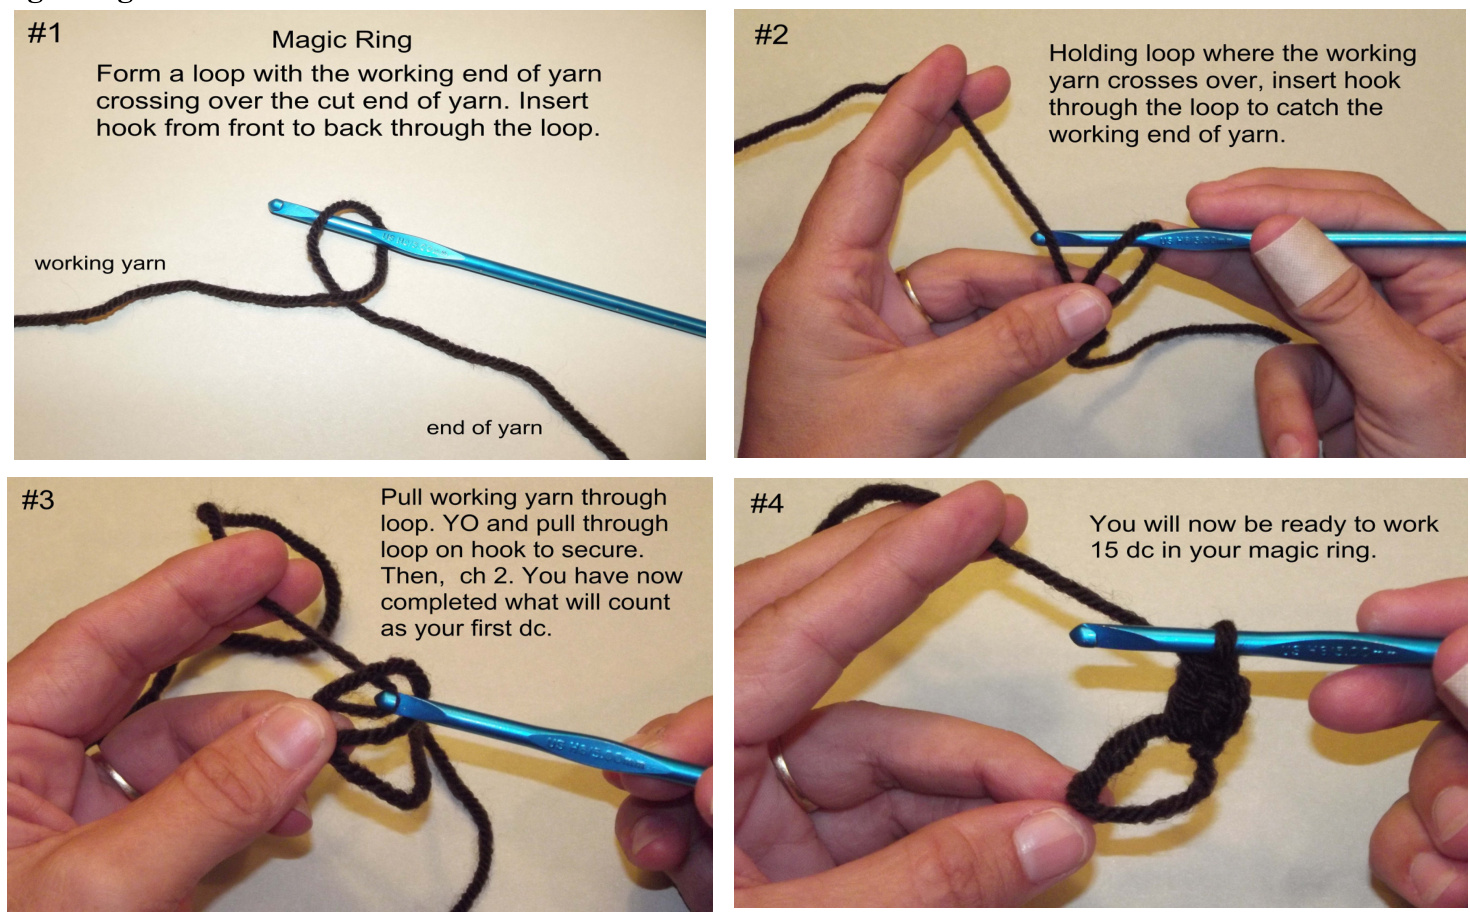
Beginning Photo Instructions:

Written Instructions Rnd 1: Join color B with a sl st in any dc, ch 3, \*BN8 in same dc, 2 BN8 in next dc, BN8 in next dc, ch 3, sl st in same dc as last BN8, sc in next dc,\*\* sl st in next dc,\* repeat from \* to \* 3 more times ending at \*\* on final repeat, sl st in same st as beginning ch 3. (4 petals made)
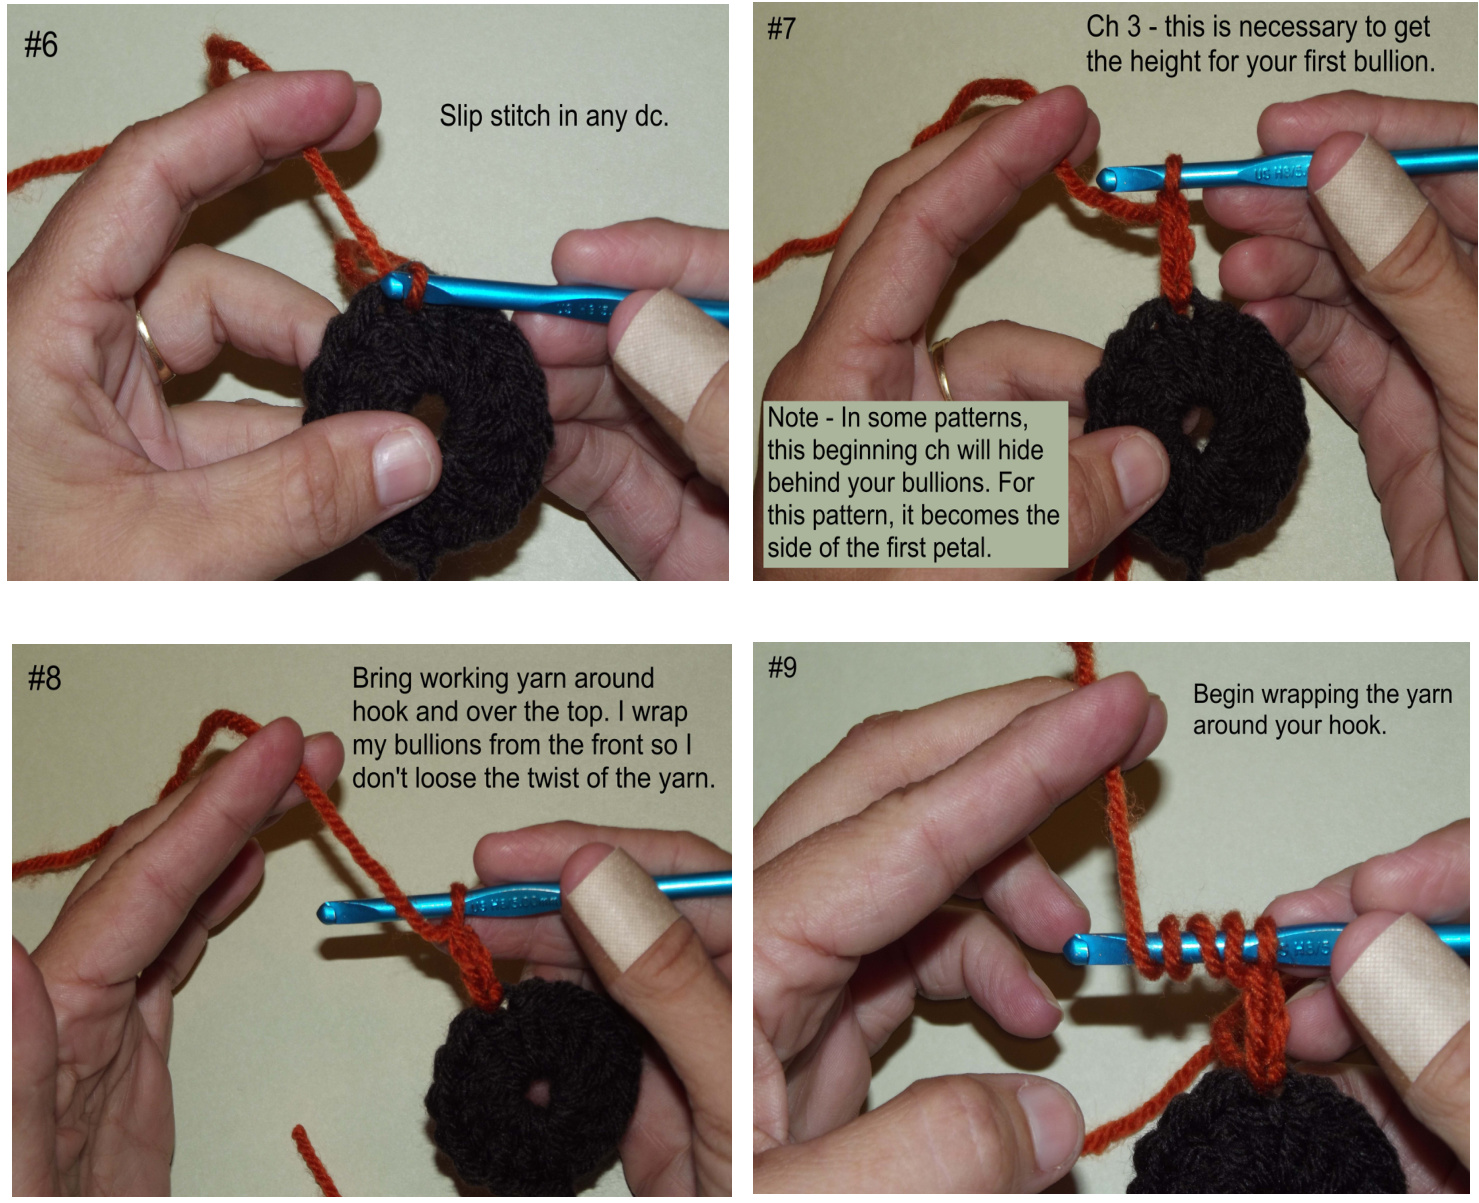
Photo Instructions Rnd 1:
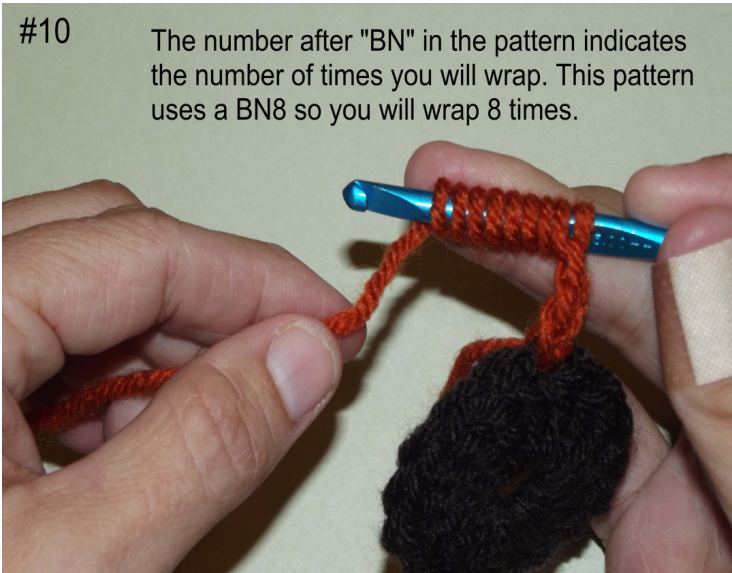
You will notice in Photo # 10 that my finger rests along the back side of the wraps. Once all the wraps are on the hook, I rotate my finger toward me just slightly. This will loosen the wraps on the hook and thus making the next few steps easier.

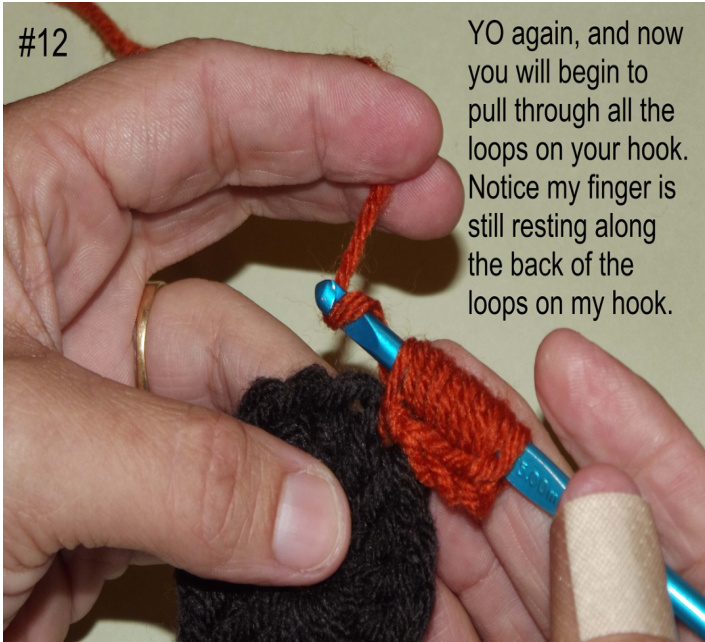
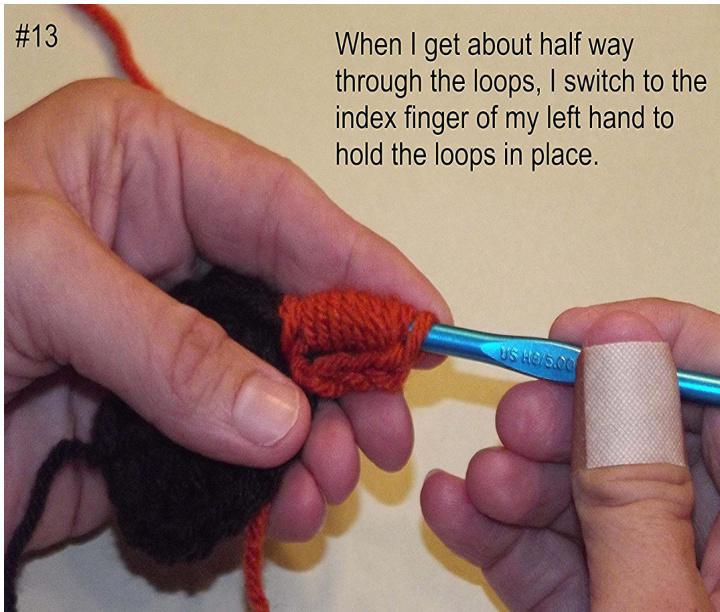
Keeping steady pressure on the back of the loops with your finger pushes them forward and makes some wiggle room thus, making it easier to pull the hook through.

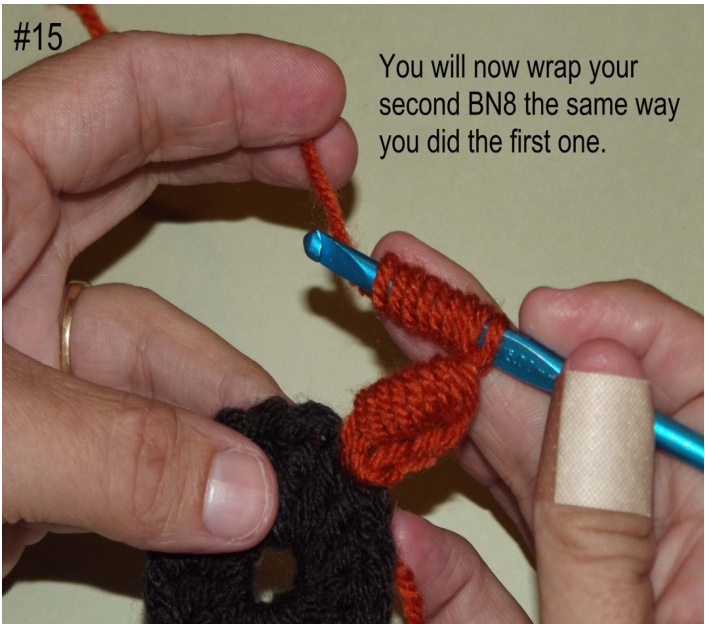
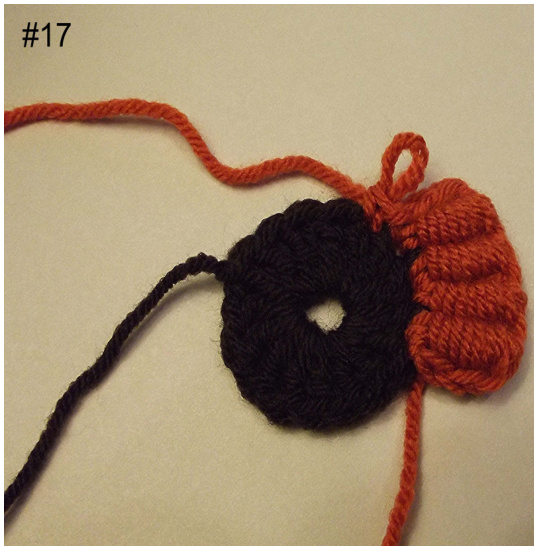
Now you are ready to finish this petal by working a third BN8 in the same st as the second BN8, a fourth BN8 in the next st, ch 2 and sl st in same st as fourth BN8. Sc in next dc. Be sure to pull enough yarn through your bullion so it stands straight and tall. When you YO to secure the bullion, don't pull to tightly or it will gather the loops of your bullion together and pull them down. You want them to look like little rings stacked on top of each other.


Written Instructions Rnd 2: Join color C with a sc in any sc of Rnd 1, \*ch 6, working behind next petal,\*\* sc in next sc\* repeat from \* to \* 3 more times ending at \*\* on final repeat, sl st in beginning sc. (4 ch sps)
Photo Instructions Rnd 2:
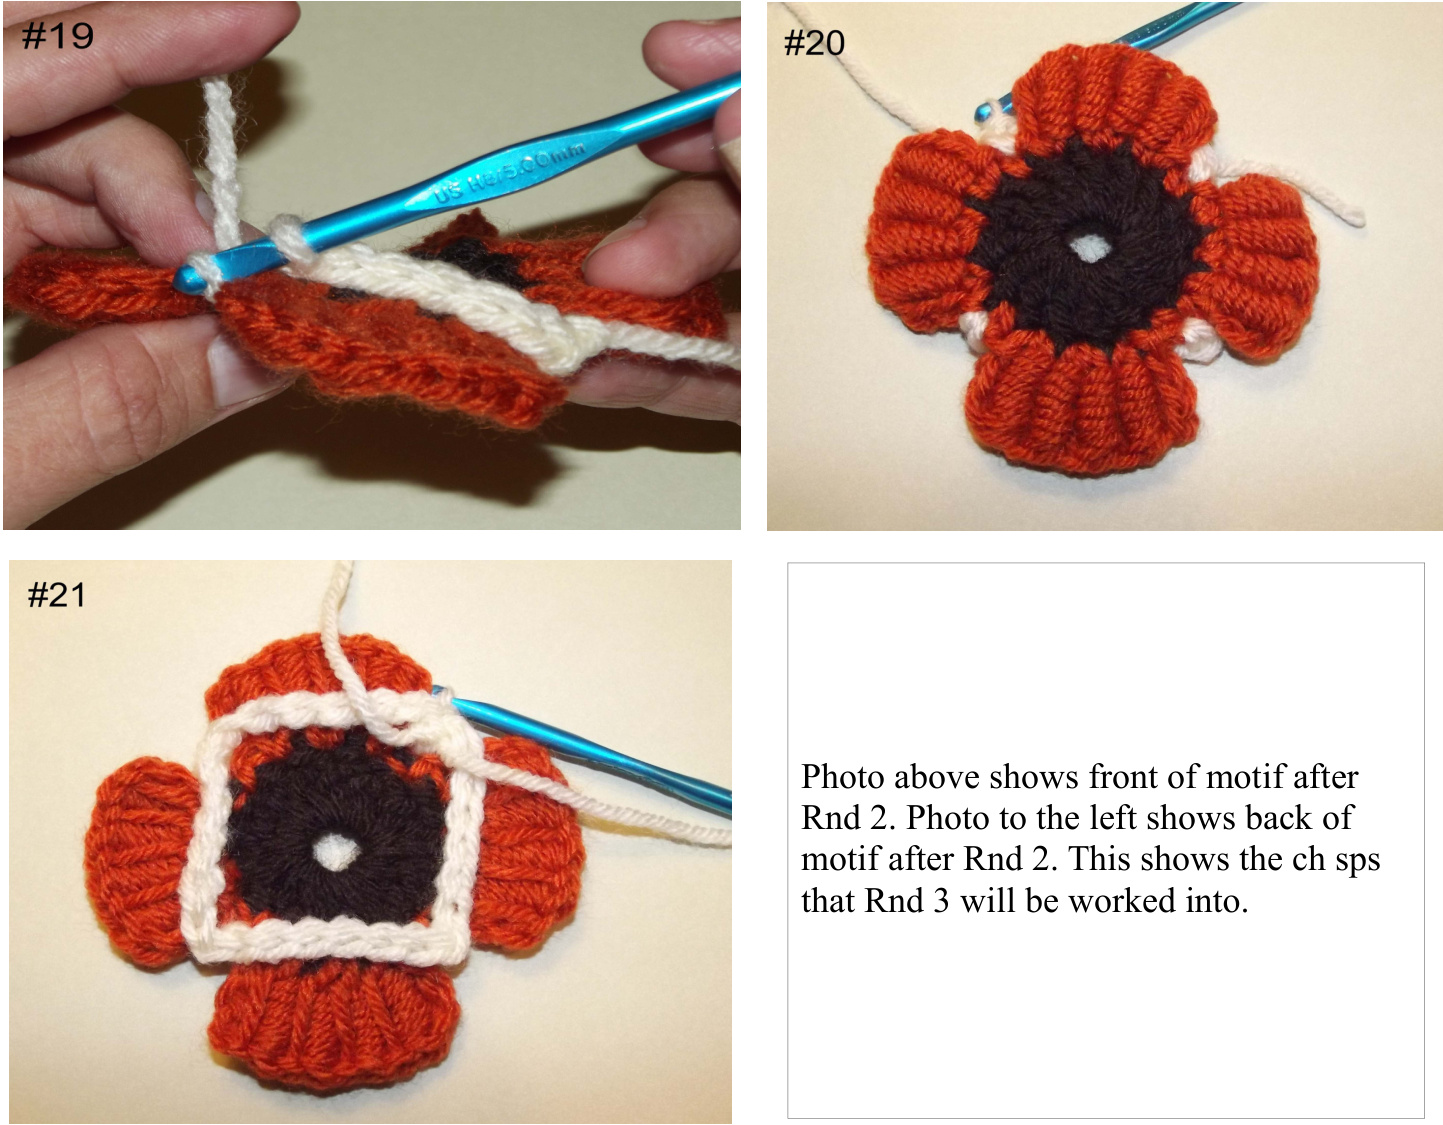
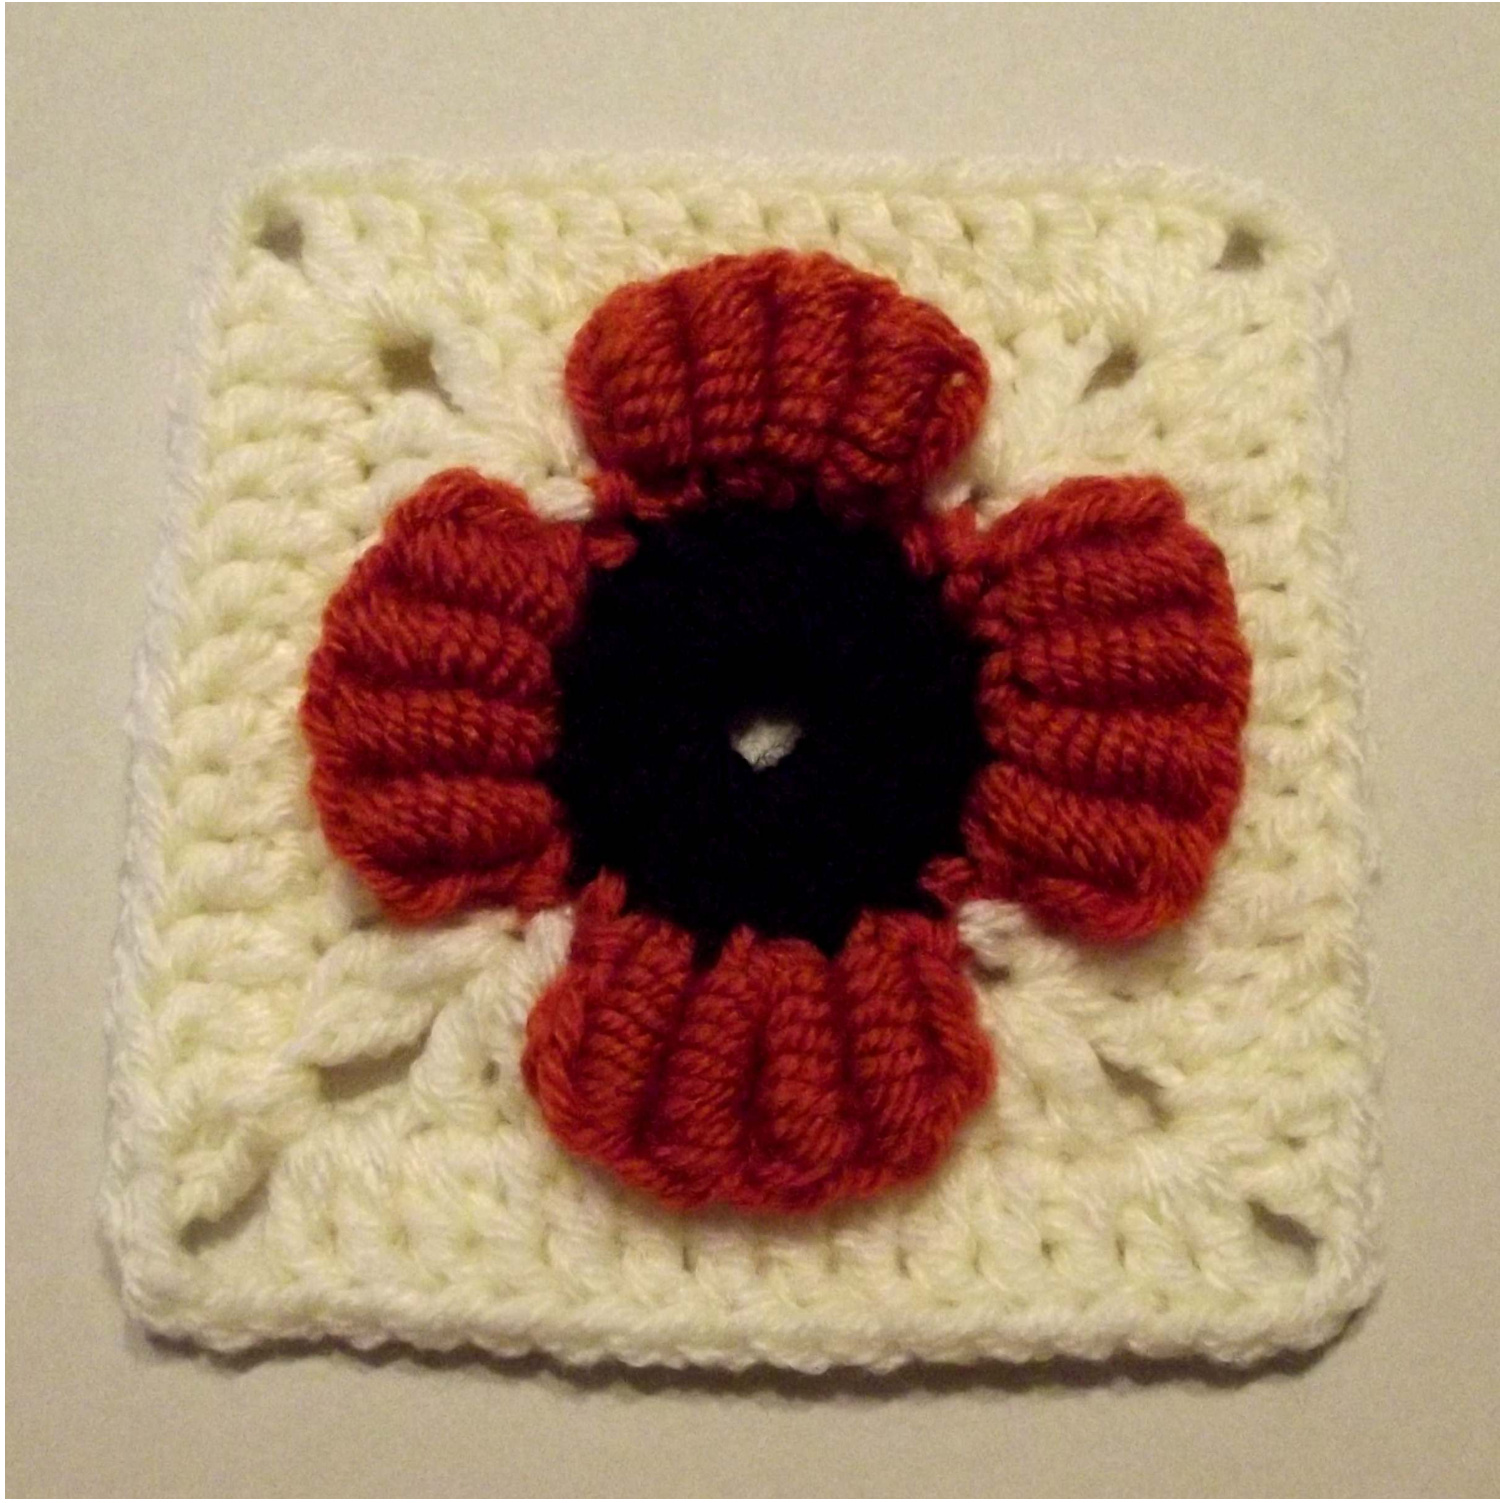
Written Instructions Rnd 3: Ch 5 (as dc, ch 2), 2 dc in same st, \*6 dc in next ch sp,\*\* corner as (2 dc, ch 2, 2 dc) in next sc\* repeat from \* to \* 3 more times ending at \*\* on final repeat, dc in same st as beginning ch 5, sl st in 3rd ch of beginning ch 5. (10 dc along each side, corners as ch 2) Written Instructions Rnd 4: Sl st into next ch 2 sp, ch 5 (as dc, ch 2) 2 dc in same sp, \*dc in next 8 dc,\*\* corner as (2 dc, ch 2, 2 dc) in next ch 2 sp\* repeat from \* to \* 3 more times ending at \*\* on final repeat, dc in same st as beginning ch 5, sl st in 3rd ch of beginning ch 5, fasten off. (14 dc along each side, corners as ch 2) Congratulations! You have now completed your Bullion Block!
@ Copyright September, 2011 by Donna Kay Lacey, all rights reserved. This pattern may not be reproduced -- mechanically, electronically, or by any other means, including photocopying -- without the written permission of Donna Kay Lacey. Projects made from this pattern may be gifted, swapped or sold. If you use this pattern to sell items on the internet, kindly credit Donna Kay Lacey as the designer.


