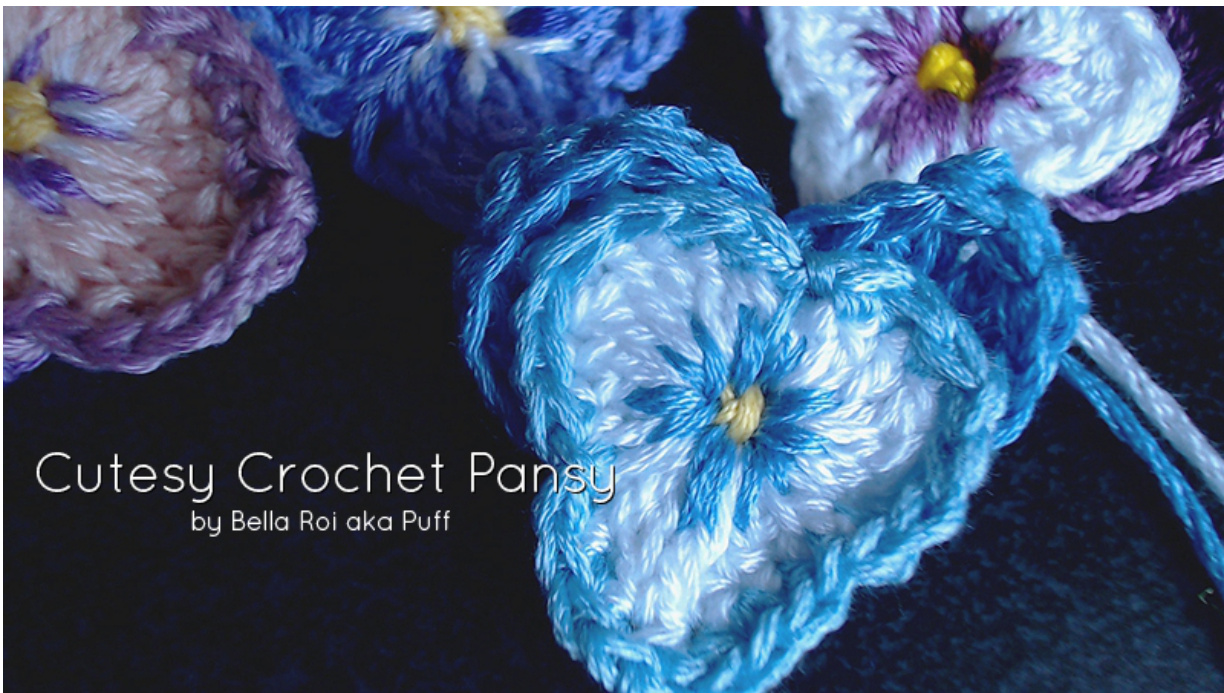
Cutesy Crochet Pansies (assembly required) by Bella Roi - http://www.ravelry.com/people/Puffington Do not sell pattern, do not redistribute without credit
Abbreviations in US:
ch - Chain ss - Slip Stitch sc - Single Crochet hdc - Half Double Crochet dc - Double Crochet tr - Treble dtr - double treble Tools required: Crochet hook size 2.5mm (you can probably go smaller) Needle Scissors Embroiderythread --l purchased 100 skeins of randomly selected colours and got pretty lucky on Amazon. Each embroidery thread is about 8 metres long and you can get about three centre petals or four back petals out of one skein. Select three complimentary colours that go from light, medium to dark.
Centre Petals:
Using the lightest colour, for the very first (left side) petal, create a small magic circle (and ch one) then sc, hdc, 2 dc, 2 tr, 2 dc, hdc, ss all into the circle. If needed, add a stitch marker to the beginning of the first petal.

Carry on in the same magic circle with 2 dc, 3 tr, 2 dc and ss for the bottom centre petal.
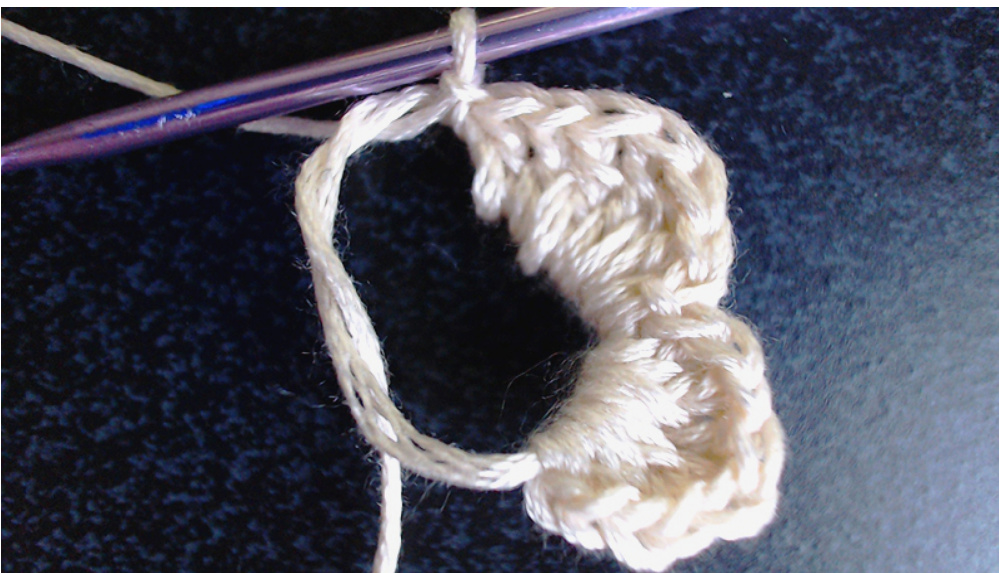
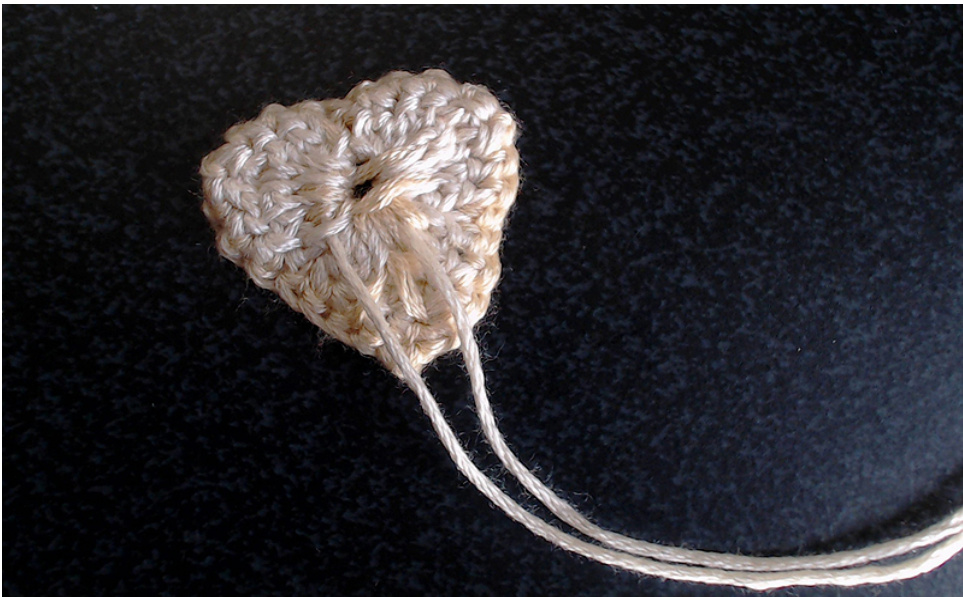
For the third (right side) petal, you're basically doing what you did with the first: hdc, 2 dc, 2 tr, 2 dc, hdc, ss, then bind off and pull your magic circle partially closed. Cut the yarn leaving enough of a tail to sew it onto whatever you choose (wreath, tea cosy, etc.) At this point you'll have a pretty big hole in the centre, so pull it a little tighter, but leave some space as you'll later fill it in.
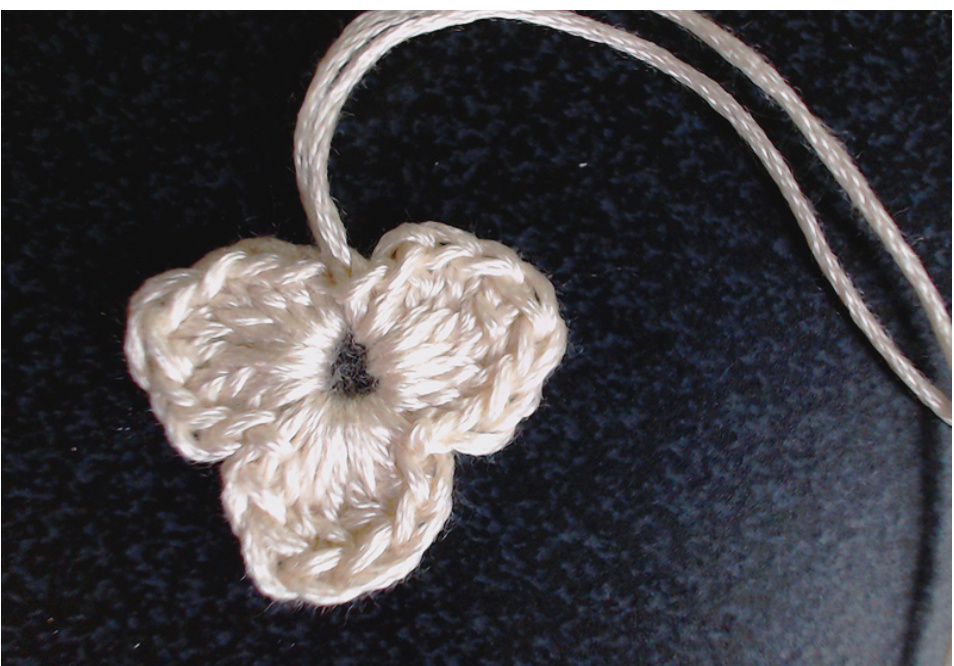
Edging:
Start by connecting the secondary (medium) colour to anywhere in the outside chains of the main three petals. I like to start at the top of the second tr in the second petal (the one pointing down). Leave another tail of about 3 inches as this will be used to decorate the centre bit of the flower. Sc along the top chains of the three petals to create the edging. When you get to the top part of the flower where you first started the three petals, instead of finding a chain to sc into, sc into the centre hole of the flower then continue to sc into the top chains until you get to the beginning of the edge. Bind off, leaving another tail of about 2 to 3 inches.
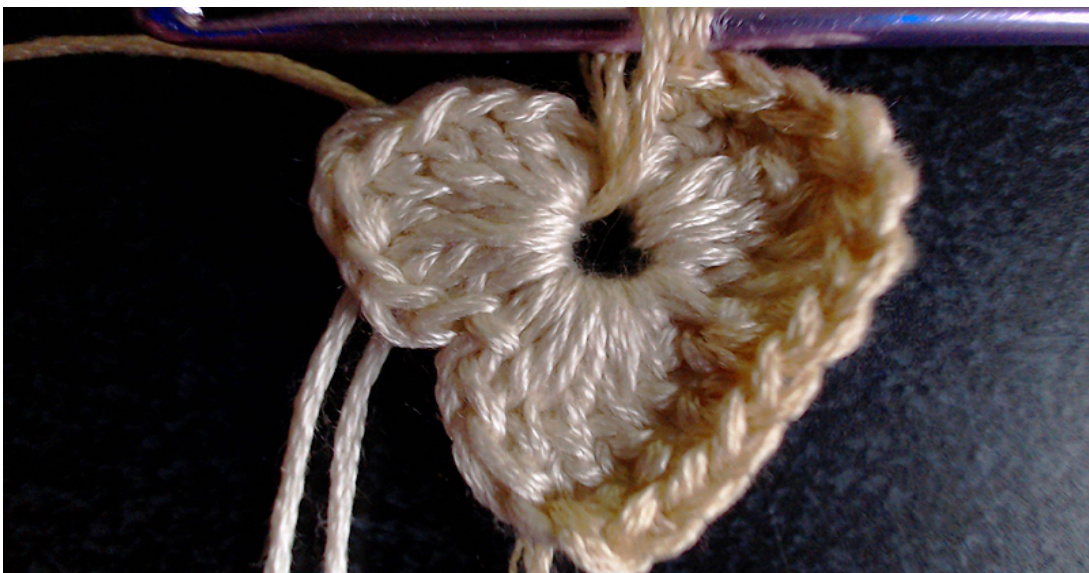
Back petals:
Using the third (dark) colour, create a small magic circle (and ch one) then hdc, 2 dc, 2 tr, 3 dtr, 2 tr, 2 dc, hdc in the circle. Pull circle closed and bind off leaving a tail of 3-4 inches. Do this twice (you need two petals in total) and, depending on how much detailing you want to/can do in the centre of the flower, either leave another long tail or you know, don't. But you'll still need enough of a tail to sew the second back petal on.
Assembly:
flower so that I can come out the centre hole from the back. What we're trying to accomplish here is to get a few short 'lines' that go around in a circle. So start by going through the front with your needle into some of the dc or tr you created and around through the back of the hole again and work yourway goingclockwise.
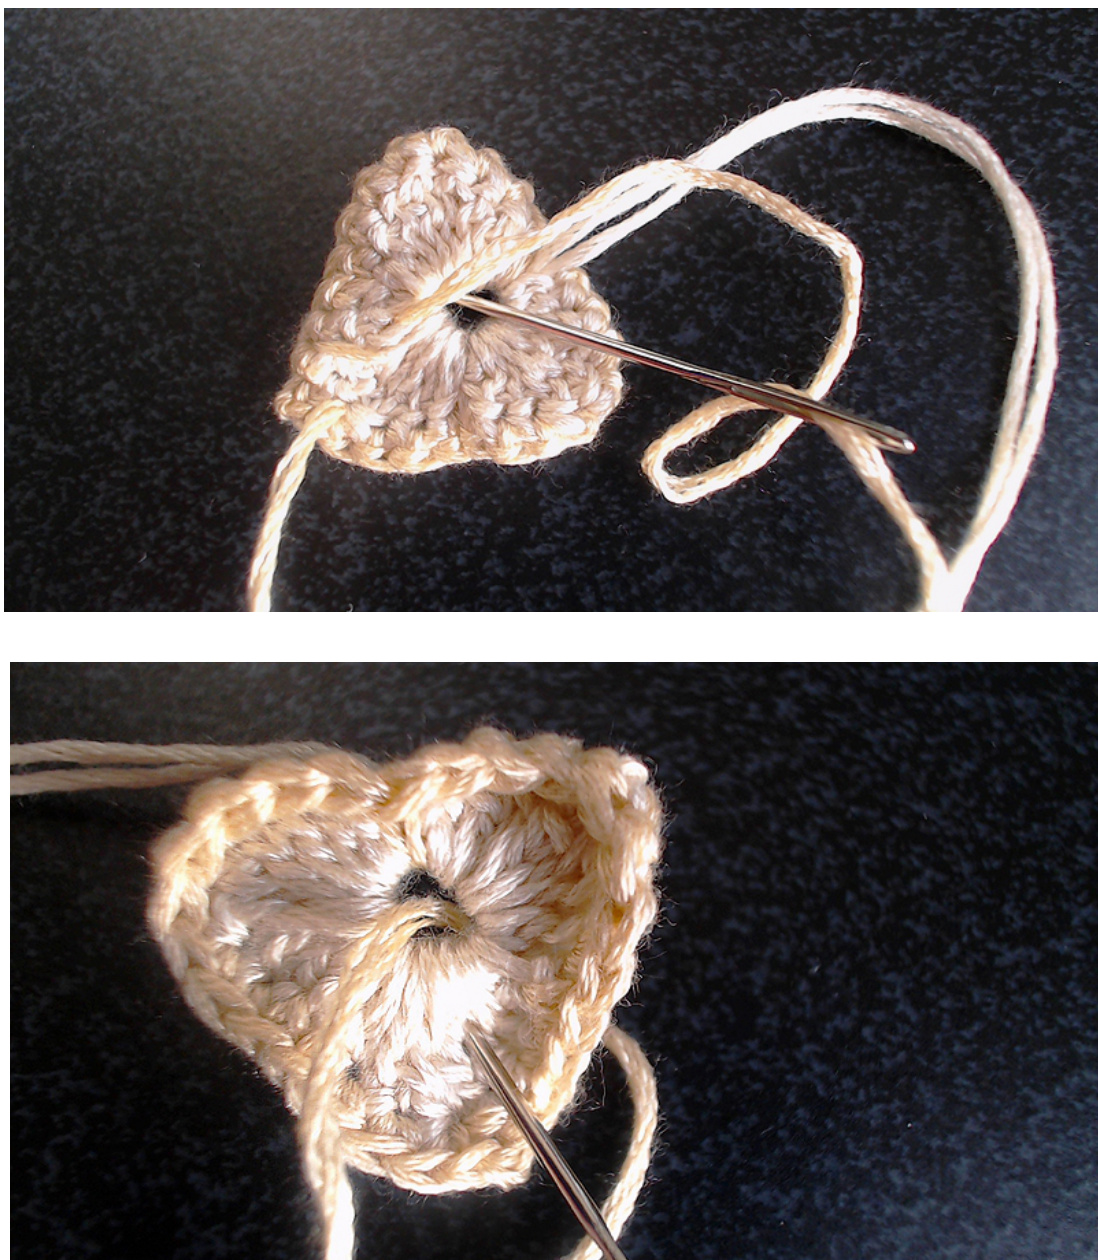
When you get to about the top left, instead of going through the back of the centre hole, move your way opposite the last little line so you get the strand to cover the hole a bit as though to create a lattice. This is for later. Carry on making those little lines until you run out of yarn. Repeat with the second tail end.
At this point I partially tuck away the first two tails of the main part, moving them towards the bottom to get them out of the way and so I can use them later to attach to things.
Attach the back petals.
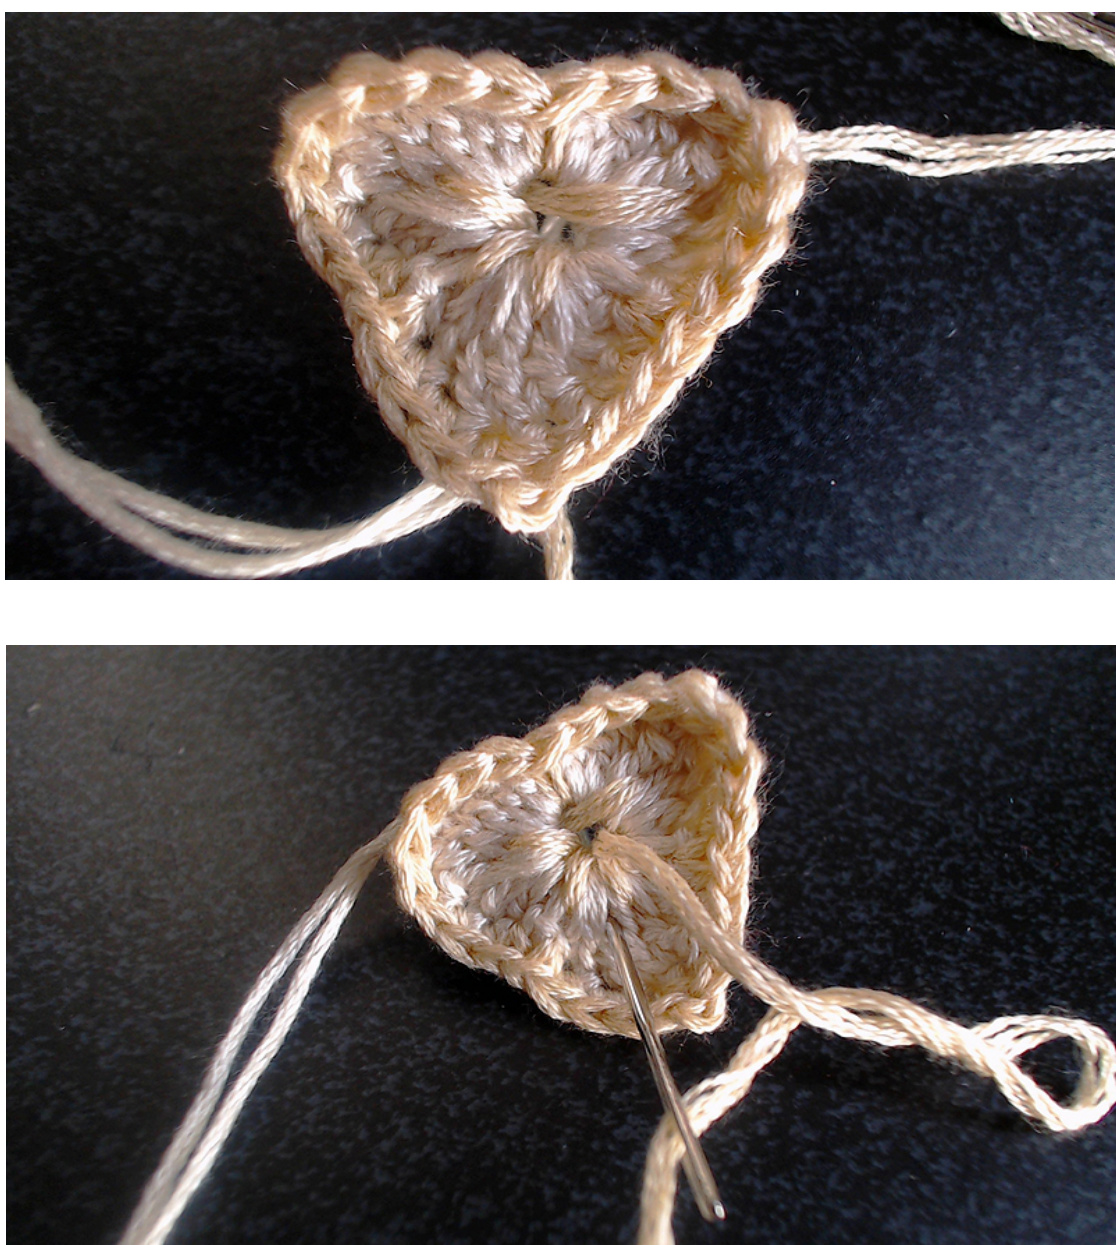
Make sure you have the back petals facing correctly--the smoother/right side is the side we want to look at when the flower is done. Position a back petal against the back of the top petal of the centre petals and using the longer tail end of the back petal, start doing a similar process as with the tail of the edging, but this time we're sewing on the back petal at the same time. It doesn't really matter where your stitches go so much, as long as the line details look nice around the centre of the flower. --As a side note, don't attach the back petals too far apart from each other, instead have them overlap slightly or they'll just look like Mickey Mouse ears.
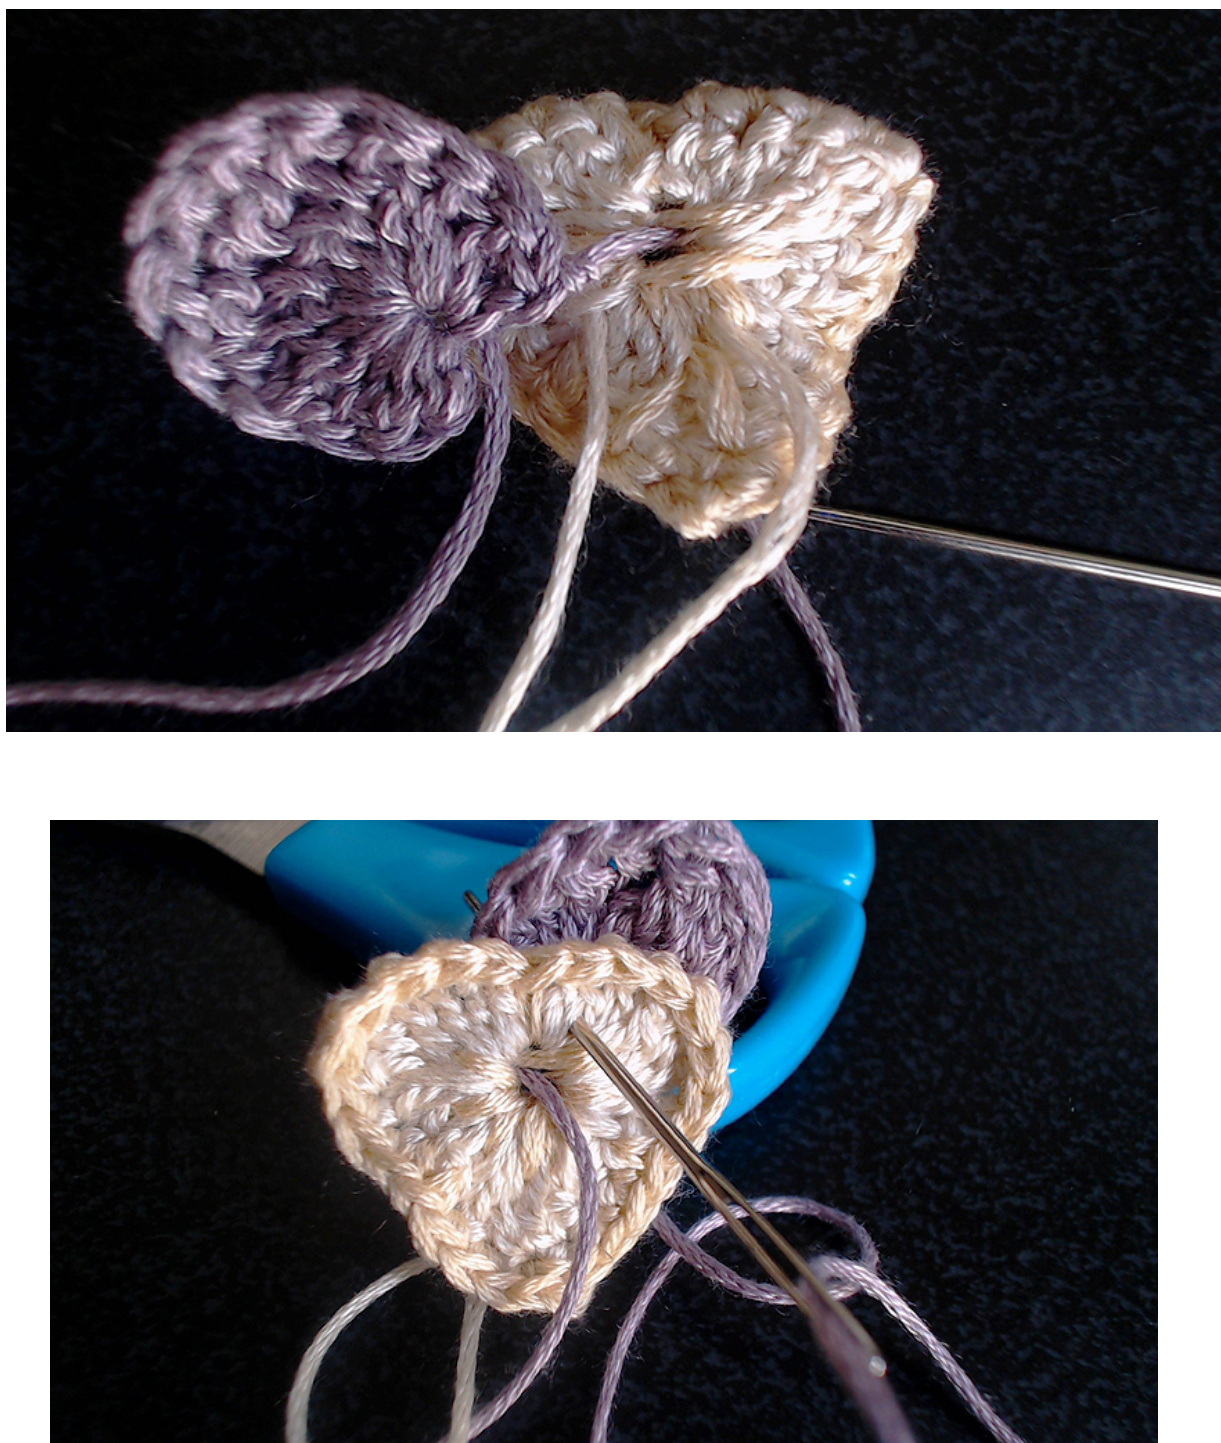

Repeat the process with the second back petal, although you'll probably find that this one's different in that it's a bit harder to attach. Just wing it. Seriously that's what I do. If you have to use some of the back of the main petals to attach it then do that, it doesn't really matter, as long as the second back petal is attached it's all good. Make sure it's secured then cut off the remaining bit (if any) of the tail end. Now you should have two more tail ends of the back petals remaining. You can either tuck them into the back, secure and cut or you can add more detailing around the centre. If your centre is still looking a bit too holey, then I suggest adding more. Feel free to cheat and manipulate strands so they sit on top of the hole like a lattice. Whatever you do, you basically want it to look like an asterisk.
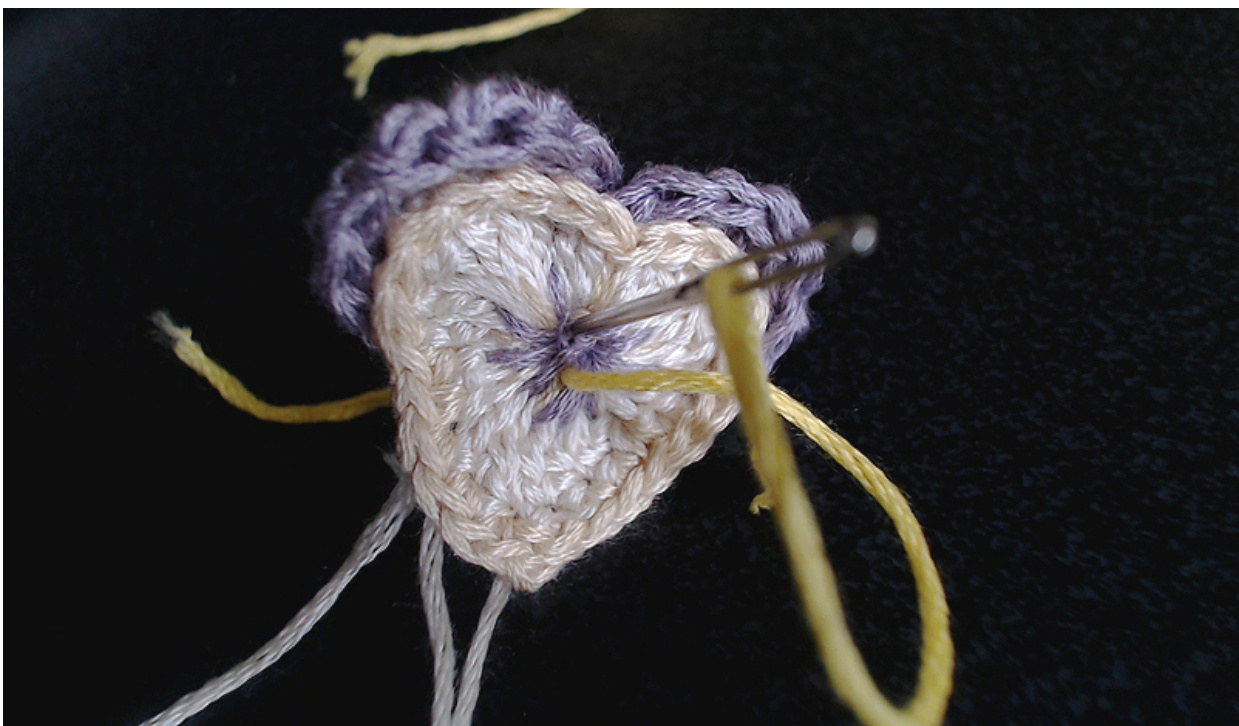
Finally, the stamen:
With a short piece of yellow thread (around 3-4 inches, depending on the side of your needle), go through the back of the hole that should hopefully be covered enough by now and make a little stamen by repeating a similar process of going back and forth through the hole about three to four times. I usually tie a little knot at the back with the two strands of yellow and cut it off there. I don't really care how messy the back looks since the backside will never see the light of day anyway once they're on the tea cosy/wreath/whatever you plan on using them for.
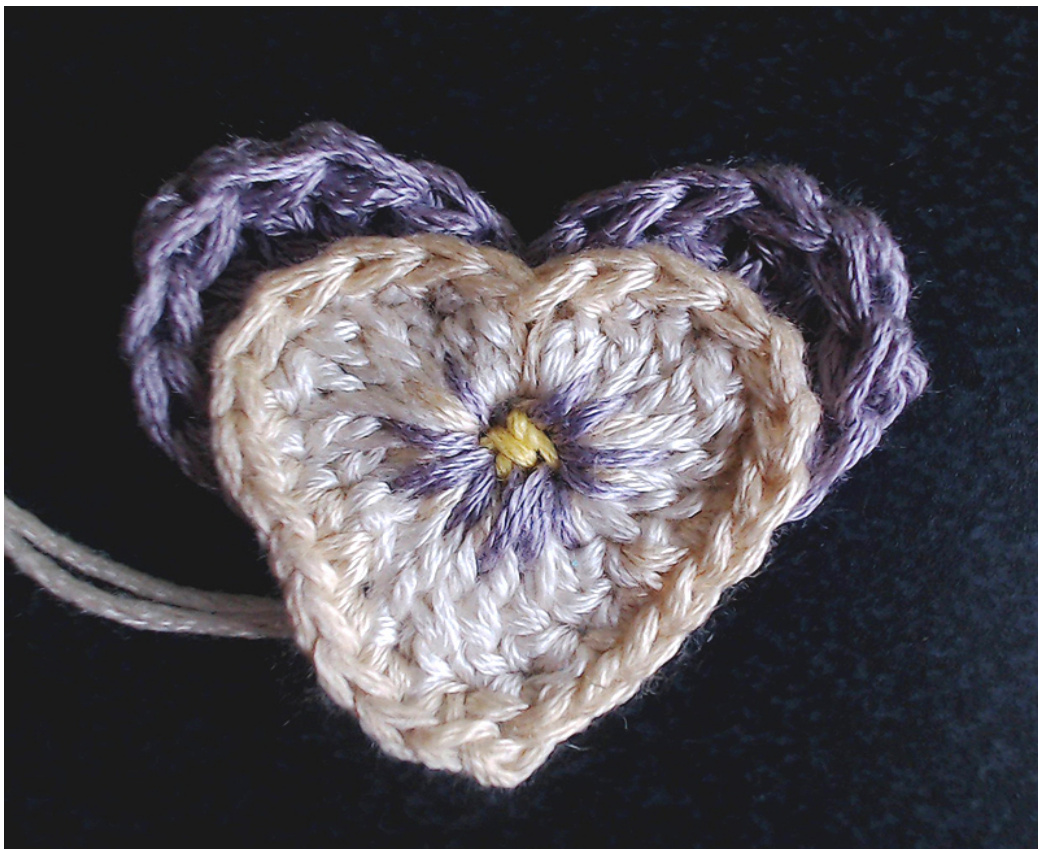
And that's it. It looks tedious and a little fiddly, but it will get easier the more you make. If you need any help, feel free to drop me a message on tumblr (bellaroi.tumblr.com) or ravelry (http://www.ravelry.com/people/Puffington).
Pattern Copyright @ 2015-current Bella Roi aka Puff. Do not sell. Do not redistribute without credit.


