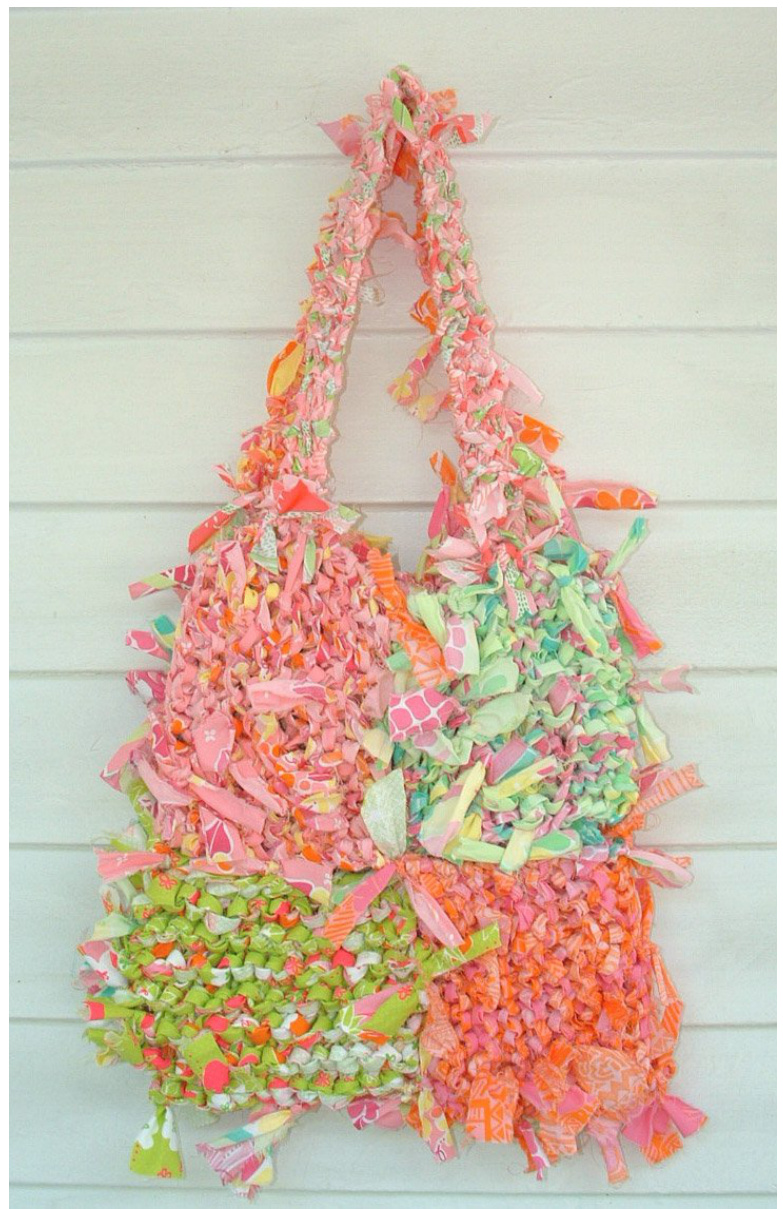
Fabric Rag Bag PATCHWORK Purse CROCHET PATTERN
Featuring...Lily Pulitzer Signature Fabrics
The Knitty Details..
$\circledcirc$ Size P crochet hook $\circledcirc$ FABRIC AND FABRIC STRIP WIDTH: about 4 yards total of fabric in desired color palette or completely random, make fabric strips approx. 1-1.25" wide for a size P crochet hook.- A rule of thumb that I go by (only by making so many of these rag bag purses) is that the width of the fabric strip should be about the width of the knitting needle OR the crochet hook!! \*\*\*Please note that to make this purse I used 9 different lilly fabrics, one different fabric for each square.\*\*\* $\circledcirc$ GAUGE: 5 ${\mathfrak{s c}}=3^{\circ}$ , 9 rows $\mathtt{S C}=6^{\circ,}$ $\circledcirc$ FINISHED SIZE OF LARGE TOTE: Base of purse is approx. 16" wide x 11" deep
CROCHET ON!
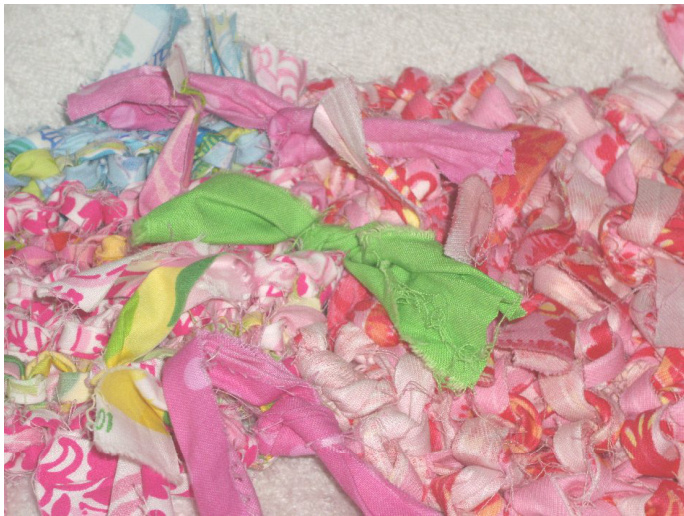
1. Prepare fabric for crocheting. Follow the directions listed on the attached guide sheet (see page 5 in the hint and tip guide specifically)! The HINT and TIP GUIDE will tell you how to prepare the fabric, attach the handles and make the purse liner!!! For this purse, I RANDOMLY tied a variety of fabrics together-there is NO pattern to how I tied the strips together!
\*\* s you are orocheting, ke in mind that you wil be reating separate squares that will compile your purse! You actually have a lot of creative control with this purse. If you want a LARGER purse, make 2 OR 4 additional squares in the manner that the pattern calls for.\*\*\*\*
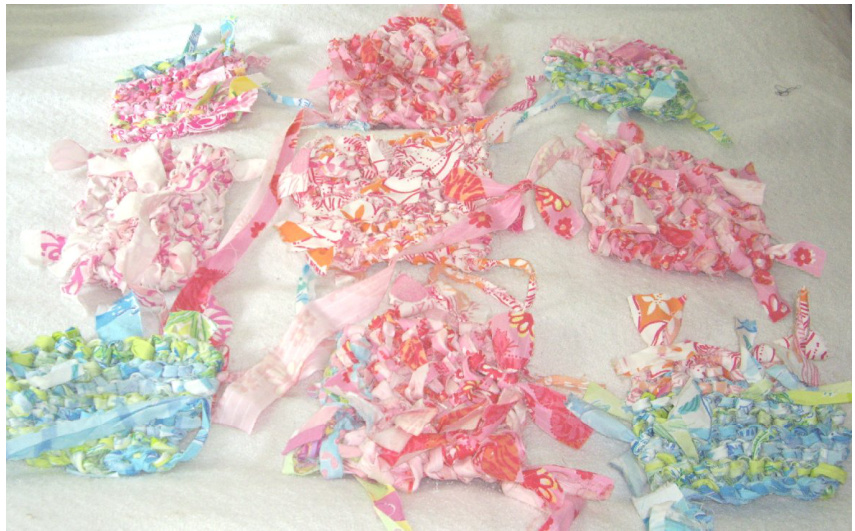
2. You will make 8 "patchwork" style squares, each approximately 6"x6", following these instructions: Abbreviations: $\pmb{\mathrm{\{se=}}}$ singlecrochet ch $=$ chain stitch Hook Size: SizePcrochethookGauge: ${\mathfrak{s s c}}=3^{\circ}$ 9 rows $\begin{array}{r}{\pmb{\mathrm{sc}}=\pmb{\mathrm{6}}^{\circ}\colon}\end{array}$ NOTE: Gauge can be highly variable depending on your tension and the fabric that is used. Ch 11 stitches (foundation chain). Starting in $\pmb{2}^{\mathsf{n d}}$ ch, sc across (10 sc). Ch 1 and turn. Sc across crocheting into the back loop of each sc in the row below (10 sc). Continue to stitch rows of 10 sc until you have a square...approximately 8 or 9 rows. Fasten off. 3. After you have made 8 squares (or the amount that you have increased to), lay the squares out in a 4x4 grid flat. I chose to alternate my squares asfollows: Row one: stitches run horizontal, stitches run vertical, stitches run horizontal Row two: vertical, horizontal, vertical ETC..ETC..
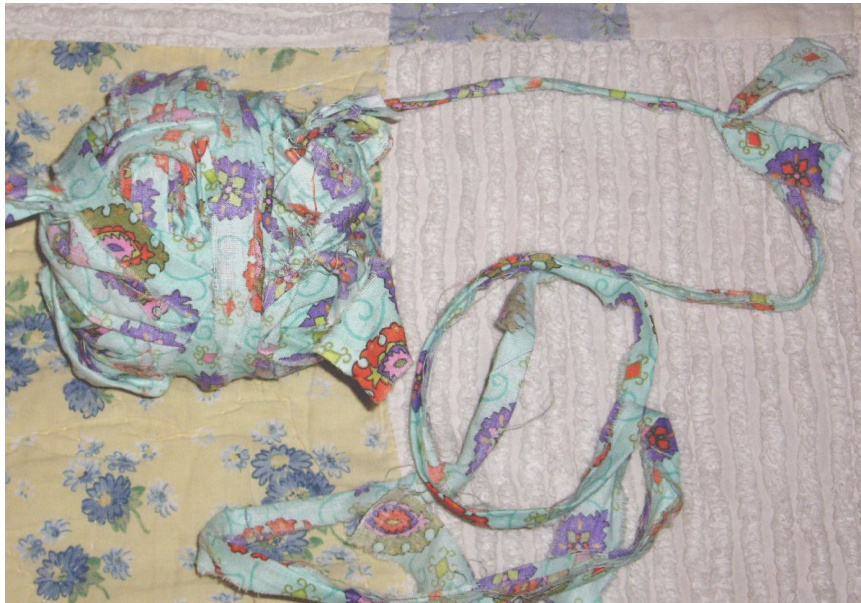
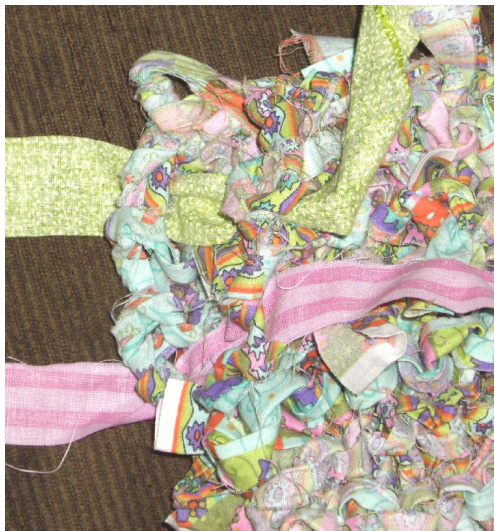
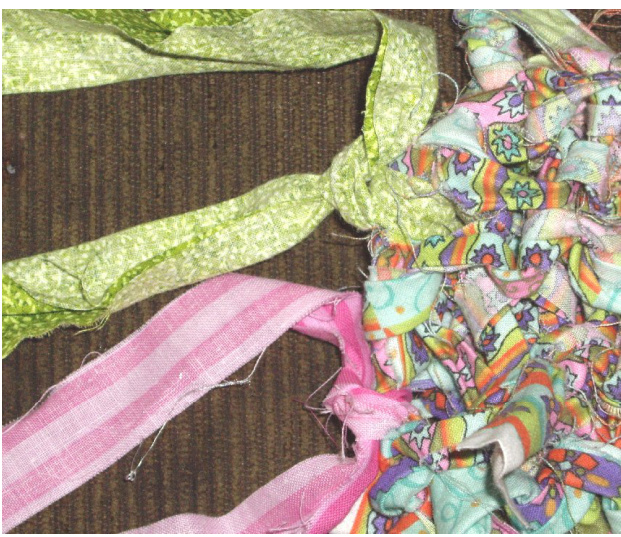
4. Now you are ready to finish the purse. With some of the left over fabric you have cut up MANY, 10" strips of fabric. It is time for the fun part...tying up the seams of the purse. To affix all of these crocheted squares together, you are simply going to tie the squares together using knots! Yes, it really is that easy 5. With the squares flat on the ground, lay the strips out alongside the purse approximately 2 inches apart (in the picture is a knit version of a square, but it is Identical to the crochet square).

6. Using the strips tie the two ends of the squares together-the top, sides AND the bottom of the purse (the 9 by 9 square grid) will remain open for now. Another way to think about it is that you are taking the 9 individual patchwork squares and are going to be tying them together to create one largesquare...
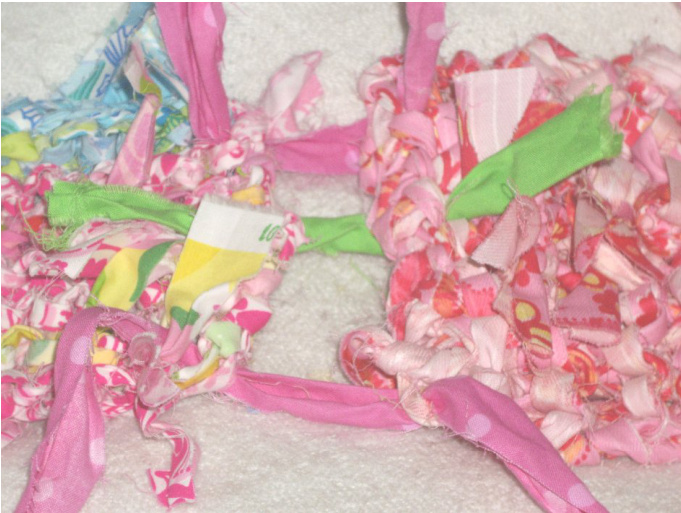
7. I found it easiest to start in the upper left corner square and work across back and forth. To tie EACH SQUARE together, I used FOUR fabric strips. Just slide the piece of fabric in one hole of each end of each square you are tying together
8. Now you are ready to fold the 2x8 grid in half and tie up the left seam and the right seam of the purse. Yes, that is correct...you are simply going to take your large square and fold it in half!!! 9.AGAIN, there is no sewing here...you will simply tie about every two inches the front and the back of the purse together using a fabric strip. I used 5 fabric strips to tie up EACH end of the purse. \*\*Ip\*.Leave the ties hanging out OR you can trim them. ersonal like them hanging out-it really adds to the texture and charm of the rag bag look! Since the purse is about 18 inches deep, space out the ties by about 2 inches. When you have finished this step, there should be an opening at the top!

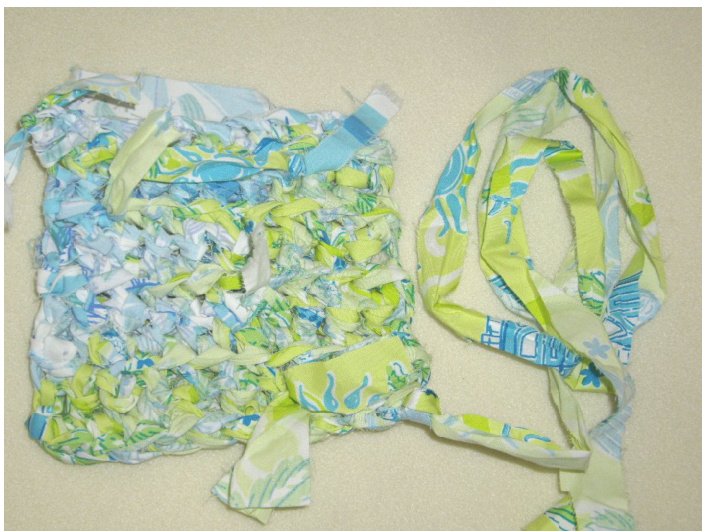
10. Crochet the purse straps as follows: Ch 5 stitches (foundation chain). Starting in $2^{n d}$ ch, sc across (4 sc). Ch 1 and turn. Sc across crocheting into the back loop of each sc in the row below (4 sc). Continue to stitch rows until you have a rectangle that measures approximately $\mathbf{30^{\circ}}$ in length (or approx. 40-45 rows). The total length of your strap will be completely dependent upon what you desire. I like to wear messenger style bags across my body. Therefore, I made a longer strap. Just crochet a strap as long as you need! Fasten off. Cut about 6 short fabric strips to use to attach the purse handle to the purse. I used three on each side and simply made the double knots again-the same method used for the sides of the purse. 11. Lay the purse down flat and then lay the purse handle along the top edge.\*You may want to use a ruler to measure the center of the purse $\star\star\star$ I then lay out the strips out to properly spread them out across the pursehandle. 12. If you want to make a simple broadcloth liner, follow my SIMPLE steps on that also in the hint and tip guide! 13.Congratulations!!! You have now created your very own fabric rag bag large tote! This pattern is designed for you personal knitting enjoyment. This pattern may NOT be made for sale without written permission from Heather Lynch Lowe/Heather Knitz. All designs are original to me and not intended for copy or reproduction. If you are interested, I would be delighted to speak with you about any retail or consignment options that may be available. I'd be happy to accommodate you.


