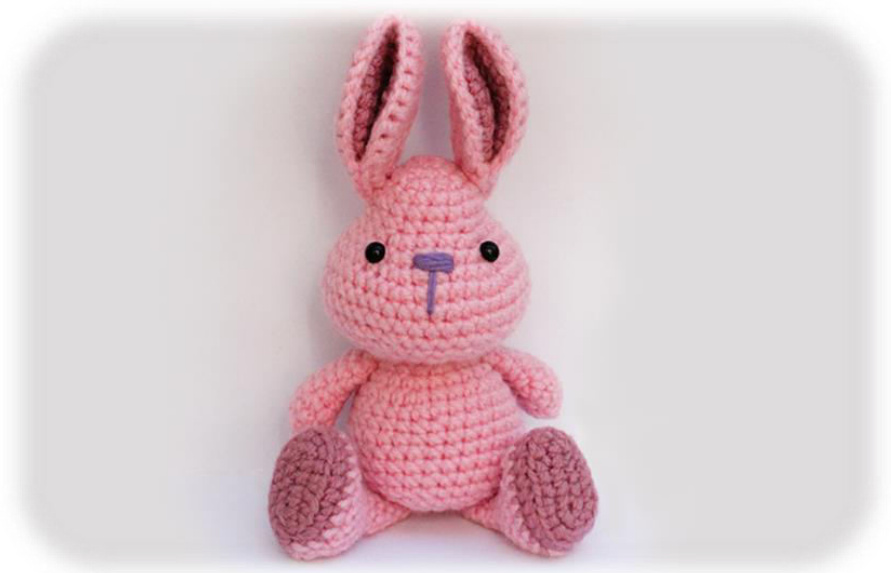
BUNNY
Things you need to know about this project
Work in continuous spiral, do not join, you will be told when you need to close the rounds with a sl st. Crochet tight to prevent gaps between the stitches that wil not allow the stuffing to show through the fabric. For this bunny project I used 3,0 mm crochet hook the bunny is about 24cm tall and 9.5cm wide. Use a stitch marker or piece of yarn to mark the end or the beginning of a round, move the marker at the end of every round. Tip! from this pattern you can make smaller or larger bunny by using a bulkier or finer yarn. choose a smaller crochet hook at least one size smaller then suggested on the yarn label. by changing the bunny size make sure to adjust the size of the safety eyes, also you can use for the eyes buttons, French knot or paint eyes. For support from me over email anatillea@gmail.com http://anatillea.wix.com/anatillea
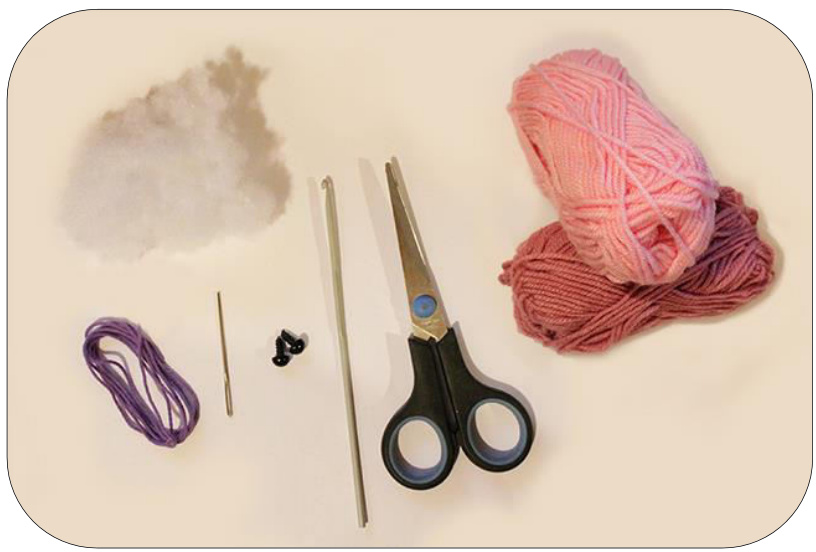
Supplies
yarn: Bonbon classic 100% Acrylic 100g, 200 mt Renk no: 98221 (Light Pink) Bonbon classic 100% Acrylic 100g, 200 mt Renk no: 98224 (Dark Pink) 3,0 mm crochet hook 2 black 8mm safety eyes toy you can use buttons, French knot or paint eyes Soft stuffing (poly fill, cotton wool etc.) Purple embroidery thread Yarn needle, scissors, stitch marker
Abbreviations
R 二 round SC single crochet sc2tog = single crochet two together (single crochet decrease) st = stitch bl = back loop only sl st = slip stitch . Ch = chain rep = repeat until end of round f/o = fasten off
Bunny | Copyright @ 2015 Anat Tzach
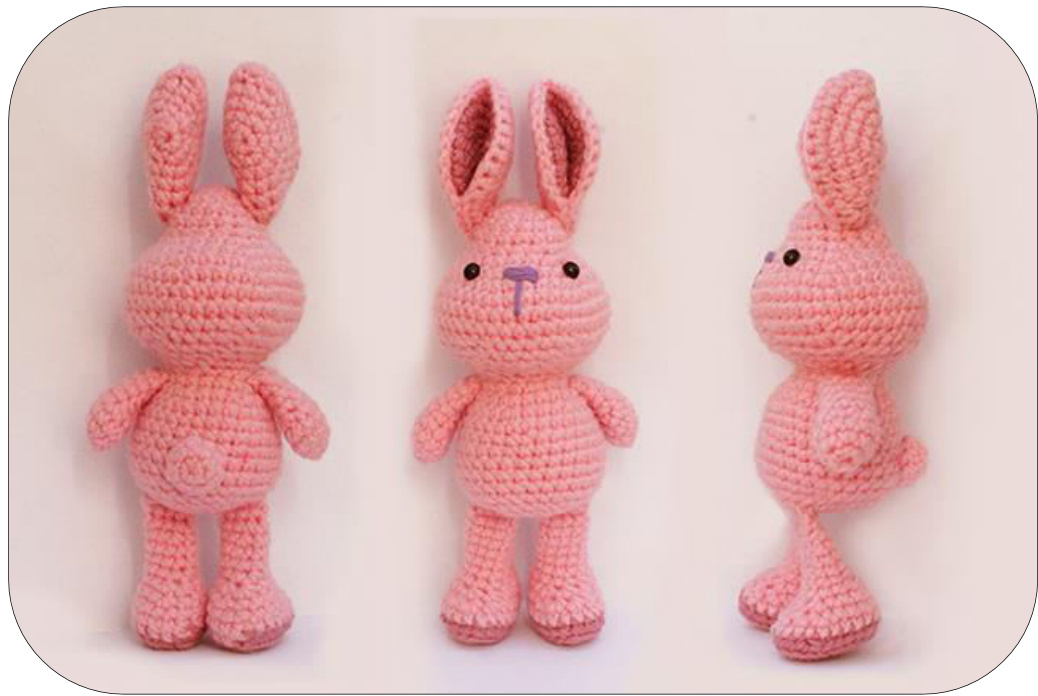
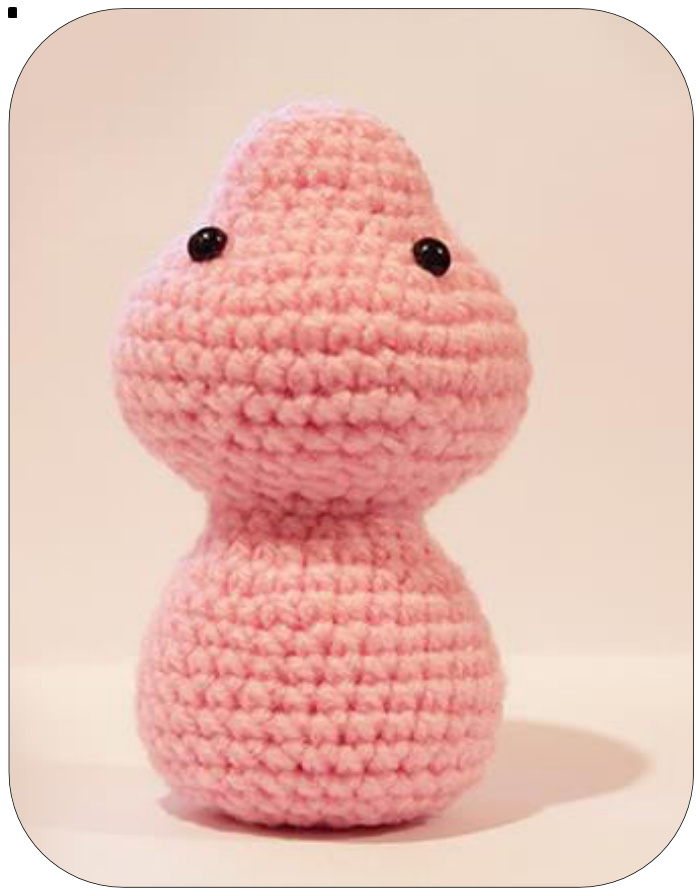
Head and Body with light pink yarn.
Head and body crochet from one piece, We start from the top of the head and finish at the bottom of the body. R1: magic circle with 6st (6) R2: 2sc in each st (12st) R3: 1sc then 2sc in next st rep 6 times (18st) R4-5-6: 1sc in each st for 3 rows (18st) R7: 1sc in next 2st then 2sc in next st rep 6 times (24st) R8: 1sc in next 3st then 2sc in next st rep 6 times (30st) R9: 1sc in next 4st then 2sc in next st rep 6 times (36st) R10: 1sc in next 5st then 2sc in next st rep 6 times (42st) R11-12: 1sc in each st for 2 rows (42st) Attach safety toy eyes round 8 and leaving 8 stitches (count 7 holes) between them. R13: 1sc in next 5st then sc2tog rep 6 times (36st) R14: 1sc in next 4st then sc2tog rep 6 times (30st) R15: 1sc in next 3st then sc2tog rep 6 times (24st) R16: 1sc in next 2st then sc2tog rep 6 times (18st) R17: 1sc in each st for 1 row (18st) R18: 1sc in next 4st then sc2tog rep 3 times (15st) R19: 1sc in next 2st then 2sc in next st rep 5 times (20st) R20: 1sc in next 4st then 2sc in next st rep 4 times (24st)
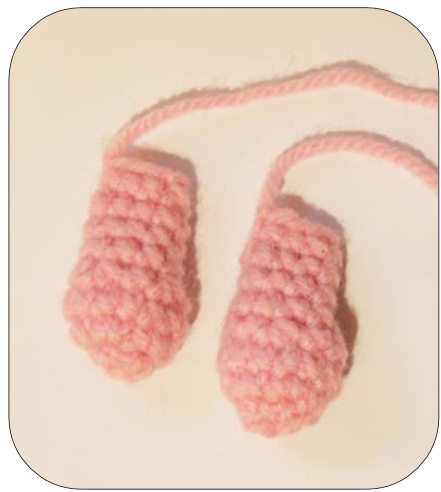
Stuff firmly and shape the head. R21: 1sc in next 3st then 2sc in next st rep 6 times (30st) R22-28: 1sc in each st for 7 rows (30st) R29: 1sc in next 3st then sc2tog rep 6 times (24st) R30: 1sc in next 2st then sc2tog rep 6 times (18st) Stuff firmly and shape the body, add more fiberfill into the neck area if needed. R31: 1sc in next st then sc2tog rep 6 times (12st) R32: 1sc in next st then sc2tog rep 4 times (8st) Before closing the hole, add a litle bit more fiberfillif needed and make sure that the bottom is flat so the bunny can sit . R33: sc2tog one time fasten off and use yarn tail to weave in and out of the remaining stitches, pull tight until the hole is completely closed, knot off and hide yarn tail inside the body. (see page 10 how to close a hole) 4 Legs make 2 start with dark pink yarn. \*The foot is an oval shape, we start with a chain. R1: Ch (chain) 6 then 2sc into the second chain from hook, then 1sc next 3st then 4sc in the last chain, Turn and work on the other side, 1sc in the next 3st then 2sc into the last chain (14st) Place the
Marker!
R2: 1sc in next st then 2sc next st rep 7 times (21st) R3: 1sc in each BL (Back loop only) st for 1 row (21st) Switch color with light pink yarn.

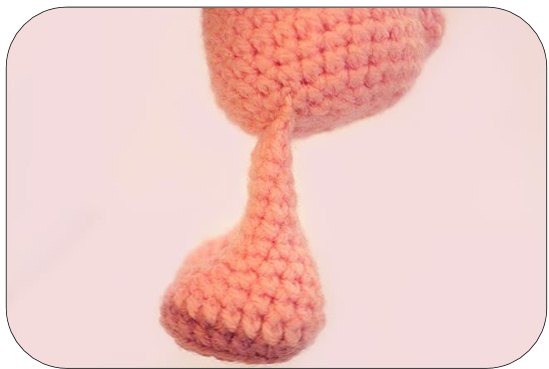
R14: Press the top of the leg together and 1sc through both sides of the leg across the top for one row. fasten off, leaving a long tail for sewing. ArWS make 2 with light pink yarn. R1: magic circle with 6st (6) R2: 2sc in each st (12st) R3: 1sc in each st (12st) R4: 1sc then sc2tog rep 4 times (8st) R5-6-7-8 : 1sc in each st for 4 rows (8st) Stuff lightly the hand and leave the top off the arm free of stuffing. sl st in the next st fasten off, leaving a long tail for sewing.
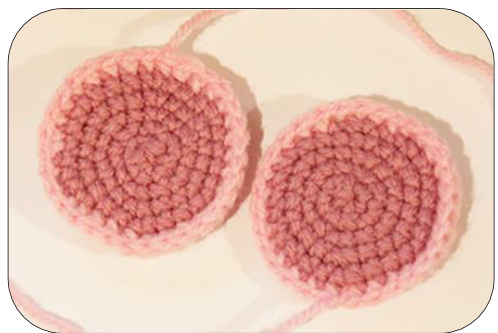
EarS make 2 with dark pink yarn and 2 with Light pink yarn. R1: magic circle with 6st (6) R2: 2sc in each st (12) R3: 1sc then 2sc in next st rep 6 times (18st) R4: 1sc in next 2st then 2sc in next st rep 6 times (24st) R5: 1sc in next 3st then 2sc in next st rep 6 times (30st) Fasten off and weave in the ends on the wrong side.
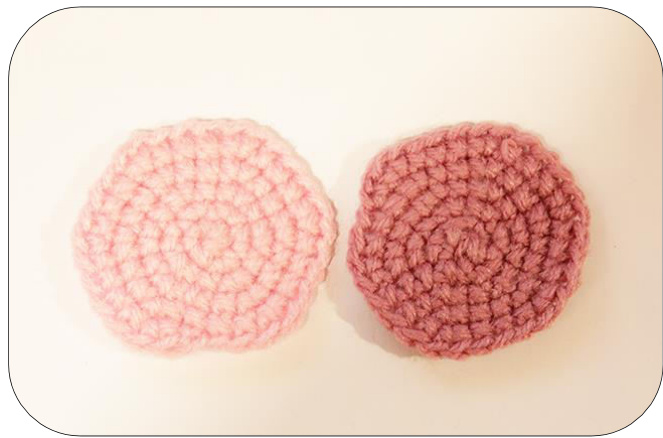
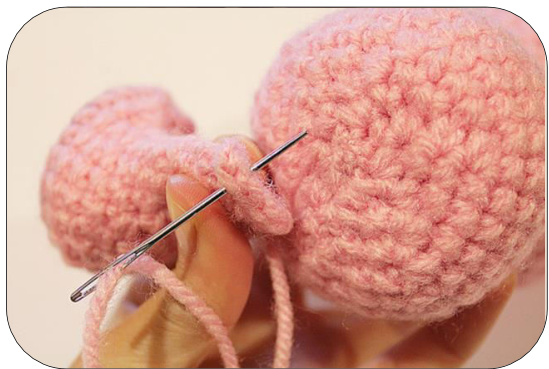
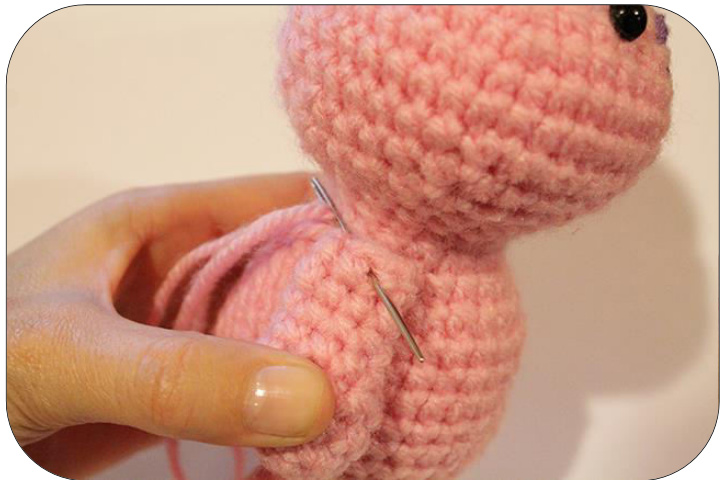
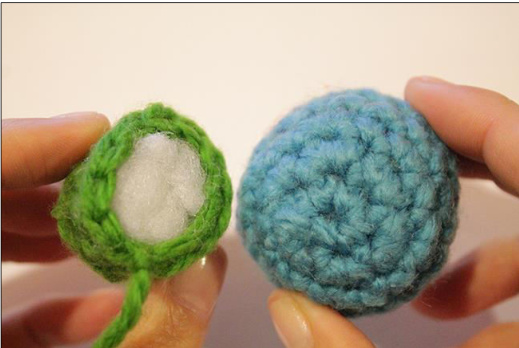
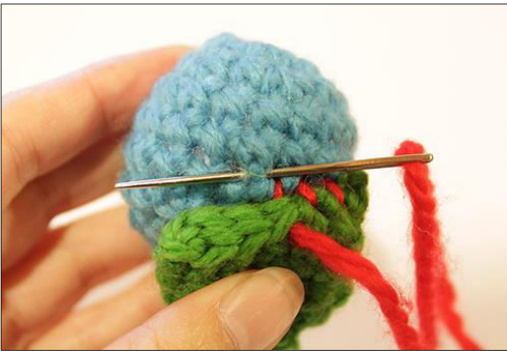
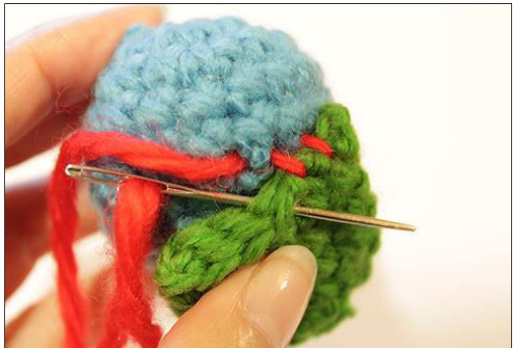
Crocheting the two pieces together Videotutorial
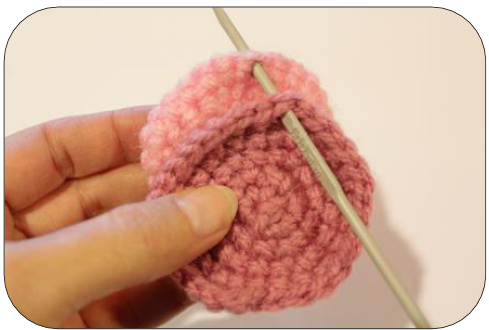

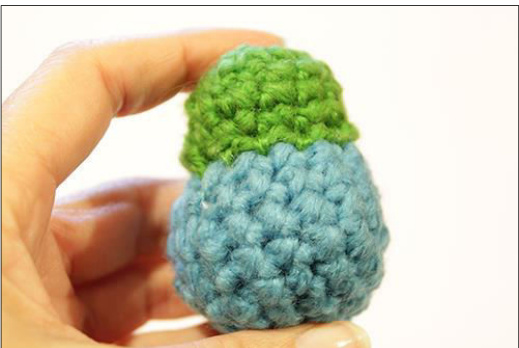
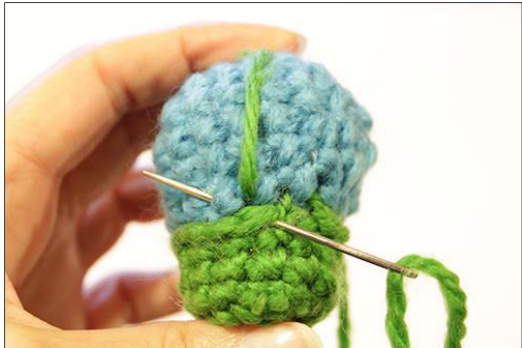
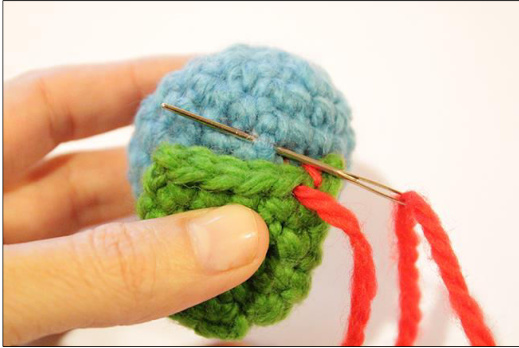
1. Face the 2 pieces to one another with the wrong side. 2. SC together one stitch of both pieces at a time, all the way around.
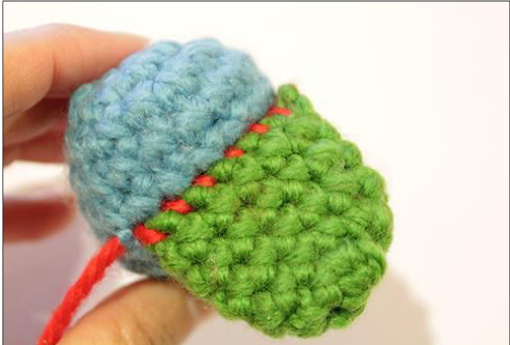
3.sl st in the next st fasten off, leaving a long tail for sewing.
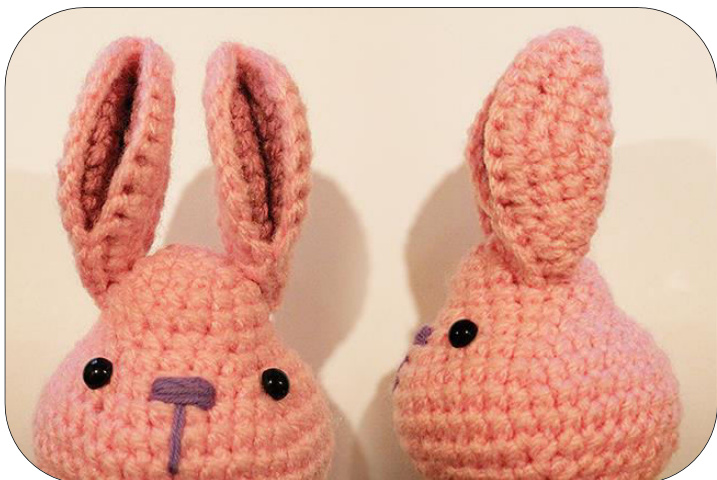
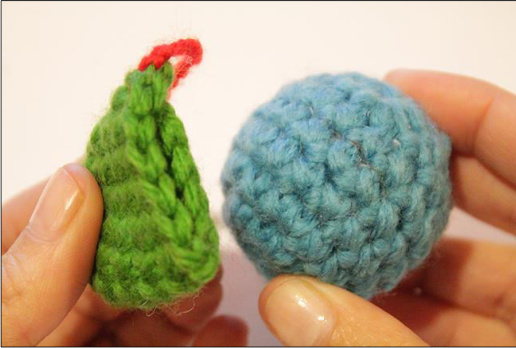
Fold the ears
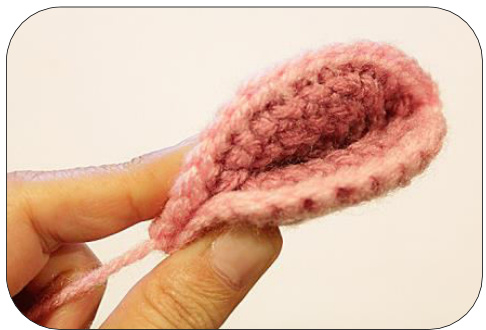
1. Fold the ear in half.
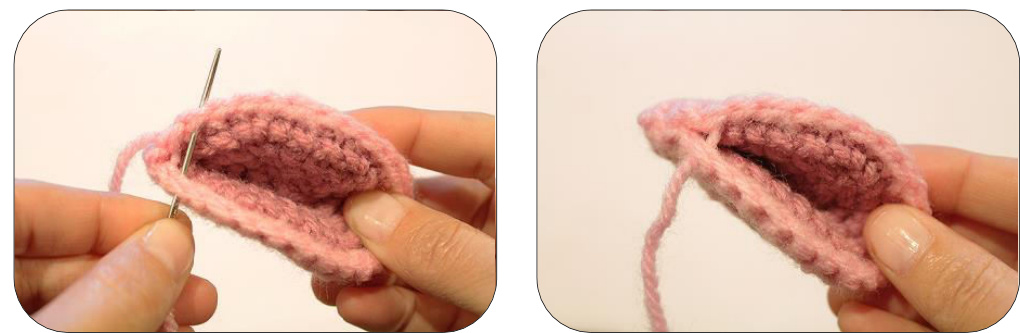
2. Sew 4 stitches together.
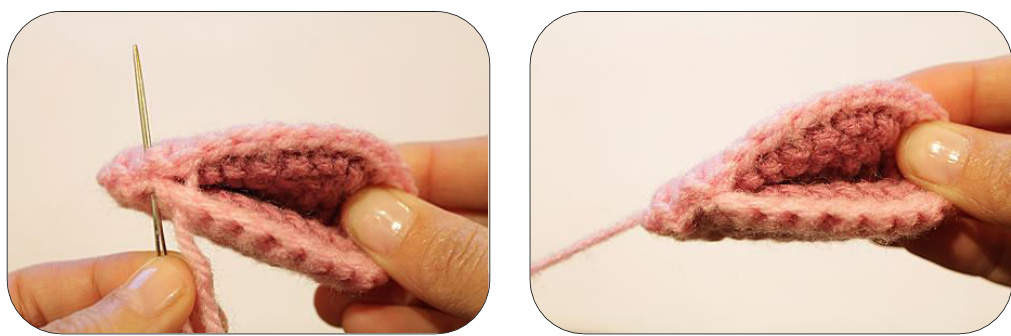
3. Now sew back to the bottom edge.
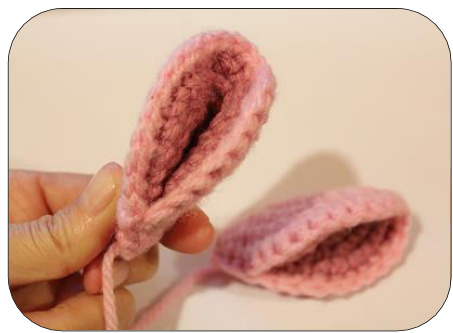
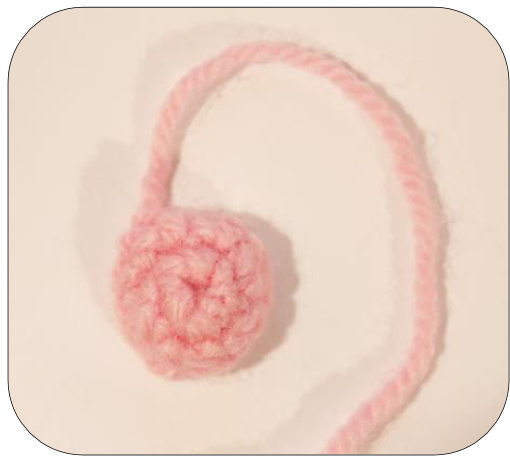
4. Finish. Tail with light pink yarn. R1: magic circle with 6st (6) R2: 2sc in each st (12st) R3: 1sc in next st then sc2tog rep 4 times (8st) Stuff lightly the tail. sl st in the next st fasten off, leaving a long tailfor sewing.
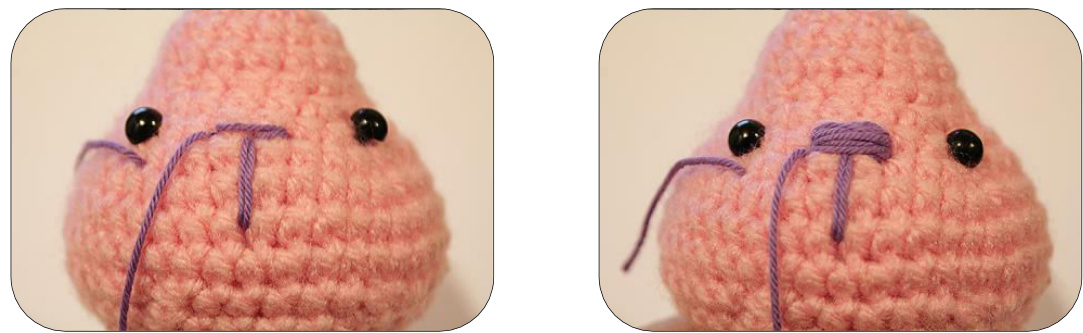
How to Embroider the nose
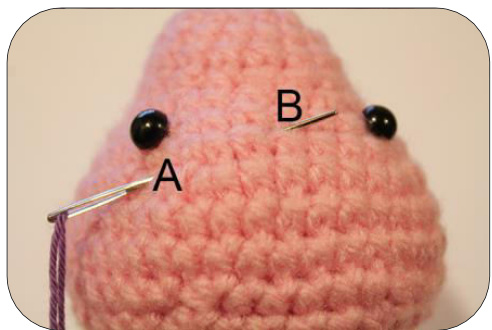
A. Insert the needle in a hole between stitches some distance away where you want the nose to be. B. Bring the needle to the starting point in the center (row 8) for the embroidering, pull it through and leave a long tail.

3. Insert the needle horizontal along 2 stitches to form the nose and draw the thread tight.
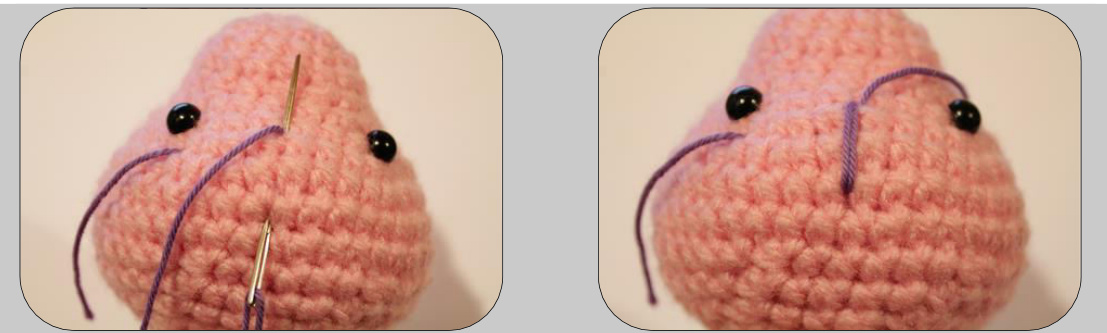
2. Make a vertical stitch along 3 stitches in the center line. draw the thread tight, do it twice.
4. Start embroidering the nose horizontal as showing in the picture until the nose is big enough.
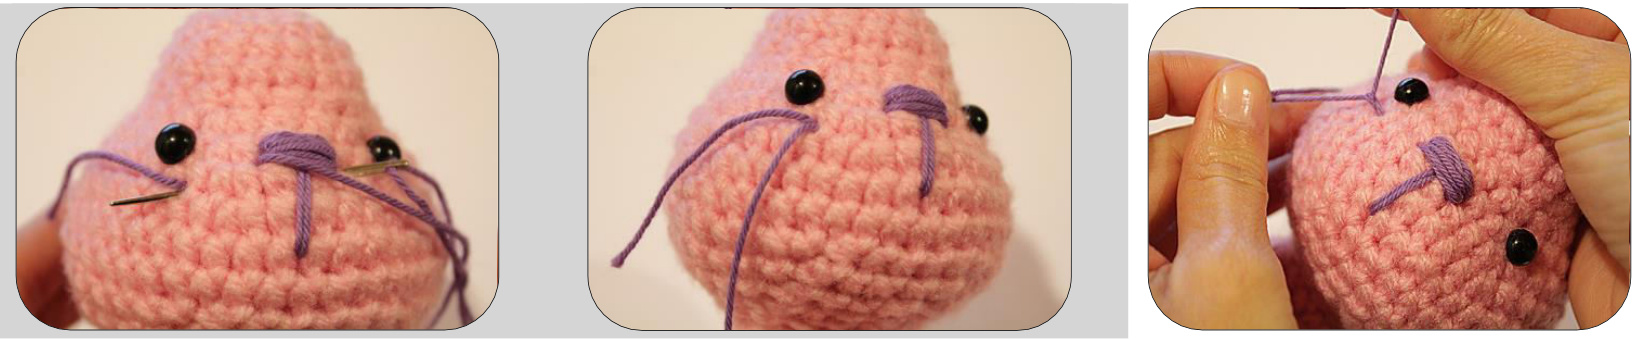
6. Knot the two ends together twice
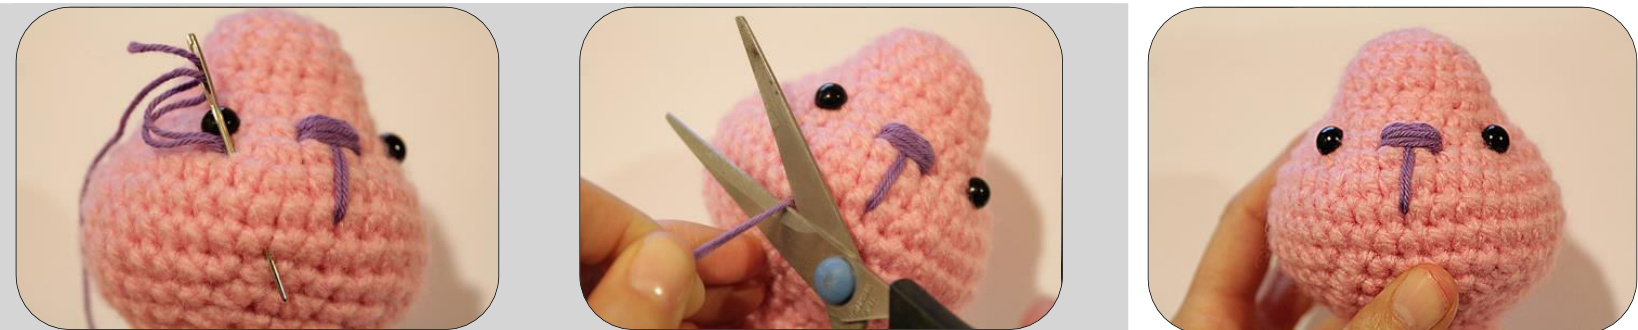
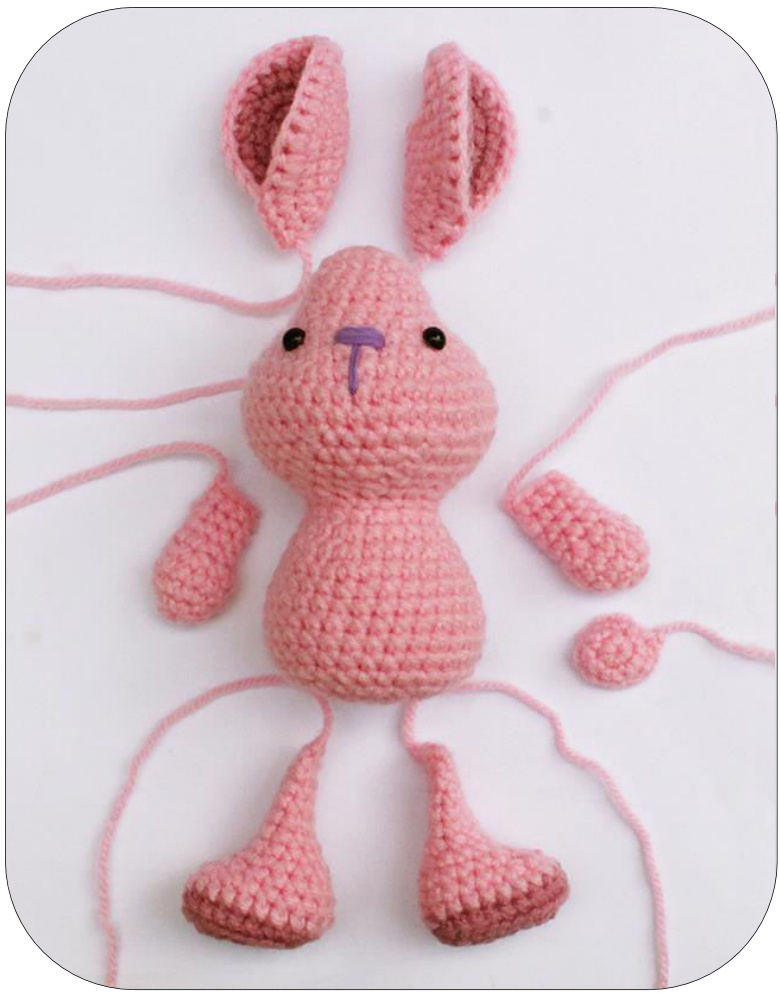
7. Reinsert the 2 threads into the needle and insert the needle into the same hole where both ends emerge and bring it Bear | Copyright @ 2015 Anat Tzach Now all the parts are ready to be joined
Sewing the legs
1. Sew the leg across the top of the row.
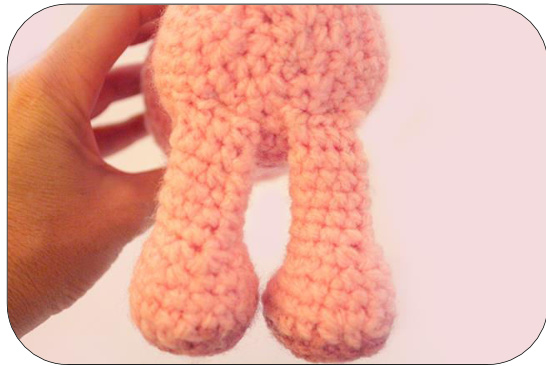
2. place the legs above row 31, a bit more to the front of the body.
3. Sew the legs to the body, fasten and hide yarn tail inside the body. \* See how to sew a flat piece to a closed piece (see page 11).
Sewing the arms
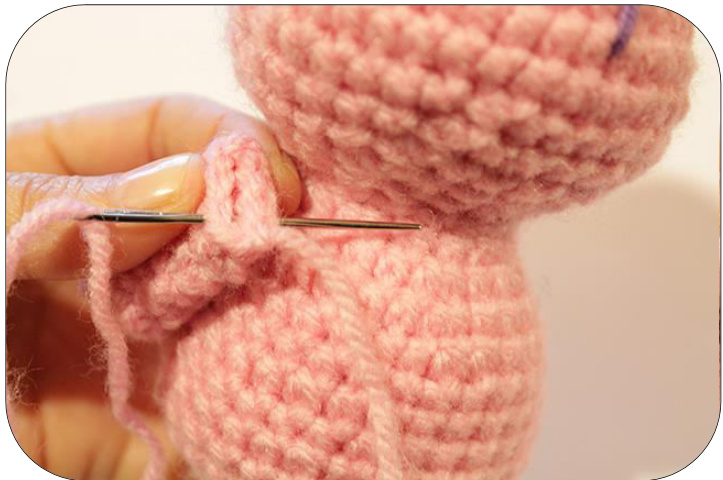
1.Press both sides of the top arm together and insert the needle through both stitches.
2. Sew the arms just beneath row 19, fasten and hide yarn tail inside the body. e how to sewaflat pieceto a closed piece (see page:
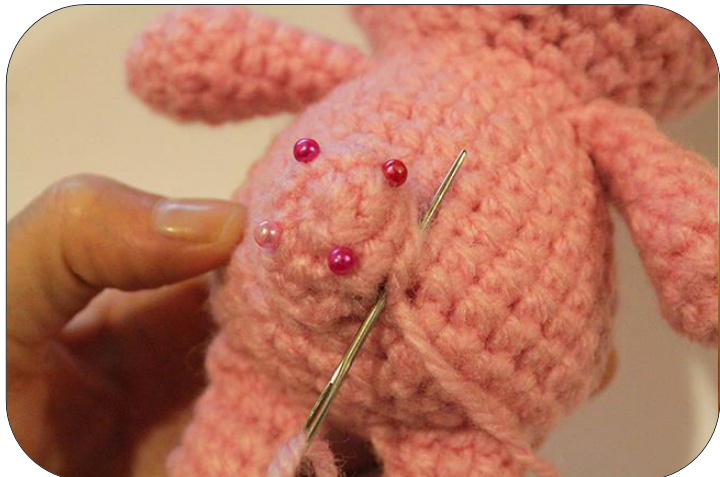
Sewing the ears
Sewing the tail
Place the ears just beneath row 5, pin the ears to the head, sewinplace,fasten and hide yarn tail inside thehead. \*See how to sew a flat piece to a closed piece (see page 11).
Place the tail at the bottom in the middle, pin the tailto the conniocota 3cloco
How to close a hole and hide yarn tail inside the piece

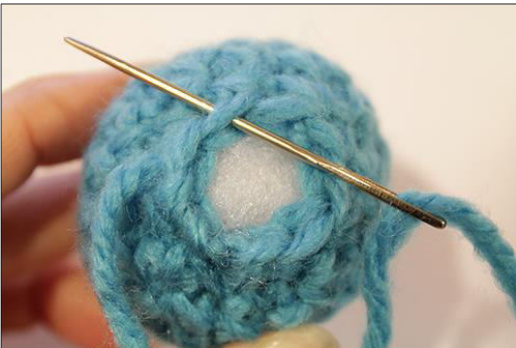
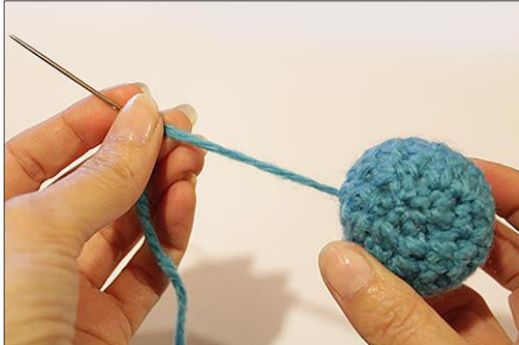
1. Cut the yarn, fasten off leaving a long tail. From the inside of the hole Insert the needle under the front loop only, draw the yarn toward the outside and again next front loop from the inside to the outside, pick up all the remaining stitches.
4. Pass the yarn through the piece coming out on a different side through a hole.
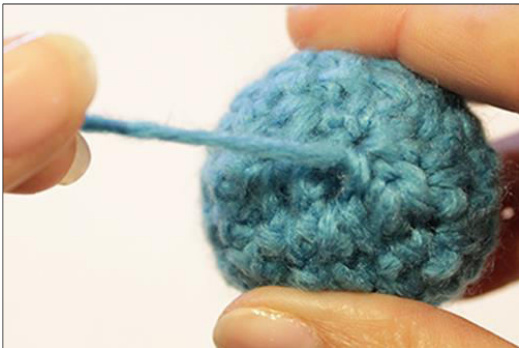
2.Pull the yarn tail tight until the hole is completely closed and knot.
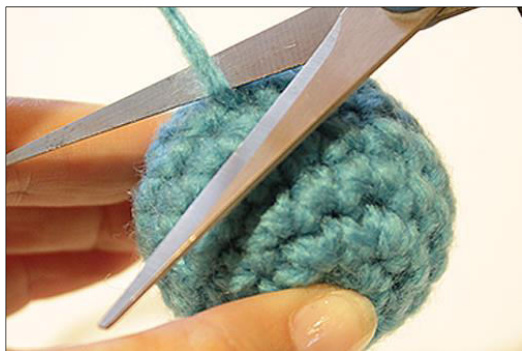
5. Cut the yarn tail.
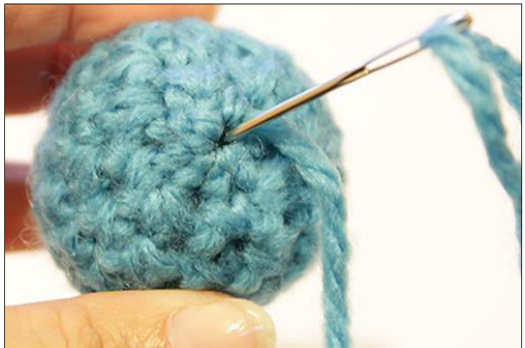
3. Insert the needle back to the center.
Sewing an Open Piece to a closed piece

\*This technique is good for sewing the tail
Sewing an open piece to a closed piece
3.Draw tight after every stitch and make sure the stitches are parallel to one another.

1.First stitch, insert the needle in a hole And bring the needle up below the next stitch on the closed piece and draw the yarn through.
2. Insert the needle under both loops together in the open piece and then insert the needle into the hole where the yarn tail emerge out in the closed piece and bring the needle up below the next stitch and draw the yarn through. Do it all the wayaround. \* This technique is good for sewing the arms, legs and ears.
Sewing a flat piece to a closed piece
3. Go back to the same hole where the yarn tail emerge out in the closed piece and draw the yarn through tight
1. Insert the needle to a hole between stitches and bring the needle up below the next stitch and draw the yarn through.
4. Repeat across the top of the flat piece.
2. Insert the needle under both loops together in the flat piece and draw the yarn through. Note: For this sewing example, I used a contrasting yarn that will be more clear for you to see the technique. For your work used the same yarn you used for the flat piece.


