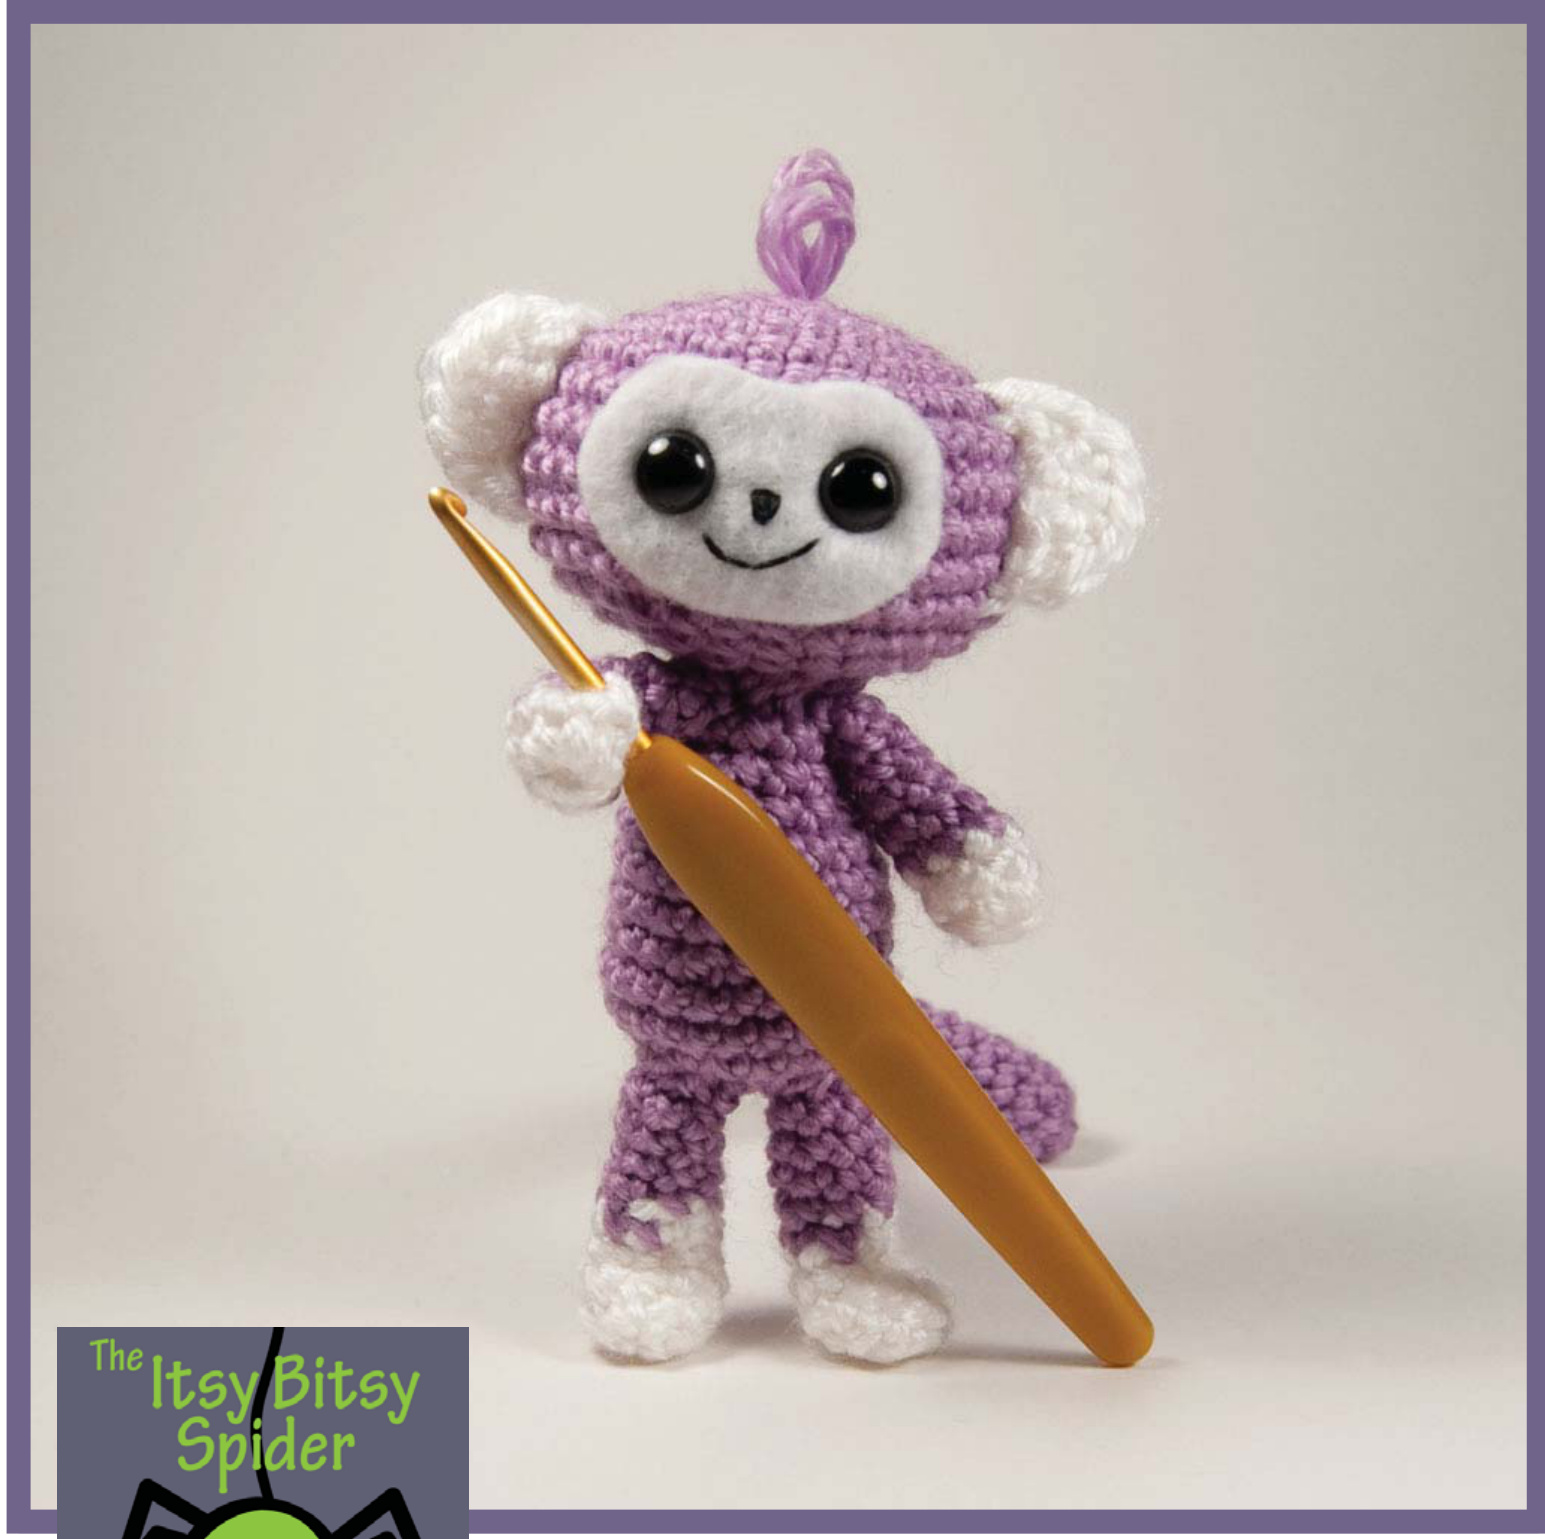
Monkeys!
Find more Itsy Bitsy Spider patterns online:
Etsy http://www.etsy.com/shop/theitsybitsyspider Blog http://itsybitsyspidercrochet.blogspot.com/ rla Fitch. Please do not reproduce or copy this pattern without express written permission from the creatc
Monkeys!
Who doesn't love a monkey? They can be playful or pouty —- happy or sad — adventurous or cuddly! However you choose to make your monkey, he (or she) is sure to be a great friend!
MATERIALS
Caron Simply Soft worsted weight yarn (see pattern notes for yarn used) Fiber fill Beads for filling the body One pair 9 mm doll eyes (optional — see pattern notes for suppliers) Small amount of felt Small amount black embroidery floss Chenille stem at least 12 inches (30 cm) long Size E (3.5 mm) crochet hook Yarn needle Stitch marker Sewing needle Glue Sharp scissors
STITCHES AND ABBREVIATIONS USED IN THIS PATTERN:
CH chain stitch SC single crochet DECR decrease ST stitch STS stitches MM move marker FO finish off For the project shown in the photographs, I used Caron Simply Soft Yarn in Orchid (main color) and White (accent). purchase all of my eyes and noses from 6060 on Etsy. The shop URL i http://www.etsy.com/shop/6060 Note: When determining whether to use buttons or other small embellishments, keep in mind the age of the intended recipient. Doll eyes and other decorations may pose a choking hazard for children under three. A safer alternative for the very young is to sew eyes and any other decorations using embroidery thread or yarn.
PART 1: FACE PREPARATION
I typically begin by preparing the monkey's face. this allowes me to complete the head first and glue the face in place. While I wait for the glue to dry, I can finish the rest of hte pieces and put the monkey's body together. To make the face, you will need the face template (see Figure 2), sharp scissors, black embroidery floss, and your sewing needle. 1. Begin by cutting the felt piece. Use the template from Figure 3 as a guide. IMPORTANT NOTE: Template is approximate! Because your gauge may vary from the project shown, you may need to enlarge or decrease the face template size. 2. Using black embroidery floss, stitch the nose. TIP: To get the nose nice an even, start from the base and work toward the top, as shown in Figure 2,below.
Figure 2: Nose stitches 3. Continue by stitching the mouth with black embroidery floss. 4. Using sharp scissors, snip holes for the eyes. Set the face aside when finished.
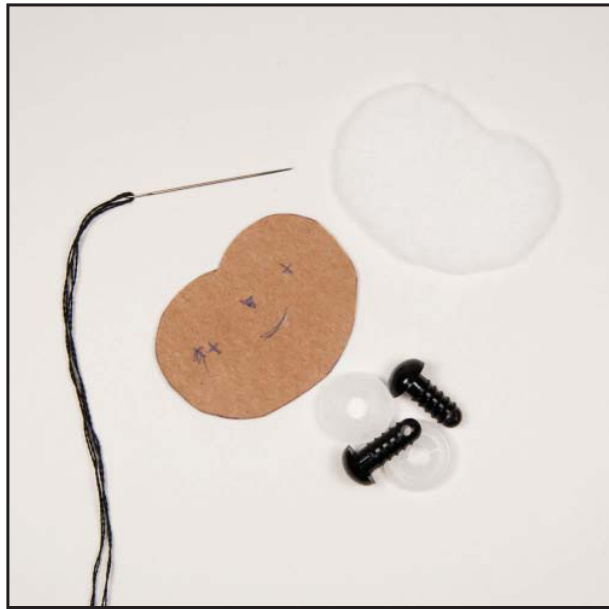
Figure 1: Face pieces
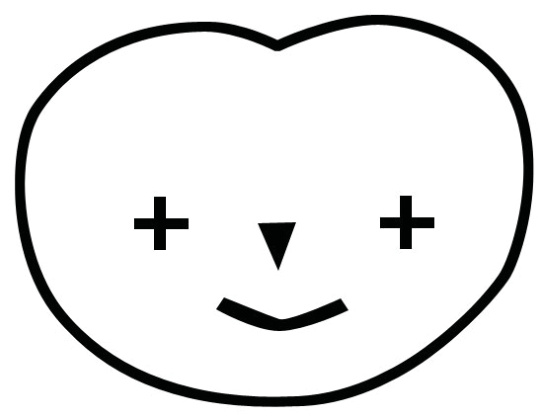
Figure 3: Face template
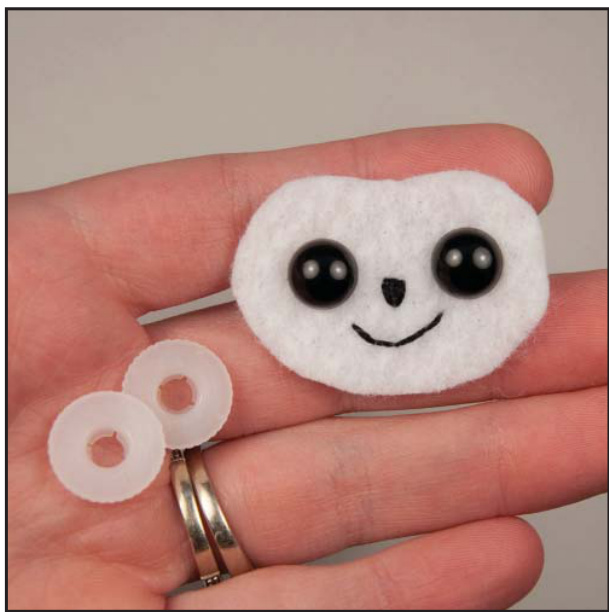
Figure 4: Prepared face
PART 2: HEAD AND FACE
The head is made in a spiral, so you may want to use a stitch marker to help keep track of your rounds. Use the main color yarn to make the head. Round 1: CH 2. 6 SC in second chain from hook. Place stitch marker in the last SC to mark the end of the round. Round 2: 2 SC in each ST around (12 SC). MM Round 3: \*2 SC in first ST and SC in next. Repeat from \* around (18 SC). MM. Round 4: \*2 SC in first ST and work one SC in each of the next two STS. Repeat from \* around (24 SC). MM. Round 5: \*2 SC in first ST and work one SC in each of the next three STS. Repeat from \* around (30 SC). MM. Round 6: \*2 SC in first ST and work one SC in each of the next four STS. Repeat from \* around (36 SC). MM. Rounds 7-10: SC in each ST around (36 SC). MM. Round 11: \*DECR across first two STS. SC in each of the next four STS. Repeat from \* around (30 SC). MM. Round 12:\*DECR across first two STS. SC in each of the next three STS. Repeat from \* around (24 SC). MM. Round 13:Round 11: \*DECR across first two STS. SC in each of the next two STS. Repeat from \* around (18 SC). MM. Round 14: \*DECR across first two STS. SC in next ST. Repeat from \* around (12 SC). FO, leaving tail for sewing. TIP: Leave at least 18 inches (46 cm) tail so that you have enough to sew the head to the neck and attach the monkey's arms. To attach the face: 1. Center the felt on the head ball and push the posts of the safety eyes through both the felt and the yarn. Fasten the eyes with the washers provided. 2. Gently fold the edges of the felt up and lay a thin line of craft glue around the edges to help hold the face in pace (see Figure 6).

Figure 5: Finished head
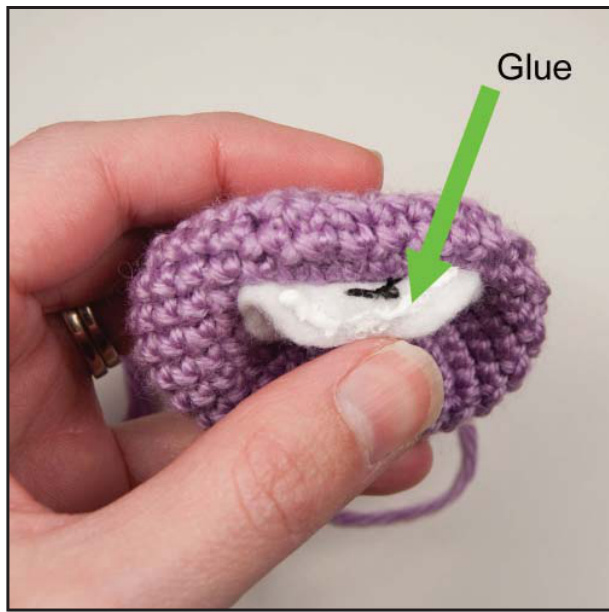
Figure 6: Glue face
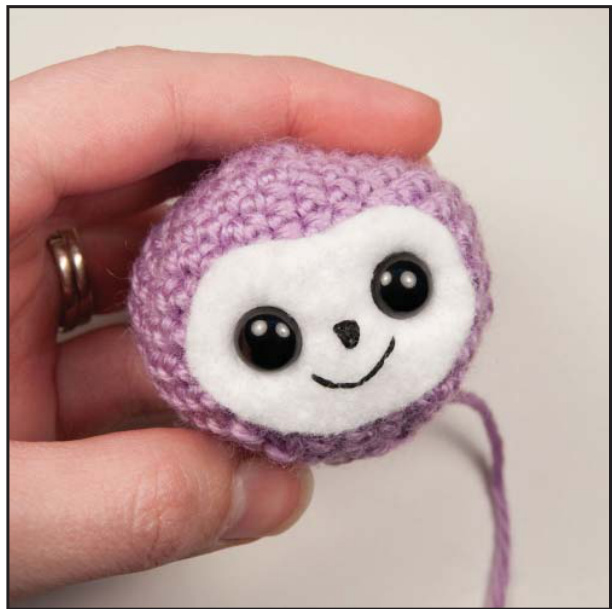
Figure 7: Face attached
PART 3: BODY
The body uses your main color yarn and is made in a spiral. Round 1: CH 2. 6 SC in second chain from hook. Place stitch marker in the last SC to mark the end of the round. Round 2: 2 SC in each ST around (12 SC). MM. Round 3: \*2 SC in first ST and SC in next. Repeat from \* around (18 SC). MM. Round 4: \*2 SC in first ST and work one SC in each of the next two STS. Repeat from \* around (24 SC). MM. Rounds 5-6: SC in each ST around (24 SC). MM. Round 7: Round 11: \*DECR across first two STS. SC in each of the next two STS. Repeat from \* around (18 SC). MM. Rounds 8-10: SC in each ST around (18 SC). MM Round 11: \*DECR across first two STS. SC in next ST. Repeat from \* around (12 SC). MM. Rounds 12-13: SC in each ST around (12 SC). MM. Note: After round 13, FO.
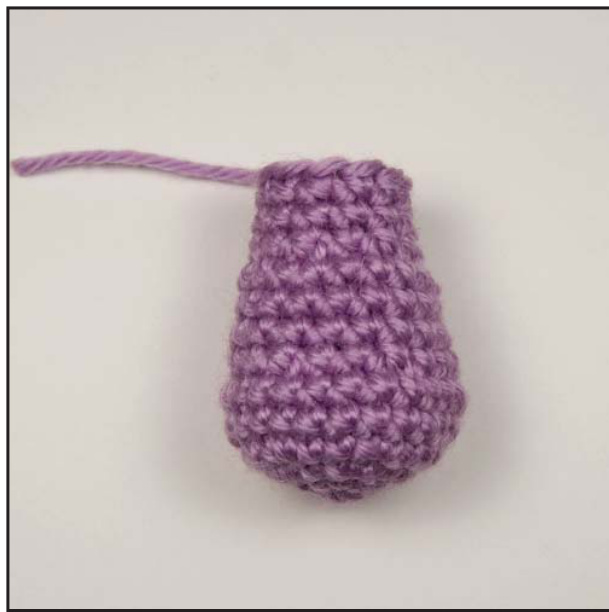
Figure 8: Body
PART 4: TAIL
The tail is made in a tight spiral. After finishing the crochet portion of the tail, I insert a chenille stem to make the tail bendable. Because the tail is so tight, it may be difficult to use a stitch marker! If you can't, try to keep count in your head. Round 1: CH 2. 8 SC in second chain from hook. Place stitch marker in the last SC to mark the end of the round. Rounds 2-24: SC in each ST around (8 SC). MM. Note: After round 24, FO. Leave at least 18 inches (46 cm) tail so that you have enough to sew the tail to the body and attach the legs. To add the chenille stem:
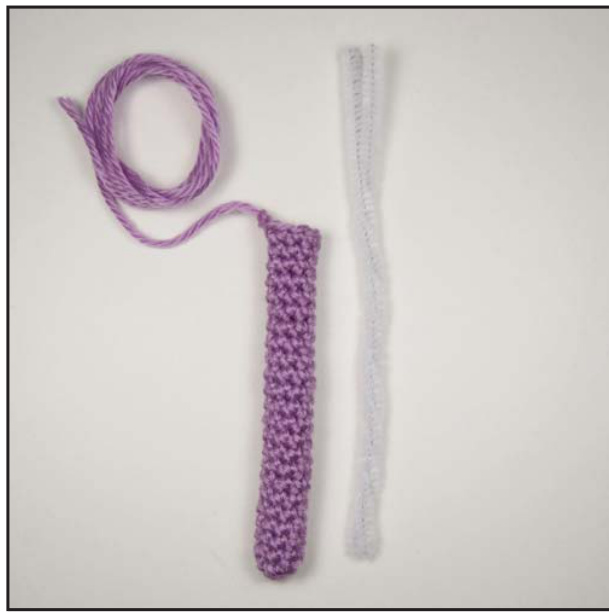
Figure 9: Tail and chenille stem 1. Fold the stem in half and twist the two halves together (see Figure 9). 2. Insert the bent end of the sten into the tail, leaving the other end to hang out. Set aside.
PART 5: ARMS (MAKE TWO)
The arms are worked in a spiral, starting with two rounds of the accent color and then switching back to your main color. Again, because the arms are so tight, it may be difficult to use a stitch marker! Round 1: With accent color, CH 2. 8 SC in second chain from hook. Place stitch marker in the last SC to mark the end of theround. Round 2: SC in each ST around (8 SC). Break accent color. Round 3: Join main color. SC in each ST around (8 SC). MM. Round 4: \*DECR across first two STS. SC in each of the next two STS. Repeat from \* once more (6 SC). MM. Rounds 5-8: SC in each ST around (6 SC). MM)
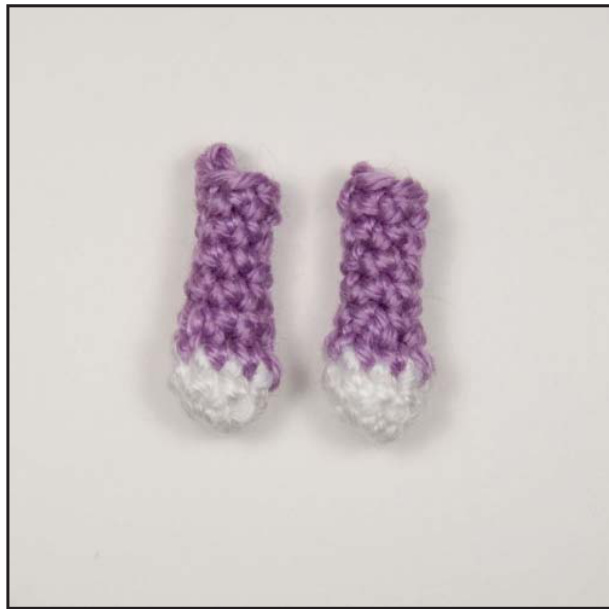
Figure 10: Finished arms Note: After round 8, FO. TIP: To get a finished look on the arms, I simply tuck the ends inside. Since you will be sewing the arms to the body using the extra yarn from the head, there is no reason to weave inthe ends.
PART 6: LEGS (MAKE TWO)
Like the arems, the legs start out in the accent color and then switch to the main color after a few rounds. You will also do a little shaping on the legs to get the impression of feet. Round 1: CH 2. 6 SC in second chain from hook. Place stitch marker in the last SC to mark the end of the round. Round 2: \*2 SC in first ST and SC in next. Repeat from \* around (9 SC). MM. Round 3: DECR across first two STS. SC in each of the reamining STS (8 SC). MM. Round 4: DECR across first two STS. SC in each of the reamining STS (7 SC). Break accent color. Round 5: Join main color. SC in each ST around (7 SC). MM. Rounds 6-10: SC in each ST around (7 SC). MM.
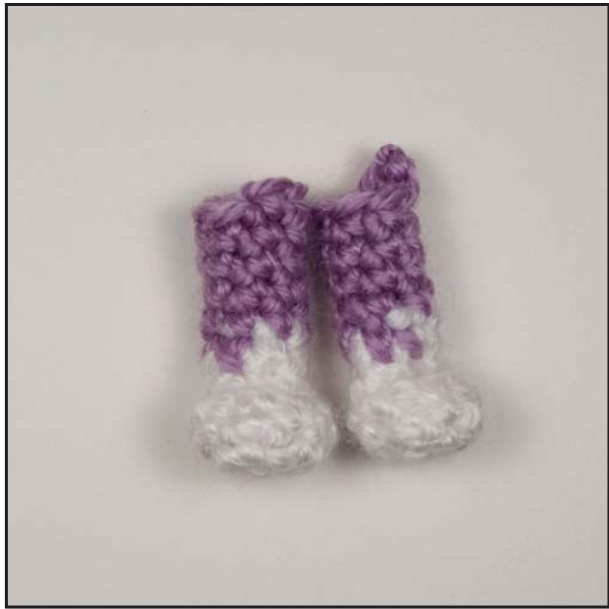
Figure 11: Finished legs Note: After round 10, FO. TIP: To get a finished look on the legs, I simply tuck the ends inside. Since you will be sewing the legs to the body using the extra yarn from the tail, there is no reason to weave in the ends. To shape the feet: 1. Look for the place in the leg where you made the decreases for rounds three and four. 2. Pinch the piece together around that area as shown in Figure 12.
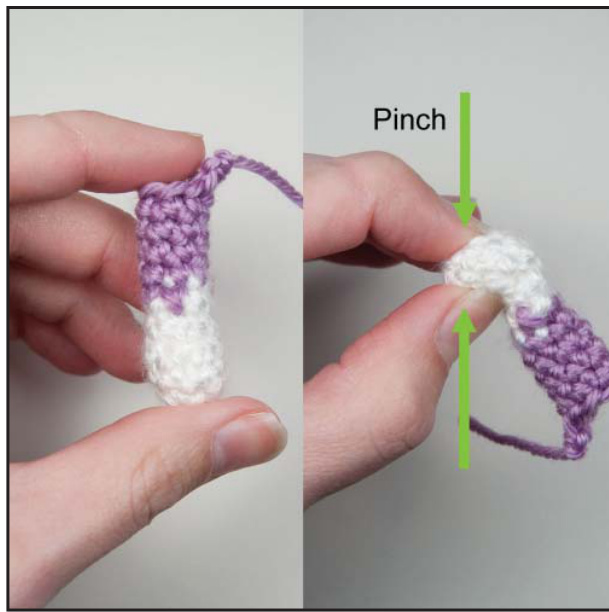
Figure 12: Pinching feet
PART 7: EARS (MAKE TWO)
The ears are just two rows made with more stitches than a row should naturally hold. The result is a crescent shape! Row 1: CH 3. SC in second chain from hook and in next. CH 1 and turn. Row 2: 2 SC in each ST across (4 SC). FO, leaving a tail for sewing.
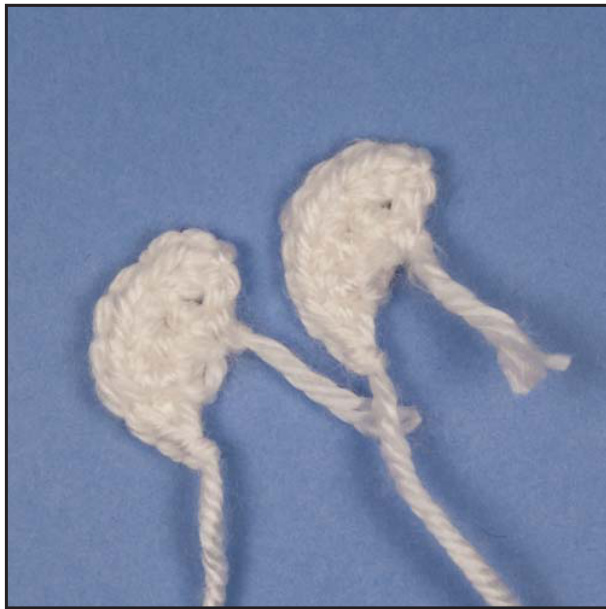
Figure 13: Finished ears
PART 8: ASSEMBLY
1. Begin by stitching ears to either side of the head. TIP: Because the ears are identical, you should be careful to make sure that the same sides are faceing front. In order to do this, start sewing one ear from the top of the head down toward the cheek. the other ear shold be sewn on starting from the cheek and working back toward the top. 2. Stuff the head and set aside. 3. Gently poke the chenille stem from the tail through the base of the body as shown in Figure 15. TIP: If the chenille stem is too long and pokes out the top of the neck, fold it over inside the body. 4. Using the left over yarn, sew around the ouside of the tail to secure it in place. 5. Sew the legs in place witht he remaining yarn left from the tail. See Figure 16 for placement.
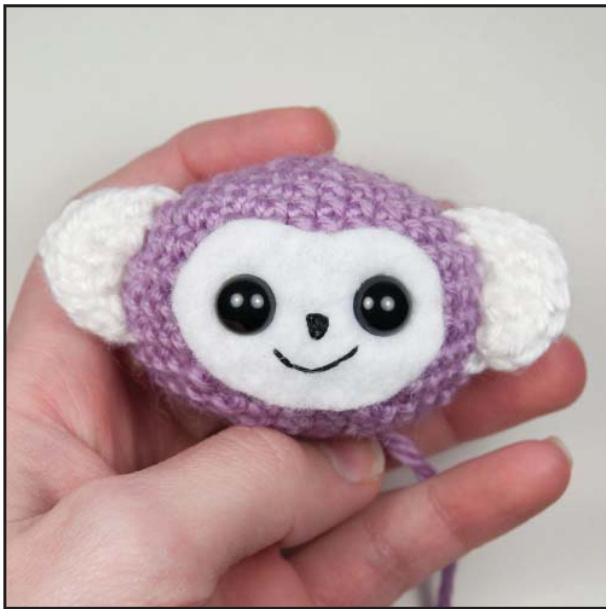
Figure 14: Attach ears
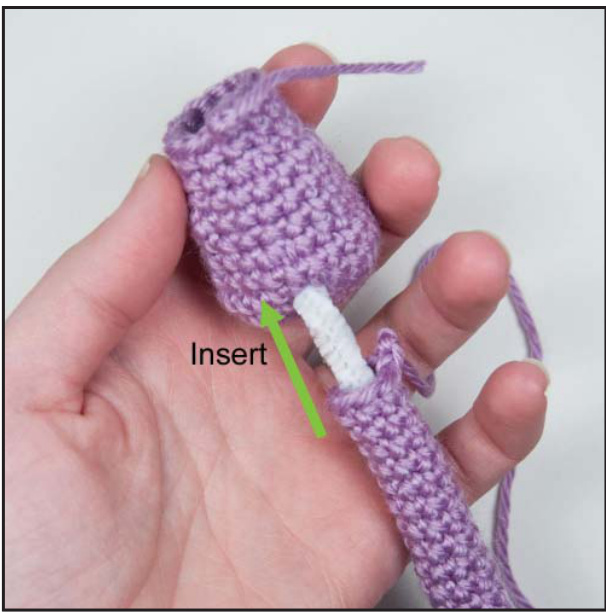
Figure 15: Insert tail

Figure 16: Attach legs 6. Fill the lower portion of the body with beads. Note: I used surplus beads from the craft store, but you can also buy poly beads or use small driend beans or rice. 7. Center the head on the body and sew in place. 8. Attach arms by sewing through the neck (see Figure 17). TIP: You can do both arms at the same time. Just sew through all three pieces at once! 9. Using the remaining yarn, bring the needle up through the center of the head (see Figure 18). 10.Sew back down through the head, leaving a loop to create little tufts of "hair." 11.Knot off your yarn nd enjoy your new friend!
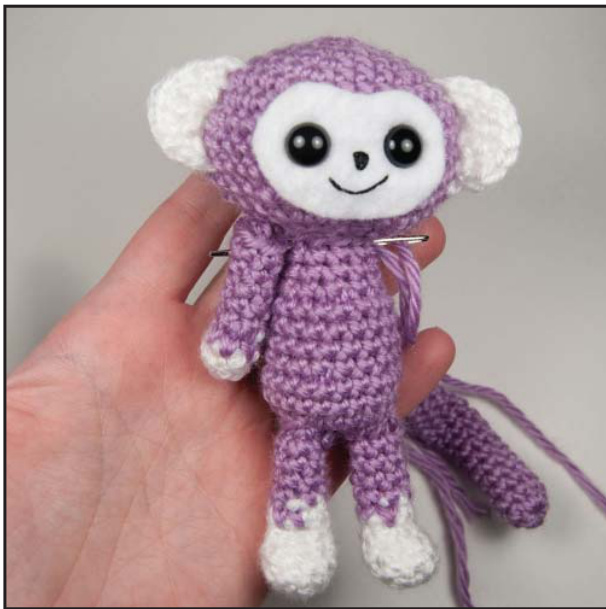
Figure 17: Attach arms
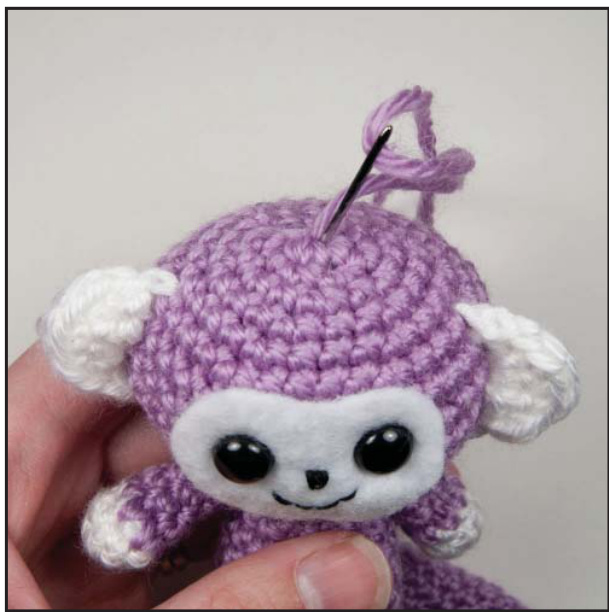
Figure 18: Create hair loops


