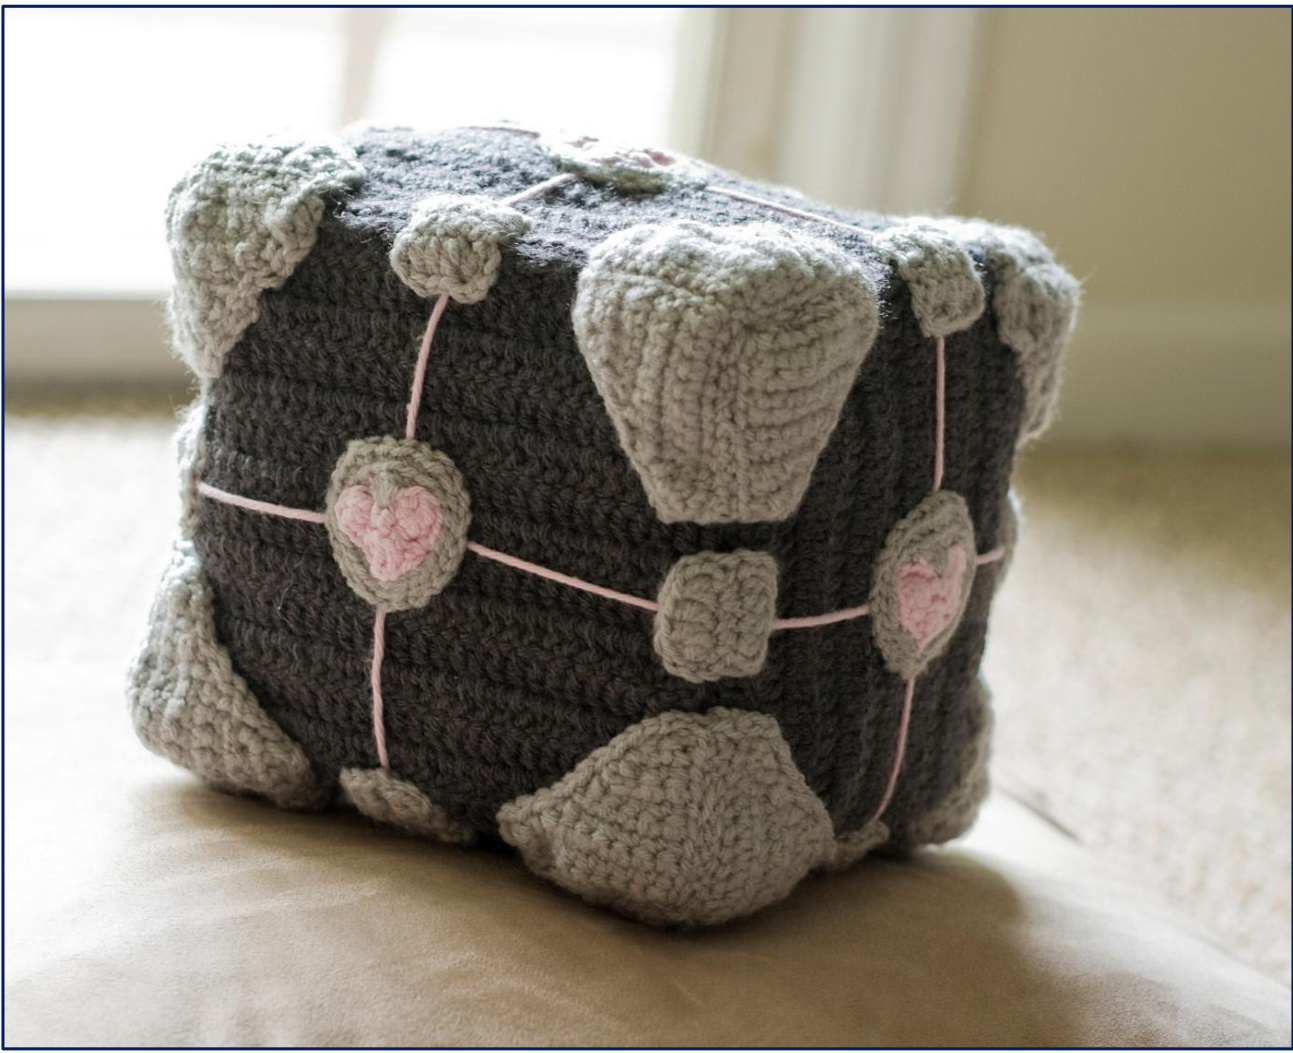
crochet pattern by lenslove
Supplies: Crochet hook, 3.5 mm/size E Light grey yarn, worsted weight (I used I Love This Yarn grey mist.) Dark grey yarn, worsted weight (l used Vanna's Choice charcoal grey.)\* Light pink yarn, worsted weight (I used I Love This Yarn soft pink.) Yarn needle (optional, but I think it helps a lot) Poly fiber filling (enough to fill an approximately $4^{\prime\prime}\times6^{\prime\prime}$ space) Foam pad $(12^{\prime\prime}{\times}12^{\prime\prime}{\times}1^{\prime\prime})$ \*I used almost all of the charcoal yarn, so if you're using yarn left over from other projects, make sure you have plenty. Abbreviations: SI - slip stitch Ch - chain Sc - single crochet Dc - double crochet Tc - triple crochet FO -finish off Inc - increase Before you start this project, I feel that I should warn you, this is really tedious work. It actually took me about 4 months to finish this project because I kept putting it down out of boredom/annoyance. Unlike making animal or people amigurumi, you're basically making everything you need 6 times, so it takes longer than you might think. (This is why I don't make blankets.) It isn't particularly difficult work, but it requires a lot of patience nonetheless. I've included the total number of stitches in each row in parentheses at the end of each line of directions. This is the number of stitches there should be before you chain any stitches for the turn. Cube sides - dark grey - make 6 Row 1: Ch 29 (29), ch 2 to turn Row 2 -13: Dc 29 (29), ch 2 to turn Row 14: Dc 29, FO, leave a long tail As hard as I tried, it was really difficult to get the sides to be perfectly square, but you want it to be as close to a $6^{\prime\prime}\!\times\!6^{\prime\prime}$ square as possible.If it's not exact, i'll be fine, but you don't want it to be an inch longer one way or anything like that. I used dc because I am impatient and knew sc would take forever, but if you are up to it, by all means, go for it.
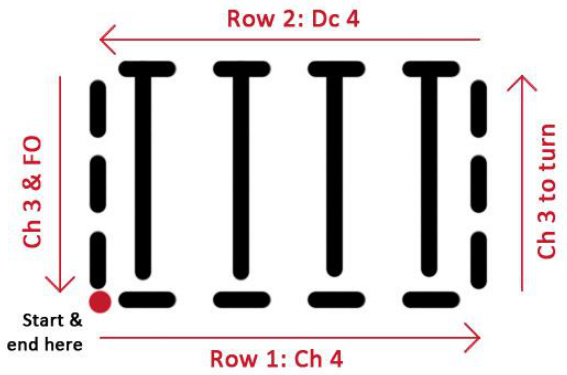
Side bumpers - light grey - make 24
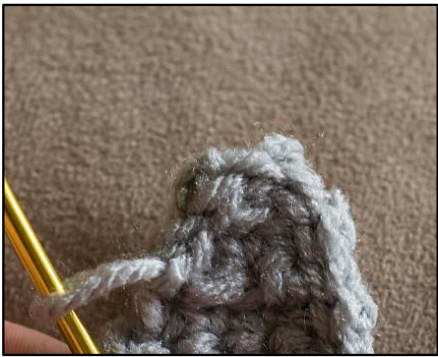
Row 1: Ch 4 (4), ch 3 to turn Row 2: Dc 4 (4), ch 3 and FO by attaching to first stitch in row 1, leave a long tail (see diagram on right)
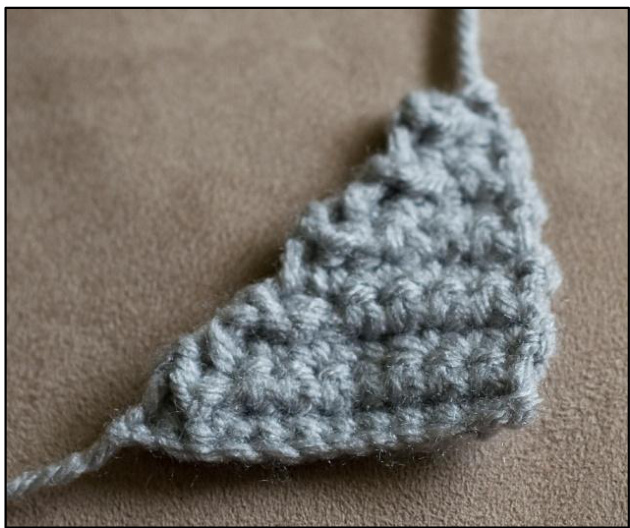
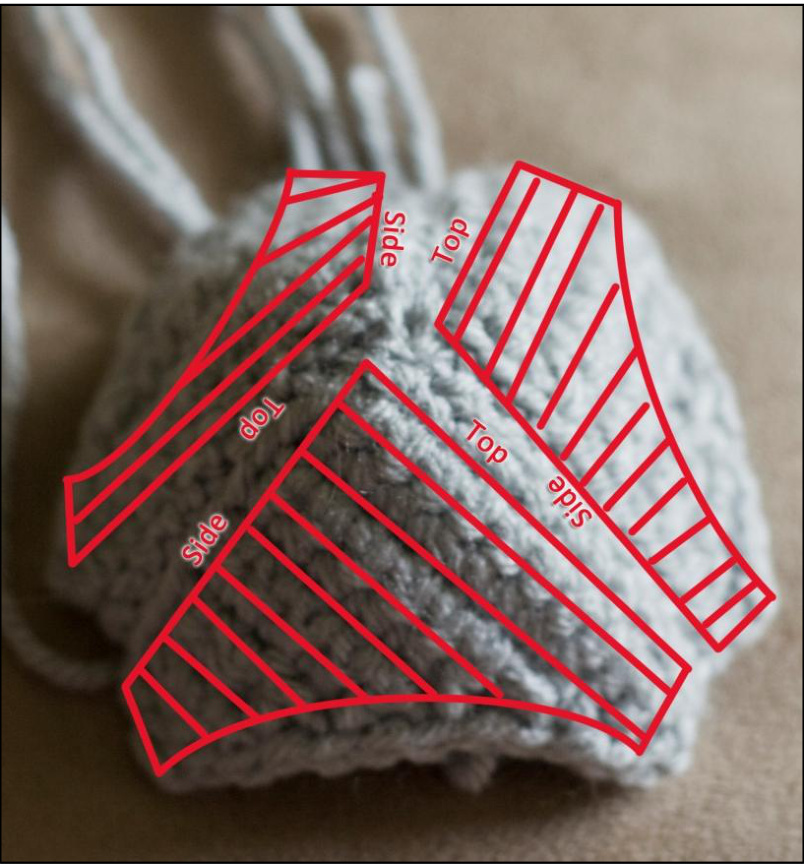
Corner bumpers - light grey - make 24 Row 1: Ch 11 (11), ch 1 to turn Row 2: Sc 11 (11), ch 1 to turn Row 3: Dec3 stitches to $1^{*}$ , sc 8 (9), ch 1 to turn Row 4: Sc 7, dec 1 (8), ch 1 to turn Row 5: Dec 3 stitches to $1^{*}$ ,sc 5 (6), ch 1 to turn Row 6: Sc 6 (6), ch 1 to turn Row 7: Dec 1, ch 4 (5), ch 1 to turn Row 8: Ch 3, dec 1 (4), ch 1 to turn Row 9: Dec 1, ch 2 (3), ch 1 to turn Row 10: Sc 3 (3), ch 1 to turn Row 11: Dec 1, sc 1 (2), FO
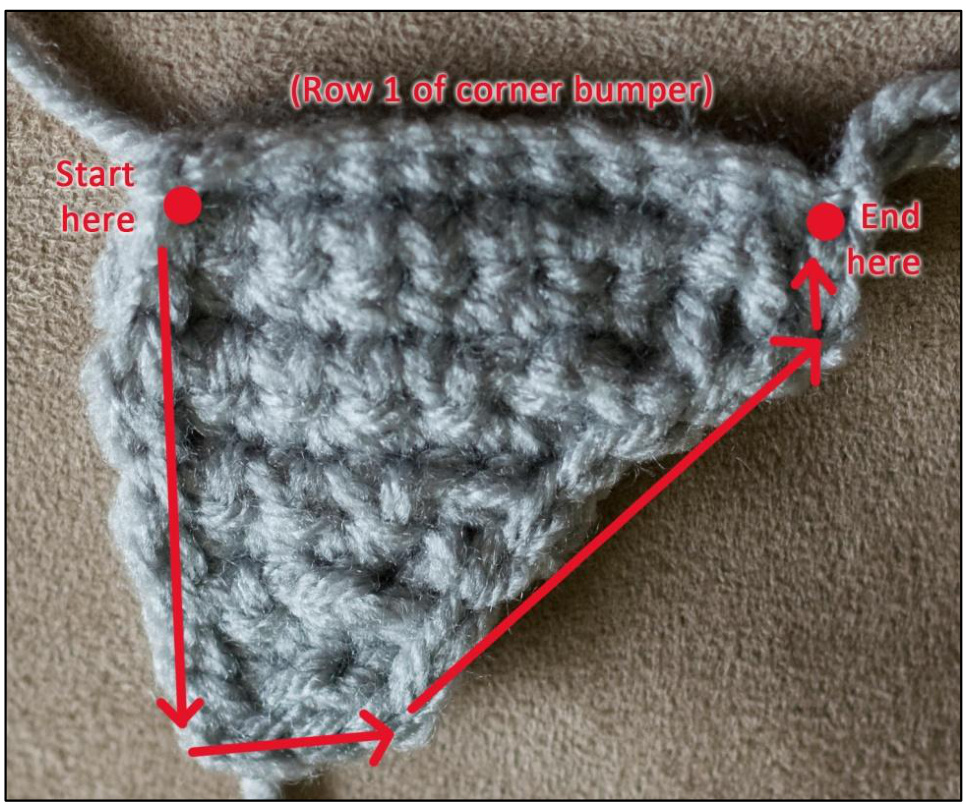
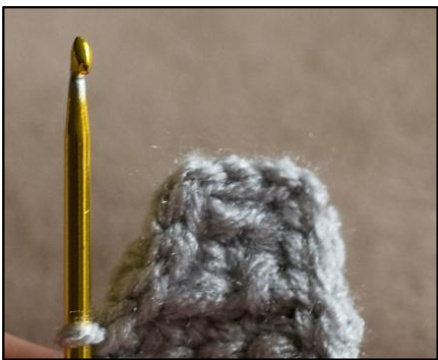
\*My method for decreasing 3 stitches to 1: Insert hook through first stitch, yarn over, and pull loop through stitch. You should now have 2 loops on your hook. Insert hook through second and third stitch, yarn over, and pull loop through both stitches. You should have 3 loops on your hook. Continue pulling that loop through the first 2. (Don't pulltoo tightly, or you'll end up making the row curve at the end.) There are other methods you could use to decrease 3 stitches down to 1, but this is what I did. When you finish each corner bumper, pull a loop from a new piece of yarn through the location shown on the diagram below. Slip stitch around the outside edge to form a border, putting your hook through wherever you can find a space. Try to make your stitches as even as possible. When you reach a corner, chain stitch once, then slip stitch into the stitch after the corner-—-it will make your corners look better (see the pictures below).
Without chain stitch at corners
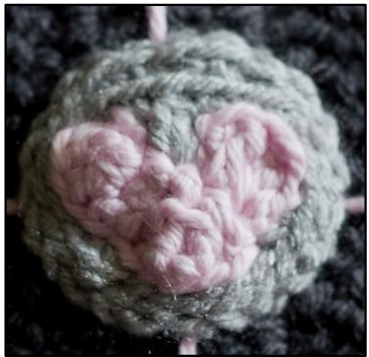
With chain stitch at corners Heart - pink - make 6 Row 1: Ch 1 (1), ch 1 to turn Row 2: Inc 1 (2), ch 2 to turn Row 3: Inc 2 (4), ch 2 to turn Row 4: Sc 1, Inc 1, Sc 2 (5), ch 2 to turn Row 5: [Sc, dc, tc] in 1st stitch, [tc, dc, sc] in 2nd stitch, sl st, [Sc, dc, tc] in 4th stitch, [tc, dc, sc] in 5th stitch Slip stitch around the edge of the heart to make a border, continuing around to where row 5 began. Finish off. Circles - light grey - make 6 Pull a loop of yarn through the border of the heart at its bottom tip. Use slip stitches, single crochet, and double crochet as necessary to form a circle around the heart, going around it exactly twice. Finish off when you reach the tip of the heart the second time. Leave a long tail for attaching to the cube sides. It isn't an exact science, just try to make it as round as possible.
Putting it all together:
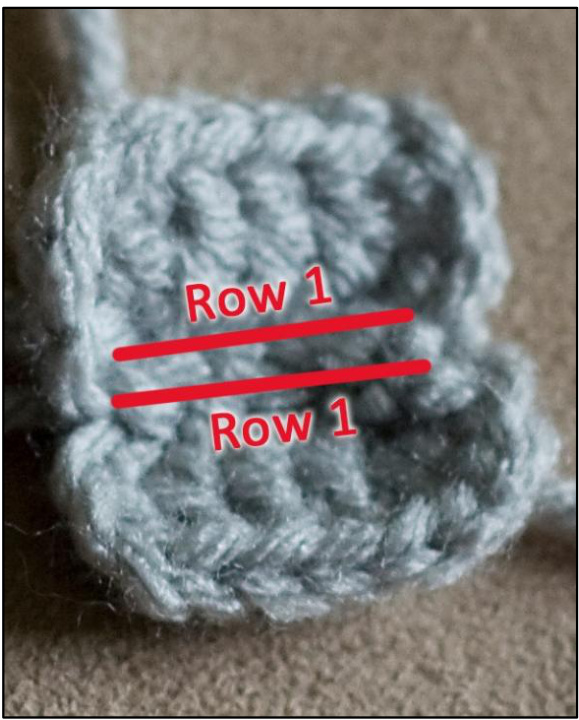
Attach the side bumpers together in pairs, connecting row 1 of the first bumper to row 1 of the second bumper. If you want a softer, more rounded look to your cube (which is what I opted for in the one I made) attach them on the back side. If you want a more precise edge, attach them on the front side as neatly as possible.
Attach the corner bumpers together in sets of three. Be sure to connect the top of each piece to the bordered side of the next. This will make each side's lines run at a ${90}^{\circ}$ angle to the ones next to it, ensuring a consistent look around your cube. (See the picture if you're confused.) Again, attaching on the back side will make them more rounded and bubbly, while attaching on the front will make them have sharper edges.
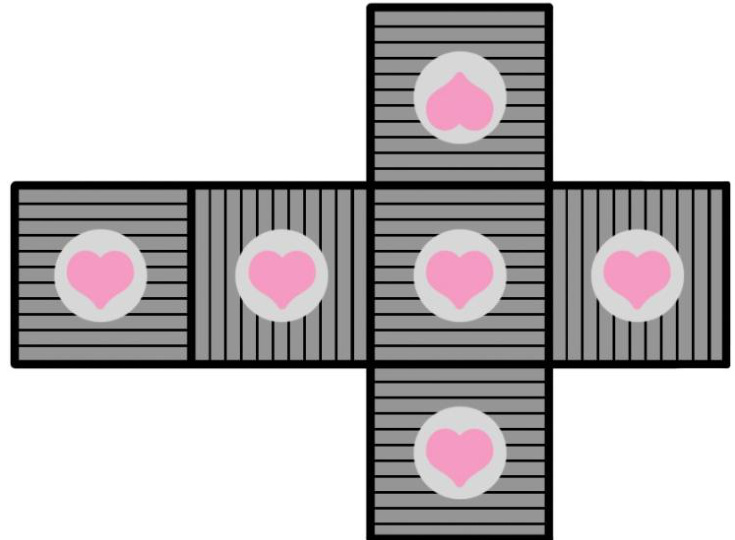
Attach a piece of pink yarn vertically across each cube side, as well as one horizontally, being sure they are centered in each direction. Attach a heart/circle to the center of each cube side over the intersection of the pink strings, making sure it faces the proper direction according to the chart below. Use a yarn needle to sew the edges of the circle to thecube side. Attach the cube sides to each other in the proper direction according to the chart below. This will help to ensure that your line directions are consistent as you go around your cube. (Also, if your sides aren't perfectly square, this will help make sure that they fit together properly.) Completely sew together the sides and bottom. Don't attach the top yet.
Attach the side and corner bumpers, including the ones on the top—-just don't attach them to the actual top, seeing as it's not on there yet.
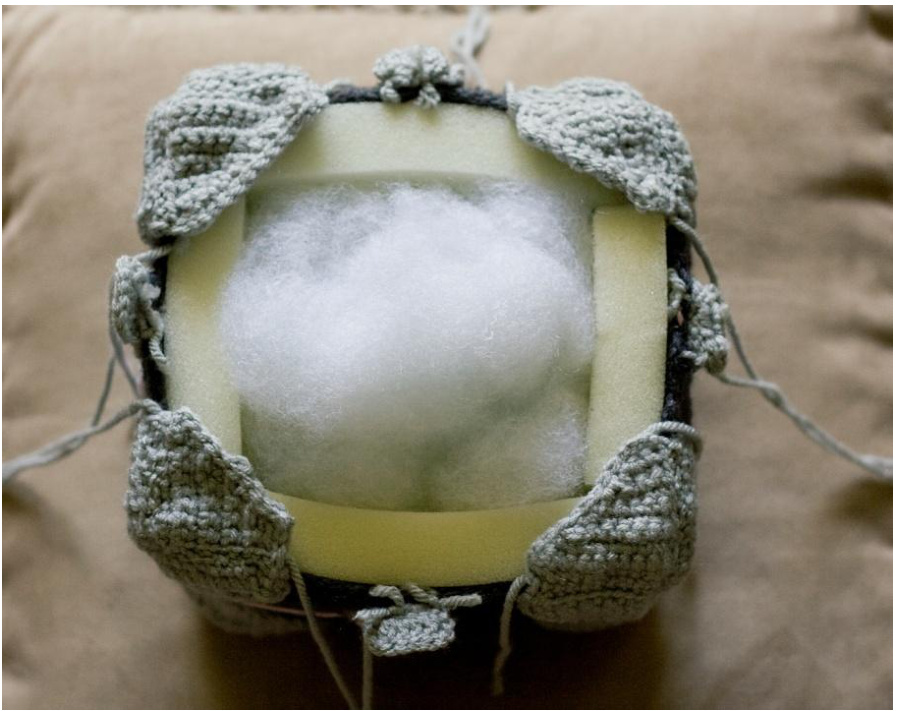
Attach the top of the cube underneath the bumpers. Then finish attaching the remaining bumpers to the top. Cut your foam pad into quarters. Insert two of these pieces into opposite sides of the cube. Trim them a little at a time if they are too wide or too tall, just until they fit without creating bulges in the cube walls. Cut two inchesoffofone side ofeachof the remaining two pieces of foam pad so that they are approximately $4^{\prime\prime}\!\times\!6^{\prime\prime}$ . Insert them into the remaining two sides of the cube, fitting them between the two foam pads already inside. Again, trim the pads as needed to ensure a proper fit. Fill the center of the cube with poly fiber. Do not overstuff it, or the bottom and top will bulge out instead of sitting flat. Finally, sing to yourself, "This was a triumph. I'm making a note here--huge success. It's hard to overstate my satisfaction." Now go enjoy some cake with your awesome new companion cube.


