Kauni felted beret Design and pattern instructions ? 2013 Elena Berezinskaya Translation from the Russian ? 2013 Katharina Sokiran
Kauni felted beret
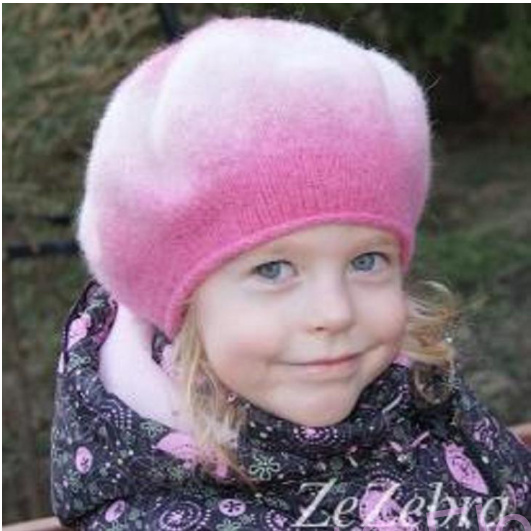
by Elena Berezinskaya Everything brilliant is simple! What kind of headwear could beat a plain beret in brilliance and simplicity? Only a colorful felted one from fingering weight yarn, of course!
Seamless stockinette knitting (all knit stitches worked in the round) can be accomplished even by a novice knitter, and the beautiful color gradient appears by itself - just like magic! Felting will cover up any irregularities in the knit fabric and other minor infractions so that the resulting beret will be a long way from the dreaded “homemade? look. The yarn amount needed is minimal - just 50-80 grams (1.8 to 2.8 ounces), depending on the size of your beret. Let me show you how to make the simplest version of such a beret, from fingering weight yarn with a yardage of 400 m (438 yards) per 100 gram. This pattern contains a picture tutorial (pages 2 to 10), row-by-row-description (page 11 and 12) and short instructions (page 12).
You will need:
- (One) 50 gram skein of fingering weight feltable yarn or remnants with an overall weight of 50 grams (1.8 oz). The sample beret shown was made of Aade long artistic 8/2 in Pink 8/2. - 2.5 mm (between US 1 and US 2) circular knitting needle, 40 cm (16 inch) long. - 2.5 mm DPN's or circular 100 cm (40") for the crown when there are no more stitches left to fill a 16 inch circular. -- Tapestry needle or crochet hook for weaving in ends. - Optional: Stitch markers (for marking the beginning of the round), row counter Head circumference: 56-57 cm (numbers for child's size 52-53 cm in parenthesis) Gauge: 22 sts x 30 rows =10x10 cm (2.5 x 2.5 inches) in stockinette
A row-by-row description can be found on pages 11 to 12, short instructions on page 12.
Instructions as picture tutorial
The ideal beret should be seamless. With short circular needle, cast on 90 sts (81 for child's size), join to round and knit 12 rows. This will be the rim of our beret.
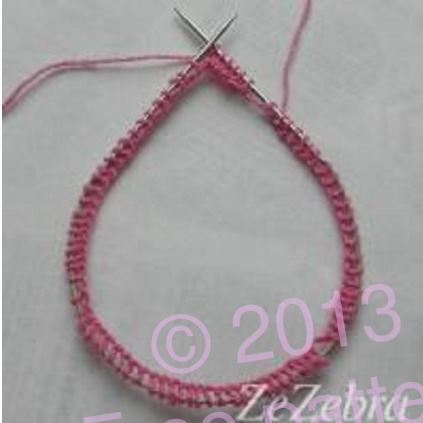
1. How to cast on with a short circular
Short circulars are hard to fold in half for casting on, therefore use a second circular for the caston (shown here with red cord).
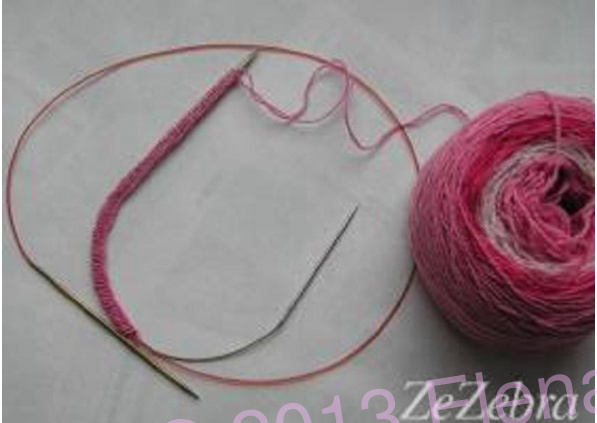
Cast on the required number of sts, remove the auxiliary needle (the second one with the red cord) and join into round on the shorter circular, being careful not to twist any sts.
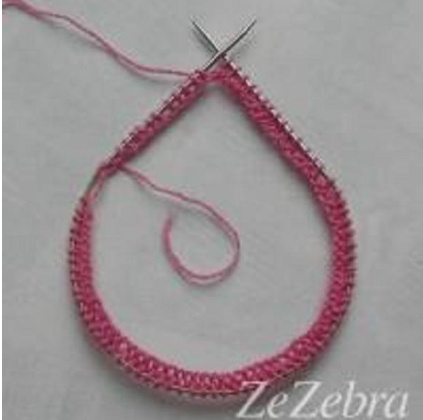
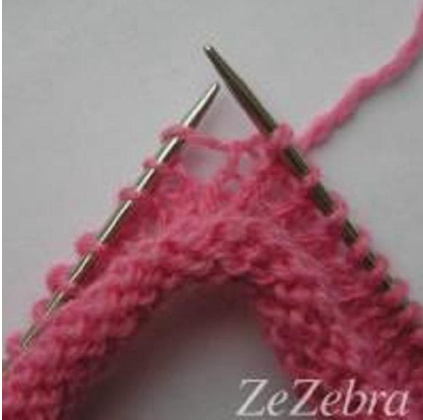
2. How to knit in the round without twisting
Before joining, make sure no stitches are twisted around the needle. It should not look like this:
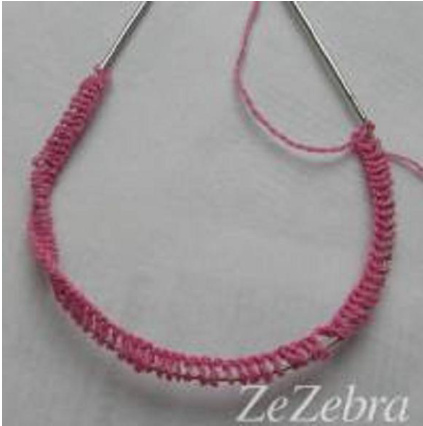
Untwist all sts and align them so all knots face the inner edge of the circle formed by your circular.
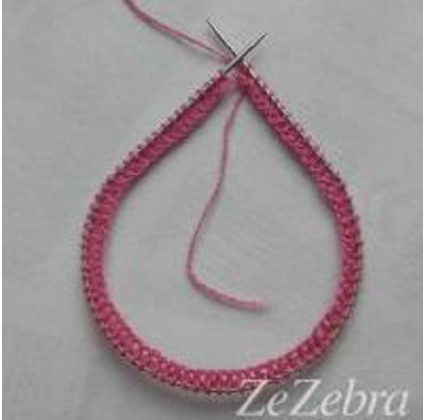
Slightly stretch out sts along the circular and start working in the round.
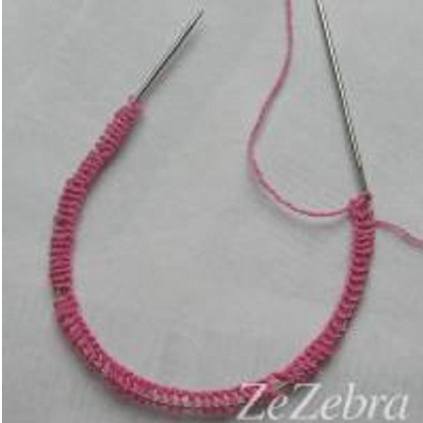
Continue knitting, periodically making sure all knots are lined up inwards and there are no sts twisted around the needle.
Kauni felted beret Design and pattern instructions ? 2013 Elena Berezinskaya Translation from the Russian 2013 Katharina Sokiran
At the end of the first round, check again for correct positioning of sts.
After the first round is completed, everything goes practically by itself, and the knitting can't get twisted anymore. At this point you might opt to place a marker for the beginning of the round, or use the beginning tail for orientation. Now knit 12 rounds more. The rim is finished, now we are going to widen it by adding inereases. V'd For an ideal beret, increase by 9 sts every other round, evenly spaced throughout the round. Increases are worked as M1-ktbl (lift the bar between the st on the RN you just worked and the st on the LN that is going to be next and knit through the back of this newly formed loop). Continue increasing every other round until you have 9x22=198 sts (9x21=189 for child's size). Please note: The M1 increases have to be knit through the back loop to avoid holes. For an even and ideally round beret, avoid placing increases on top of each other and stagger them instead. To find out how to make evenly spaced increases not aligned on top of each other, see row-byrow-description, pg. 11 to 12.
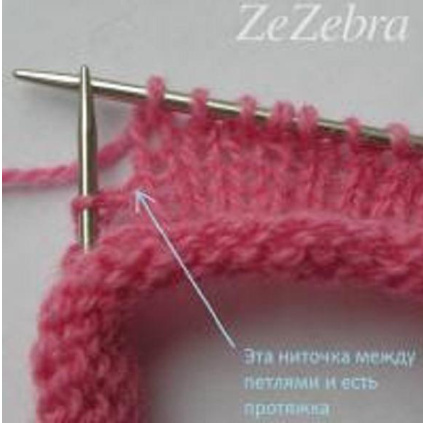
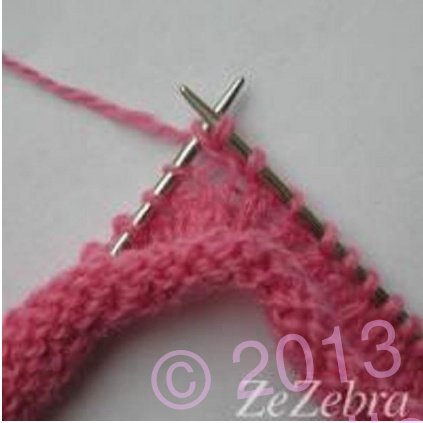
4. How to increase from the bar between stitches
What exactly is this “bar between stitches"? Here it is: The little strand the arrowhead is pointing to is referred to as "bar'.
Kauni felted beret Design and pattern instructions ? 2013 Elena Berezinskaya Translation from the Russian 2013 Katharina Sokiran
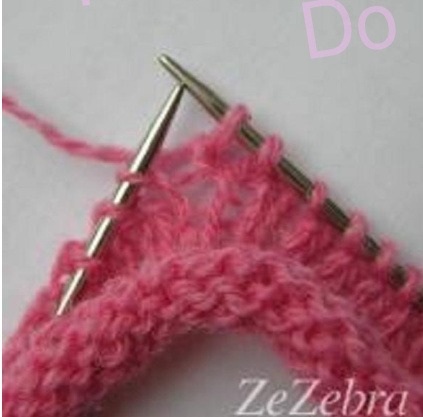
With your right needle, raise the bar and lift it onto the left needle.
Now knit one stitch through the back loop as can bee seen here:
The result is an unnoticeable, tight increase without hole.
reases are finished. Now knit 4 more rounds before you begin the crown decreases For the crown decreases, decrease by 9 sts, evenly spaced, in every other round. Please note: The decreases have to be staggered, they should not sit atop of each other. This way, your beret will turn out truly round and even.
5. How to do the crown decreases
Once there are not enough stitches left anymore to fill the round, change to DPNs or the longer circular for magic loop. With a longer circular for magic loop, work like this: Divide all sts into two even sections and knit in the round first the first half, then the second one. A long circular will form two loops that divide the knitting into two sections.
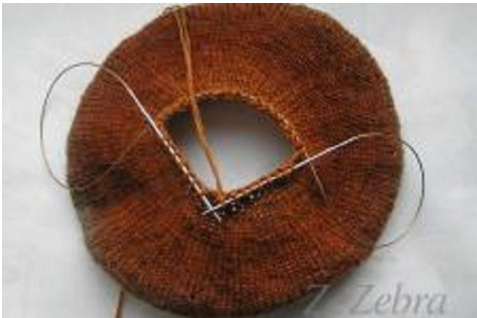
(The hat in the photo is a different design, but the technique is the same.)
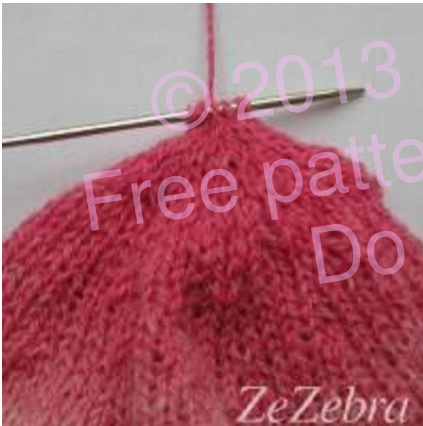
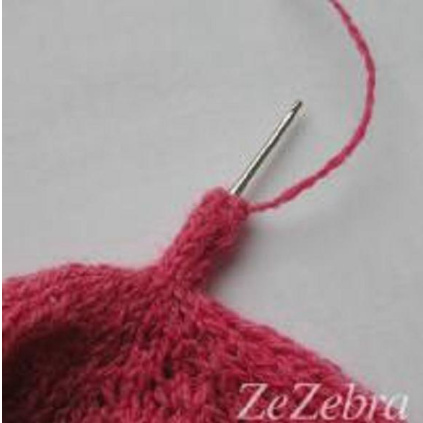
6. How to knit the point
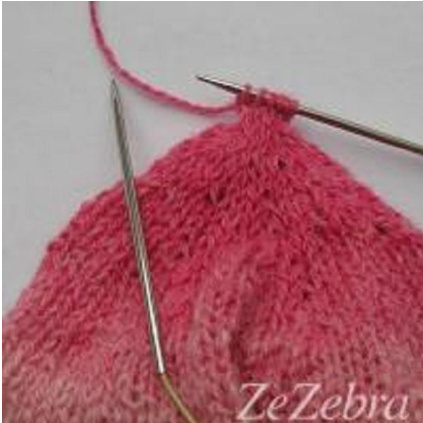
What is the most important part in a beret? Its spiffy tail or elegant point, of course! This is not hard to do - just a 6 stitch i-cord worked over 6 rounds. When there are only 9 sts left on the needles, work as follows: (k2to, k1)\* - repeat 3 times. 6 sts are left. Gather all 6 sts on a short circular as seen in the picture:
Knit 6 sts. It should now look like this:
Kauni felted beret Design and pattern instructions ? 2013 Elena Berezinskaya Translation from the Russian ? 2013 Katharina Sokiran
Slide the sts to the other end of the circular. Now you have this:
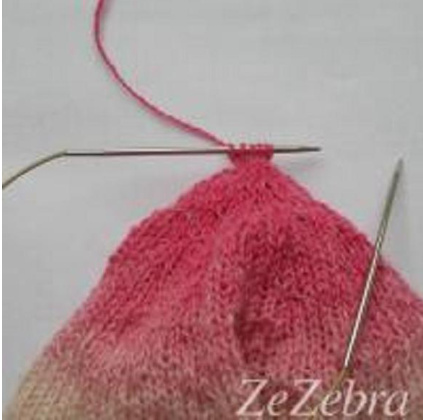
Knit the 6 sts again, then slide them to the other end of the circular again. Repeat until you have worked 6 rounds. The work is facing you all the time and doesn't need to be turned. Your working yarn stays in the back all the time. When having finished one round and starting the next, the working yarn just stays in the back. After completion of a row, it straightens up and pulls these 6 sts tight, forming the cord. Here is a view from the back of the cord with a piece of paper inserted into the end to make the tightened working yarn strand more visible:D reZllTSI
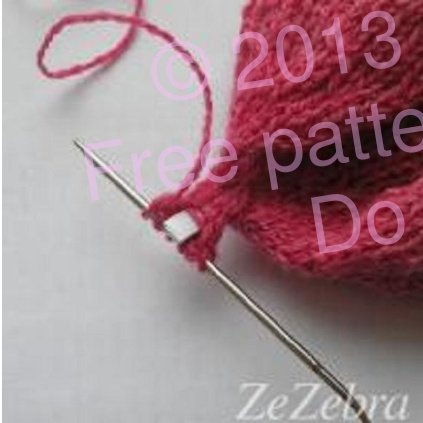
Do not bind off. Pull tail through remaining 6 sts, but not too like to avoid breaking the yarn. Use a crochet hook to pull the end inside the cord.
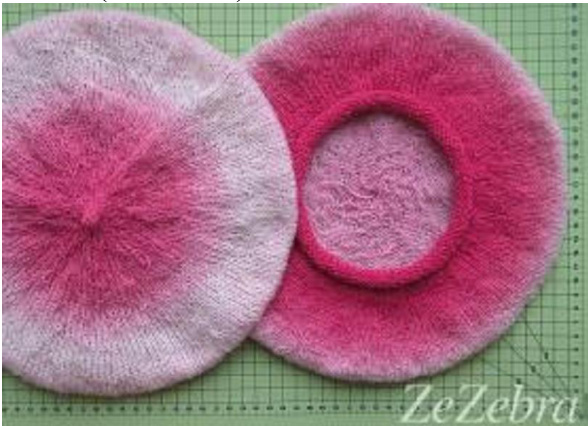
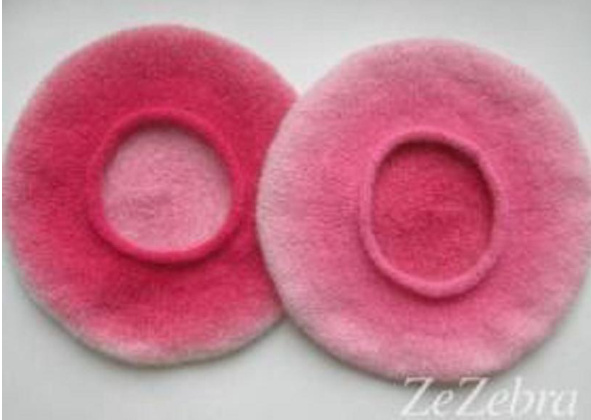
This is what we've got so far: Flat round berets with a tiny tail, diameter before felting 28 cm (11 inches).
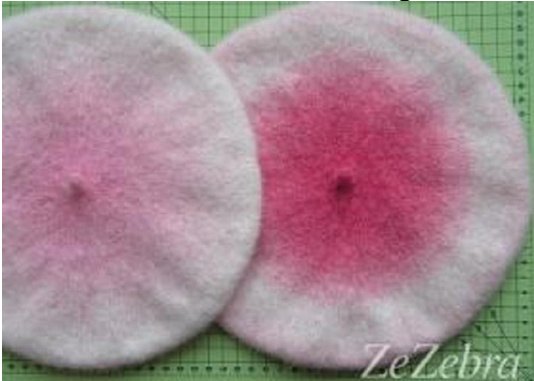
Felting by hand takes a long time and is not very pleasant for one's hands, but it gives more precise control over the shrinkage. I usually felt berets in the washing machine using a regular (not wool) program with regular (not wool) detergent at 40°C = 104°F and 800 revolutions per minute. Important! In order for the berets to felt only slightly, don't put anything else in with them. Although it is often said to put felting goods into the machine with something rough like denim jeans or terry towels, for our berets, we don't do that so they don't turn into coarse and stiff felt buckets. Daveiry Berets from such thin yarn will felt just a little bit, but will turn out fluffy and eve:
All queer stitches have disappeared, the color is looking fresh and clean now, and the texture has turned to gentle and fluffy!
Kauni felted beret Design and pattern instructions ? 2013 Elena Berezinskaya Translation from the Russian 2013 Katharina Sokiran
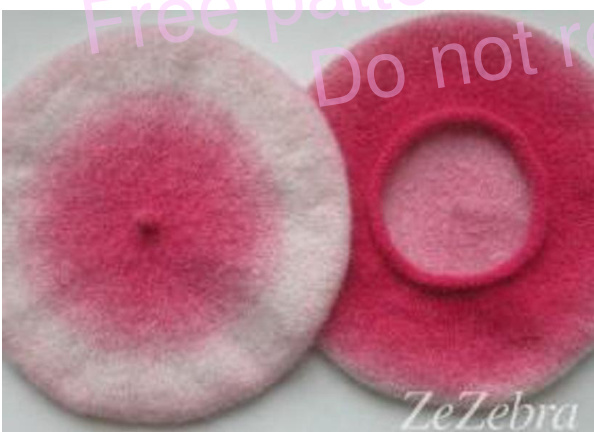
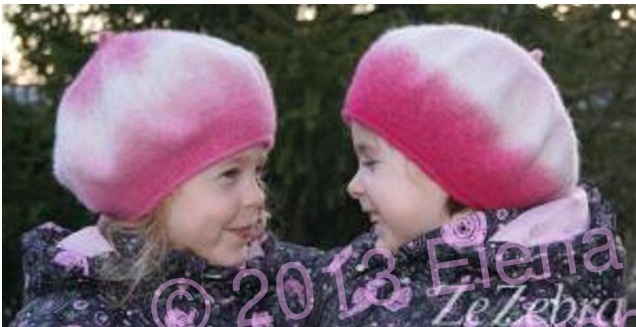
Tenderness in person! Two little berets for two little princesses:
These berets are deep enough to cover the ears. For a shallower beret, work fewer rounds, or felt more intensely.
Important tips:
1. Cast on exactly as many stitches as you would have for a non-felted beret according to gauge and head circumference but deducting a little for the stretch. You don't need to cast on more because it will be felted. The opening of the beret will not shrink that much, and it has to be stretched out a little for a snug fit. 2. A nice flat crown is achieved by increasing/decreasing 9 sts in every other round. The most important thing is not to place the increases/decreases atop of each other to avoid creating a polygon shape instead of a smooth circle. All increases and decreases have to be staggered to hide them in the knitted fabric and make the beret as round as possible. 3. If knitted loosely, the beret will felt more, and the felted fabric will turn out thicker. If you want to make a lightweight and soft beret, knit tighter. For a warmer and thicker beret, knit as instructed, but on thicker needles = fewer stitches as with original gauge and more shrinkage. 4. Be sure to knit all increases from the bar between stitches through the back loop to avoid holes. Holes will not close up, but get bigger after felting! 5. You will need 50 grams (1.8 oz) of yarn per beret, which are approximately two whole color sections. For a three-color beret, start from the middle or almost from the end of the first color section, there will be room for another whole color repeat and a little bit of the third color. To put up more colors you may cut out color sections. 4 to 5 colors will only fit in one beret when a yarn with shorter color sections is used (colors “Lilac", “Lavender” and “Rainbow"). 6. At first, felt beret slightly at 40°C = 104°F, don't start with 60°C = 140°F and the fastest spin cycle right away. In case it should turn out too big, it can always be felted a second time. If it comes out too small, it has to be stretched over a plate or cardboard template right away while Still wet. Don't' forget: In order for the berets to felt only slightly, nothing else should be put in with them while they felt. Even though you may have frequently read about throwing jeans or towels into the machine with your felting, don't do it. The result would be coarse, thick and un-pliable which you don't want with a beret. Detailed instructions start on pg. 11. Shorter instructions start on pg. 12. Still having questions? Want to make a comment? Visit my thread on the “Osinka” forum. Successful knitting! See you with the next berets!

With best wishes, Elena Berezinskaya proprietor of the “Green Zebra” internet-shop Next time, I will cover knitting a beret with turned-in rim from 8/2 fingering yarn.
Kauni felted beret Design and pattern instructions ? 2013 Elena Berezinskaya Translation from the Russian ? 2013 Katharina Sokiran
Detailed instructions
1. Rim
Size 56: With short circular, cast on 90 sts. Size 52: With short circular, cast on 81 sts. Join into round, being careful not to twist any sts, and knit 12 rounds.
2. Increasing - 22 rounds
Increase by 9 sts every other round, evenly spaced throughout the round, until you have 9x22=198 sts (9x21=189 for child's size). Rounds 13 and 14 for child's size only. For adult size, continue with Round 15. Round 13: (M1, k9) - repeat 9 times. Round 14 and all other even rounds - knit (stockinette in the round). Round 15: k4, (M1, k10) - repeat 8 times, M1, k6. Round 17: k8, (M1, k11) - repeat 8 times, M1, k3. Round 19: (M1, k12) - repeat 9 times. Round 21: k4, (M1, k13) - repeat 8 times, M1, k9. Round 23: k8, (M1, k14) - repeat 8 times, M1, k6. Round 25: k12, (M1, k15) - repeat 8 times, M1, k3 Round 27: (M1, k16) - repeat 9 times. rO111 Round 29: k4, (M1, k17) - repeat 8 times, M1, k13 Round 31: k8, (M1, k18) - repeat 8 times, M1, k10 Round 33: k12, (M1, k19) -repeat 8 times, M1, k7 Round 35: k16, (M1, k20) - repeat 8 times, M1, k4 Rounds 37-38 for adult size only (skip for child's size). Round 37: (M1, k21) - repeat 9 times. Rounds 39-40-41-42: knit.
3. Decreasing
Rounds 43-44 for adult size only (skip for child's size). Round 43: (k2tog, k20) - repeat 9 times. Round 45: k4, (k2tog, k19) - repeat 8 times, k2tog, k15. Round 47: k8, (k2tog, k18) - repeat 8 times, k2tog, k10 Round 49: k12, (k2tog, k17) - repeat 8 times, k2tog, k5 Round 51: (k2tog, k16) - repeat 9 times. Round 53: k4, (k2tog, k15) - repeat 8 times, k2tog, k11. Round 55: k8, (k2tog, k14) - repeat 8 times, k2tog, k6 Round 57: k12, (k2tog, k13) - repeat 8 times, k2tog, k1 Round 59: k4, (k2tog, k12) - repeat 8 times, k2tog, k8 Round 61: k8, (k2tog, k11) - repeat 8 times, k2tog, k3 Round 63: k2, (k2tog, k10) - repeat 8 times, k2tog, k8 Round 63: k6, (k2tog, k9) - repeat 8 times, k2tog, k3 Kauni felted beret Design and pattern instructions ? 2013 Elena Berezinskaya Translation from the Russian 2013 Katharina Sokiran Round 67: k2, (k2tog, k8) - repeat 8 times, k2tog, k6 Round 69: k6, (k2tog, k7) - repeat 8 times, k2tog, k1 Round 71: k3, (k2tog, k6) - repeat 8 times, k2tog, k3 Round 73: (k2tog, k5) - repeat 9 times. Round 75: k2, (k2tog, k4) - repeat 8 times, k2tog, k2 Change to DPNs or long circular. Round 77: (k2tog, k3) - repeat 9 times, Round 79: (k2, k2tog) - repeat 9 times, Round 81: (k2tog, k1)- repeat 9 times, Round 83: (k2tog) - repeat 9 times.
4. Finishing
Start knitting the “tail'. Round 84: (k1, k2tog) - repeat 3 times 6 sts left on needles. Rounds 85-90: knit i-cord Break yarn, leaving an 2-2.5 inch tail. Don't bind off. Pull tail through remaining sts, pull tight and sew in end. Don't forget to sew in the beginning tail, too. If you forget and felt while it is still hanging, it will turn thick and be much harder to hide afterwards. TA/rOm Done! The beret is now ready to be felted. Olll I I Felt by hand or in the washing machine at 40°C = 104°F.
Short instructions:
The beret is knitted in the round from the bottom up. With short circular needle, cast on 90 sts (81 for child's size, head circumference 52 cm) Join to round and knit 12 rows for rim. All even numbered rows: knit.
Increases:
Increase (M1-ktbl) by 9 sts every other round, evenly spaced, until you have 9x22=198 sts (9x21=189 for child's size). Stagger increases, don't place them atop of each other. K 4 rounds. Crown decreases: In every other round, decrease by 9 sts (k2tog), evenly spaced. Decreases should be staggered, not sitting atop of each other. At the end, when there are only 9 sts left on the needles, work as follows: (k2to, k1)\* - repeat 3 times. 6 sts are left. Work 6 rows of i-cord over these 6 sts. Don't bind off. Pull tail through remaining sts, pull tight and sew in end. Felt by hand or in the washing machine at 40°C = 104°F.


