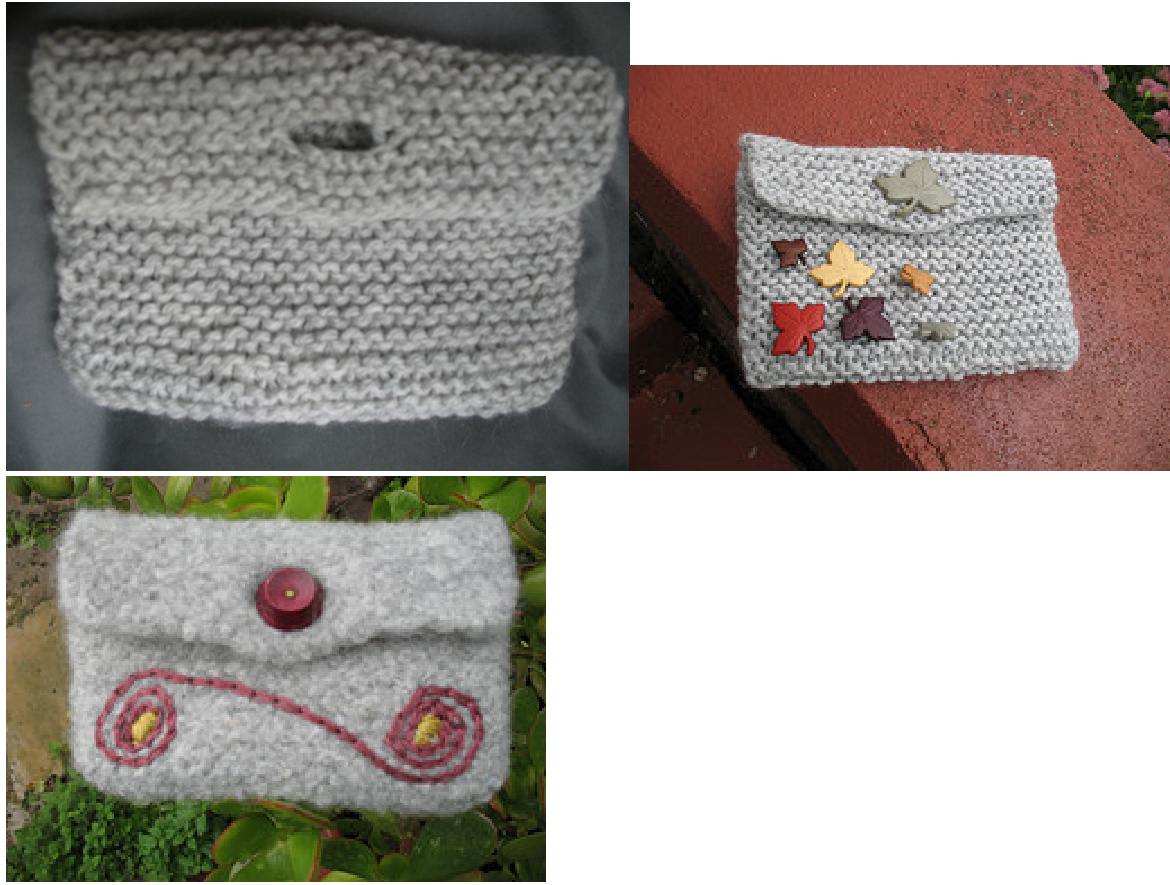
Beginner's Lucky Pouch
by Hattie B. Holtapp I've designed this as an initial project for a new knitter because it's fast and flexible. The finished project is a loosely knit pouch, perfect for that trusty graphing calculator or a locker stash of girl supplies. But, if stitches are wonky, no worries! It can be felted (shrunk on purpose) into a pouch suitable for a cell phone and some lip gloss..or the dude's equivalent of lip gloss, whatever that is. (Dudes knit, too.) It's knit in garter stitch, and uses the techniques of casting on, making a button hole, casting off and seaming. For the sake of my own sanity, I'm not including details on the techniques here, assuming you'll find those elsewhere in much better terms than I could offer.
Materials:
1 ball Knitpicks "Wool of the Andes" ( $100\%$ Wool, 110 yards/50 g) in Dove Heather #24077. In theory, you can make 2 pouches from one ball, so one of each is your reward. Size 10 needles large eyed blunt needle button to fit button hole--this will depend on whether or not the finished pouch is felted or not. Optional embroidery floss, buttons, ribbon, you-name-it for embellishment.
To Make:
Cast on 25 stitches. Knit 4 rows. Next row: Knit 10 stitches, cast off the next 5 stitches, knit the remaining 10 stitches. Next row: Knit 10 stitches, cast on 5 stitches, knit the remaining 10 stitches. Continue knitting every row until the work measures 10 inches long. Cast off stitches. Yay, you're almost done. Fold the piece like an envelope, so that the button hole end is 8 ridges long and sew the sides together. Weave in the ends. Take a look at it. Do you like it? Sew on your button and you're done! Does it look all funny? Do you want it smaller? To felt: Throw in the washing machine with the next load of towels on a hot wash cycle. Remove and pullinto a nice square shape and allow to air dry. Alternatively, you can see the magic happen (like with Shrinky Dinks (TM)) by submerging the piece in a sink with some very hot water and a squirt of soap. Use two spoons or your hands to agitate it until it shrinks to the size you want. Wrap it in a towel and squeeze as much water out as you can. Reshape a bit and allow to air dry. Embellish as desired. Text and photos copyright 2008 Hattie B. Holtapp


