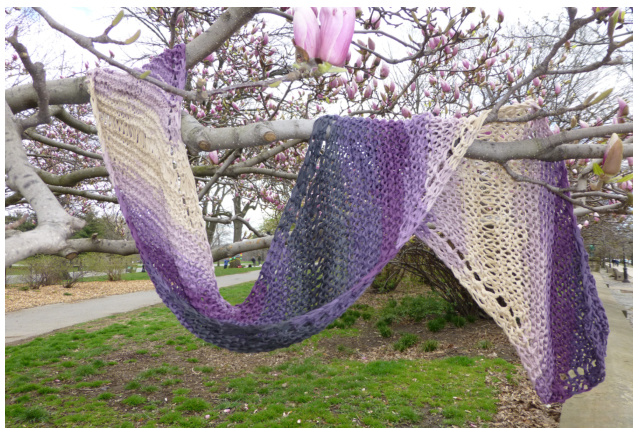
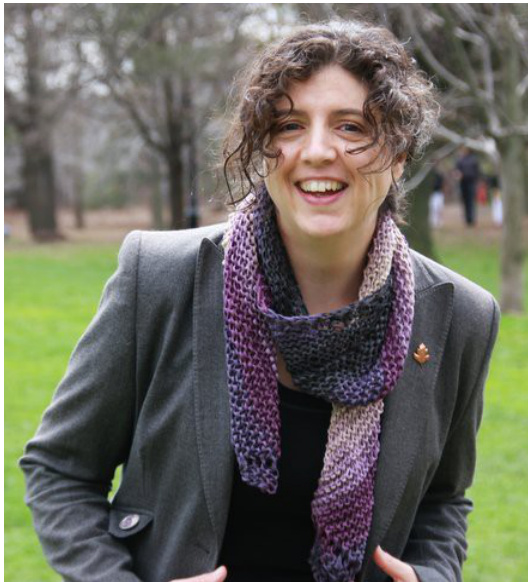
But Then I'm Biased Scarf
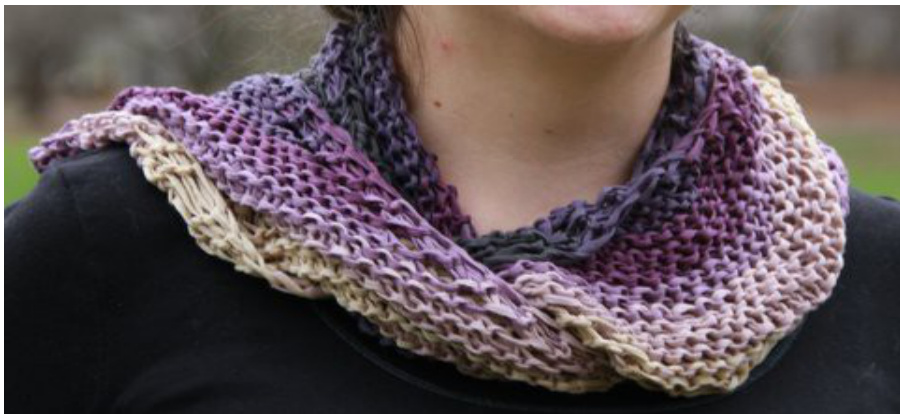
Suggested yarn 1 skein of Lang Yarns 'Sol Dégradé' Needle 9mm / size 13 This is one of those deceiving patterns where the yarn does much of the work for you, most of the knitting is simple garter stitch yet the end result is a visually interesting mid-season accessory. Did I mention gauge doesn't really matter ? You just want to use needles which create a loose drapey fabric with your yarn. Techniques needed are :- Garter stitch - knit every row kfb - knitting into the same stitch twice, once through the front loop (without transferring the stitch) once through the back loop YO - bringing the yarn over the right hand needle k2tog - knitting two stitches together at the same time
Conversational Version
We're going to make a long parallelogram so that the rows will actually hang at an angle on the finished item. The first few rows are a little fiddly but after that you can begin to see the logic - you'll increase gradually until the scarf is as wide as you want it, then maintain the same number of stitches until the scarf is as long as you want it, then you decrease down to a point to make the final corner.
Cast on 3 stitches using a cast on you're comfortable with, knit one row then your next row kfb into the first and last stitches. I think that having a slipped stitch selvedge is a nice touch so we'll start that now - decide if you prefer to slip the first stitch of the row or the last and continue to do this throughout. So, you now have five stitches, next row kfb into your second and fourth stitches. Essentially we now have three border stitches each side and the point of the first corner of your scarf. Things should fall into a nice rhythm from here on in - you're going to repeat a two row pattern for a while slipping either the first or the last stitch of each row. Row 1 - knit 3, yarn over, knit as far as the last three stitches yarn over knit 3; row 2 knit all the stitches. The body of your scarf will be getting wider and you'll always have an odd number of stitches between the borders. Keep going until you have 27 stitches inside the border. Now, you want to keep doing the yarn overs to continue the border but you don't want the scarf to get any wider so you need to fit in some decreases as well. So now you're going to use a slightly different two row repeat, still slipping either the first or the last stitch of each row. Row 1 knit 2, k2tog, YO, k2tog, knit to last three stitches, YO, knit 3. Row 2 knit all the stitches. You'll see a second corner form and get an idea of how the rows will eventually hang. As you knit you'll see the colour variations in the yarn creating stripes. Every so often you may feel that one colour band is going on a bit too long or you find yourself getting tired of just knitting we can add a row of elongated stitches. You'll need to concentrate but we're just adding an element to the same two row repeat. Row 1 do a yarn over after each action - so for the first border knit YO, knit YO, k2tog YO, YO YO, (essentially you're wrapping the yarn three times around your needle here), k2tog YO, knit YO to last 3 stitches, YO YO, (again you're wrapping the yarn three times around your needle at this point), knit YO, knit YO, Knit. Row 2 - you're going to drop all the extra yarn overs just knitting your usual stitches, I find I can slip the YO off as I slip old stitch off the lefthand needle. You need to pay attention knitting the two border yarn overs that we do want and I strongly suggest you check you still have 27 stitches in the body of your scarf at the end of this row or the next. Continue adding length to the scarf and inserting elongated sections where you feel they're needed. If you're lucky the colour repeats will tell you when to start decreasing, if not continue until your scarf is about 50 inches or 126cm long by which time you will have done about 61 repeats of these two rows plus three elongated ones since forming the second corner. You're now going to work backwards decreasing two stitches every other row as you create the third corner of your scarf and work towards the final one, still slipping either the first or the final stitch of each row. Row 1 of the new repeat still has YOs but you need to decrease either end so knit 2, k2tog, YO, k2tog, knit to last six stitches, k2tog, YO, k2tog, knit 2. Continue until you have 3 stitches remaining between the borders. The next row knit 2, k2tog, YO, slip the next stitch, k2tog, pass the slipped stitch over, YO, knit 2, next row knit all the stitches. You now have a total of just seven stitches. Knit 1, k2tog, knit 1, k2tog knit 1. Your final row k2tog, knit 1, knit, k2tog. Cast off. Weave in the ends and enjoy the compliments your receive.
Row by Row Account
There are three sections to this scarf - in section A you build width, in section B you build length and in section C you close down. Each section has a basic two row repeat. There is the option of adding a fourth two row motif in section B to add some elongated stitches. Set-up rows Cast on 3 Row 1 - knit Row 2 - kfb, knit,kfb (5 stitches) Row 3 - knit, kfb, knit, kfb, knit (7 stitches) To create a selvedge now start to slip the first stitch of every row.
Section A
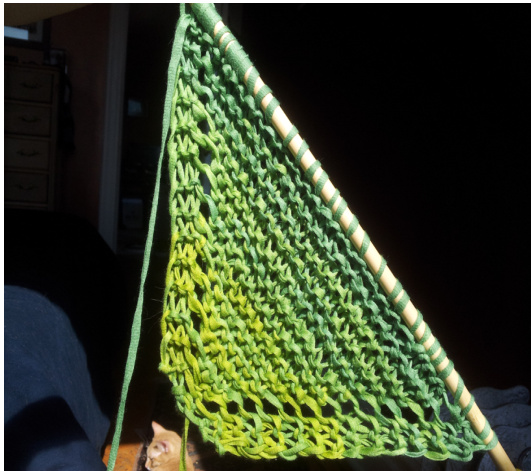
Row 1 -Slip 1, k2, YO, knit to last 3 stitches YO, k3 Row 2 - Slip 1, knit all remaining stitches Continue until you have 27 stitches between the borders. End with row 2
Section B
Row 1 - Slip 1, k1, k2tog, YO, k2 tog, knit to last 3 stitches YO, k3 Row 2 - Slip 1, knit all remaining stitches row - these help break up larger blocks of colour and show of the yarn, exact placement is a personal choice. Row 1 as row 1 of Section B with a YO after every action. Slip 1, YO k1YO k2tog YOx3 k2 tog, \*YO knit, repeat from \* to last 3 stitches YOx3 knit YO knit YO knit Row 2 - knit across the row dropping all the extra YOs. Check your stitch count 3-27-3. Continue working Section B until your scarf measures about 50inches, 126cm. This should be about 61 repeats of Section B including 3 elongated sections.
Section C
Row 1 - Slip 1, k1, k2tog, YO, k2 tog, knit to last 6 stitches, k2tog, YO, k2 tog, k2 Row 2 - Slip 1, knit all remaining stitches. Continue until you have 3 stitches remaining between the borders. Finishing Off Next row Slip 1, k2, k3tog, k3 (7 stitches) Next row Slip 1, k2tog, k1, k2tog, k1 (5 stitches) Next row k2tog, k1, k2tog Cast off and weave in ends. catrin.egan@gmail.com


