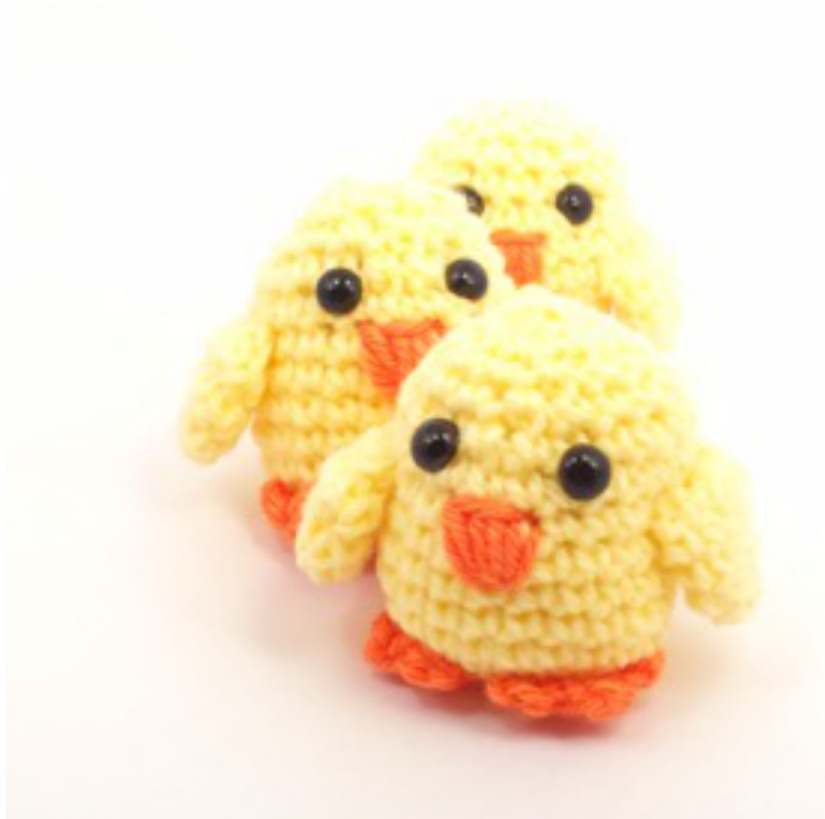
Easter Chicky Amigurumi
by Knot Your Hooker I'm happy for you to sell the finished piece made from this pdf pattern online or locally, but if you do just give me a little mention. I'm Dee at Knot Your Hooker, Enjoy the pattern :)
Doo-Dads:
·Crochet Hook: Size 3mm (maybe bigger or smaller depending on how tight your stitches are. Try to get no visible gaps) ·1 Pair of Black Safety Eyes - 9mm . Worsted Yarn ( I use Spotlight's Basic Marvel range) in: Yellow Orange ·Stuffing · Bits n' bobs (scissors, stitch markers, darning needles, tv)
Glossary:
SS - Slip Stich - Put hook into stitch, yarn over and pull through both loops. Sc - Single Crochet Magic Ring - A magic ring is an adjustable circle used at the beginning of a piece that doesn't leave an ugly little hole in the centre. June Gilbank has a really easy to follow tutorial about them at www.planetjune.com/magicring. Inc - Increase (make two sc in the same stitch) Dec- Decrease (make 1 single crochet over two stitches). Invisible decreases make your work look so much better and I don't decrease any other way now. Look to June's tutorial about it at www.planetjune.com/invdec. It has tons of info, plus handy videos for lefties and righties.
Pattern:
Body
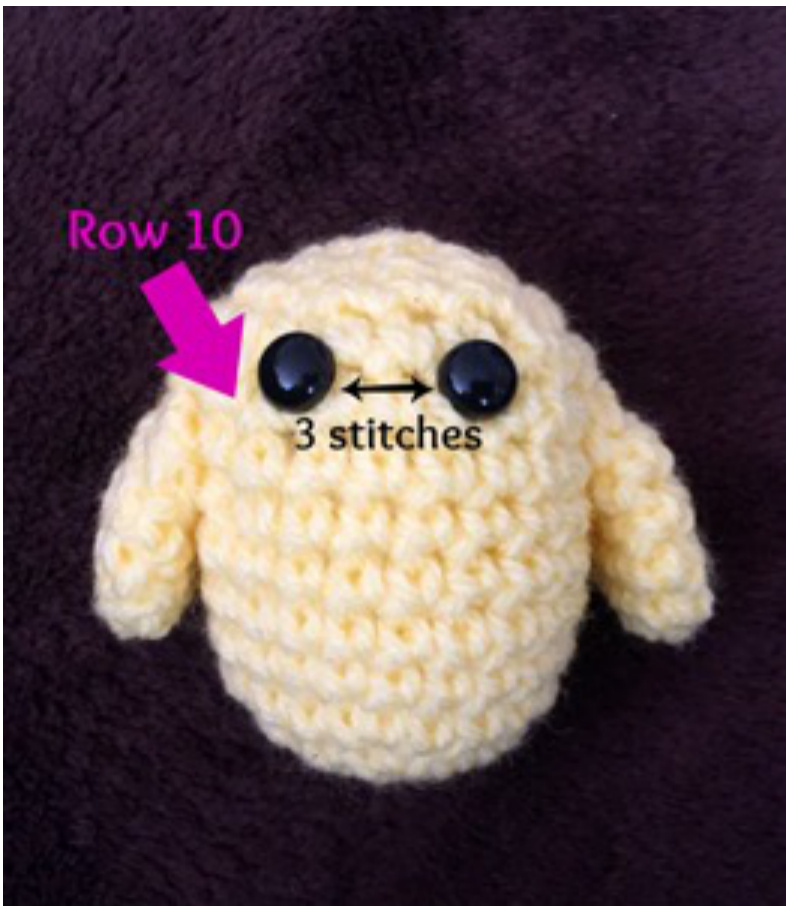
Yellow Yarn - Row 1: Make 6sc in a magic ring (number of stitches: 6) Row 2: Inc around (12) Row 3: (1 sc, inc) around (18) Row 4: (2 sc, inc) around (24) Row 5 - 10: sc around (24) Row 11: (4 sc, dec) around (20) Row 12: (3 sc, dec) around (16) Attach the eyes just above row 10 and with 3 stitches between them. Stuff most of the egg. Ifyou stuff too much it makes it difficult to keep crocheting without getting stuffing between the stitches. Row 13: (2 sc, dec) around (12) Row 14: (1 sc, dec) around (8) Fasten off. Stuff the rest of the egg and weave in the top. Planet.June has a great tutorial on weaving this end in at http:/www.planetjune.com/blog/the-ultimatefinish-for-amigurumi.
Wings (make 2)
Yellow Yarn - Row 1: Make 6sc in a magic ring (6) Row 2: (1 sc, inc) around (10) Row 3-5: sc around (10) Fasten off. Flatten the wings and attach to each side of the body at row 9.
Beak
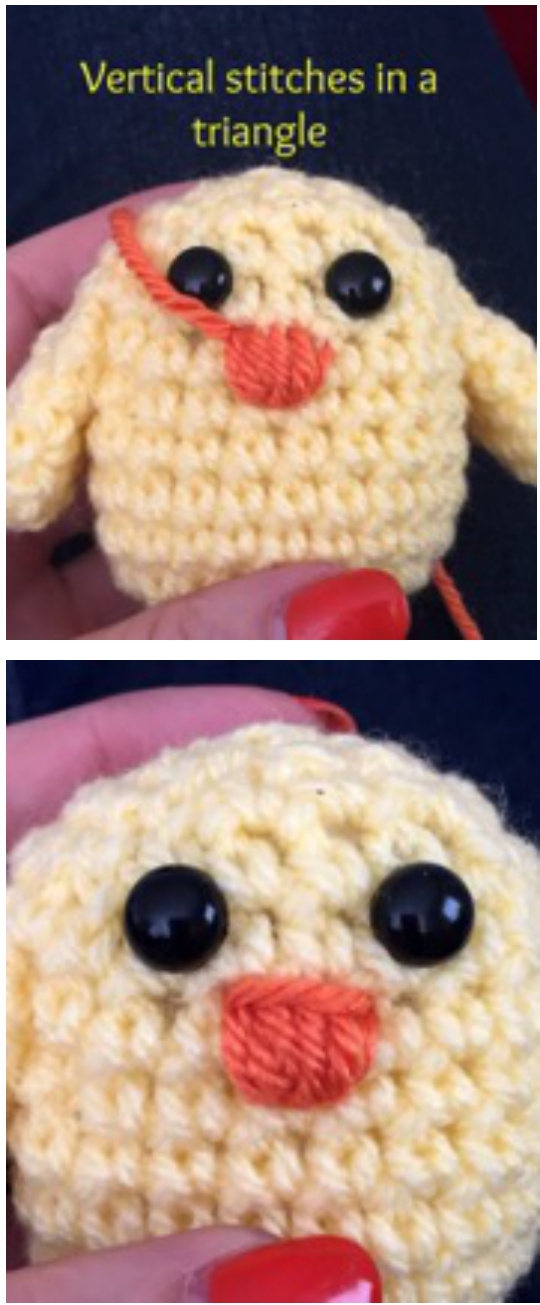
Use the orange yarn to embroider a beak onto his cute face. Make lots of vertical stitches in a upside down triangle, then do one horizontal line across the top and pull it tight to neaten the edge up. Pulling that last top stitch tight also gives his beak a little puffyness.
Feet (make 2)
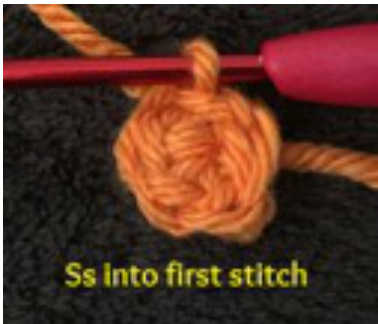
Orange Yarn - Row 1: Make 5 sc in a magic ring. Slip Stitch into first stitch to complete the ring.
Row 2: (Chain 2. Sc into 2nd chain from hook. Ss into next stitch.) x3
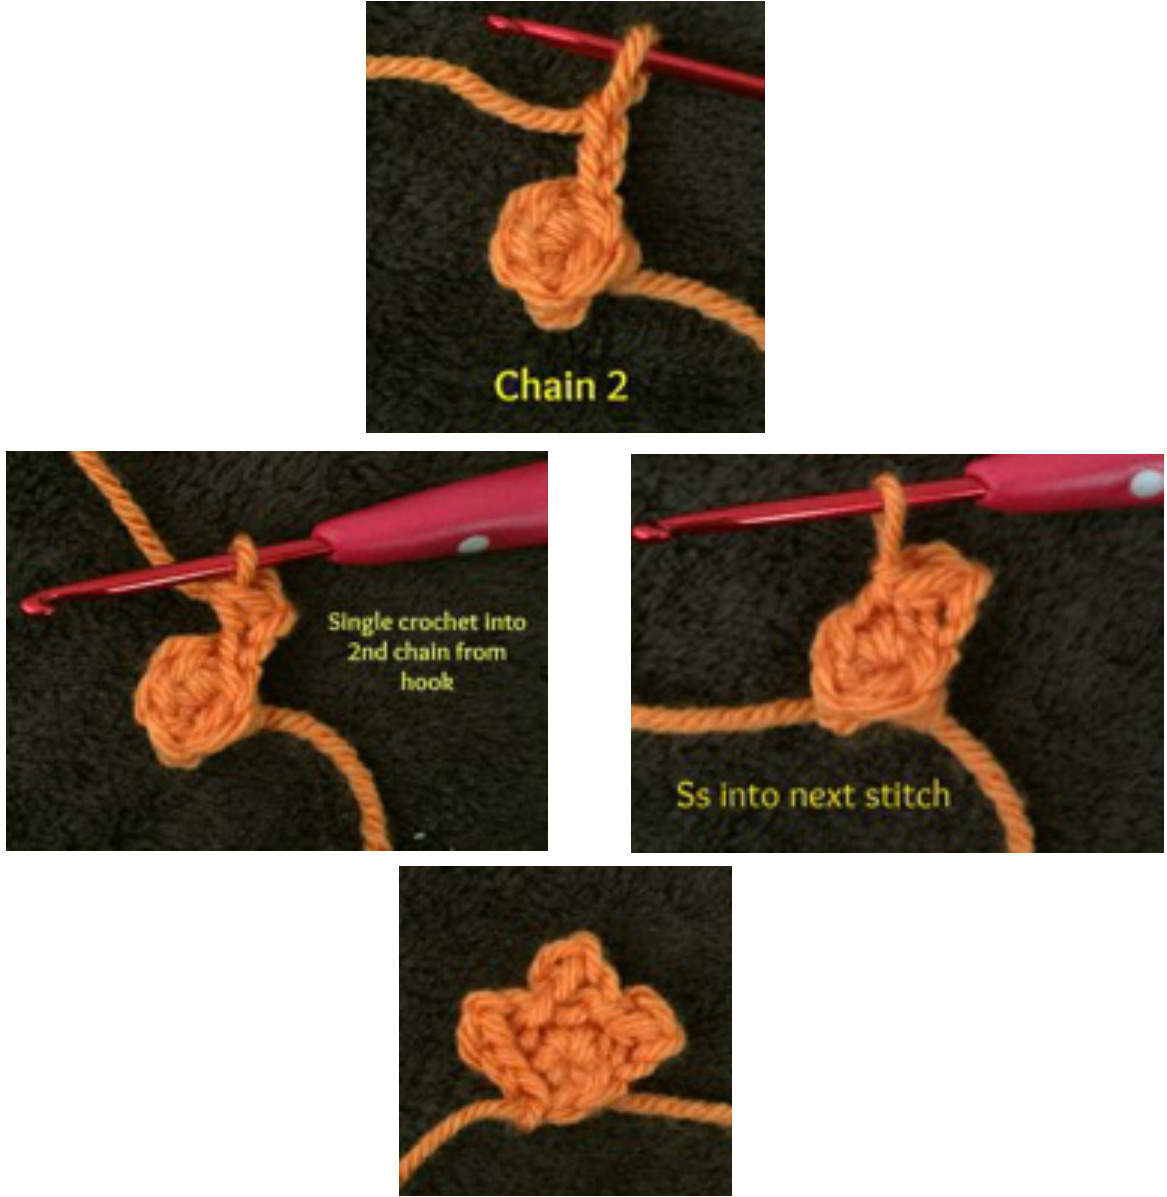
Fasten off and leave a long tail for sewing. Attach to the bottom of the body with right side closest to the body. Sew around the bottom of each foot and then through the middle, leaving the toes free and hanging out in front of the body.
DONE!
Designed by Dee from Knot Your Hooker https://www.etsy.cwwwskaptkoothooterdom


