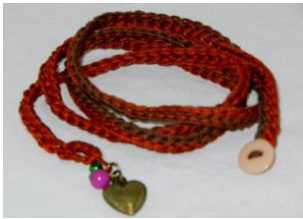
Charmed Wrap Bracelet

Use No. 10 crochet thread or embroidery thread to create this easy, boho, wrap bracelet. Add your favorite charm, a bead, or crochet a cute little daisy charm! Wrap it around your wrist or yourneck by Deanna Young The Yarn Yogi 2012 all right reserved by Deanna Young Visit me at www. The Yarn Yogi.com Skill Level:Easy Actual Measurements: As long as you like Gauge: Gauge is not important.
Materials:
Yarn: No. 10 Crochet Thread or Embroidery Thread (at least 2 skeins) Hook: Steel crochet hook 6 and crochet hook C. Stitch Marker Optional - charm, “E" Beads, large bead. Button - 1%2" Waxed Dental Floss Embroidery needle The Yarn Yogi: One-of-a-kind Charmed Wrap Bracelet
Abbreviations:
Sl st: slip stitch Ch: chain stitch Pm: place marker Sc: single crochet
Notes:
1. Read pattern instructions carefully before beginning. 2. If you have any questions, comments, or just plain need HELP, please send me an email at deedum36@gmail.com.
Instructions:
If you are adding your own charm:
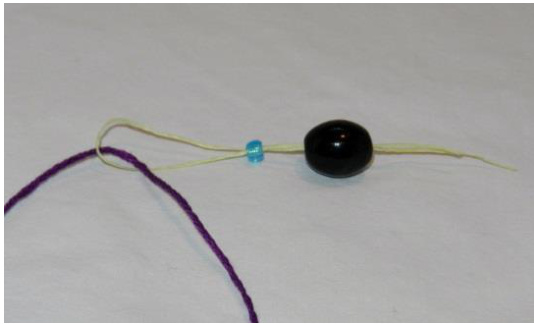
Thread an “E" bead onto the thread. If you find it difficult to thread the bead, cut a piece of the waxed dental floss, fold it in half, pinch the ends together and thread the bead into it. Insert the thread into the loop of the folded dental floss and pull the thread through the bead with the floss.
To form button loop, with steel hook size 6, ch 12, sl st into 1st ch to form a ring. Do not turn. Sl st in next 5 ch, slide “E" bead up to hook, continue sl st around, end with sl st into 1st sl st. Add your charm by opening the jump ring attached to the charm and inserting it into the “E" bead or into the thread around the “E" bead. Continue to Bracelet Length below.

If you are adding a large bead: The Yarn Yogi: One-of-a-kind Charmed Wrap Bracelet Thread an “E" bead and 1 large bead onto thread using dental floss as above. Bring thread around “E" bead and back through large bead and cut thread leaving 2 long tails for attaching to the bracelet and set aside. For button loop, with steel hook size 6, ch 12, sl st into 1st ch to form a ring. Do not turn. Sl st in each ch around ring ending with sl st in 1 st st. Continue to Bracelet Length below.

If you are crocheting the Daisy Charm:
With steel hook size 6, ch 1 very loosely, ch 1, 15 sc in 1st ch 1, sl st to 1st sc forming a ring. Pull on the tail to tighten the ring. (Ch 4, sk 1 sc, sl st in next sc, ch 4) around ending with sl st in base of beginning ch 4 - 7 ch 4 “petals". Fasten off, leaving a long tail for attaching to the bracelet. You can spray the daisy charm with stiffening spray or dip it in very diluted craft glue if you want. Add 1 or 2 “E" beads if you want and set aside. For button loop, with steel hook size 6, ch 12, sl st into 1st ch to form a ring. Do not turn. Sl st in each ch around ring ending with sl st in 1 st st. Continue to Bracelet Length below.
Bracelet Length:
With Crochet Hook C, ch st loosely until bracelet can wrap around your arm 4 or 5 times. If you want to wear it as a choker, check to see if it wraps around your neck a couple of times. Pm in last ch, and ch 4.5 more inches (that's how much the length will shrink after sl stitching all rows). Remove marker, turn. Turn your ch over and notice the humps on the back:
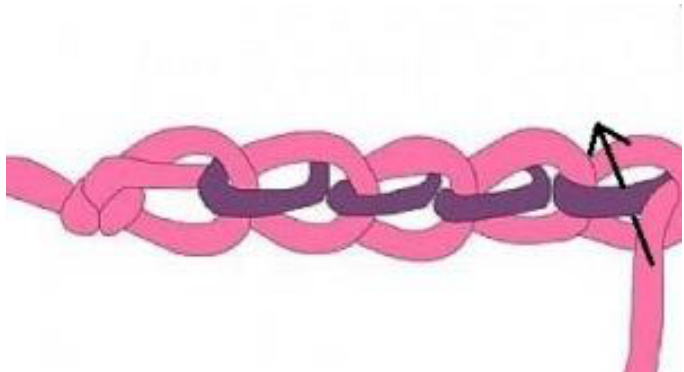
Image copied from: http://ayarnifiedlife.wordpress.com/slip-stitch-crochet/before-you-begin/ The Yarn Yogi: One-of-a-kind Charmed Wrap Bracelet DO NO sk 1st ch , sl st through humps to end. If this is too difficult (sometimes it is hard to see the humps or your hook just won't go through), just sl st through the top loop. Turn. Do not ch 1. Sl st through front/top loop of previous row's sl sts to end. Fasten off, leaving long tail to attach the button. Attach your button, using the dental floss if needed and fasten securely using your embroidery needle. Using your embroidery needle, attach your large bead or crochet daisy chain to bottom of beginning button loop. Weave in all ends.


