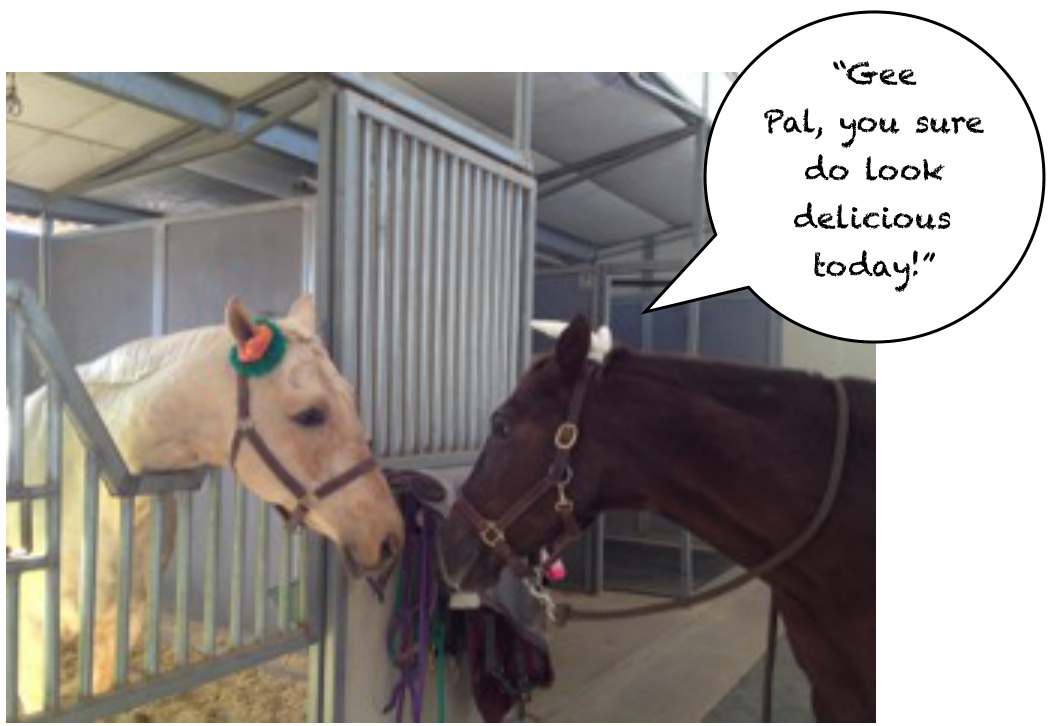
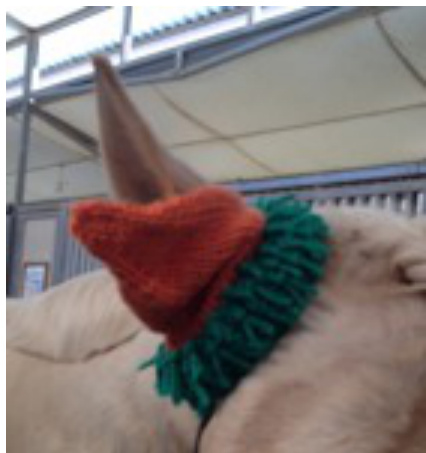
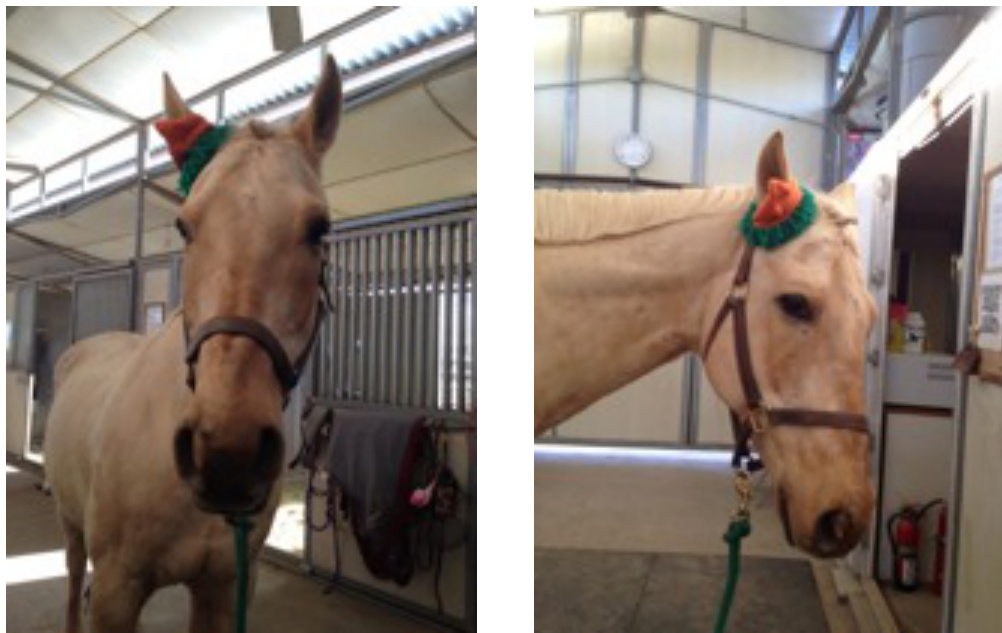
"Carrot Top" Horse Hat
An Easter / anytime version of the “Horsie Santa Hat & Elf Hat" Pattern. This is not the complete pattern. It is intended to be used along with the Santa Hat part of the original pattern. You can find this pattern at my pattern store: http://www.ravelry.com/stores/scruffy-herbert-knits
Materials:
· Set of 5 double pointed needles - US 8 ·MC: Red Heart Soft Touch in Tangerine (Or any orange worsted weight yarn) ·CC: Loops and Threads Impeccable in (Or any green worsted weight yarn) -Worked with 2 strands held together -You could also use any green bulky weight yarn · Yarn needle · Scissors · Horse halter · Row counter (optional) · Stitch markers (optional)
Abbreviations:
MC - Main Color CC - Contrasting Color CO - Cast On K - Knit P - Purl St st - Stockinette stitch K2tog - Knit 2 together P2tog - Purl 2 together ssk - slip, slip, knit SI1 - slip one PU - pick up Making the Tab: Work the tab in MC
Rim:
Work in CC, with 2 strands held together (f you use a bulky weight yarn you will only need one strand), for Rows 1 - 10 Change to MC for rows 11 - 12
Making the Ear Hole:
Continue in MC, following pattern, for rows 13 - 33 as pattern dictates, then skip rows 34 - 53, picking up at row 54 and working until the end. (You could follow the original pattern here if you want a longer hat).
Making the Fringe:
You could finish the hat here, or add a fringe around the rim (as pictured) to make the hat seem more carrot-like. To do this cut out a bunch of 3 inch strands of CC yarn (l cut about a dozen at Pattern copyright 2014, Kelsey Vo (Formerly Kelsey Wetterer). All rights reserved. For questions about this pattern, you can contact me at kelseywetterer@gmail.com or as ScruffyHerbert on Ravelry. Thanks! a time). Attach the strands, one at a time, along the top row of garter stitch stitches. Fold the strand in half and thread it through one garter stitch “bump" (using a yarn needle or crochet hook), so that the loop is on the bottom and the 2 loose ends on top. Thread the loose ends through the loop and pull tight. Continue along the row, skipping a stitch (bump) in between each strand. For the next layer, skip one row of stitches and attach fringe as before, except staggered in between the strands above. For the third row, align the fringe strands with the first row. I stopped here and trimmed to fringe to align with the bottom edge of the hat. Make sure to introduce your horse to this hat carefully. Having something new, not to mention bright orange, next to his/her face can be scary for a horse. My horse, Ransom, is very easy going, but I still showed him the hat and let him sniff it before attaching it to his halter. Once you're confident your horse won't freak out, slide the crown strap through the slot in the hat and put the halter on your horse. Once the halter is fastened, slip your horse's ear through the ear hole. Having something around his/her ear may take some getting used to. Make sure to slip the hat off of his/her ear before removing the halter. Warning: This hat is compatible with some bridles, but please use extreme caution while riding a horse with new equipment or accessories such as this “Carrot Top" hat. Horses are extremely unpredictable animals and I would be very wary when riding a horse with the Carrot Top hat on. This pattern is intended for use on a halter and I take no responsibility for accidents that may result from use while riding or on the ground. Remember, looking cute isn't as important as beingsafe!