by Jennifer Weissman
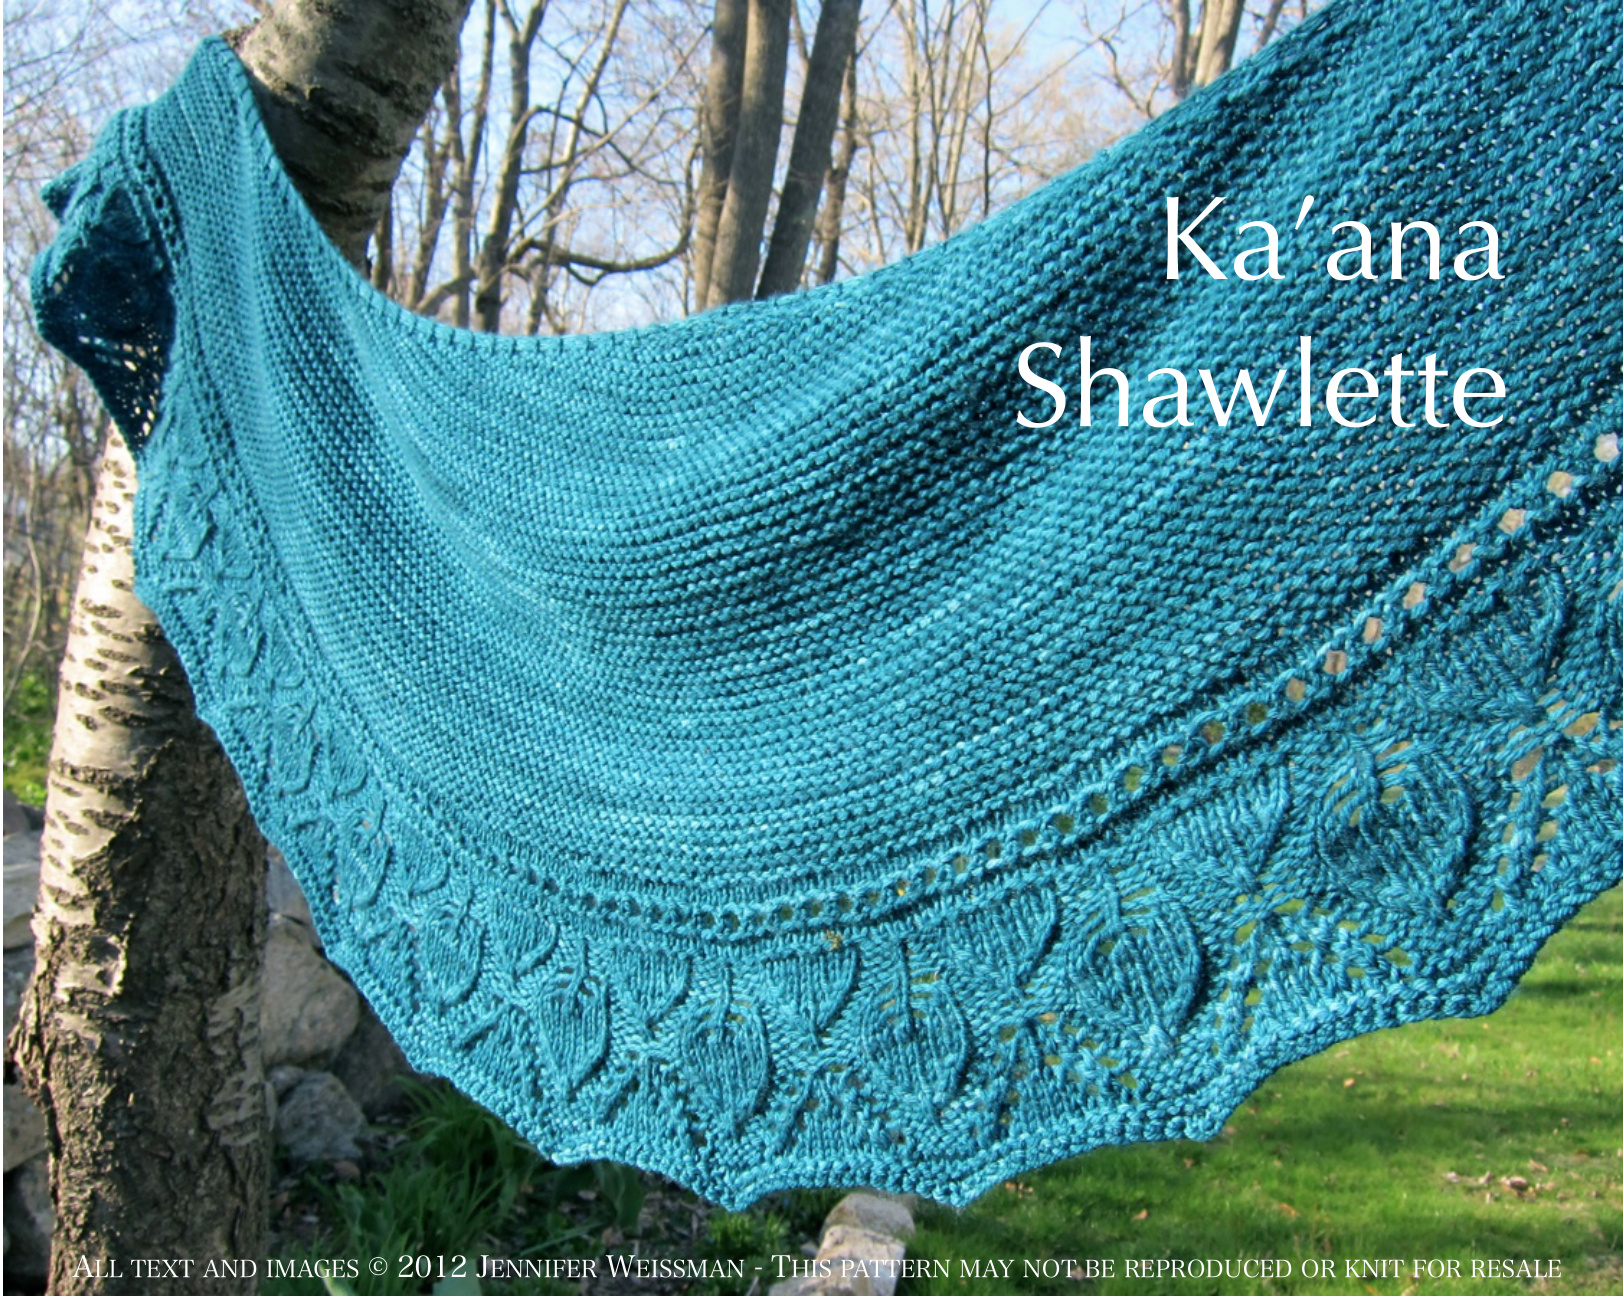
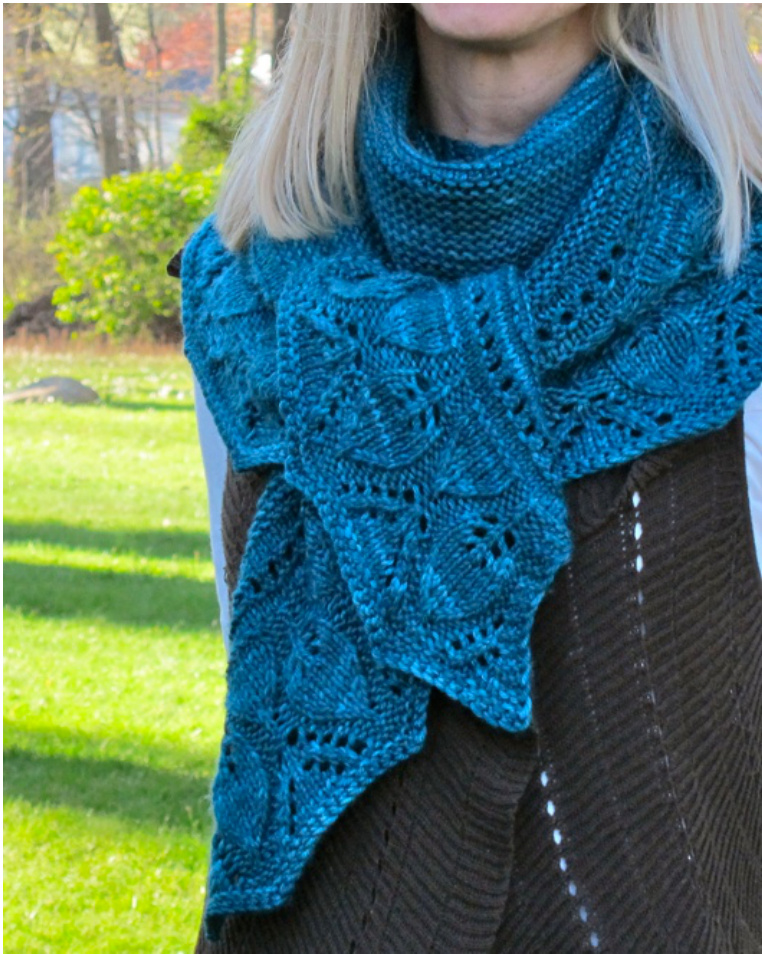
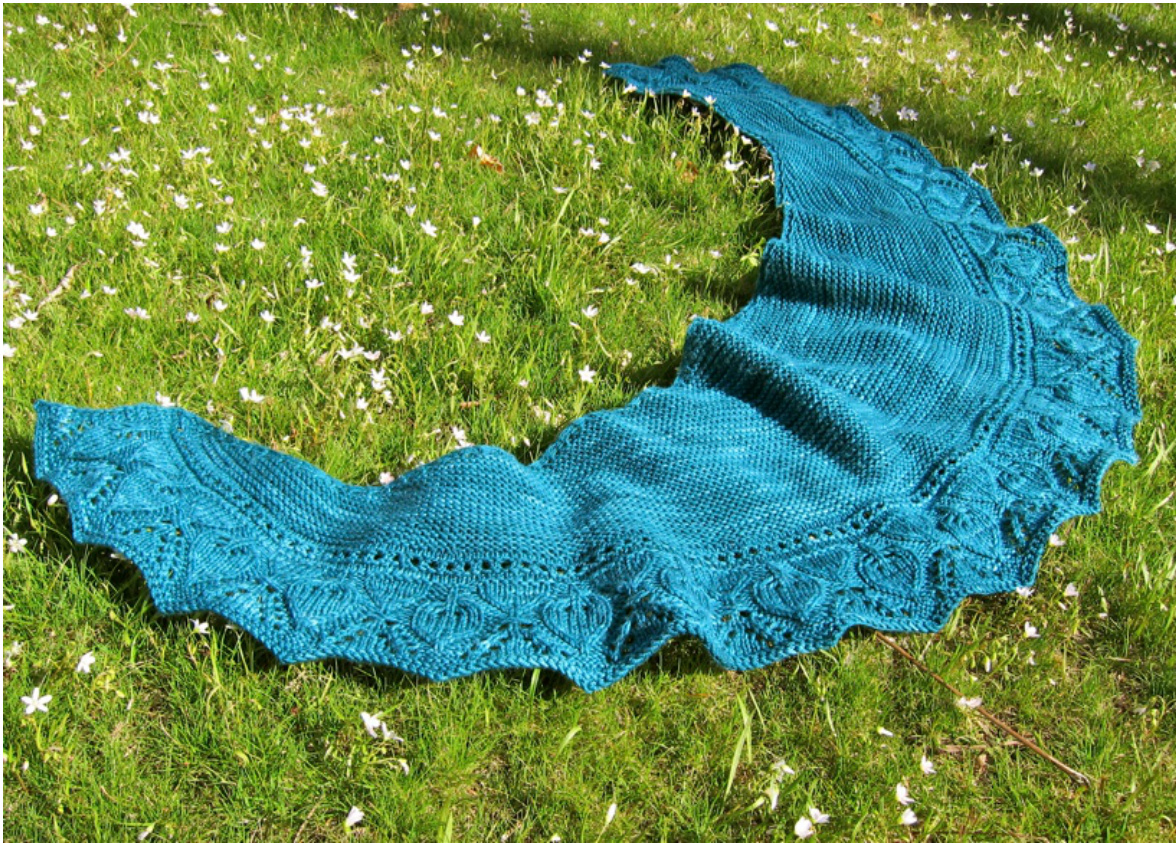
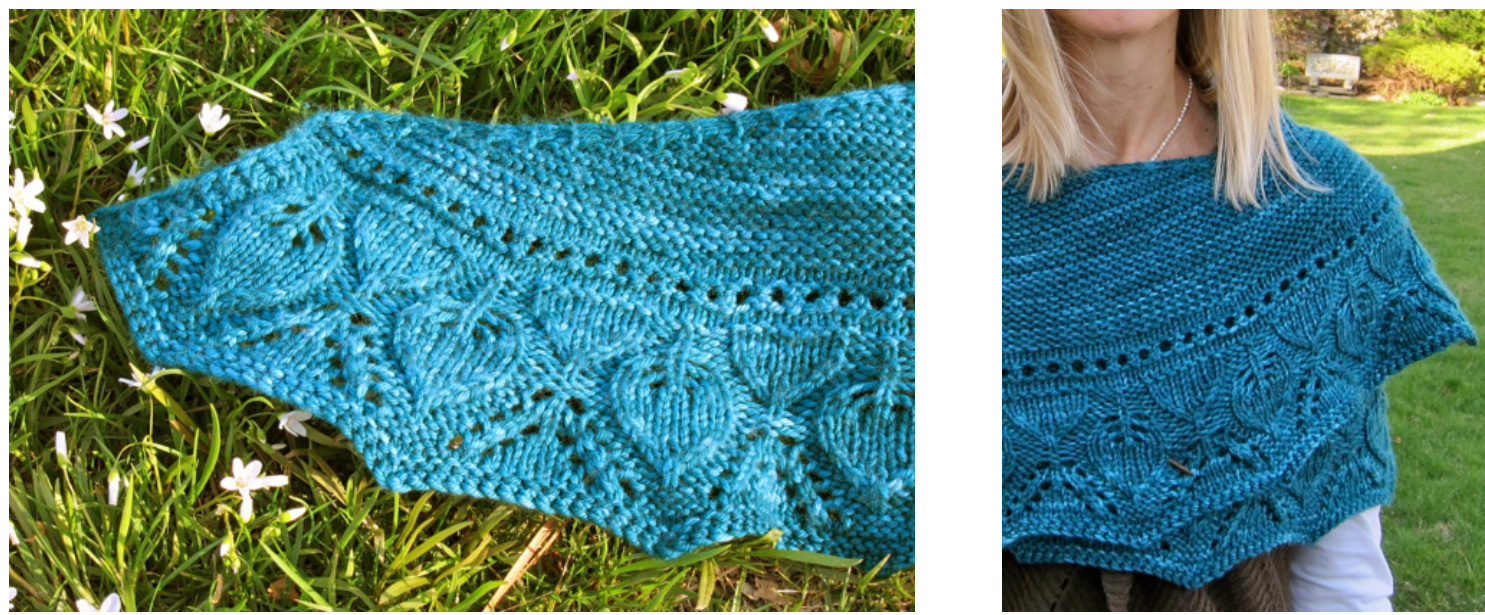
Ka'ana is a crescent-shaped shawlette knitted from the top down in worsted-weight yarn. Its shape and wide wingspan allow for multiple styles of wear. On a windy winter day, Ka'ana can be worn as a scarf, wrapped around the neck and tied securely in front. On a cool summer evening, Ka'ana's curved top edge allows it to sit beautifully as a wrap, elegantly hugging the shoulders. The first half of Ka'ana is knitted in garter stitch with increases on every row. It is quite simple and portable -- the perfect take-along project. The second half of Ka'ana includes a row of eyelets and a leafy edging to keep things interesting. The pattern includes both written and charted instructions to help you achieve the best possible results.
Finished Measurements:
Width: 60"/152 cm Center length: 14.5"/37 cm {Note: Directions for altering the size are provided in the instructions in italics.}
Gauge:
In garter stitch, 16 sts and 36 rows = 4"/10 cm after blocking. Note: Gauge is not critical for this shawlette, but yardage requirements and finished measurements will vary if your gauge differs.
Materials:
Approximately 6o0 yards/550 meters of worsted-weight yarn US size 7/4.5 mm circular needle (or size necessary to achieve correct gauge), preferably 40"/100 cm or longer US size 9/5.5 mm needle (for bind off only) 23 stitch markers, if desired (the quantity will change if the shawlette size is altered) Tapestry needle for weaving in ends
Construction Notes:
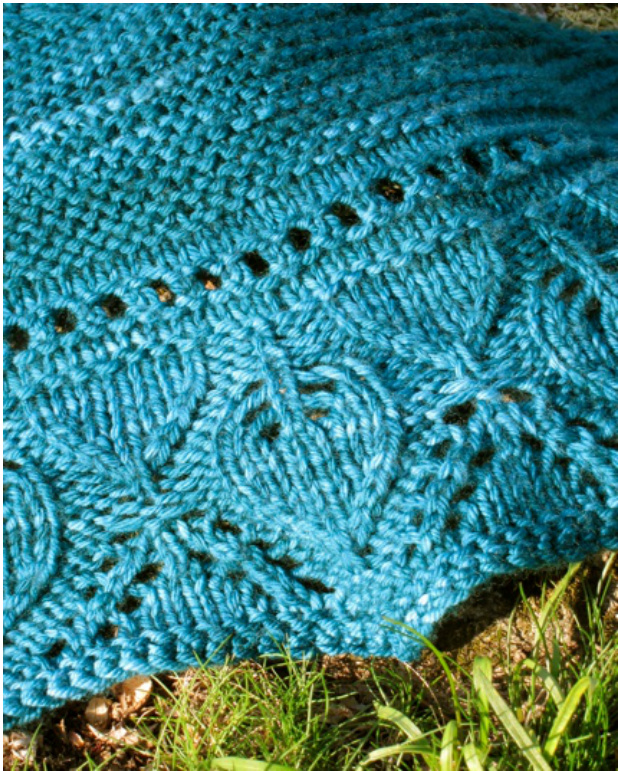
Ka'ana is a crescent-shaped shawlette that is worked from the top down and from the center out. Section One creates the crescent shape of the shawlette, with increases on the right and left sides of every row. Aside from the set-up rows, every row of Section One is the same. It is important NOT to work a slipped-stitch edge in Section One, because the top edge will be too tight, narrowing the wingspan of the shawlette. Section Two includes a row of eyelets and a leafy edging, finishing with a few rows of garter stitch. Section Two has a 3-stitch garter border on each side (one slipped stitch, for a neat edge, followed by two garter stitches). This border is included in both the written and charted instructions.
Techniques Ulsed:
Section One Yarn Overs: The increases in Section One are worked as yarn-over stitches. With the exception of the first set-up row, each yarn-over stitch is twisted closed on the following row by knitting it through its back loop. This technique prevents the yarn-over stitches from forming holes along the top edge of the shawlette. To Loosen the Top Edge: The top edge of the shawlette will curve gently, but it should be stretchy enough for you to pull it straight. If you find that the top edge of the shawlette is tight, pulling the shawlette almost into a circle, try this trick: At the beginning of each row, knit the first stitch, slip it back to the left needle, knit the first stitch again, and then continue with the rest of the row as usual. Also, as discussed above, be sure not to work a slipped-stitch edge in Section One, because this will tighten the top edge.
Instructions:
Section One
Cast on 6 stitches with knitted cast on. Row 1 (Set-up): k2, yo, k2, yo, k2 (8 sts) Row 2 (Set-up): k2, yo, k1 tbl, yo, k2, k1 tbl, yo, k2 (3 sts increased = 11 sts) Row 3: k2, yo, k1 tbl, yo, knit to 5 sts before end, k1 tbl, k1, k1 tbl, yo, k2 (3 sts increased) Repeat Row 3 83 times more, until you have 263 stitches on the needles. There is no right or wrong side to the shawlette at this point; what matters is the number of stitches on the needles. {Note: The size can be adjusted by working fewer or more rows in multiples of 11. This will adjust the stitch count by multiples of 33. For example, for one size smaller, repeat Row 3 72 times more, until you have 230 stitches on the needles. For one size (two sizes, three sizes) larger, repeat Row 3 94 (105, 116) times more, until you have 296 (329, 362) stitches 0n the needles.} Row 4 (Set-up): slip wyif, k1, k1 tbl, knit to 5 sts before end, k1 tbl, k1, k1 tbl, k2
Section Two
Work Ka'ana Chart once. Using Stitch Markers in Section Two: You may find it helpful to mark the beginning of each repeat with a stitch marker. If so, on rows 15, 17 and 19, you will need to shift each stitch marker one stitch to the left, away from the beginning of the row. On rows 25, 27 and 29, you will need to shift each stitch marker one stitch to the right, toward the beginning of the row. {Note: If you have altered the size, increase or decrease the number of repeats accordingly in increments of three repeats.}
Alternate written instructions for Ka'ana Chart:
Row 1 (RS): slip wyif, k2, [k2, m1, k9] 23 times, k2, m1, k5 (24 sts increased = 287 sts) Row 2: slip wyif, k2, purl to 3 sts before end, k3 Row 3: slip wyif, knit across Row 4: slip wyif, knit across Row 5: slip wyif, k2, [k2tog, yo] to 4 sts before end, k4 Row 6: slip wyif, knit across Row 7: slip wyif, knit across Row 8: slip wyif, k2, purl to 3 sts before end, k3 Row 9: slip wyif, knit across Row 10: slip wyif, knit across Row 11: slip wyif, k2, [p2, k1 tbl, p2, k7] 23 times, p2, ki tbl, p2, k3 Row 12: slip wyif, k4, p1, k2, [p7, k2, p1, k2] 23 times, k3 Row 13: slip wyif, k2, [p2, k1 tbl, p2, k7] 23 times, p2, ki tbl, p2, k3 Row 14: slip wyif, k4, p1, k2, [p7, k2, p1, k2] 23 times, k3 Row 15: slip wyif, k2, p1, [p1, yo, k1, yo, p2, ssk, k3, k2tog, p1] 23 times, p1, yo, k1, yo, p2, k3 (2 sts increased = 289 sts) Row 16: slip wyif, k4, p3, k1, [k1, p5, k2, p3, k1] 23 times, k4 Row 17: slip wyif, k2, p2, [k1, yo, k1, yo, k1, p2, ssk, k1, k2tog, p2] 23 times, k1, yo, k1, yo, k1, p2, k3 (2 sts increased = 291 sts Row 18: slip wyif, k4, p5, [k2, p3, k2, p5] 23 times, k5 Row 19: slip wyif, k2, p2, k1, [k1, yo, k1, yo, k2, p2, cdd, p2, k1] 23 times, k1, yo, k1 yo, k2, p2, k3 (2 sts increased = 293 sts) Row 20: slip wyif, k4, p6, [p1, k2, p1, k2, p6] 23 times, p1, k5 Row 21: slip wyif, k2, p2, k1, [k6, p5, k1] 23 times, k6, p2, k3 Row 22: slip wyif, k4, p6, [p1, k5, p6] 23 times, p1, k5 Row 23: slip wyif, k2, y0, p2, k1, [k6, p2, yo, k1, yo, p2, k1] 23 times, k6, p2, yo, k3 (48 sts increased = 341 sts) Row 24: slip wyif, k2, p1, k2, p6, [p1, k2, p3, k2, p6] 23 times, p1, k2, p1, k3 Row 25: slip wyif, k3, y0, p2, [ssk, k3, k2tog, p2, yo, k3, yo, p2] 23 times, ssk, k3, k2t0g, p2, yo, k4 Row 26: slip wyif, k2, p2, k2, p5, [k2, p5, k2, p5] 23 times, k2, p2, k3 Row 27: slip wyif, k2, yo, ssk, y0, p1, [p1, ssk, k1, k2tog, p2, yo, k2tog, yo, k1, yo, ssk, y0, p1] 23 times, p1, ssk, ki, k2tog, p2, yo, k2tog, yo, k3 Row 28: slip wyif, k2, p3, k2, p3, k1, [k1, p7, k2, P3, k1] 23 times, k1, p3, k3 Row 29: slip wyif, k3, y0, ssk, yo, [p2, cdd, p2, yo, k2tog, yo, k3, yo, ssk, yo] 23 times, p2, cdd, p2, yo, k2tog, yo, k4 Row 30: slip wyif, k2, p4, k2, p1, k2, [p9, k2, p1, k2] 23 times, P4, k3 Row 31: slip wyif, k4, y0, ssk, yo, [p5, yo, k2tog, yo, k5, yo, ssk, yo] 23 times, p5, yo, k2tog, yo, k5 (48 sts increased = 389 sts) Row 32: slip wyif, k2, p5, k5, [p11, k5] 23 times, p5, k3 After the chart is complete, knit 3 rows, slipping the first stitch of each row wyif. Note: If you prefer a lacier edge, you may skip these 3 rows and proceed to the bind-off step. On WS, using larger needles, bind off as follows: slip wyif, [k1, return 2 sts to the left needle, k2tog tbl] to end of row, pull yarn through final loop. Note: To bind off more quickly, you can skip the step of returning the 2 stitches to the left needle. Instead, insert the left needle into the front loops of the 2 stitches on the right needle and knit them together from this position (i.e., through the back loops). For a video demonstrating this bind-off technique, go to http: //www.youtube.com/watch? y=7K8CAspC23c&feature=related.
Finishing:
Weave in ends. Wash and block, gently pulling out the points of the leaves.
Credits:
A big thank you to the talented and generous ladies who tested this pattern. Your thoughtful insights were invaluable and much appreciated.
Ka'ana Chart
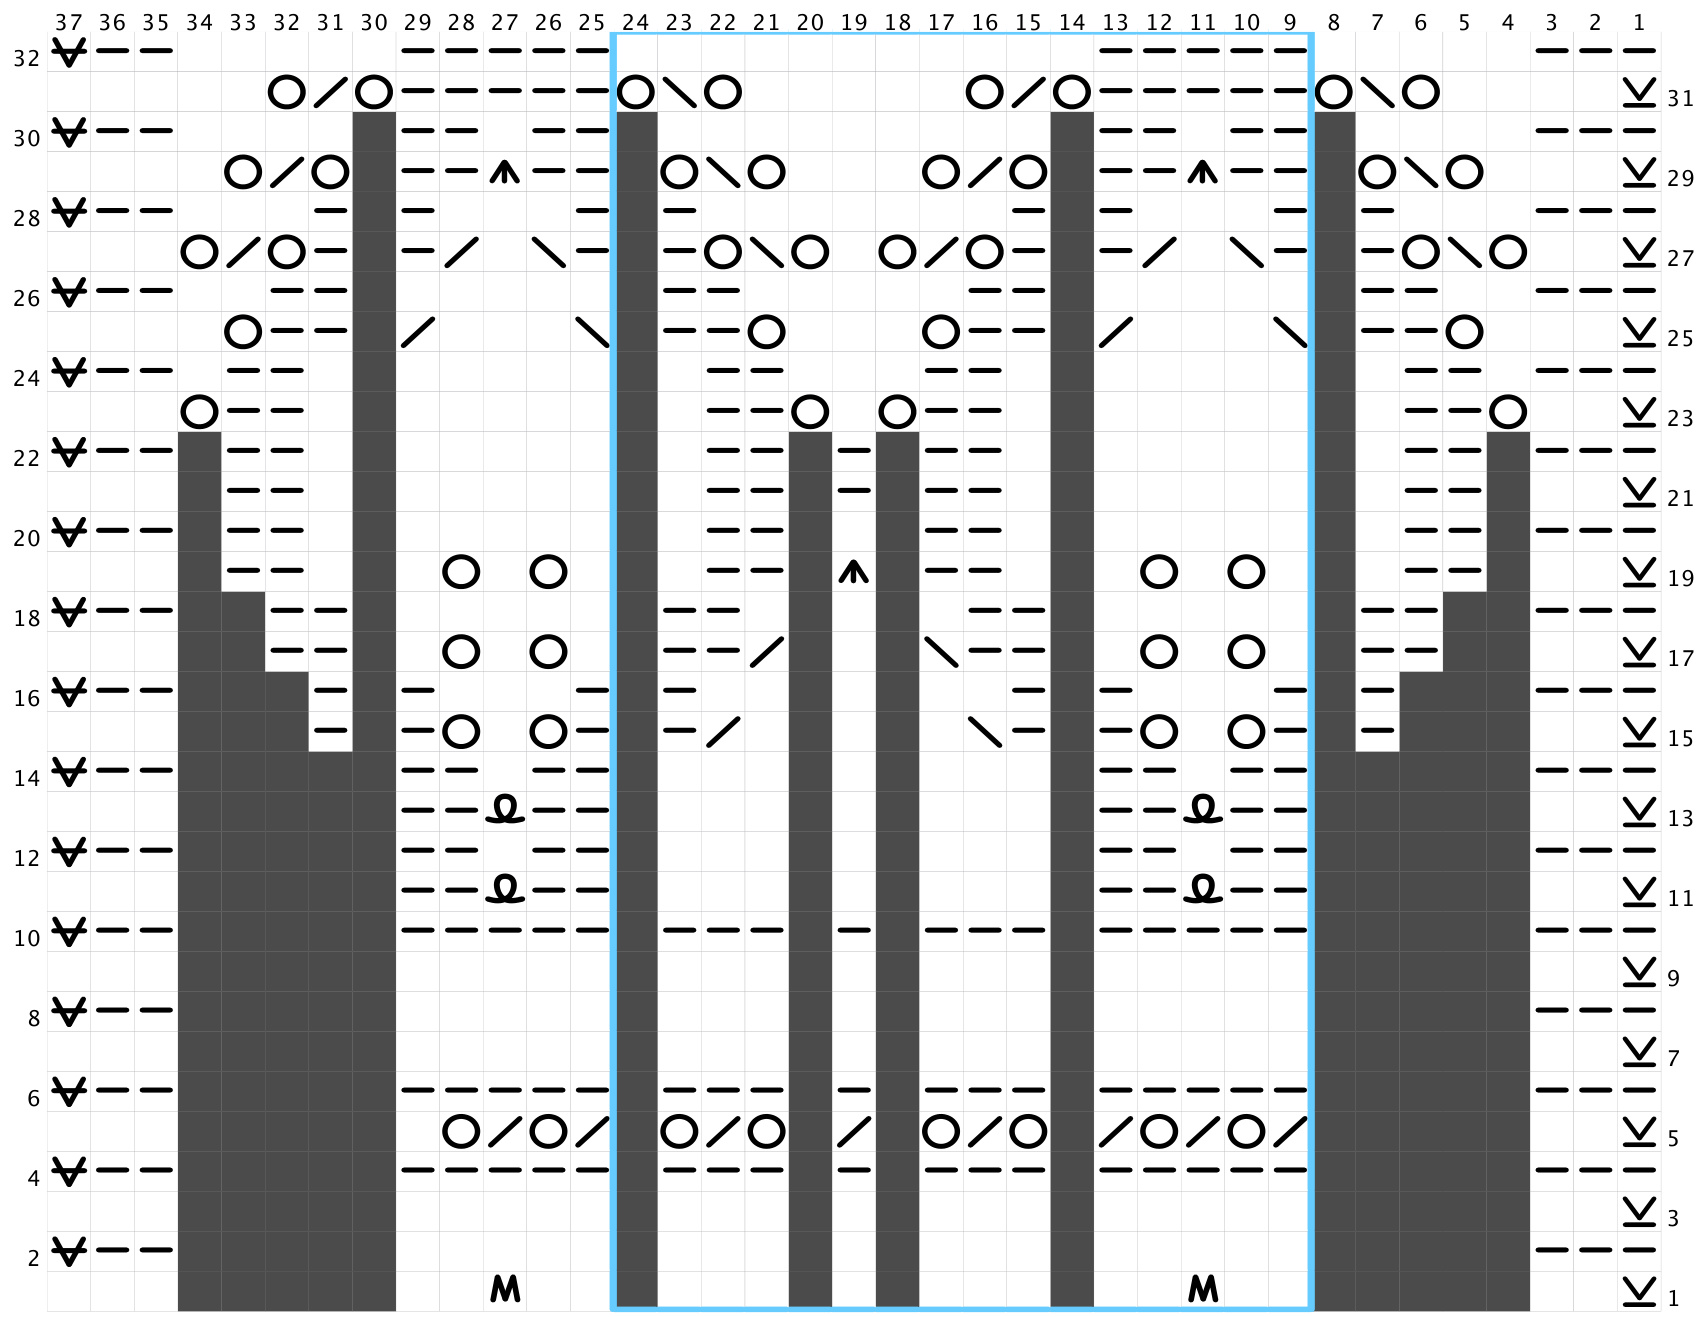
Repeat 23 times
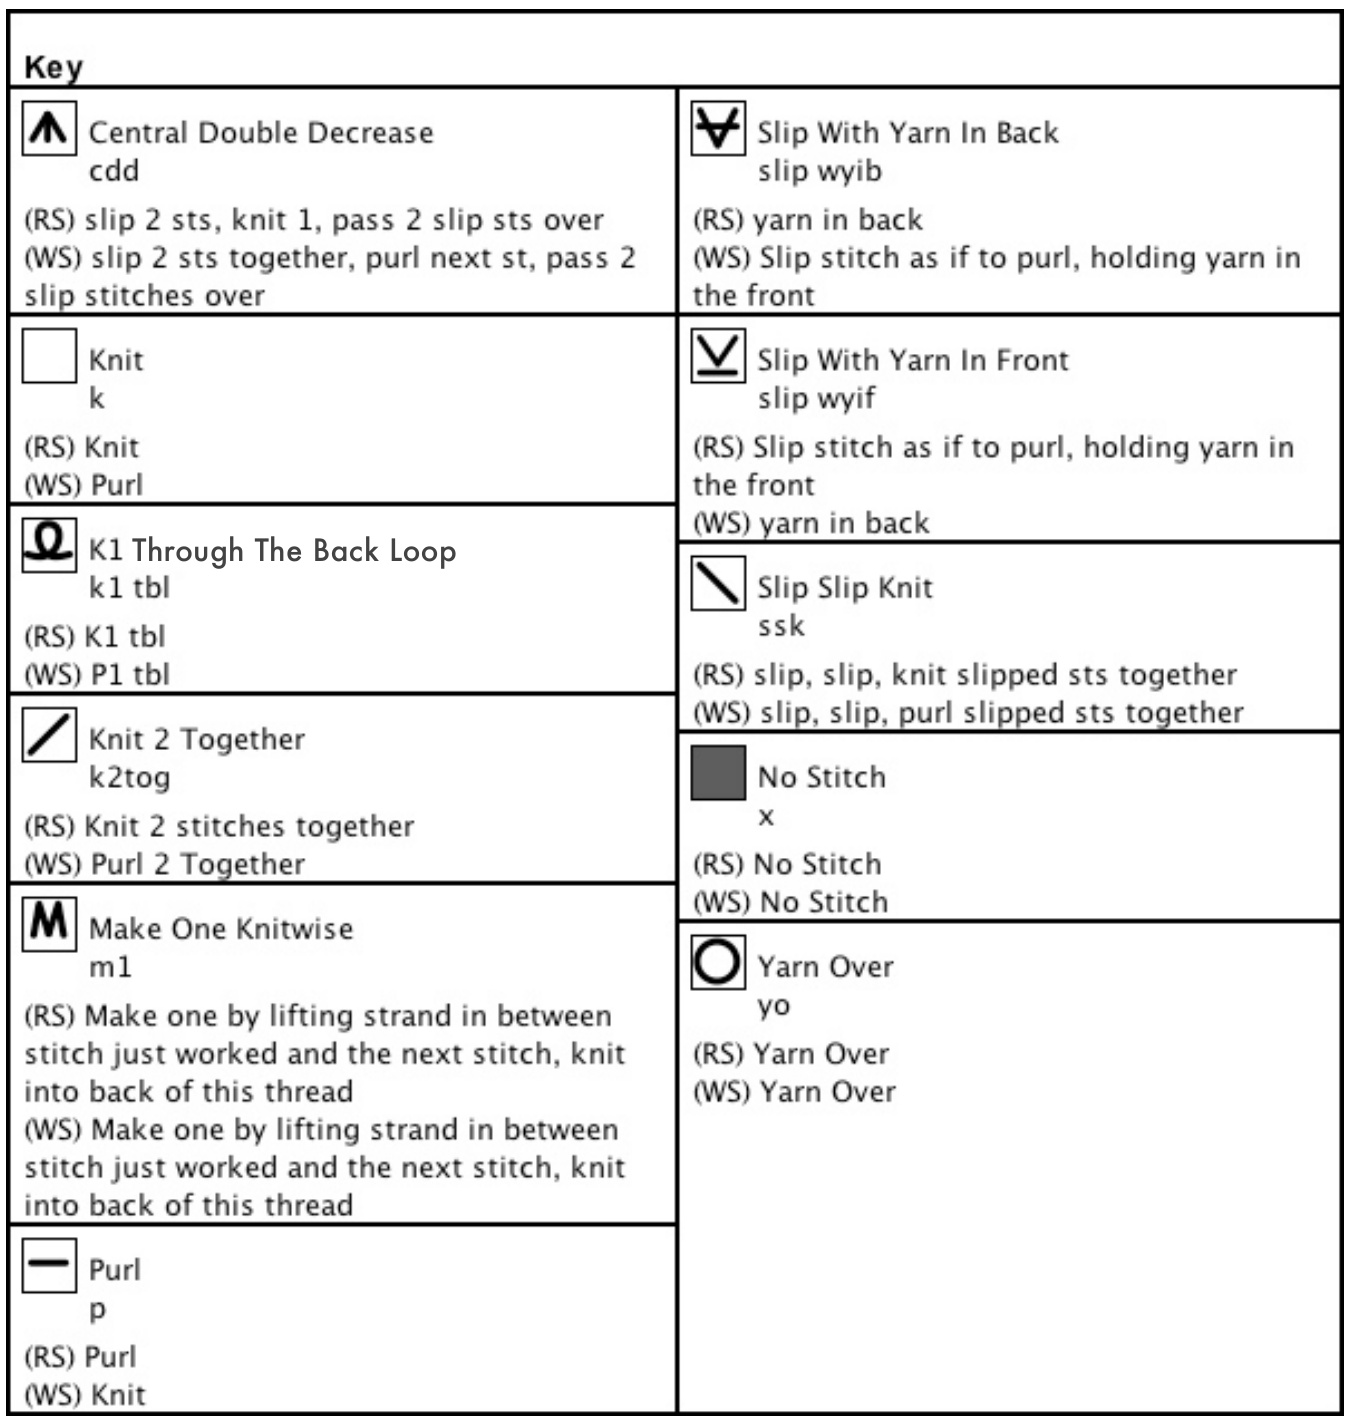
Note on ssk (slip, slip, knit): For an ssk stitch that mirrors the k2tog stitch beautifully, slip one stitch as if to knit, slip the next stitch as if to purl, and then insert the left needle into the front loops of the slipped stitches and knit them together from this position (i.e., through the back loops). Note on cdd (central double decrease): For the cdd stitch, the two stitches should be slipped together and knitwise.


