
PATTERN: JUVENILE SEA NETTLE
An original hansigurumi design. Copyright 2007 Hansi Singh.
Materials
c Worsted weight yarn in a Main Color (MC), Contrasting Color 1 (CC1), and Contrasting Color 2 (CC2) Model was worked in Cascade 220 ( $100\%$ Peruvian Highland Wool) in the following colors: MC (50 yards) $=$ Shrimp, CC1 (25 yards) $=$ Pumpkin, and CC2 (50 yards) $=$ Cotton Candy. $\mathbf{e}{\bf o}\mathrm{~2~}16^{\circ}$ $24^{\circ}$ cirla zh gauge c Tapestry needle c Fiberfl stufing
Gauge
6 stitches/inch in stockinette stitch. Whilea pecseaeistralfortsot iisprattcaat isigiftly nt nomalledftaaeiiaseillsitofe in your finished creature.
Short Rows
When knitting short rows, wrap and turn as follows. On the knit side of the fabric, knit the required number of stitches. Before turning the work, bring yarn to the front, lip the next stith to the right-hand neede,bring yarn to the back, and slip stitch back to the left-hand needl. Turn and continue. On the purl ide of the fabric, purl the required number of stitches, bring yarn to the back, slip the next stitch to the right-hand neede, bring yarn to the front, and slip stitch back to the left hand needle. Turn and continue. When passing these wraped stitches in subsequent rows, you can either pick up the wraps and knit (or purl) them with their corresponding stitches, or merely leave them. In this pattrn, I recommend that you always leave the wraps when you pass them.
Small Diameter Circular Knitting
Though normally performed with sets of4 or 5 double-pointed needles, it is also possible to do this with two circular needles (or even one long circular neede, otherwise known as the Magic Loop method). Use the method that is most convenient for you and that you are most familiar with.
Knit-on Cast-on Method
This cast-on method creates an extremely tight, inelastic edge, which creates a lovely, crenulated effect in the sea nette oral arms. To perform it, work as for the cable cast-on method, but instead of creating new stitches by drawing new loops between the last two loops on the left needle, draw new loops from the last loop on the left needle as if by knitting. Continue in this manner until you have cast-on the required number of stitches.
Increases
Iuse twdiffntirea in thispatte theyavenreae Y),and th ki rightloopnreae KL)Exelt explanations of these increases, accompanied by clear video tutorials, can be found at the follwing websie: http://www.knittinghelp.com/videosincreases
Abbreviations
K Knit K-tbl Knit stitch trough back loop CO Cast on (long-tail, unlessotherwise noted) BO Knit and bind of (traditional, unless otherwise noted) KRL Knit right loop increase (see Technica Notes on increases, above) YO Yarn over increase (see Technical Notes on increases, above) SSK Left slanting decrease (slip 2 stitches knitwise, then knit these stithes together) K2tog Right slanting decrease (knit two stitches together) w&t Wrap and turn (see Technical Notes on short rows, above)
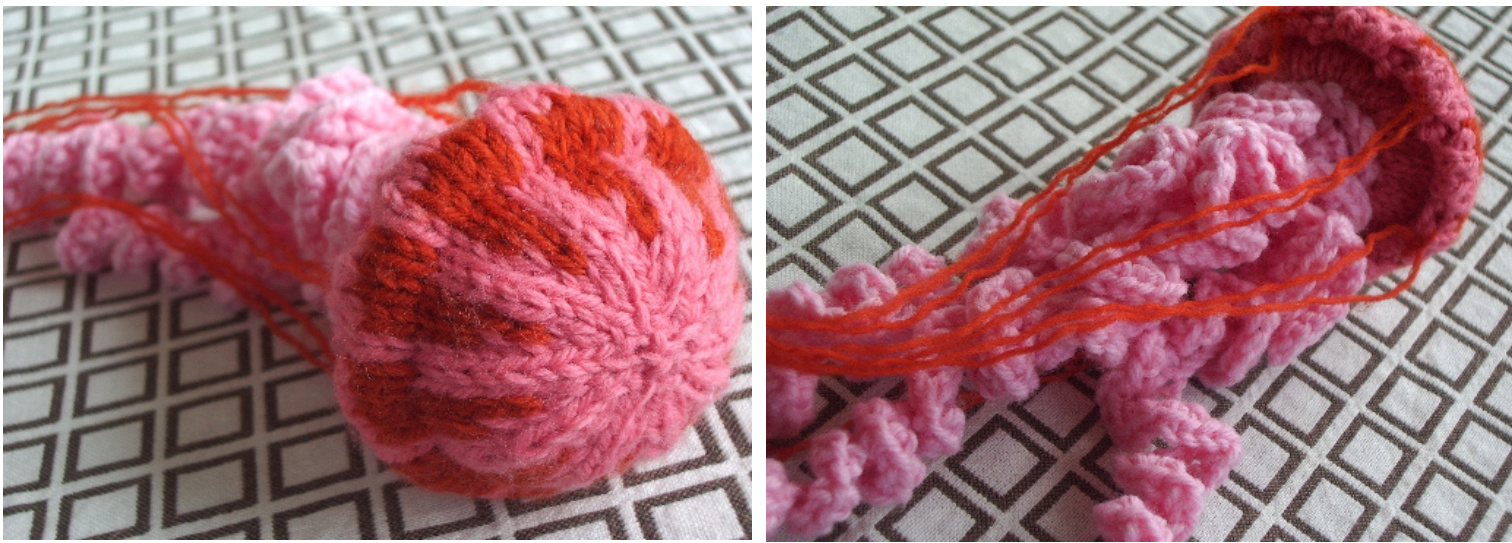
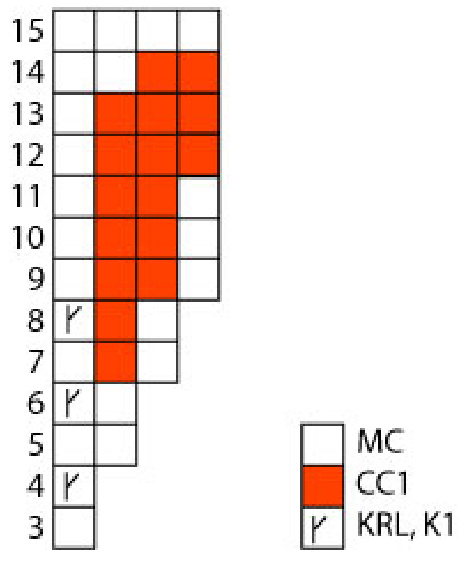
Bell
CO 5 stitches in MC. Join these stitches in a round, and continue: Round 1: Knit. Round 2: $^{\ast}\mathrm{KRL}$ repeat from \* to end of round. (10 stitches) Rounds 3-15: Follow chart. Note that rounds 7through 14 require you to work with both MC and CC1. You will be working each line of the chart 10 times to complete each round.
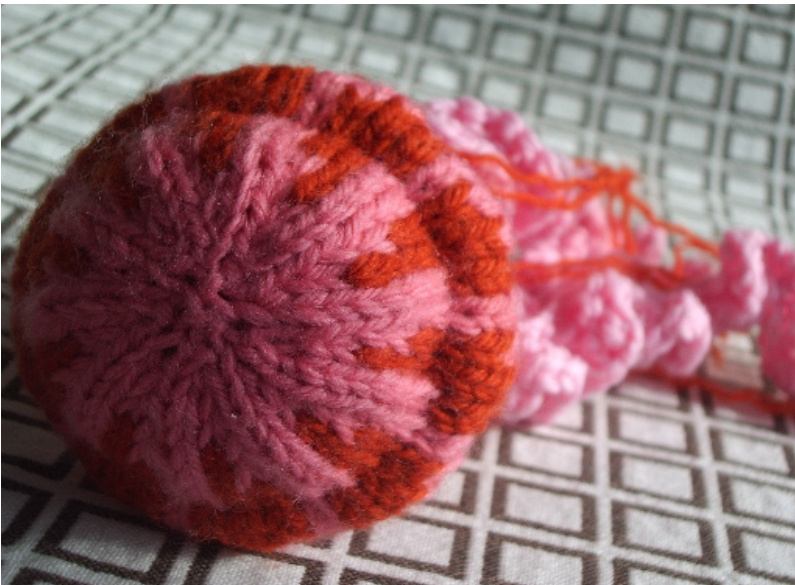
Round $16{\mathrm{:}}^{\ast}\mathrm{YO}$ twice, K2tog, SSK, repeat from \* to end of round. Round 17: ${}^{\ast}\mathrm{K}1$ , P1, K2, repeat from \* to end of round. Rounds 18-21: Knit. BO allstitches. Cut yarn, leaving a long tail. Fold over edge of bellso that the holes formed by the double yarn overs lie at the hem of the bell. Using long yarn tail, sew the BO edge to the inside of the bellto create a scalloped hem.
Underside of Bell
Using MC yar, pick u4 stitche fm thedge fthebellNte that this ee is atached to the inside ofthe bell. Join these 40 stitches into a round, and proceed: Rounds 1-3: Knit. Round 4: $^{\ast}\mathrm{K}2$ tog, repeat from \* to end of round. (20 stitches) Round 5: Knit. Round 6: $^{\ast}\mathrm{K}2$ tog, repeat from \* to end of round. (10 stitches) Round 7: $^{\ast}\mathrm{K}2$ tog, repeat from \* to end of round. (5 stitches) Cut yafthbl ithell snTedthe y til thugha stich alltigh, cin theu side of the bell.
First Oral Arm
Using the knit-on method (see Technical Notes above), CO 31 stitches. Continue: Row 1: [K-tbl, YO] 14 times, K-tbl 3 times, [YO, K-tbl] 14 times. (59 stitches) Row 2: K29, w&t. Row 3: [K1, YO] 13 times, K-tbl 3 times, [YO, K1] 13 times. (85 stitches) Row 4: K27, w&t. Row 5: [K1, YO] 26 times, K1. (111 stitches) BO all stitches.
Second Oral Arm
Using the knit-on method, CO 45 stitches. Continue: Row 1: [K-tbl, YO] 21 times, K-tbl 3 times, [YO, K-tbl] 21 times. (87 stitches) Row 2: K43, w&t. Row 3: [K1, YO] 20 times, K-tbl 3 times, [YO, K1] 20 times. (127 stitches) Row 4: K41, w&t. Row 5: [K1, YO] 40 times, K1. (167 stitches) BO all stitches.
Third Oral Arm
Using the knit-on method, CO 61 stitches. Continue: Row 1: [K-tbl, YO] 29 times, K-tbl 3 times, [YO, K-tbl] 29 times. (119 stitches) Row 2: K59, w&t. Row 3: [K1, YO] 28 times, K-tbl 3 times, [YO, K1] 28 times. (175 stitches) Row 4: K57, w&t. Row 5: [K1, YO] 56 times, K1. (231 stitches) BO all stitches.
Finishing
Sew the thre oral arms totheunerside ofthebellSeparate the pliesfseveral lengthsofCC ya tocreate wisy single ply strands. Attach these strands to the hem of the bell. Take care of any lose yarn ends. Enjoy your new friend!
$\copyright$ 2007 Hansi Singh. This paten (including text $\&$ images i anorginahasiguridegnItis for prsoalenly.Othue ncluding bt t to reproduction, distribution, or commercial sale, is stricly prohibited. Allrights reserved.


