WWW.ADHDKNITTING.COM
Double Pointed Needles Size: US13
Rx: My Sweet Tam-Boreen Difficulty: Advanced Beginner
Jse With: 1 ball Crystal Palace Iceland ( $100\%$ Wool) Fuchsia (MC) 1 ball each of Berroco Comfort $(50\%$ Nylon, $50\%$ Acrylic) Color: 9721/Sage (CC1) and color: 9723/Rose (CC2) Carded wool and felting needles (OPTIONAL: for design on top of cap) Circular Needles Size: US7, US13 Special Techniques: knittin inthe round, changing colors, icreases and decreases, needle felting (optional). Stitch Markers
Directions: Knit rom bottom up:
Darning Needle With CC1 double stranded cast on 64 sts and join in round being careful not to twist stitches Round 1: knit in seed stitch (k1,p1) around Round 2: adding in the CC2 (keep CC1 double stranded) continue knit ting in seed stitch around Round 3 & 4: keep both CC1 double stranded and CC2 single stranded and continue knitting in seed stitch Round 5: with CC1 only, purl around (begin garter section) Round 6: knit Round 7: with CC2, purl Eyelet row is for decoration only, you can knit it as follows or simply knit the whole row to stay in garter stitch pattern Round 8: $\star|\mathbf{k3}$ , yo, k2tog\* rep to last four, k4 Round 9: purl Round 10: with CC1 only, knit Round 11: purl Rep rounds 10 and 11 twice more Knit three rounds in CC1 instockinette stitch (nit every row) Switch to US13s and MC Begin increases: Next round: \*k7, k1fb\* (72) Knit around for 4 inches Next round: purl Next round: knit Next round: purl Next round: knit Begin decreases: Round 1: $\star|k|0$ pm, $\mathsf{k2t o g^{\star}\,6}$ times (66 sts) Round 2 and all even: knit around Round 3 and all odd: \*knit to marker, slip marker, k2tog\* rep to end of round NOTE: You will need to switch to DPNs when stitches get to too tight to work on circular needles.
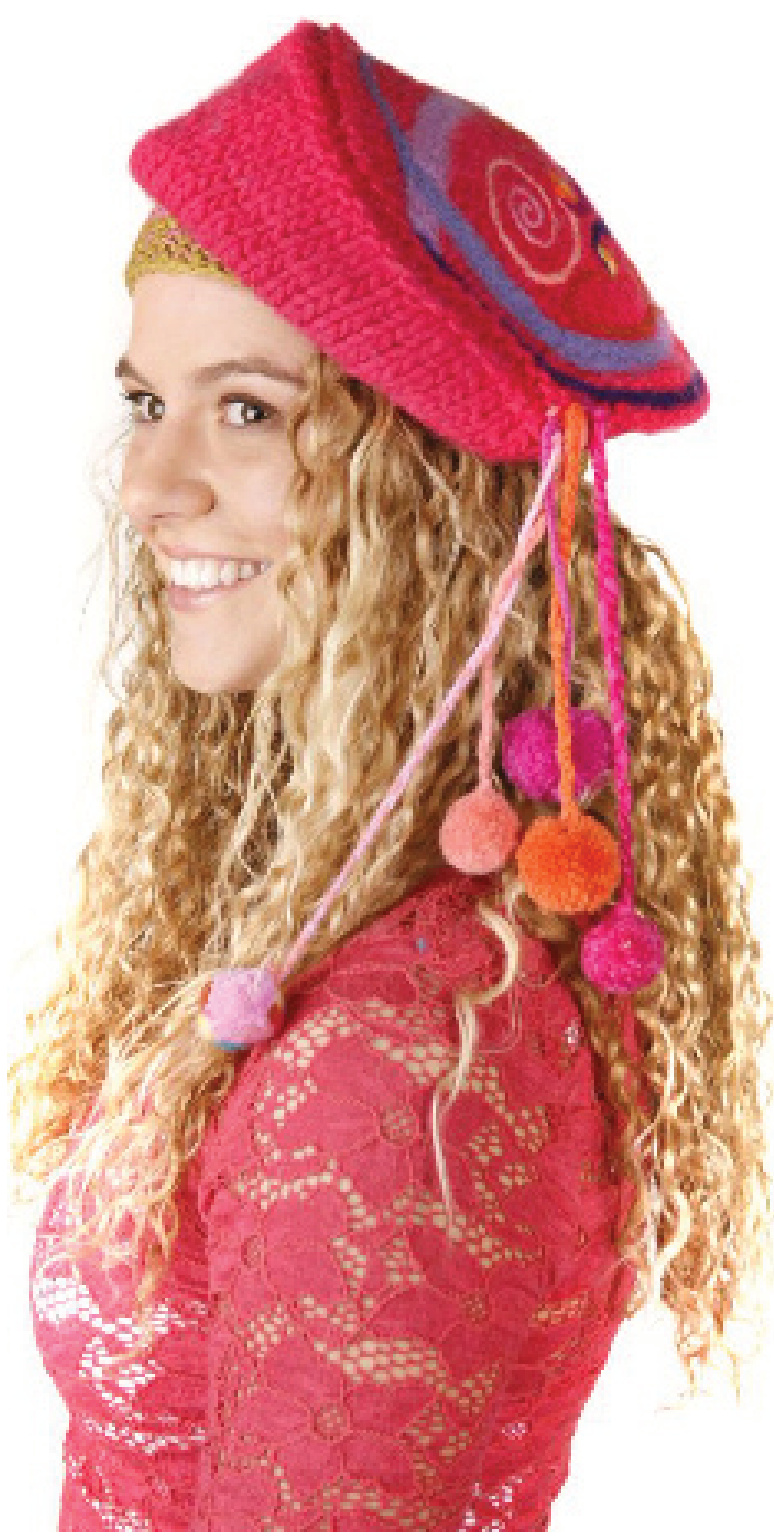
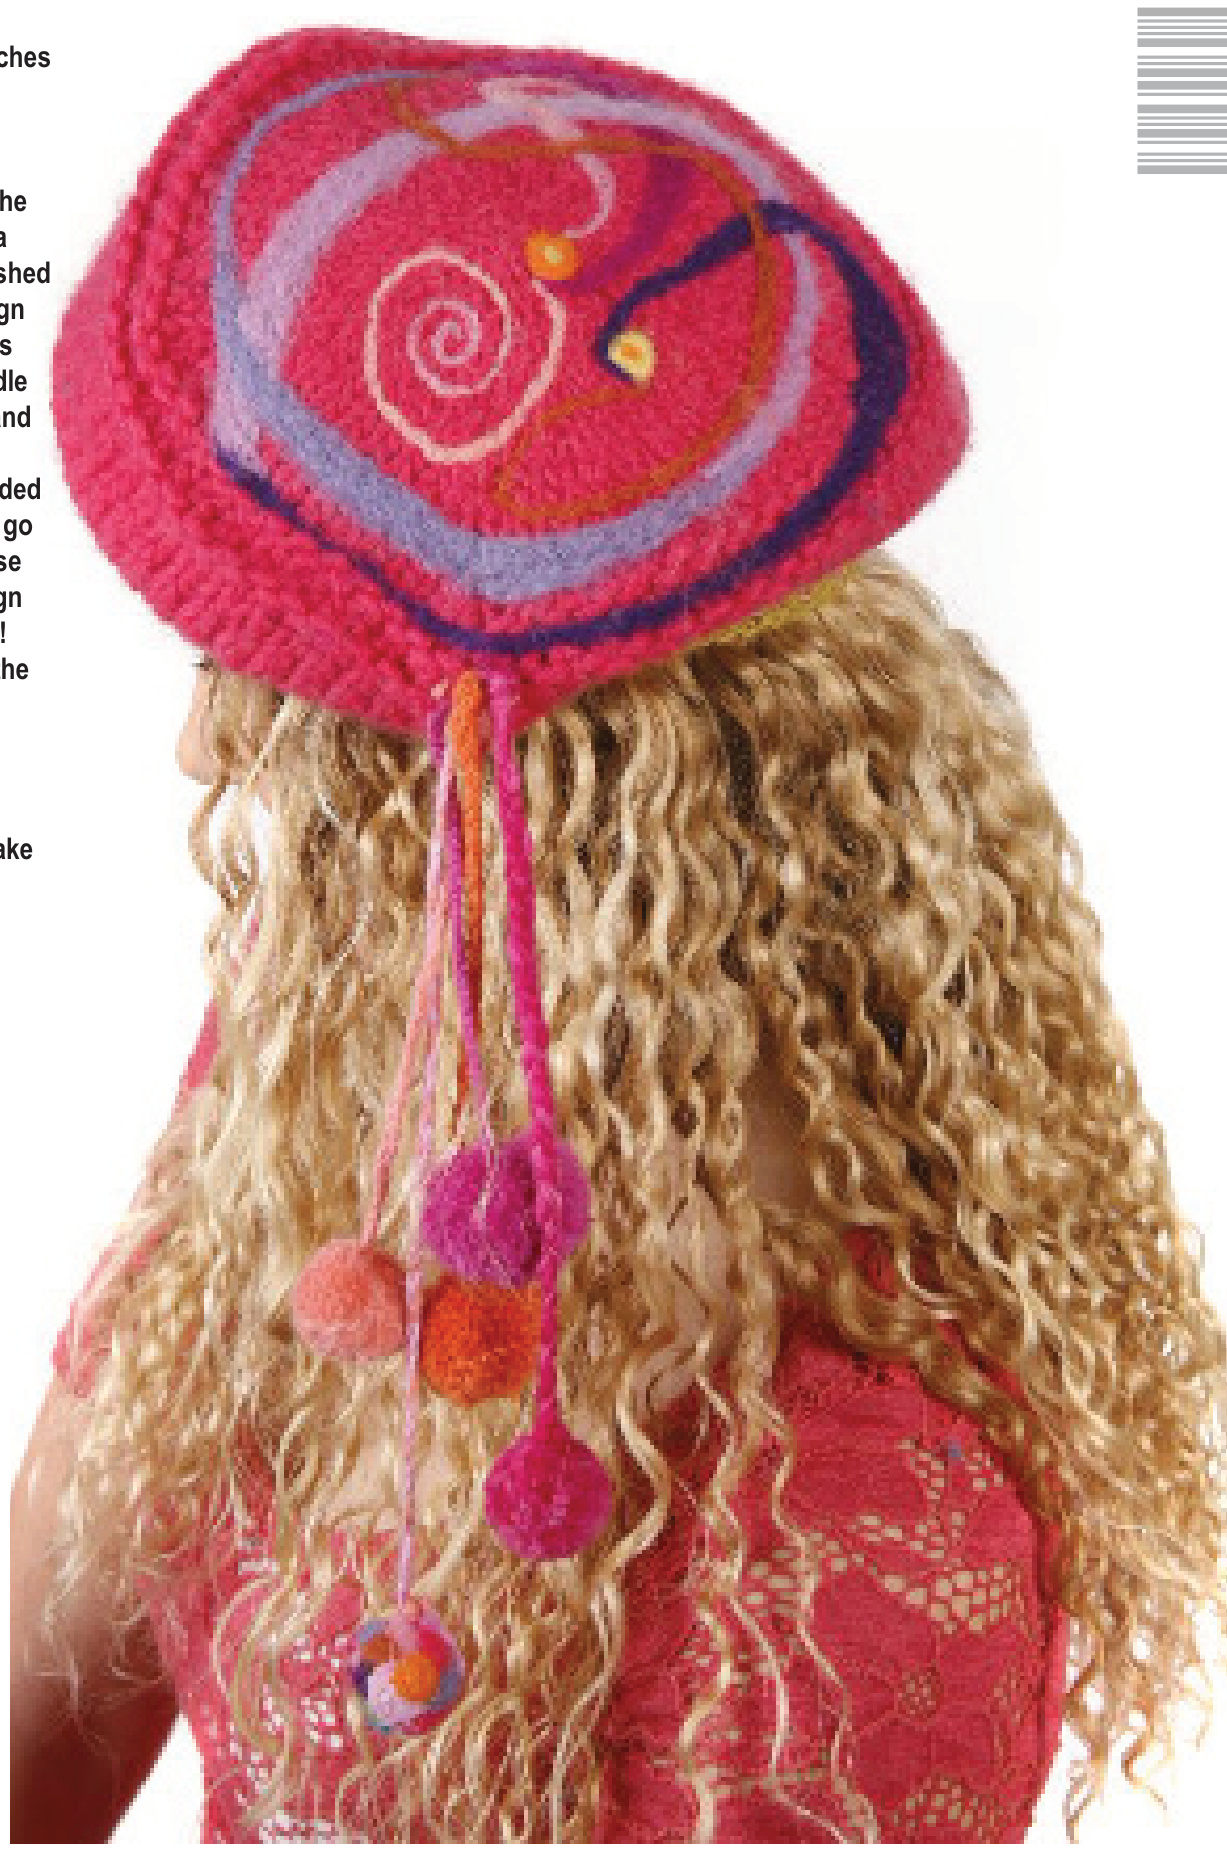
Repeat rows 2 & 3 until 8 stitches remain. Thread darning needle through remaining stitches and cinch tight to close up top of hat. For design on top of hat: You can do any design you like on the top of the hat or leave the hat plain. The hat shown has a freestyle design on the top which is accomplished using carded wool and needle felting the design into the top of the hat. The top of the hat needs to be at least slightly felted in order to be needle felted. To felt by hand you can use hot water and soap to rub vigorously to make the top a little felted and firmed. Then you simply lay the carded wool out in strips how you want the design to go and needle punch them down. You can also use embroidery or duplicate stitch to make a design on the top of your hat. Feel free to experiment! Below we have given a close up of the top of the hat if you would like to duplicate this design. For tassles and pom poms: Using the yarns from the lower part of the hat braid or knit i-cords of varying lengths and make coordinating pom poms.