Original pattern by Michelle Juett (link) Modifications by Matthew J Gravelyn
Materials
Worsted weight yarn (white & black) US size F (3.75 mm) hook Yarn needle
Terms/Abbreviations
Sc single crochet Hdc half double crochet Dc double crochet Ch chain Ch-Sp chain space, opening left by chaining SI St slip stitch St, Sts stitch, stitches Turn flip your work over
Pattern
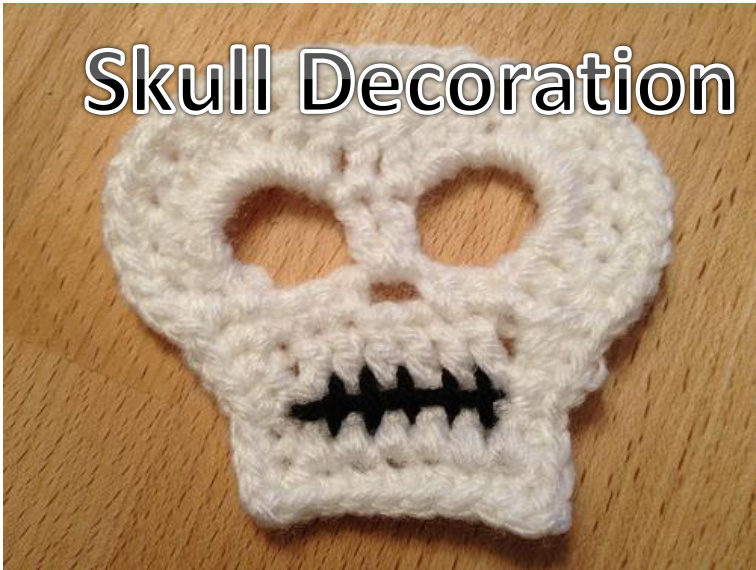
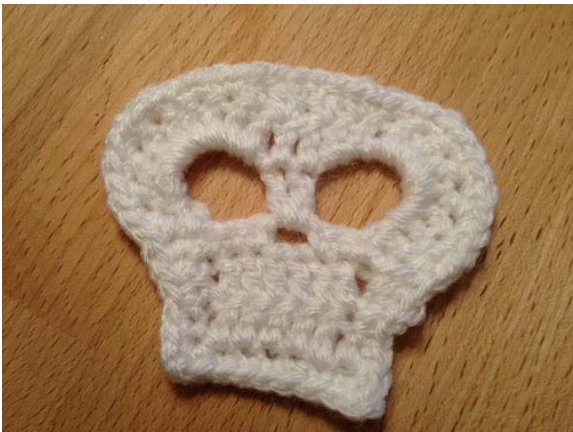
Skull Base
Ch 9, turn Skip 3 Sts, Dc across, Ch 3, turn Dc across, Ch1, turn Sc in next 3 Sts, Ch2, skip 2 Sts, Sc in final 3 Sts, turn Ch 8, Dc twice in Ch-Sp (nose), Ch8, Sl St in last St, Ch3, turn Dc 10 times in Ch-Sp (eye), Dc in next two Sts, Dc 10 times in next Ch-Sp (eye), Dc in foundation, Ch 1, turn Sc twice in each St (increase) around, fill in above nose with Hdcs and Dcs as needed Continue down to the mouth with 1 Dc, 1 Hdc, and continuing with Sc. On the corners, Ch2 and Sc on the adjacent side Work back up to other eye with 1 Hdc and 1 Dc SI St in eyefoundation and fasten off
Adding Teeth
If you want to add some teeth to your skull, use your yarn needle and black yarn (about 12-16 inches) to stitch them in. I made one long line for the mouth leaving about 4-6 inches hanging in the back. This is to help tie off when you complete the mouth. Next, come up from the back at the top of the first "tooth", down across the mouth line, then back in. Next, start at the bottom of the next “tooth" and worked back up and over. Once you finish all your teeth, go back and gently tighten them so they are about the same length. Finish with a square knot with the original end and trim any excess.
Extras
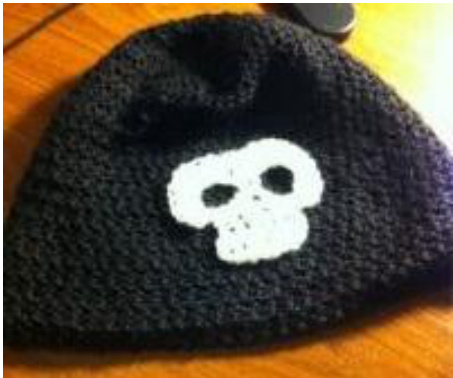
You can add a loop on top for hanging as a Halloween decoration, fancy it up for Dia de los Muertos, or sew the entire piece onto a spooky hat or scarf. I hope you have fun with this pattern, and please send any feedback or pictures to crochetlunch@gmail.com. Thanks!


