The Lonely Doll scarf
skill level
Beginner (skills needed: casting on, knit stitch, casting off, weaving in ends)
materials
Knitting needles US 8 / 5mm 275 yards of worsted weight yarn for the main colour (A) 50 yards of worsted weight yarn for the contrasting colour (B) guage 5 stitches per inch (2.5 cm)
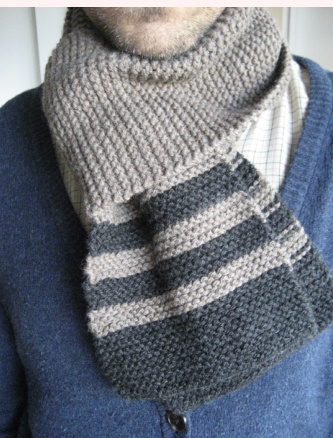
about this project
A simple unisex scarf, sized for adults: 5.5 × 56 inches (14 x 142 cm). This is inspired by the garter stitch scarf The Lonely Doll knits. (There are less stripes and it is not as long, to make it easier). This is designed to be a good length to wear Parisian style (when you fold the scarf in half lengthwise, place around neck and pull the loose ends through the centre and pull to tighten). If you would like a muffler length scarf, then you may add 10 - 15 inches (25.5 - 39 cm) at step 5.
modifications you can make
Very new knitters may wish to omit stripes. Make the scarf a little wider by adding a stitch or 2 at cast on. Adjust the width or number of stripes. Add a fringe.
directions
1. Cast on 27 stitches in your contrasting colour (B). Knit for 18 rows. Cut yarn, leaving a tail of about 6 inches (15 cm). 2. At the beginning of the next row, begin knitting with your main colour (A), leaving a tail of 6 inches (15 cm). Knit 6 rows. Cut yarn, leaving a second tail of 6 inches (15 cm). 3. On the next row, begin knitting with your contrasting colour (B), leaving a tail of 6 inches (15 cm). Knit 6 rows. Cut yarn, leaving another tail of 6 inches (15 cm). 4. Repeat step 2. Then repeat step 3. You should now have 1 large stripe and 4 thinner stripes, 2 in each colour, ending with your contrasting colour (B) 5. Repeat step 2 again, but don't cut the yarn after 6 rows. Keep knitting until it is 45 inches (114 cm) long. If you would like to wrap the scarf around more times, muffler style, then add 10 - 15 inches (25.5 - 39 cm) here. 6. Repeat step 3, knitting in a 6-row stripe of your first colour. 7. Repeat the stripes in steps 2 and 3, so that you have 4 thinner stripes, 2 in each colour, ending with your main colour (A)
8. Knit the last 18 rows and cast off in your contrasting colour (B) 9. Weave in the ends. The best way is diagonally through the bumps: up 3 rows and then back down again 3 rows, repeat. 10. Wet-blocking is not necessary, but if your scarf is looking uneven, it will help (it will also soften wool): wetscarf in water(ideally with a little Eucalan or fabric softener mixed in). Gently squeeze out water, roll in a towel to remove excess water. Lay flat and gently shape. Let dry.


