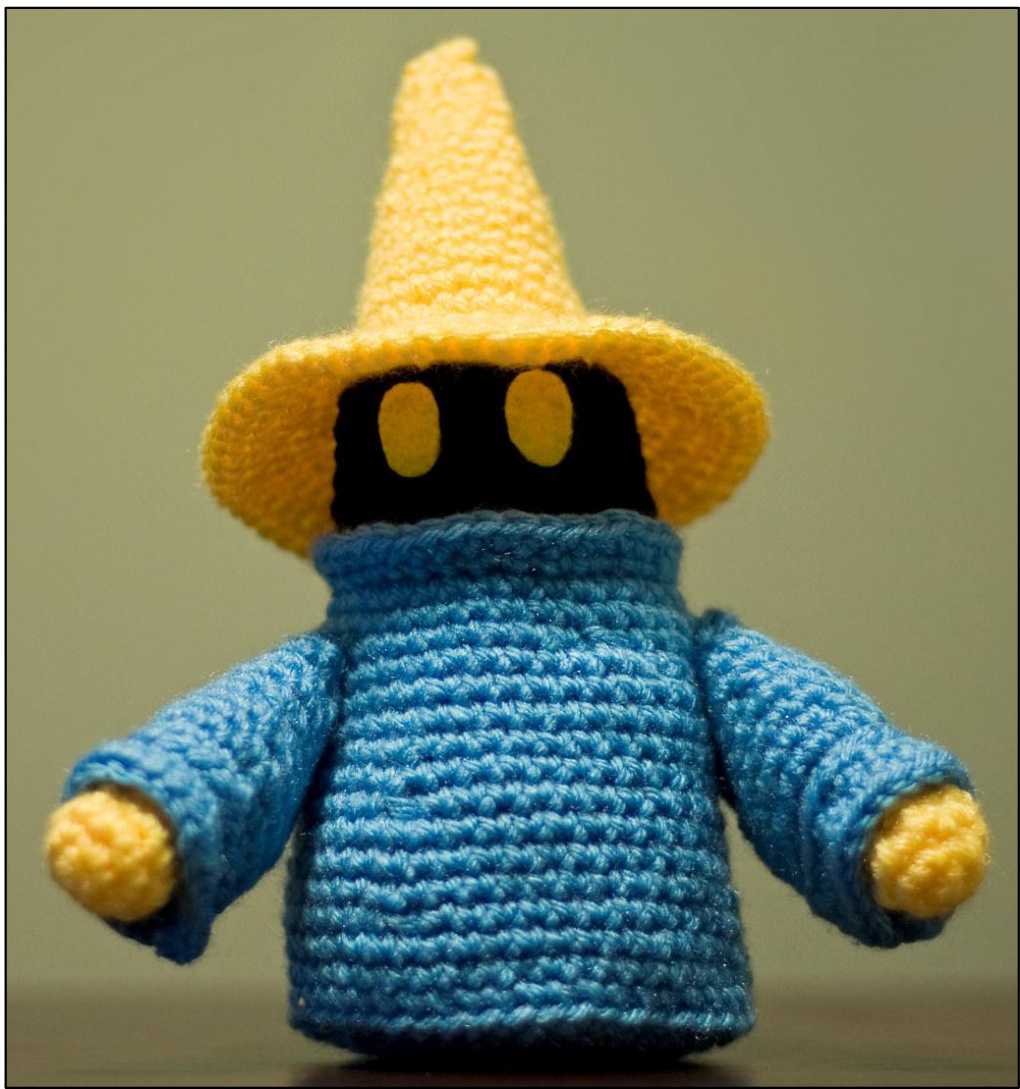
Final Fantasy Black Mage
crochet pattern by Rivndellelf
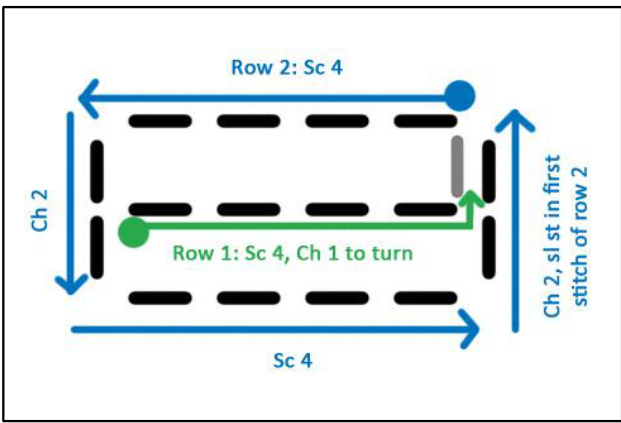
Supplies: Crochet hook, 3.5 mm/size E Blue yarn, worsted weight (l used Vanna's Choice Baby little boy blue.) Black yarn, worsted weight (I used Vanna's Choice black.)\* Yellow yarn, worsted weight (I used Vanna's Choice Baby duckie.) Yarn needle (optional, but I think it helps a lot) Poly fiber filling Yellowfelt Craft glue Abbreviations: Sl - slip stitch Ch - chain Sc - single crochet Dc - double crochet Inc - increase Dec - decrease FO -finish off This pattern is pretty simple actually. I made the whole thing in just a few hours. When finished, it stands about $8^{\prime\prime}$ tall. For the body of the black mage, you're making a flat circle to act as the base, then crocheting in the back loops to start the sides of the body. As you continue to go up the sides of the body, you don't have to follow the pattern exactly for the placement of your decreases-the idea is to decrease twice on every other row, but you just want to make sure you don't keep decreasing in the same place because your body will become slightly oval-shaped instead of round. Just keep moving them around, and you'll be fine. I've included the total number of stitches in each row in parentheses at the end of each line of directions. This is the number of stitches there should be before you chain any stitches for the turn. Also, I prefer to crochet in continuous rounds, but if you don't, just chain one at the start of each round and slip stitch to close at the end of the round. Body - blue Row 1: Sc 6 in a magic ring (6) Row 2: Inc 6 (12) Row 3: [Sc 1, Inc 1] 6 times (18) Row 4: [Sc 2, Inc 1] 6 times (24) Row 5: [Sc 3, Inc 1] 6 times (30) Row 6: [Sc 4, Inc 1] 6 times (36) Row 7: [Sc 5, Inc 1] 6 times (42) Row 8: [Sc 6, Inc 1] 6 times (48) Row 9: (in back loops only) Sc 48 (48) Row 10: Sc 11, Dec 1, Sc 22, Dec 1, Sc 11 (46) Row 11: Sc 46 (46) Row 12: Sc 21, Dec 1, Sc 21, Dec 1 (44) Row 13: Sc 44 (44) Row 14: Sc 10, Dec 1, Sc 20, Dec 1, Sc 10 (42) Row 15: Sc 42 (42) Row 16: Sc 19, Dec 1, Sc 19, Dec 1 (40) Row 17: Sc 40 (40) Row 18: Sc 13, Dec 1, Sc 18, Dec 1, Sc 5 (38) Row 19: Sc 38 (38) Row 20: Sc 5, Dec 1, Sc 17, Dec 1, Sc 12 (36) Row 21: Sc 36 (36) Row 22: Sc 12, Dec 1, Sc 16, Dec 1, Sc 4 (34) Row 23: Sc 34 (34) Row 24: Sc 4, Dec 1, Sc 15, Dec 1, Sc 11 (32) Row 25: (in front loops only) [Inc 1, Sc 8] 4 times (36) Row 26: [Inc 1, Sc 9] 4 times (40), FO, leave long tail to attach to head Hands - yellow - make 2 Row 1: Sc 6 in a magic ring (6) Row 2: Inc 6 (12) Row 3: Sc 12 (12) Row 4: Dec 6 (6), FO, leave long tail to attach to arm Arms - blue - make 2 Row 1: Ch 4 (4), Ch 1 to turn Row 2: Sc 4, Ch 2, Sc 4 across other side of row 1, Ch 2, Sl st in first stitch of row 2 (12) (see diagram if confused) Row 3: Sc 5, Inc 1, Sc 5, Inc 1 (14) Row 4: [Sc 1, Inc 1] 7 times (21) Row 5: (in back loops only) Sc 21 (21) Row 6: Sc 21 (21) Row 7: [Sc 5, Dec 1] 3 times (18) Rows 8-9: Sc 18 (18) Row 10: [Sc 4, Dec 1] 3 times (15) Rows 11-12: Sc 15 (15) Row 13: [Sc 3, Dec 1] 3 times (12)
Sl st as needed to even out top edge of arm. On the outside of the arm (make sure you do this on opposite sides on each of the arms) create a rounded shoulder by crocheting row 14 as follow. Row 14: Sl st, Sc 1, Dc 1, Dc 1, Sc 1, Sl st (6), FO, leave long tail to attach to body Sleeves - blue - make 2 Row 1: Ch 21 (21) Row 2: Sc 1 in first stitch of row 1 to create a round, Sc 20 (21) Row 3: Sc 21 (21), F0, leave long tail to attach to arm Head - black Row 1: Sc 8 in a magic ring (8) Row 2: Inc 8 (16) Row 3: [Sc 1, Inc 1] 8 times (24) Row 4: [Sc 3, Inc 1] 6 times (30) Row 5: (in back loops only) Sc 30 (30) Rows 6-7: Sc 30 (30) Rows 8-10: SI st 7, Sc 15, Sl st 8 (30) Row 11-12: Sc 30 (30), FO Hat - yellow Make 2 of the following: Row 1: Ch 1 (1), Ch 1 to turn Row 2: Inc 1 (2), Ch 1 to turn Row 3: Inc 1, Sc 1 (3), FO Stitch both pieces together on the sides to form the top point of the hat. Continue the pattern below starting at the first stitch of row 3. Row 4: Sc 8 (8) (The fourth and eighth stitches should connect to where you stitched the sides of the above pieces together.) Row 5: [Sc 3, Inc 1] 2 times (10) Row 6: [Sc 4, Inc 1] 2 times (12) Row 7: [Sc 5, Inc 1] 2 times (14) Row 8: [Sc 6, Inc 1] 2 times (16) Row 9: [Sc 7, Inc 1] 2 times (18) Row 10: [Sc 8, Inc 1] 2 times (20) Row 11: [Sc 3, Inc 1] 5 times (25) Row 12: Sc 25 (25) Row 13: [Sc 4, Inc 1] 5 times (25) Row 14: Sc 30 (30), FO, leave long tail to attach to brim
Brim - yellow
Row 1: Ch 30 (30), Sl st in first stitch of row to create a round Row 2: [Sc 2, Inc 1] 10 times, (40) Row 3: [Sc 3, Inc 1] 10 times, (50) Row 4: [Sc 4, Inc 1] 10 times, (60) Rows 5-6: Sc 60 (6), FO, leave long tail to attach to head
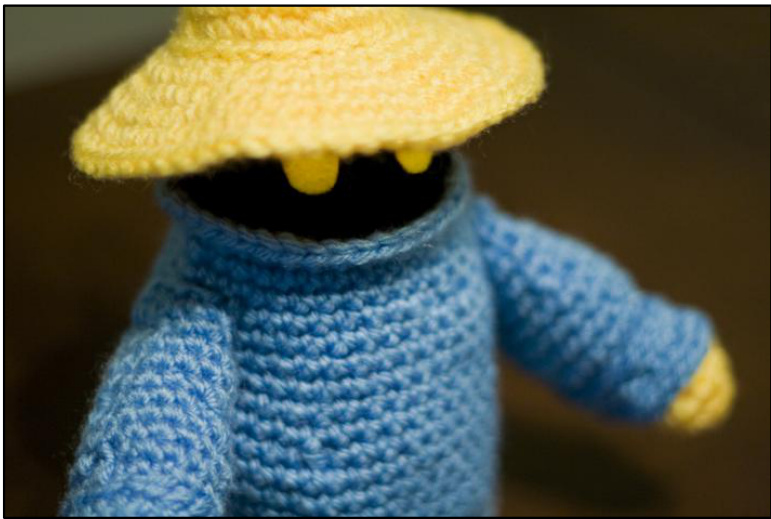
Putting it all together:
Attach the hands to the ends of the arms. See the diagram for proper placement. (Make sure to pay attention to which arm is which so that you don't accidentally attach the hand at the bottom of the arm end instead of the top. Attach row 1 of each sleeve to the front loops left over on row 5 of the arms. There are the same number of stitches in each of the pieces, so be sure to match them up stitch to stitch. Stitch the arms to the body, with the shoulders on the outside. I attached the front part of the shoulder in the fourth row down on the body (two rows below the collar), and approximately in the middle of the body from front to back. I attached the back part of the shoulder in the seventh row down, about 4 stitches behind the front of the shoulder. This will make the arms stick out downward and slightly forward. You can make them stick straight forward instead by attaching the shoulder vertically. Stuff the body lightly. If the bottom won't stay flat, insert a circle of cardboard the same size as the bottom of the body, then stuff it. Attach the front loops from row 5 of the head to the back loops from row 25 of the body. This should make it look like there is a collar that sticks up slightly all around the head. Attach row 1 of the brim to the front loops of row 14 of the hat, matching stitch to stitch. Stuff the hat and head lightly, and attach the back loops of row 14 of the hat to the top of the head, matching stitch to stitch. Cut out two oval-shaped eyes from the yellow felt, and use the craft glue to attach them to the head.


