Skill Level: Brave Intermediate
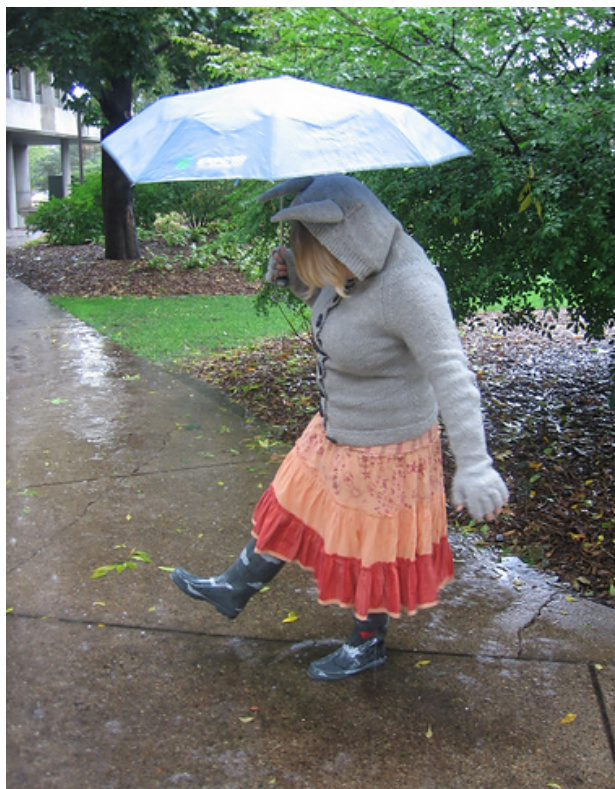
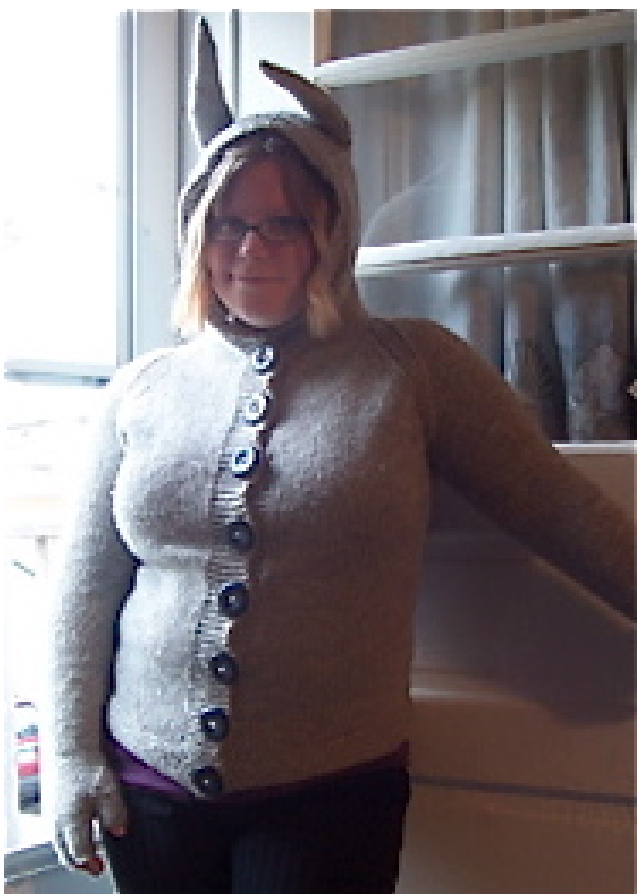
A fitted women's hoodie suitable for wild rumpusing, fort building, throwing dirt clods at annoying brothers, and anything else a queen of the wild things might have on her daily to-do list. Sizes (finished bust measurement, in inches): 29.5,32,34.5, 37, 39.5,42, 44.5,47,49.5, 52, 54.5,57 Before You Cast-on...
Materials Needed:
Cascade Eco Wool (2 skeins for sizes 29.5-39.5" 3 skeins for sizes 42-57") Size 10 circular needles and DPNs (or size needed to obtain gauge) Stitch markers Contrasting waste yarn Tapestry needle Several $1^{1}/{}_{2}^{\;,}$ buttons A small amount of lightweight stuffing
Gauge:
13st and about 20 rows $=4^{\circ}$ in stockinette stitch
Check the Skills Needed list
If you aren't familiar with some of the skills on this list, ask your local knitting guru to show you or check out the awesome instructional videos at www.knittinghelp.com: Knit Purl Ktbl (Knit through back loop) Increases: YO (Yarn-over), M1R (Make one right), M1L (Make one left) Decreases: K2tog (Knit two together), SSK (Slip, slip, knit), P2tog (Purl two together) Placing Marker (PM) and keeping track of markers Small diameter knitting Magic Loop Short rows Picking up stitches Seaming Kitchener stitch (grafting) Weaving in ends Ability to read your knitting Familiarity with bottom-up sweater construction (great to have, but not $100\%$ necessary)
Do a guage swatch! No, really. DO A GAUGE SWATCH.
Eco Wool has a tendency to grow after washing, so to find your true gauge, knit and wash a swatch. This pattern was written to accommodate that growth, so if you're using a
substitute yarn, look for something that grows a bit after washing. If you're using a substitute yarn that doesn't grow after washing, add about 1”' of extra length to the body, arms, and hood of your hoodie.
Choose your size
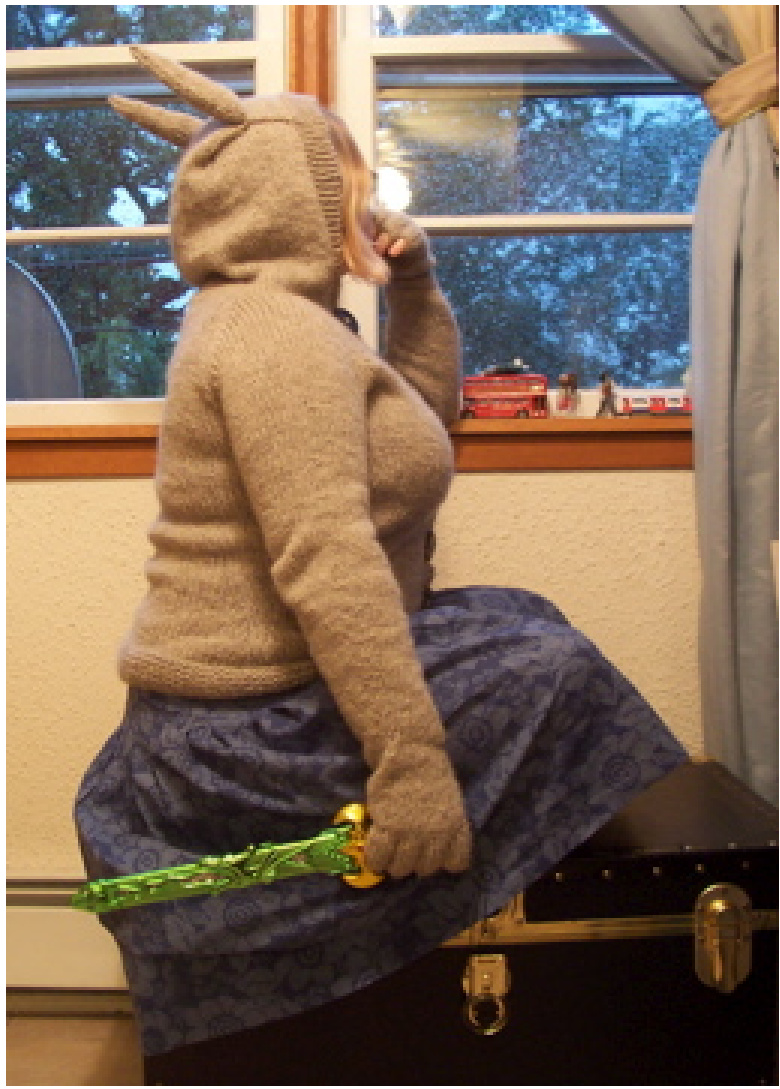
The sizes listed are the exact bust measurements for the finished hoodie. For a traditional sweater fit, choose a size $2{-}3^{\circ}$ above your bust measurement (this is the amount of ease in the hoodie in the photos). You can also size down for a very close-fitting hoodie or size up for a loose-fitting hoodie that could be worn as a jacket.
Read the mod notes
I've included notes on modifications and how to do them in blue boxes within the pattern. If you aren't interested in modding this pattern, ignore them. (The hoodie modeled in the photos has short row bust shaping mods.)
On to the pattern!
Body
Cast-0n (96, 104, 112, 120, 128, 136, 144, 152, 160, 168, 176, 182)st. K in Garter Stitch for 2". Place first buttonhole row near the end of the Garter St.
Buttonhole row:
On Right Side row: K2, K2tog, YO, YO, SSK, K1, continue row as usual. On the next row, when you reach the buttonhole band, K3, Ktbl, K3. Repeat the buttonhole row every 18 rows (9 rows of purl bumps in the garter stitch between buttonholes). 1) K to end. 2) K7, P to 7st from end, K7. Repeat these two rows for 1".
Waist decreases:
PMs (22, 24, 26, 28, 30, 32, 34, 36, 38, 40, 42, 44)st from the edge on both sides of the work. 1) [K to 3st from M, SSK, K1, sIM, K1, K2tog] twice, K to end of row. 2) K7, P to 7st from end, K7. 3) K. 4. K7, P to 7st from end, K7. Repeat rows 1-4 four (4) more times (five repeats total).
Mod: Longer Waist
If you have a long waist, Add in a couple of inches of stockinette rows (don't forget the button bands!). Try on the body so far and see if it fits your natural waistline Once it hits your waist in a way you like, stop on the next purl row and begin waist increases.
Waist increases:
1) [K to 1st from M, M1R, K1, slM, K1, M1L] twice, K to end of row. 2) K7, P to 7st from end, K7. 3) K. 4. K7, P to 7st from end, K7. Repeat rows 1-4 four (4) more times (five repeats total) Knit on, remembering the button bands and buttonholes, until work reaches to about an inch from your armpits. If you can't try it on, some general measurements to use: $12^{\mathfrak{n}}$ for a petite torso, $14^{\prime\prime}$ for average, $16"$ for long. (The shortened measurements are to compensate for the way Eco Wool grows after a washing. If you're using a yarn that doesn't grow much, knit all the way to your armpits or add an inch to these measurements.)
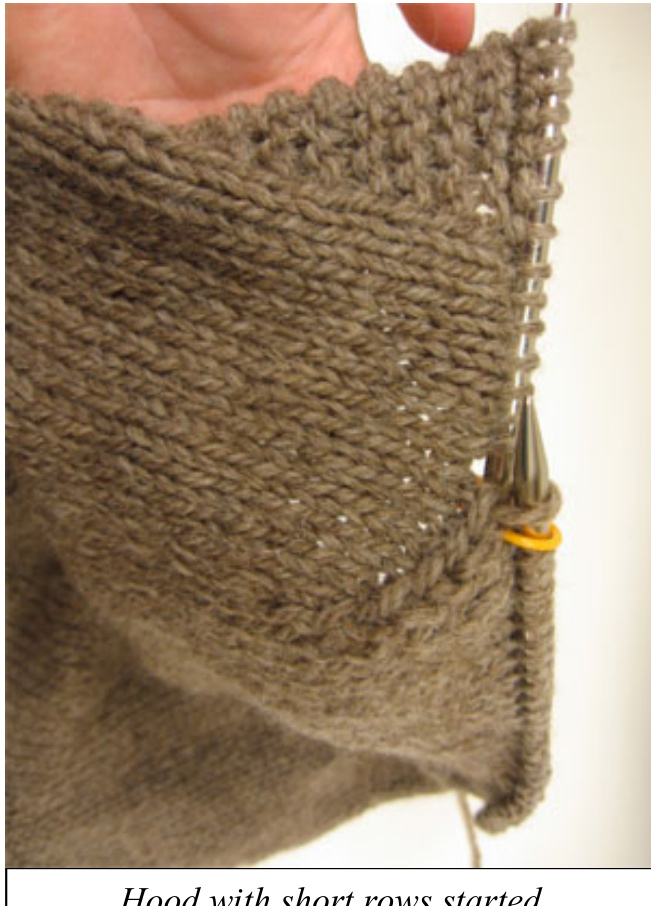
Mod: Short Row Bust Shaping
To include short row bust shaping for a more boob-friendly hoodie, stop knitting the body when it reaches the fullest point of your bust - generally an inch or two from your armpits (but note: your mileage may vary! Every body is different, and if you've never added short row bust shaping on a sweater before, you may want to try it on a top-down sweater first) - and add some short rows to make the bust fit better. To add short rows: 1. Once you reach the end of the row, turn the work and work in pattern back to the next marker. 2. Wrap & turn. Work in pattern to the nearest end of the row again. 3. Work in pattern to Ist from the marker, wrap & turn. 4. Repeat in this manner, doing a W&T 2st from the marker, 3st from the marker, etc. until you have: 3 wrapped stitches for a C cup, 4 for D, 5 for DD/E, and so on. Once you've got the right number of wraps, work in pattern to the wrapped stitches, knit wraps together with wrapped stitches (insert needle into the wrap first, then k2tog or p2tog the wrap and wrapped stitch), work in pattern to the end of the row, turn, and knit to the other end of the row. 5. Repeat the process for the other side of the bust. For a photo tutorial of short row bust shaping, check out http://www.knitty.com/ISSUEsummer03/FEATbonnetric.html You should have (96, 104, 112, 120, 128, 136, 144, 152, 160, 168, 176, 182)st on the needles. Leave your stitch markers in - youll need those when you join the arms and body! Congratulations, you have a hoodie body! Do the dance of joy!
Arms (make two)
The arms are knit from the fingers up. The hand sizes are separate from the size of the hoodie in order to accommodate different widths of hands.
Mod: Hands-free
To knit this hoodie without the hands, measure your wrist. For $6"(7",8")$ wristsize,CO28(36, 44)st. Place marker at the beginning of the row (the outside of the arm). Join in the round and K for $2"$ in garter stitch, then switch to stockinette stitch and continue with the pattern as written from the Arm section.
..with gloves!
To add detachable gloves to your hands-free hoodie, follow the instructions for hands until just before the Arms section, then: K 3 rows. K2P2 for 12 rows (or K1P1, if you prefer). Bind off. This should create a snug glove wrist that your sleeve can be pulled over.
Hands - sizing:
Sizes: Women's Small (Medium, Large). The length of the hand is customizable, so sizes are based on the circumference of the hand: $6"(7",8")$ . The hand should fit loosely, but not so loosely as to be uncomfortable. The best way to figure out which size will work for you is to knit the thumb and try it on your thumb and non-pinky fingers - if it fits comfortably without the stitches stretching, it's right. For a custom fit, you can also size up or down your DPNs.
Thumb:
Cast-on 8(10, 12)st. Being careful not to twist the stitches, join in the round. Knit for 7 rows/1.5", or until you like the length of it (make a note of how many rows so you can do the same for the second hand). Break yarn. Slip onto waste yarn and set aside.
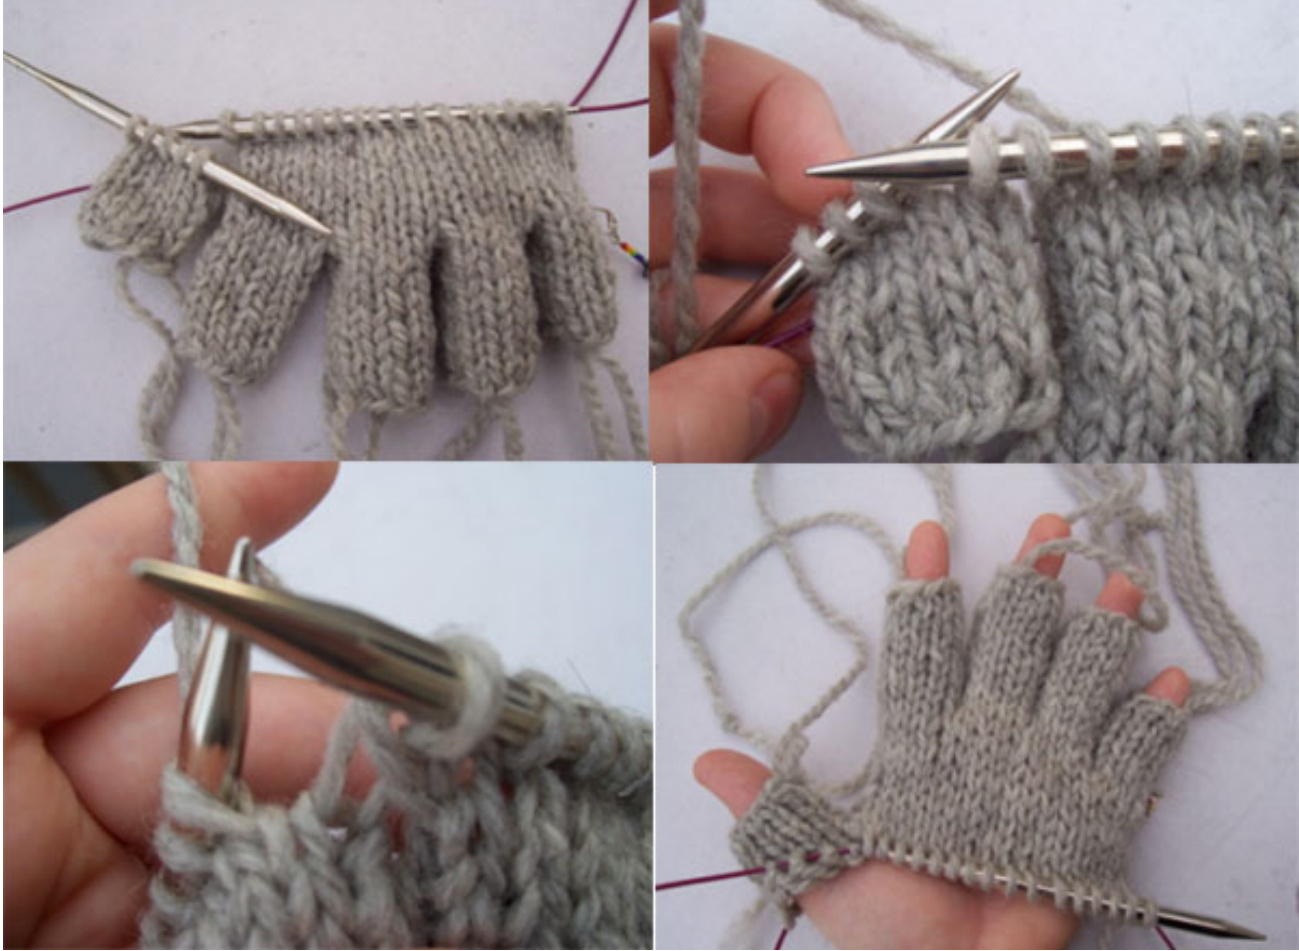
Main fingers (make three):
Cast-on 8(10, 12)st. Being careful not to twist the stitches, join in the round. Knit for 9 rows/2", or until you like the length of it (make a note of how many rows so you can do the same for the second hand). Break yarn. Take out your circs. Holding the circ needles parallel, slip your finger stitches onto them, half to one side and half to the other (4(5, 6)st on each circ needle). Set this aside until the next finger is complete, then do it again. Be sure to leave the tail ends of yarn between fingers - these will be used in finishing to sew up the gaps between fingers.
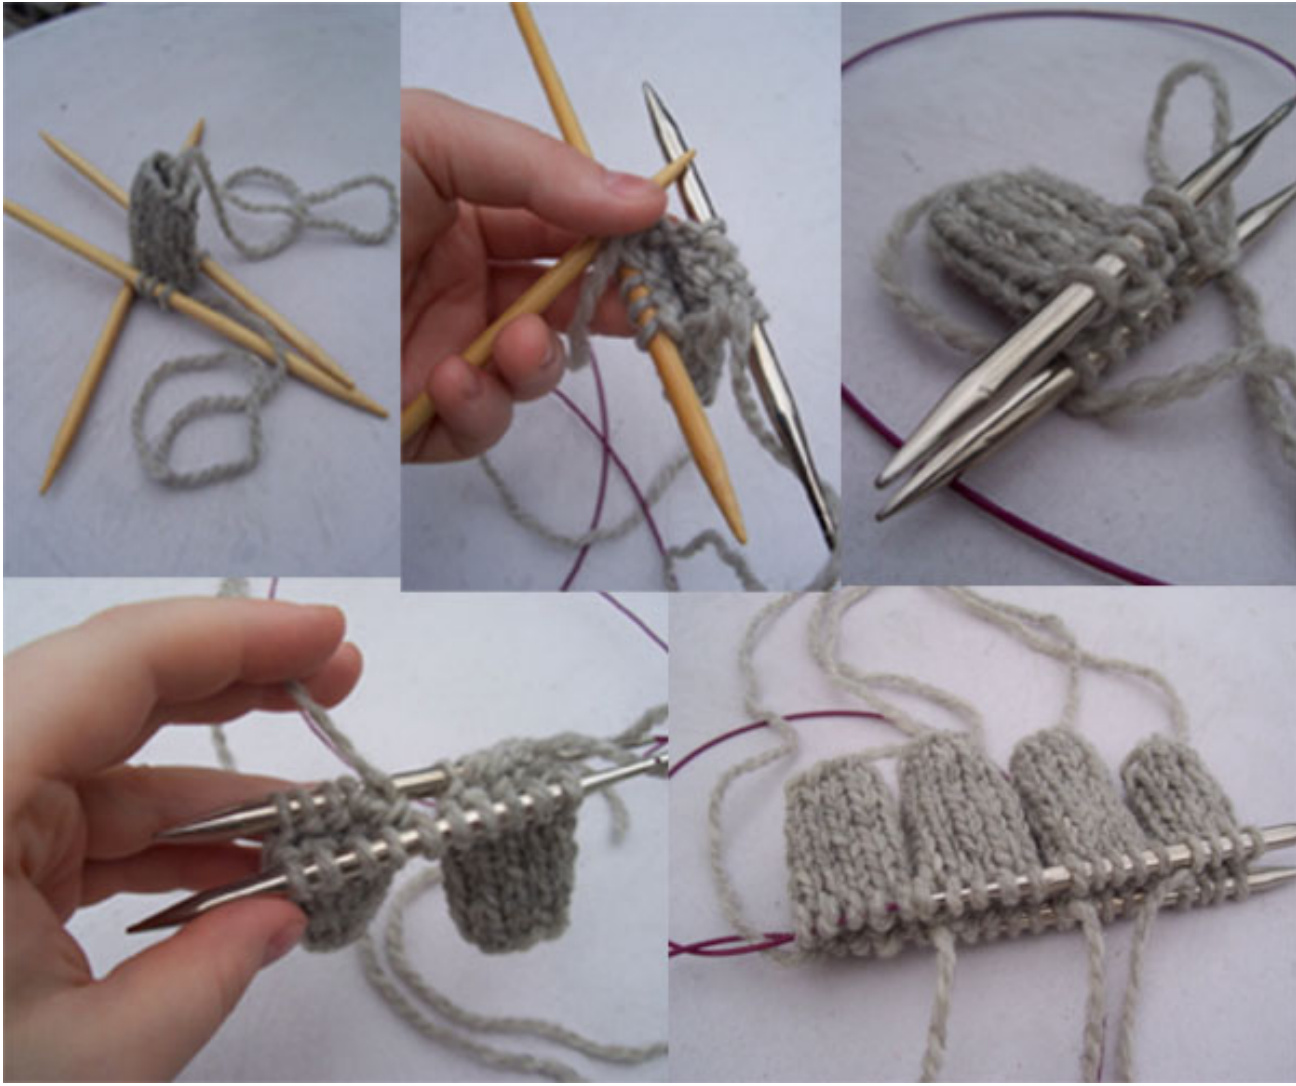
Pinky finger: Cast-on 6(8, 10)st. Being careful not to twist the stitches, join in the round. Knit for Knit for 7 rows/1.5", or until you like the length of it (make a note of how many rows so you can do the same for the second hand). Do not break yarn. Slip your pinky finger stitches onto the circ needles as for the main fingers, with the active yarn at the very end. You will continue to knit with this as you move into the body of the hand. You now have 30(38, 46)st on the needles of your circ, half on each needle. It's time to begin knitting using Magic Loop.
Body of hand and thumb gusset:
PM - this will be the beginning of the row. [K2(3, 4), K2tog] three times, K6(8, 10), [K2tog, K2(3, 4)] three times. (Or in non-math terms: $*_{\mathrm{Knit}}$ to the second to last stitch of this finger, then K2tog to knit the last stitch of this finger together with the first stitch of the next. Repeat from \* eight times to connect all fingers, then K to end of row.) You now have 24(32, 40)st on the needles. K until your mitt reaches the crease where your thumb meets your hand (1 1/2" to 2", generally). Now it's time to add the thumb. K11(15, 19), PM, S1 1 stitch onto right needle. Slide the thumb stitches onto your left needle. S1 1 stitch from thumb onto right needle. K this together with the last st from your hand (SSK).
K6(8, 10) st, K2tog, PM, K to end of row. 1) K a row. 2) K to M, slM, SSK, K to 2st from M, K2tog, slM, K to end of row. Repeat rows 1 and 2 until there are only two stitches between markers at the thumb gusset. Remove these two markers (leaving the marker that marks the beginning of the row). K11(15, 19), K2tog, K to 2st before end of row, K2tog. K a row. K10(14, 18), K2tog, K to 2st before end of row, K2tog.
Mod: Flip-back Hands
If you don't want separate hands that could get lost but do want to be able to remove the hands to, say, eat cheese curds in the back of a friend's car in the middle of October in Wisconsin, flip-back hands that open at the wrist is a solution for you! Bind-off half the stitches currently on your needles on the palm side - 10(14, 18)st. On the next row, when you reach the boundoff stitches, use backward loop cast-on to CO 10(14, 18)st. Don't bind-off and cast-on to0 tight. Now you'll have a hole just below the hand that you should be able to pull your hand out through when you need to use your hands. (Designer's note: seriously, don't eat cheese curds with the hands on. Bad idea.)
Arm:
K for 1". The beginning of your row should be marked on the outside of the arm (pinky side). 1) K1, M1L, K to 1st from end of row, M1R, K1. 2) K (5, 5,5, 4, 4,4, 3, 3, 3, 2, 2, 2) r0ws.
Mod: Roomier Arms
This pattern is built to be close-fitting. Going up a size or two at the arms will give you more ease in the arms. (For example, if you're making a size $37"$ hoodie, follow the directions for a size $39.5"$ from here on out.) Don't worry about your stitch count on the arms not matching your overall hoodie size - all sizes reach the same number when you hit the hood. Repeat steps 1 and 2 until there are (36, 40, 40, 44, 48, 48, 52, 56, 56, 60, 60, 64)st on the needle. K until sleeve comes to your armpit when tried on. K (16, 18, 18, 20, 22, 22, 24, 26, 26, 28, 28, 30)st (2st before the halfway point in the row). Break yarn.
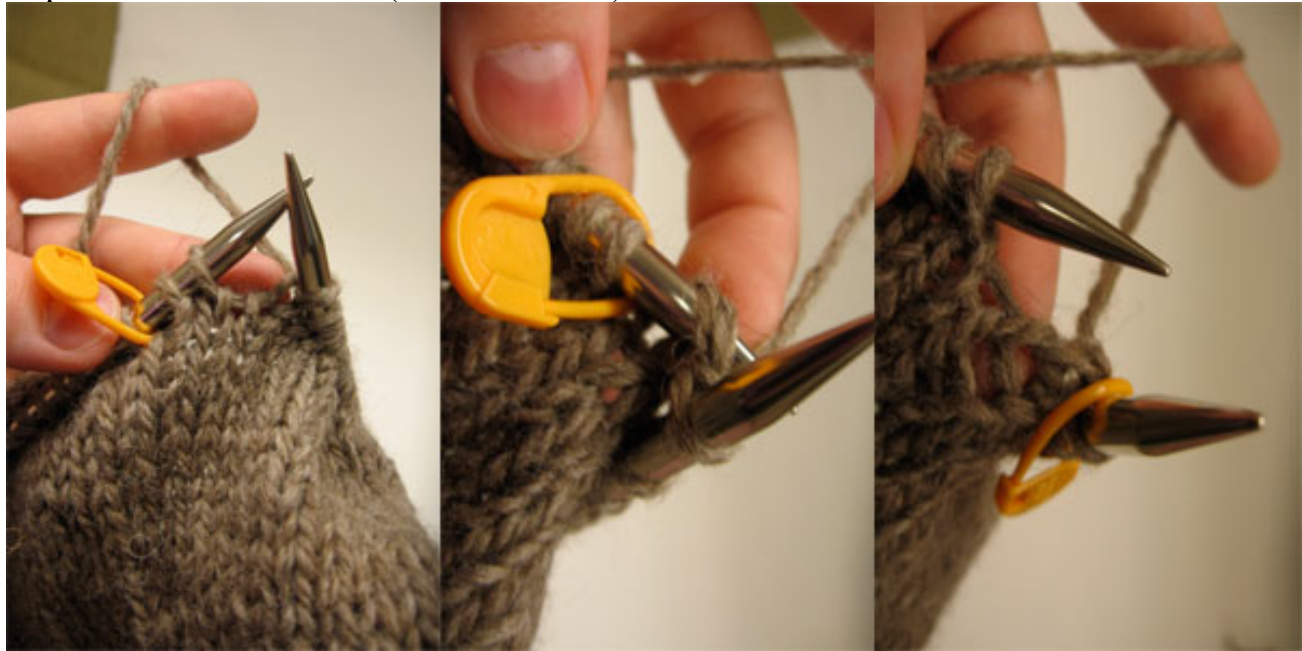
Shoulders:
Attaching the sleeves to the body: Starting with the body of your hoodie, K to 2st before first M. PM. Put next 4st on holder or waste yarn (removing the original M). Add the first sleeve to your needles, starting where you left off with it. Put first 4st on holder or waste yarn. Starting with the st to the left of the 4st on holder/waste yarn, K around the sleeve. PM. Starting with the first st after the 4st on holder/waste yarn, K body to 2st before next M. PM. Put next 4st on holder or waste yarn (removing the original M). Add the second sleeve to your needles, starting where you left off with it. Put first 4st on holder or waste yarn. Starting with the st to the left of the 4st on holder/waste yarn, K around the sleeve. PM. Starting with the first st after the 4st on holder/waste yarn, K body to end of row. Your sleeves and body are now attached! 1) K7, P to 7 before end of row, K7. 2) K row.
Repeat rows 1 and 2 for $1-2"$ , depending on how deep you want your arm holes. (2" will give you some extra ease under the arms.) When you reach the depth you want, repeat row 1 one more time.
Raglan decreases:
1) [K to 3st before M, SSK, K1, slM, K1, K2tog] four times, K to end of row. 2) K7, P to 7st before end of row, K7. Repeat rows 1 and 2 until only 80st remain on the needles. Stop placing buttonholes at this point.
Hood
Remove the first and fourth M in the row (the ones marking the raglan decrease points on the front of the hoodie). Leave the second and third M - these will now mark the decreases on the hood, once you reach them. 1) K row. 2) K7, P to 7st before end of row, K7. Repeat rows 1 and 2 for 8". (About 9" for yarns that don't grow when washed)
Mod: Longer/Shorter Neck
If hoods tend to be too tight or loose on you, here's where you can adjust the hood to fit you better. Instead of knitting to $8^{\circ}$ , knit until the hood comes to about $1^{\circ}$ from the top of your head when you try the hoodie on. Next, there are decreases to make the turn of the hood less angular.
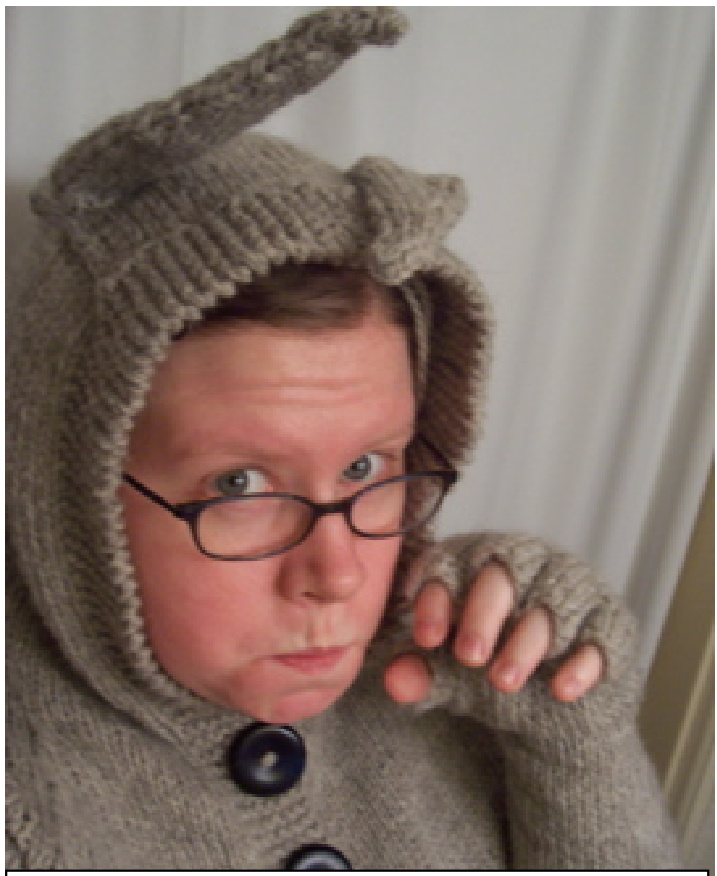
Ears unstuffed: still quite fierce. 1) K to 2st before M, K2tog, slM, K to M, slM, SSK, K to end. 2) K7, P to 7st before end of row, K7. Repeat rows 1 and 2 once (two times total).
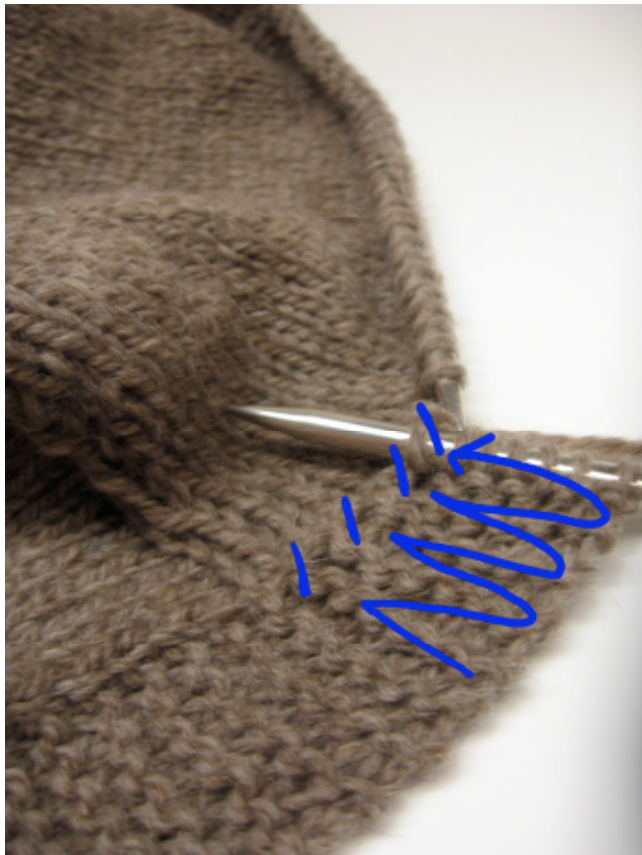
Next, short rows without wraps will shape the top of the hood. K to M, sIM, K to next M, sIM, SSK, turn. 1) sl1, sIM, P to next M, slM, P2tog, turn. 2) sl1, sIM, K to next M, slM, SSK, turn. Repeat rows 1 and 2 seven (7) more times (eight times total). Ear row: sl1, slM, use contrasting waste yarn to K7, sl those 7st back onto the left needle, K to 7st before next M, use contrasting waste yarn to K7, sl those 7st back onto the left needle, sIM, SSK, turn. 1) sl1, slM, P to next M, slM, P2tog, turn. 2) sl1, slM, K to next M, slM, SSK, turn. Repeat rows 1 and 2 until only 8st are left outside the markers on each side. On the next P row, when you reach the decrease, don't turn. K the last 7st.
Now it's time to knit the last part of the hood's hem, using up the remaining stitches from the top of the hood. 1) K the first 6st, SSK, turn. 2) K to end. Repeat until only 14st are left, 7 from each side. Hold 7st on each needle and graft them together with Kitchener stitch.
Ear (do twice):
Carefully remove the contrasting waste yarn and pick up stitches on DPNs: 7st along the back, 8st along the front, 1st from the side (16st total). Distribute them as evenly as possible, keeping the beginning of the row along the outside edge (next to the row of decreases). PM to mark beginning of row.
Short rows will make the ears stick straight up:
K3, W&T.
P6, W&T. K6, pick up wrap and K2tog with stitch, W&T. P7, pick up wrap and P2tog with stitch, W&T. K8, pick up wrap and K2tog with stitch, W&T. P9, pick up wrap and P2tog with stitch, W&T. K to end of row. K10 rows. 1) K to 2st before end of row, K2tog. 2) K row. 3) SSK, K to end of row. 4) K row. Repeat rows 1-4 until there are 4st left. K2tog, SSK. Break yarn and pull yarn through remaining 2st.
Finishing
Hands: Use the leftover tails of yarn between fingers to seam the gaps between fingers shut. Underarms: Slip the stitches under the arm onto two needles (4st per needle, arm stitches on one and body stitches on the other). Graft them together using Kitchener stitch. Ears: Wash and block the hoodie first! No, really. Wash, block, then stuff the ears, otherwise they'll stretch out and the stuffing that's in them will not. Stuff them until they stand upright on their own (or flop about in a way you like) when the hood is on your head. Loosely seam the Sew on buttons. Weave in all remaining ends. Let the wild rumpus begin!