
CURLY TOED BOOTIES
Ideal for pixies, elves, witches or jesters!
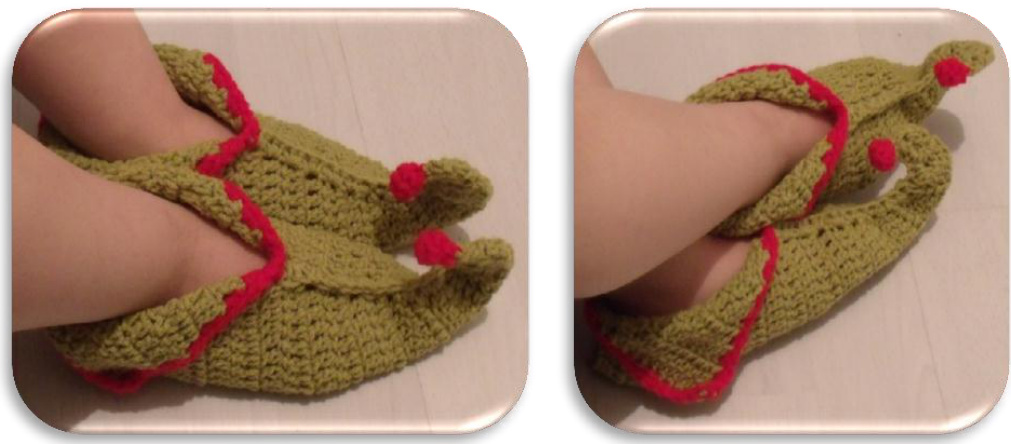
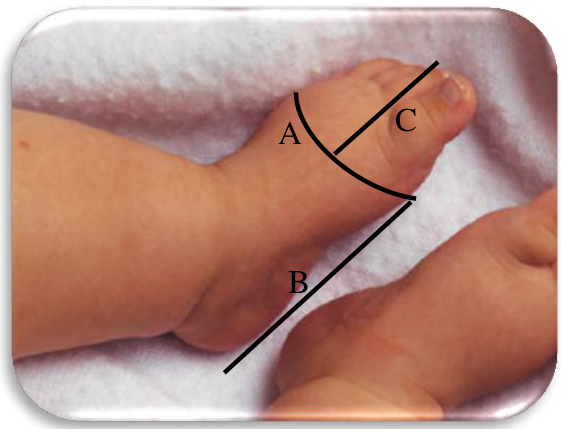
These novelty boots, with curly toes, can be worked in a variety of yarns (4ply, DK, Aran, WW, light chunky), to any size, providing you have a few simple foot measurements: A. Around the foot, at the widest part, generally just behind the toes. B. The distance from measurement A to the heel. C. The distance from measurement A to the toe.
Once you have these measurements, choose your yarn, an appropriately sized hook, two stitch markers and a wool needle for neatening ends. As a guide, 200m of DK yarn will make a pair of adult boots. While there is no gauge for this item, it is preferable to work with a hook that produces neat (tighter) stitches not loose ones. ttern is written in UK terms with the US equivalents provided below as applicable
| UK abbreviation | UK term | US abbreviation | US Term |
| ch | chain | ||
| dc | doublecrochet | SC | single crochet |
| RS | right side | ||
| SM | stitch marker | ||
| st(s) | stitch(es) | ||
| tr | treble | dc | double crochet |
Commence with 4ch. Row 1: (RS) 2tr into 4th ch from hook - counts as 3tr, turn (3sts). Row 2: 3ch - counts as 1tr, starting in first st work 1tr into each st to last, 2tr into last st, turn (5sts). Row 3:As row 2 (7sts). Row 4:As row 2 (9sts). Continue increasing, in this manner, until the width of the row is the same as measurement A. Place a stitch marker in the centre of this row. Continue increasing, as before, until the piece measures, from the stitch marker to the end row, 1"" (2.5cm) less than measurement B. Fasten off and neaten ends leaving the stitch marker in place until later. Make the second piece to match. Stitch each of the boots, as per the directions that follow:
Directions for Joining
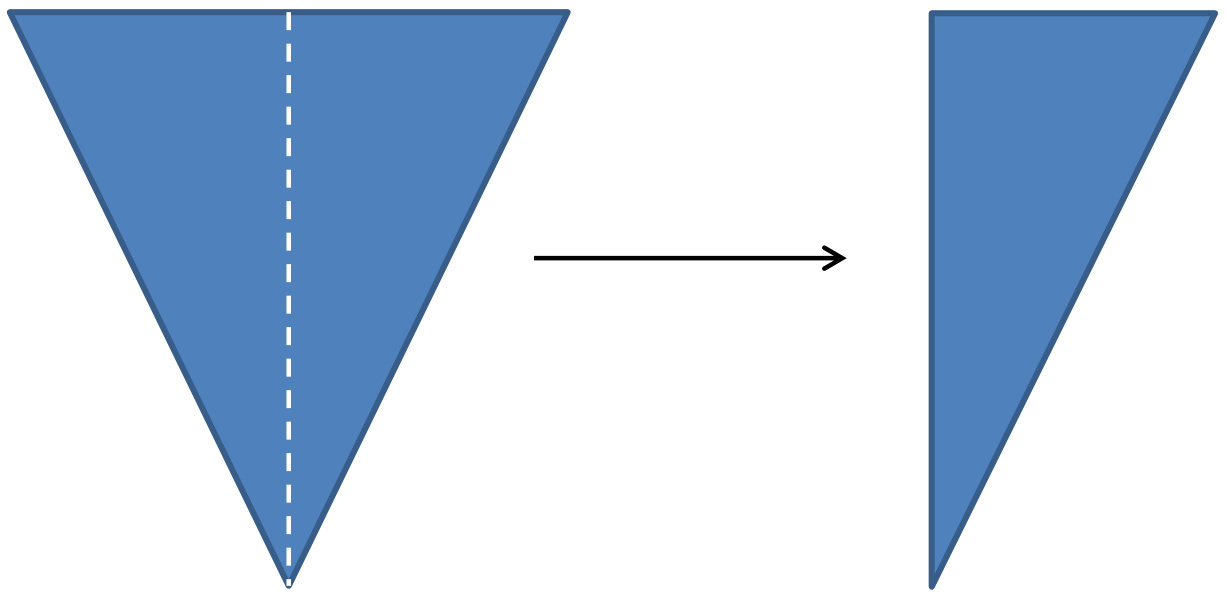
Fold along the dotted line with the right side to the outside.
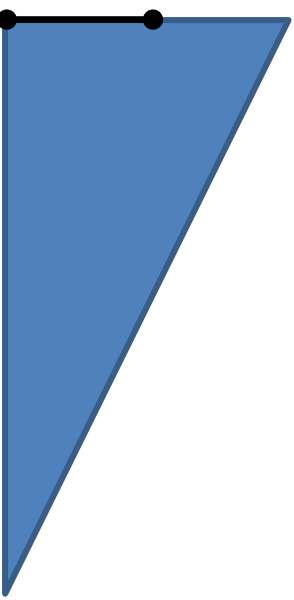
Stitching through both layers, join the back from the fold to around half way, as indicated by the solid line with dots at either end.
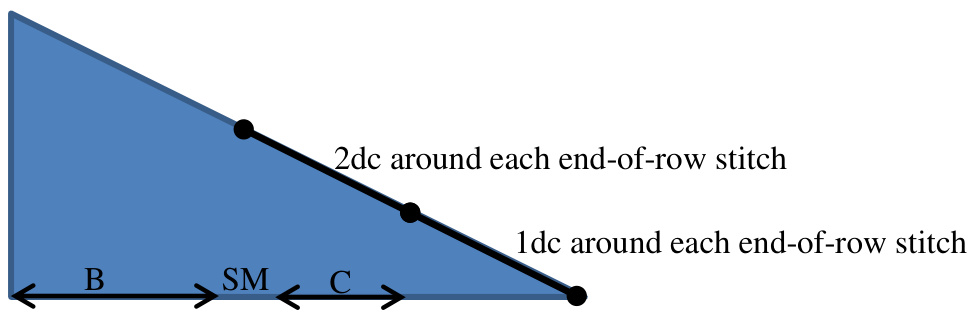
Re-join the yarn, to the edge of the row containing the stitch marker (SM). Working through both layers, join the upper with 2dc around each of the end-of-row stitches. When you reach the toes, (as per measurement C), switch to 1dc around each end-of-row stitch. The 1dc per stitch will cause the toes to curl up - do not try to work against this! Fasten off and neaten ends. Flatten the curly toe with the seam running up the centre and roll upwards.
Fold open edge over and, with RS facing, edge in double crochet (or chosen edging). e with pompoms, bells or embellishments of your choice or stitch the toe to hold in place.


