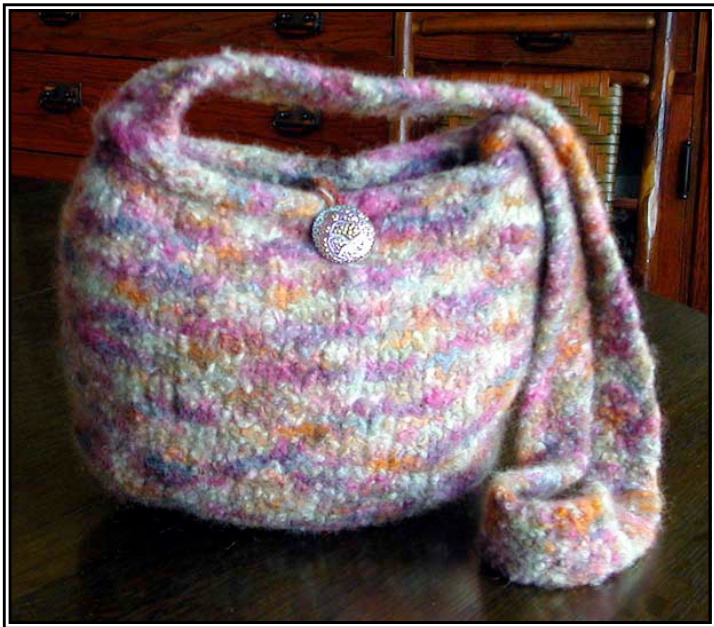
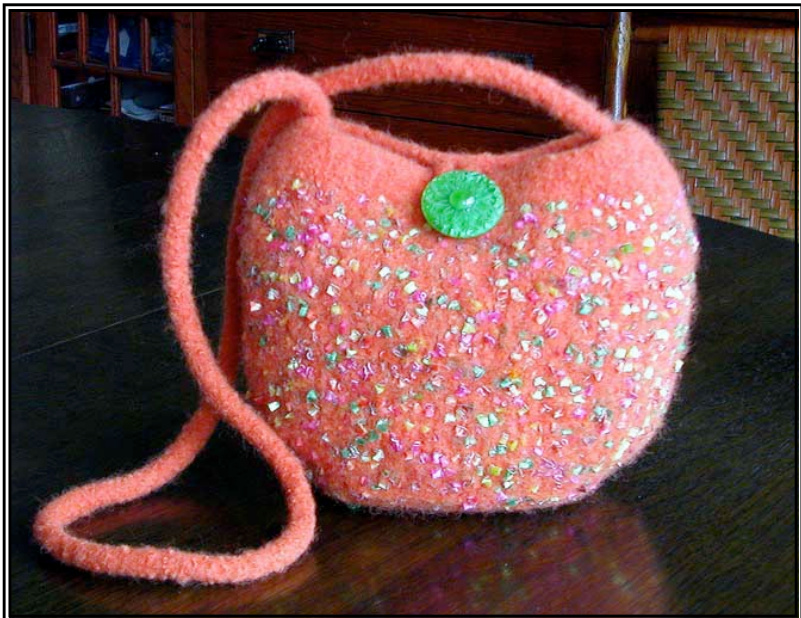
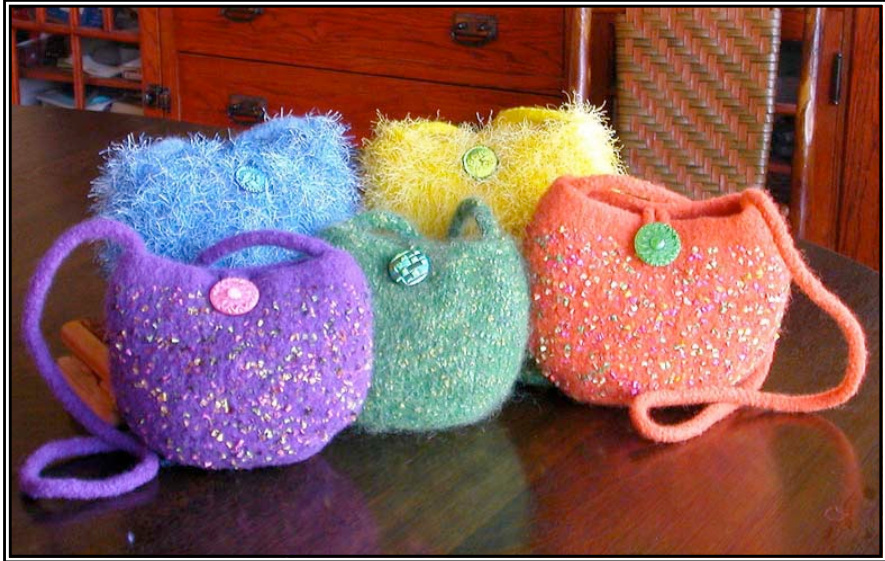
The Balloon Bag: A felted shoulder bag with a great shape
Materials:
2 skeins Manos del Uruguay yarn (or about 260 yards of a comparable wool yarn) (optional novelty yarn, about 100 yards) #15 16" circular needles aballoon size K crochet hook ball point needle
Gauge:
Since this is a felted project, gauge is unimportant. The large needle size ensures your knitting will be very loose, essential for successful felting. The body of this felted bag is worked with two strands of yarn. If you are working with Manos or other space-dyed yarn, work from two balls at the same time, to equal out the color variations.
The Strap:
I like to make the strap first, to be sure I have enough yarn. That way I can use up almost all the yarn on the base of the bag without worrying. Option One -- I-Cord: Using two strands, cast on two stitches. Knit them. Slip them back onto the left needle. Knit them again. Repeat until the I-cord measures about 5 feet. (Stretch the Icord and then release it before measuring.) Option Two -- Flat Strap: Using two strands, cast on five stitches. Row 1, and all subsequent rows: Knit one, purl one, knit one, purl one, knit one. Repeat until strap measures about 5 feet. (Stretch the strap and release it before measuring.) This option uses more yarn, so plan ahead!
The Base:
(lf you are using novelty yarn as a carry-along, you can opt to omit it for the base of the bag. Bring it in when you begin the sides of the bag, and work with three strands from then on.) Cast on 6 stitches. Row 1: Slip one (as if to purl), knit to end. Row 2: Slip one (as if to purl), increase one purlwise (by picking up the stitch below the one on your left needle and purling it), purl 4, increase one purlwise (same way), purl 1. (8 stitches total) Row 3: Repeat row 1. Row 4: Slip one (as if to purl), increase one (as above), purl 6, increase 1 (as above), purl one. (10 stitches total) Row 5: Repeat row 1. Row 6. Slip one (as if to purl), purl to end. Row 7-25: Repeat rows 5 and 6 (stockinette stitch.) Row 26: Slip one, purl two together, purl 4, purl 2 together, purl 1. (8 stitches total) Row 27: Repeat row 1.
Row 28: Slip one, purl two together, purl 2, purl to together, purl 1. (6 stitches total) You now have a lozenge shaped base, with 14 slipped stitches on the sides -- perfect for picking up!
Sides of the bag: (with corrections!)
(lf you are working with a supplementary novelty yarn, now is the time to add it to your knitting-) Knit 3, place Marker #1, knit 3. Then pick up 14 stitches along the left edge of the lozenge shaped base. (20 stitches total) Pick up three of the original cast on stitches, place Marker #2, pick up the last three original cast-on stitches. (26 stitches total) Pick up the remaining 14 stitches along the last edge of the base. (40 stitches total) Knit 2. You are now one stitch from Marker #1. Round 1: Increase one (by picking up the stitch below the one on the left needle and knitting it), knit 1, pass Marker #1, knit 1, increase 1 (same way), knit to one stitch before Marker #2, increase 1 (same way), knit 1, pass Marker #2, knit one, increase one (same way), knit to one stitch before Marker #1. (44 stitches) Round 2: repeat Round 1. (48 stitches) Round 3: repeat Round 1, (52 stitches) Continue working the sides of the bag in knit stitches until your bag height is about 1 % times the width of the base - or you have about 18 yards of yarn left. @2006 Diane Sutliff The Balloon Bag Option A: Purling. This makes the edge of the bag curl in a bit. It also creates a slightly different texture which makes nice contrast to the body of the bag. You can stop using your novelty yarn at this point if youwish. Final Round #3: As you come to three stitches before Marker #1, purl 2 together, purl 1, slip the marker, purl 1, purl 2 together and then continue purling toward the next marker. Repeat these decreases the same way on either side Marker #2. (48 stitches total) Final Round #2: Repeat as above. (44 stitches total) Final Round #1: Repeat as above. (40 stitches total) Cast off purlwise LOOSELY. You cannot cast off too loosely, really! It might help to use a larger working needle, or two needles held together. Work the final three rows as above, but knit instead of purl. Then cast two new stitches onto your left needle. Knit one, slip one, knit one, pass the slipped stitch over the last knit one. Slip the two stitches back onto the left needle. Repeat. This cast -off must be done very loosely. It might help to go up one needle size
Assembling:
You should have a few yards of yarn left. With your ballpoint needle, stitch the ends of the strap to the inside edge of the bag at both sides so the strap and the lip of the bag overlap by about 1 % inches. These stitches will disappear during felting. Crochet a chain about 16" long with the final scraps of yarn. You will use this to make a button loop.
Felting:
Place your bag, the strap and the button loop in a zippered pillowcase or in a regular pillowcase held closed with a snug rubber band. Set your top-loading washer on the smallest load size. Add just a few tablespoons of laundry soap. Set the water temp to hot wash/cold rinse. Place the loaded pillowcase and one or two pairs of jeans in the washer. Do not use towels or other types of fabric, because they will release lint that will lock itself into your felt. Start the washer. You might want to check on the progress of your felting during the cycle while you become more familiar with the felting process. Fully felted fabric should no longer have visible stitches, and should not stretch much when pulled on the bias. ves an additional shock to the wool and helps the felting process alonc Some felting guides recommend skipping the spin cycle, because it can create creases in your finished product. These creases can often be steamed out with an iron. If you opt not to use the spin cycle, squeeze the handbag in a thirsty towel to get out as much water as possible, so the bag will dry within your lifetime.
Blocking:
To give the Balloon Bag its distinctive oval shape, stretch the bag well by putting your fists inside the bag and twisting. You can't stretch it enough. Work out any bumpy places that have formed during felting. Really stretch the cast-off edge. Stretch out the strap. Really stretch it. Inflate the balloon inside the bag. Blow it up a firmly as you can. Find a warm place for your bag todry.
Finishing:
When the bag is perfectly dry, pop the balloon. Trim off any excess ends of yarn that have worked free. They will look like little rainbow dreadlocks. Sew the perfect button near the center edge of one side of the bag. Add the loop closure on the inside of the opposite side of the bag. Gauge the size of the button loop by the appearance when buttoned. Wear proudly!
This pattern was developed especially for: Nina: a well-knit shop 1655 W. Division Street Chicago, IL_ 60622 773/468-8996 www.ninachicago.com They stock a delicious collection of Manos del Uruguay yarns. Visit our website for more handbag patterns! www.feltedhandbagworkshop.com


