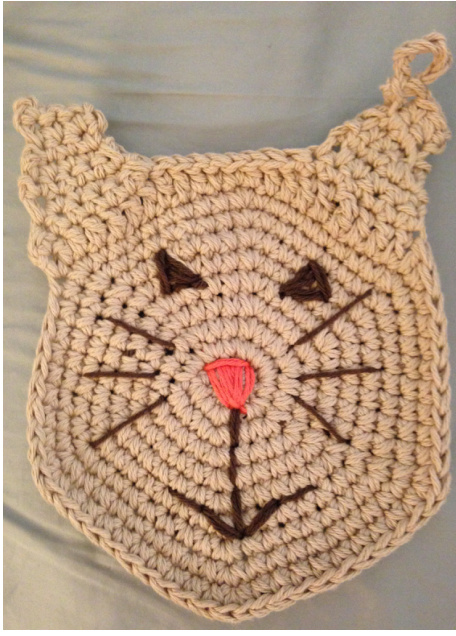
Potholders
A pattern by crochetyknitter http://www.crochetyknitter.tumblr.com/ http://www.etsy.com/shop/thecrochetyknitter http://www.ravelry.com/people/corknitter Inspired by The Purl Bee's Fruity Trivets Hook Size: K/10 1/2 - 6.5 Mm Yarn: Worsted 4-Ply 100% Cottton (Brand used here is Lily Sugar N' Cream) 1 Skein (70.9 g/120 yds) in Jute Few yards length of pink and brown for features Other Notions Needed: Large-Eye Yarn Needle Two removable stitch markers (bobby pins work!) Gauge: It don't matta! Living life on the edge over here. But if you insist, somewhere around 3 sc = 1 in. \*\*\* NOTE: The jute yarn is doubled here throughout the pattern to make a very thick potholder. So, you will be holding two strands together at the same time. (Don't worry-it's not as scary as it sounds!) The easiest way to do this is to pull the end from the center of a center-pull ball/skein and the other end from the outside of the centerpull bal/skein at the same time. Alternatively, you can just use two separate balls/skeins put together.
THE CAT HEAD
Round 1: Use the magic ring method, ch 1, sc 12 times into center, slip stitch into ch1 ch. Pull tight. You should have 12 stitches. \*\* Note: Mark the firststitch of the next round with the removablestich marker. Reposition the marker at the beginning of each round so you know when you finish a round. Round 2: Round 2: \*1 sc into next stitch, 2 sc into next stitch, repeat from \* to end of round. Round 3: \*1 sc into next 2 stitches, 2 sc into next stitch, repeat from \* to end of round. Round 4: \*1 sc into next 3 stitches, 2 sc into next stitch, repeat from \* to end of round. Round 5: \*1 sc into next 4 stitches, 2 sc into next stitch, repeat from \* to end of round. Round 6: \*1 sc into next 5 stitches, 2 sc into next stitch, repeat from \* to end of round. Round 7: \*1 sc into next 6 stitches, 2 sc into next stitch, repeat from \* to end of round. Round 8: \*1 sc into next 7 stitches, 2 sc into next stitch, repeat from \* to end of round. Round 9: \*1 sc into next 8 stitches, 2 sc into next stitch, repeat from \* to end of round. Round 10: Round 4: \*1 sc into next 9 stitches, 2 sc into next stitch, repeat from \* until you have two sets left (20 stitches left in the round). Place another marker. 8 dc, 1 hdc, 2 sc, 1 hdc, 8 dc, sl into Ist st of prev round (where your marker should be). Ch 1, turn.
The ears
Left ear: Row 1: Sc 7, do not chain, turn. Row 2: Sc into 2nd stitch from hook, sc across, but don't sc last stitch, ch 1, turn. Row 3: Sc across row (should be 5 stitches), do not chain, turn. Row 4: Sc into 2nd stitch from hook, sc 2 more, then sl into last stitch, ch 1, turn. Row 5: Sc into second stitch from hook, sc next 2, ch 1, turn. Row 6: Sc across (should be 3), ch 1, turn. Slip stitch across top of ear, down the side of ear, and across top of head until you are 7 from that other marker you placed For right ear, repeat Rows 1-6 above. Chain 10, slip stitch into the first chain. This makes the loop from which you can hang the potholder. Fasten off and weave in ends.
Embroidery Part
For the embroidered part, I thought pictures would be easiest. Following these exact directions will result in a mirror image on both sides.
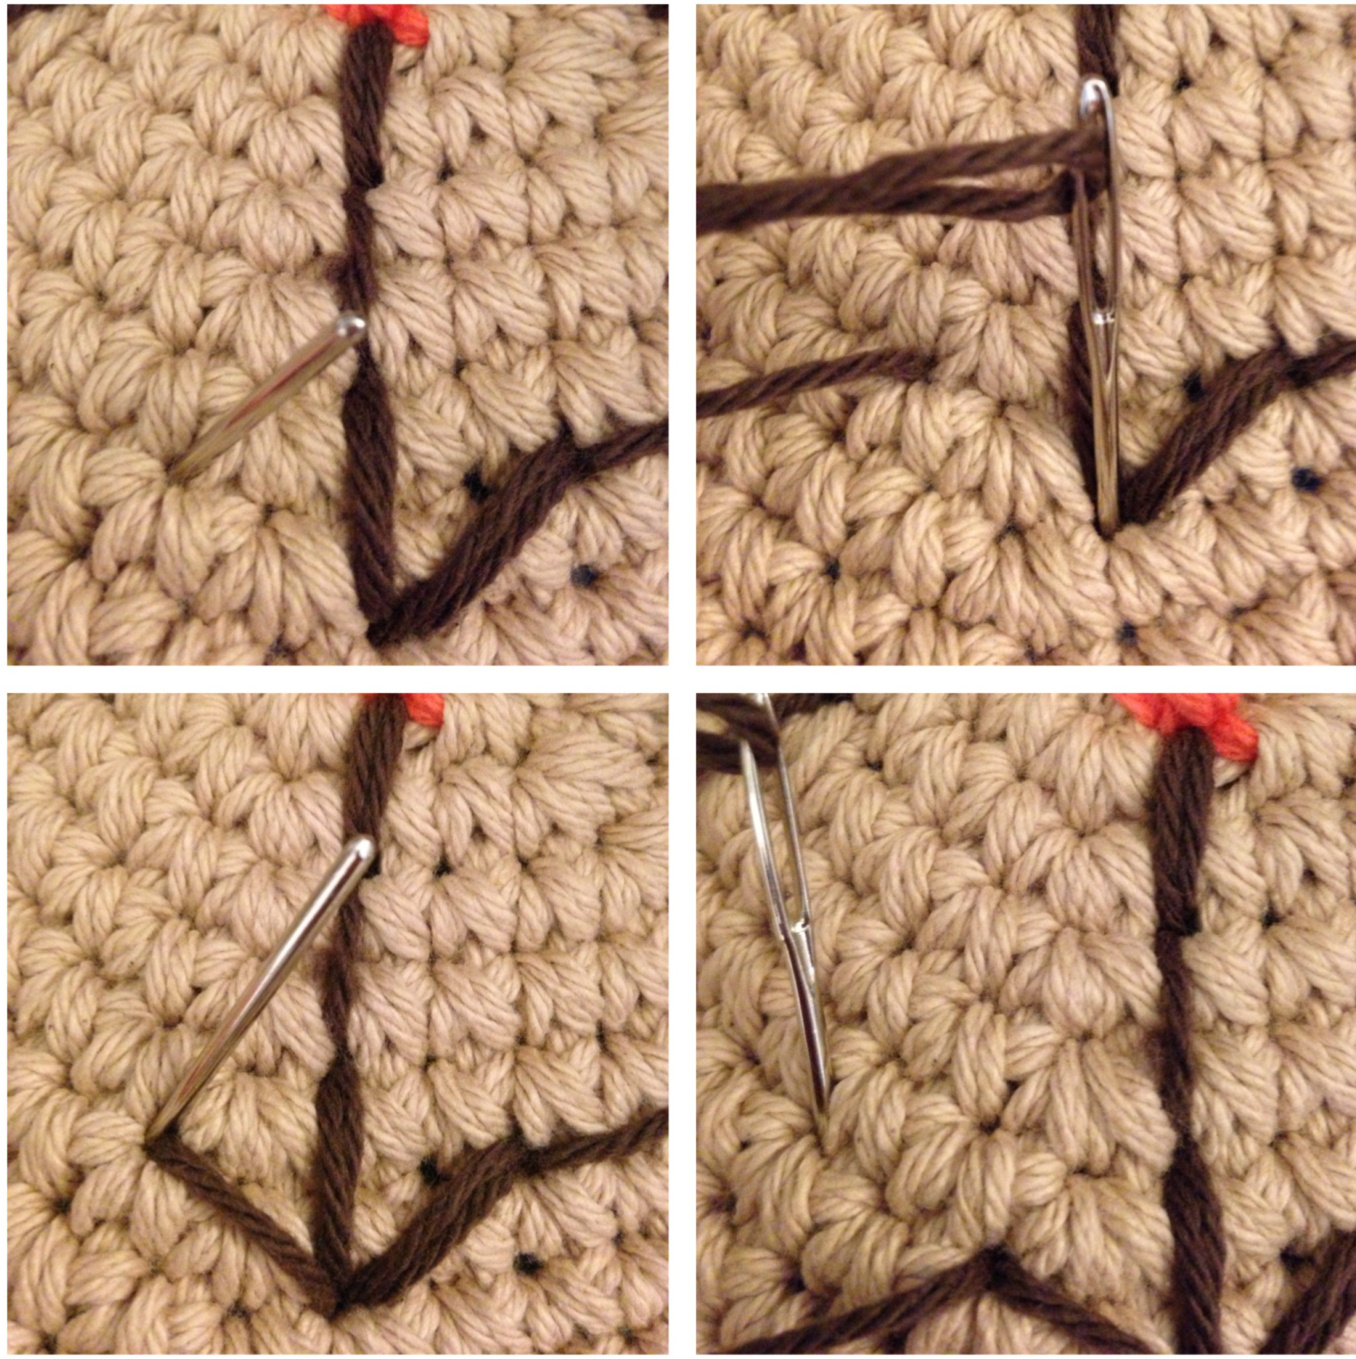
Nose:
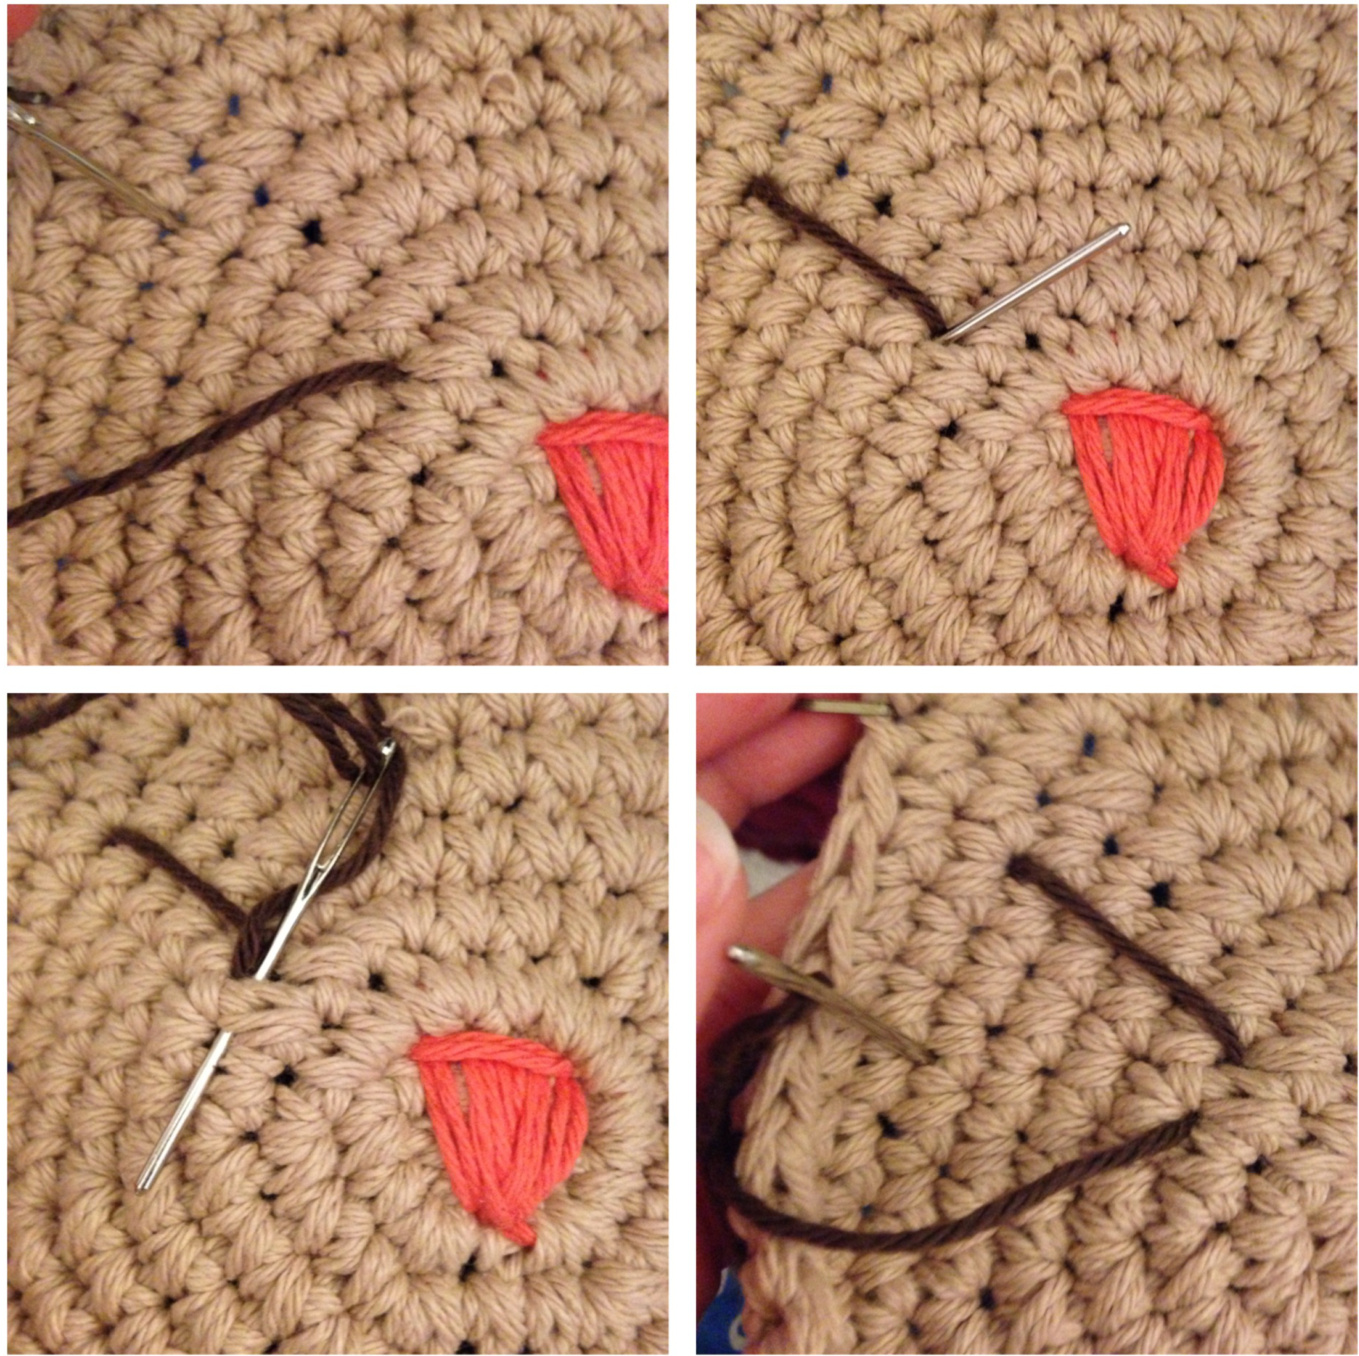
Cut a piece of pink yarn 45 inches, fold in half, and thread the doubled up yarn onto needle. When you first put into head, leave a 5 in tail to weave in later. s made in the middle of the cat head where you started your rounds \*\*Read these like so:
| 1 | 2 |
| 3 | 4 |
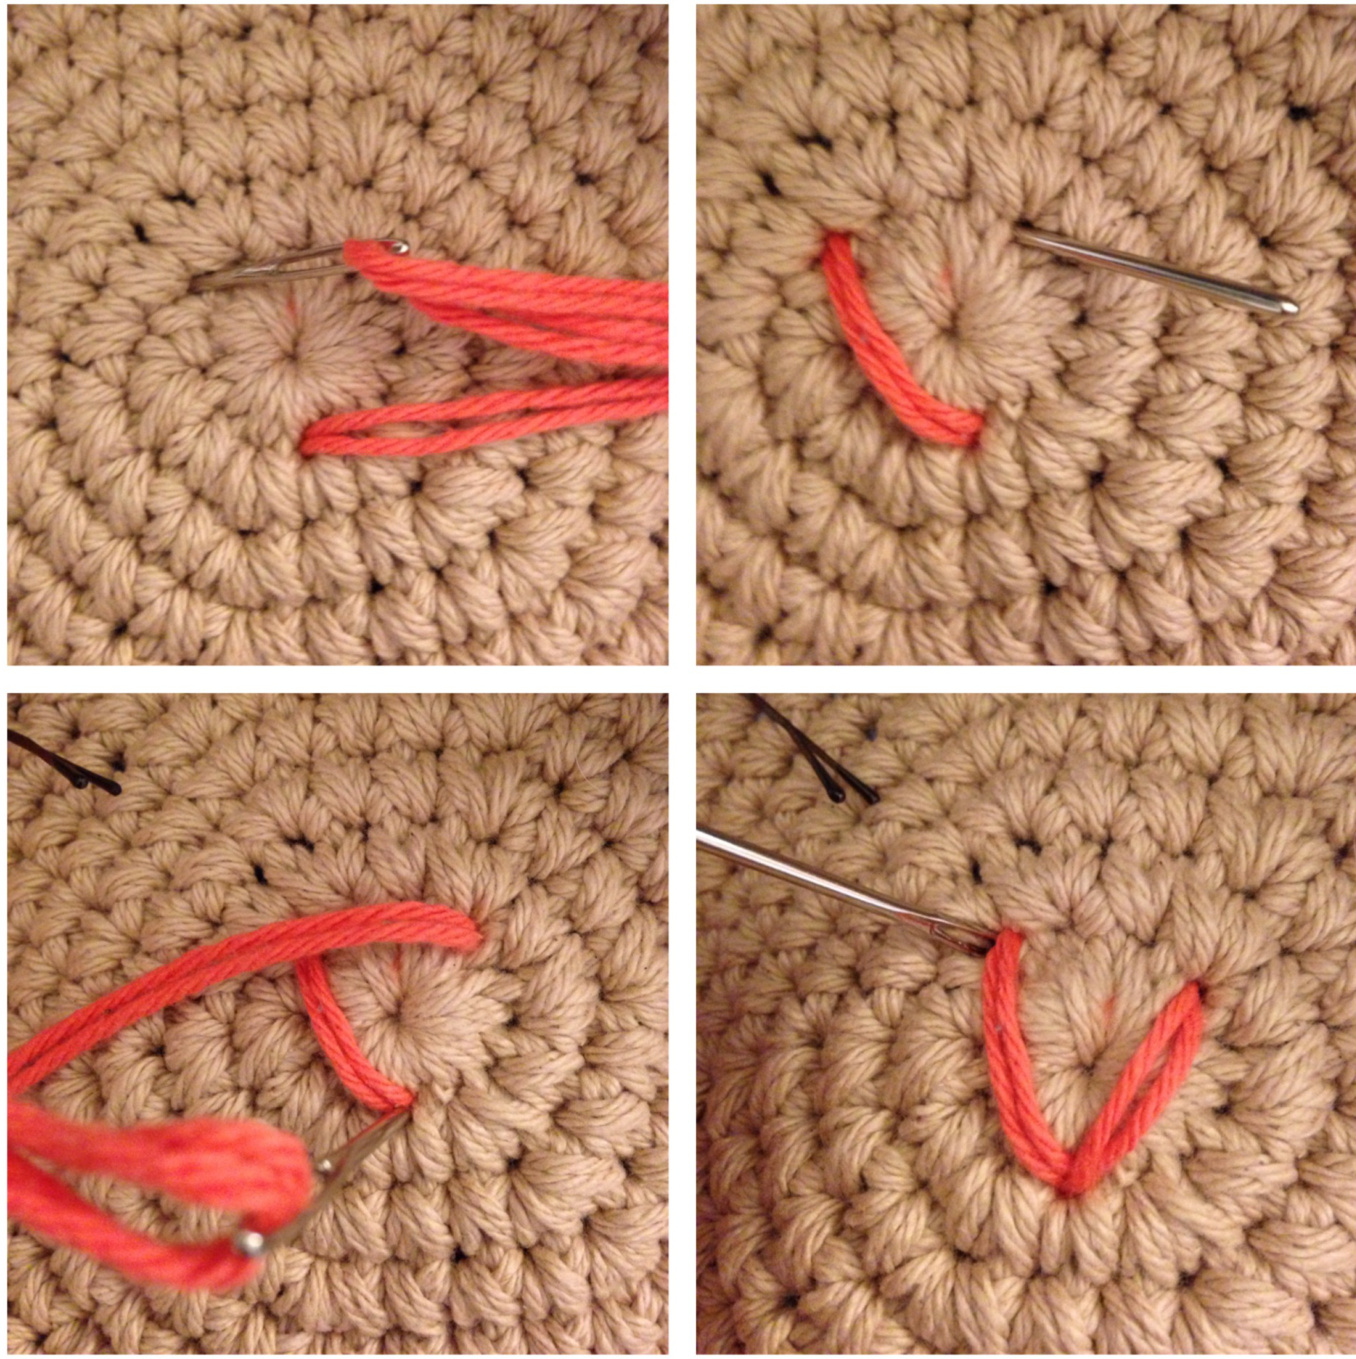
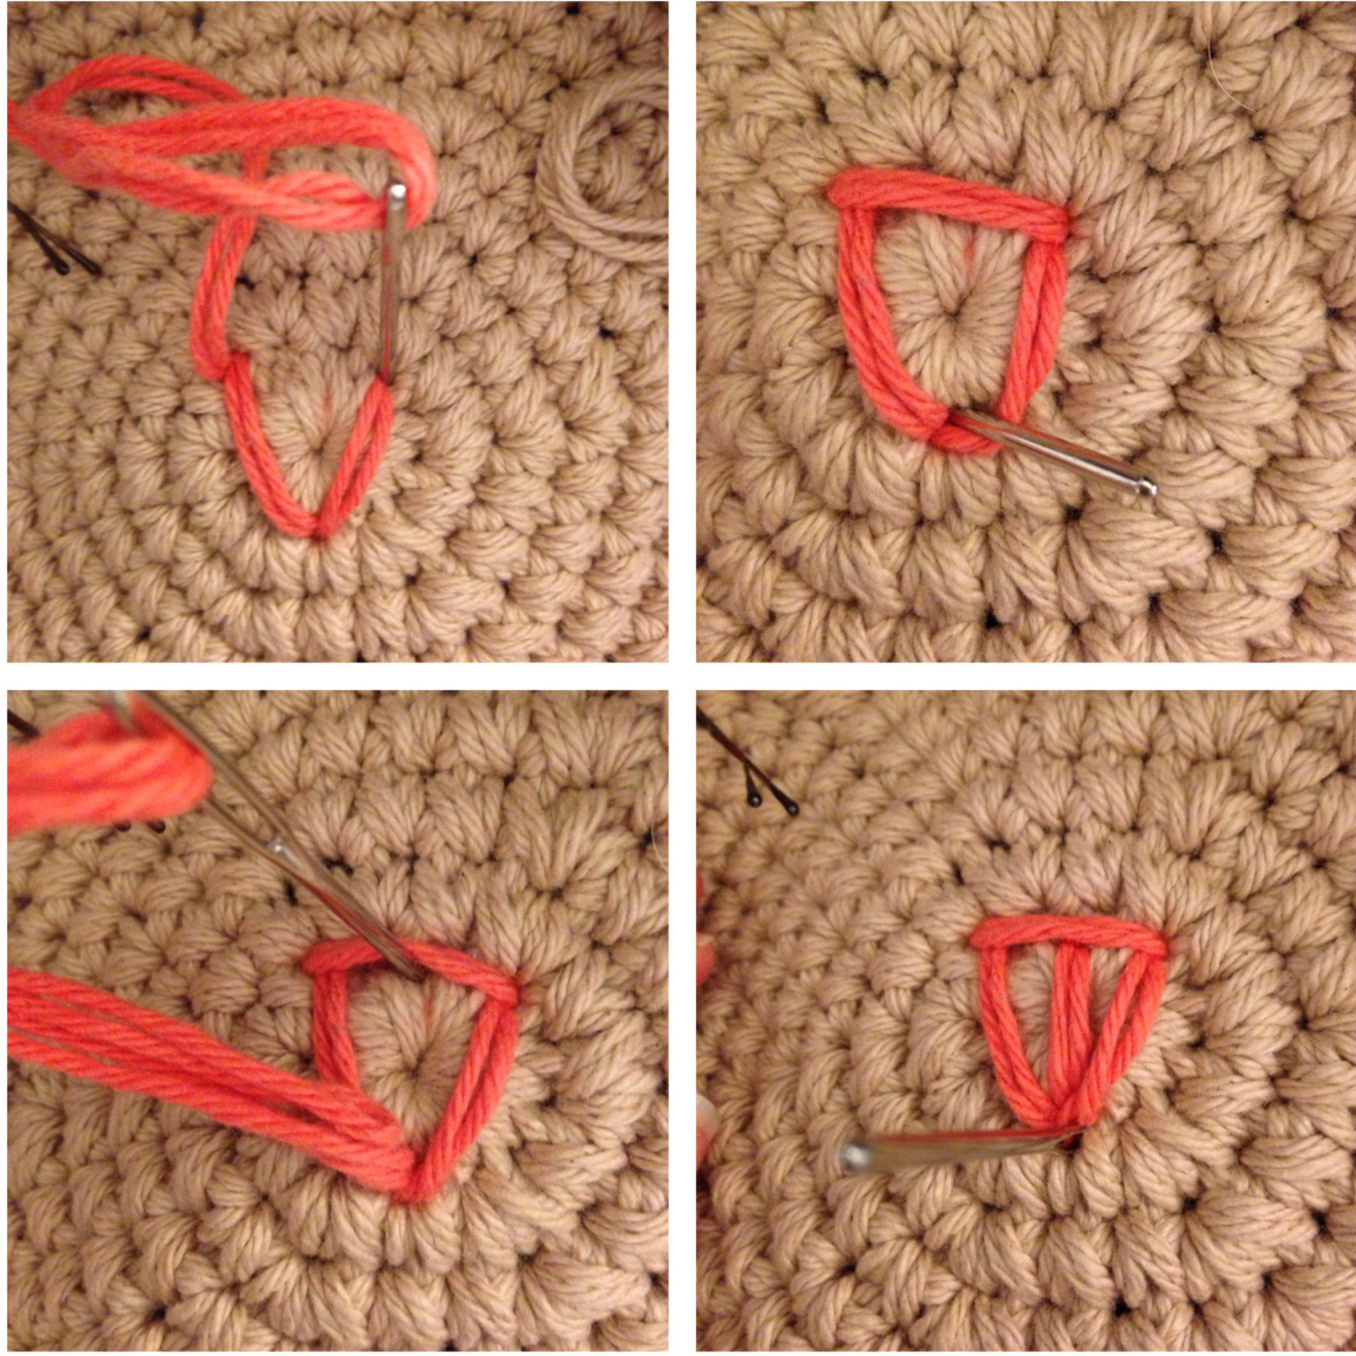
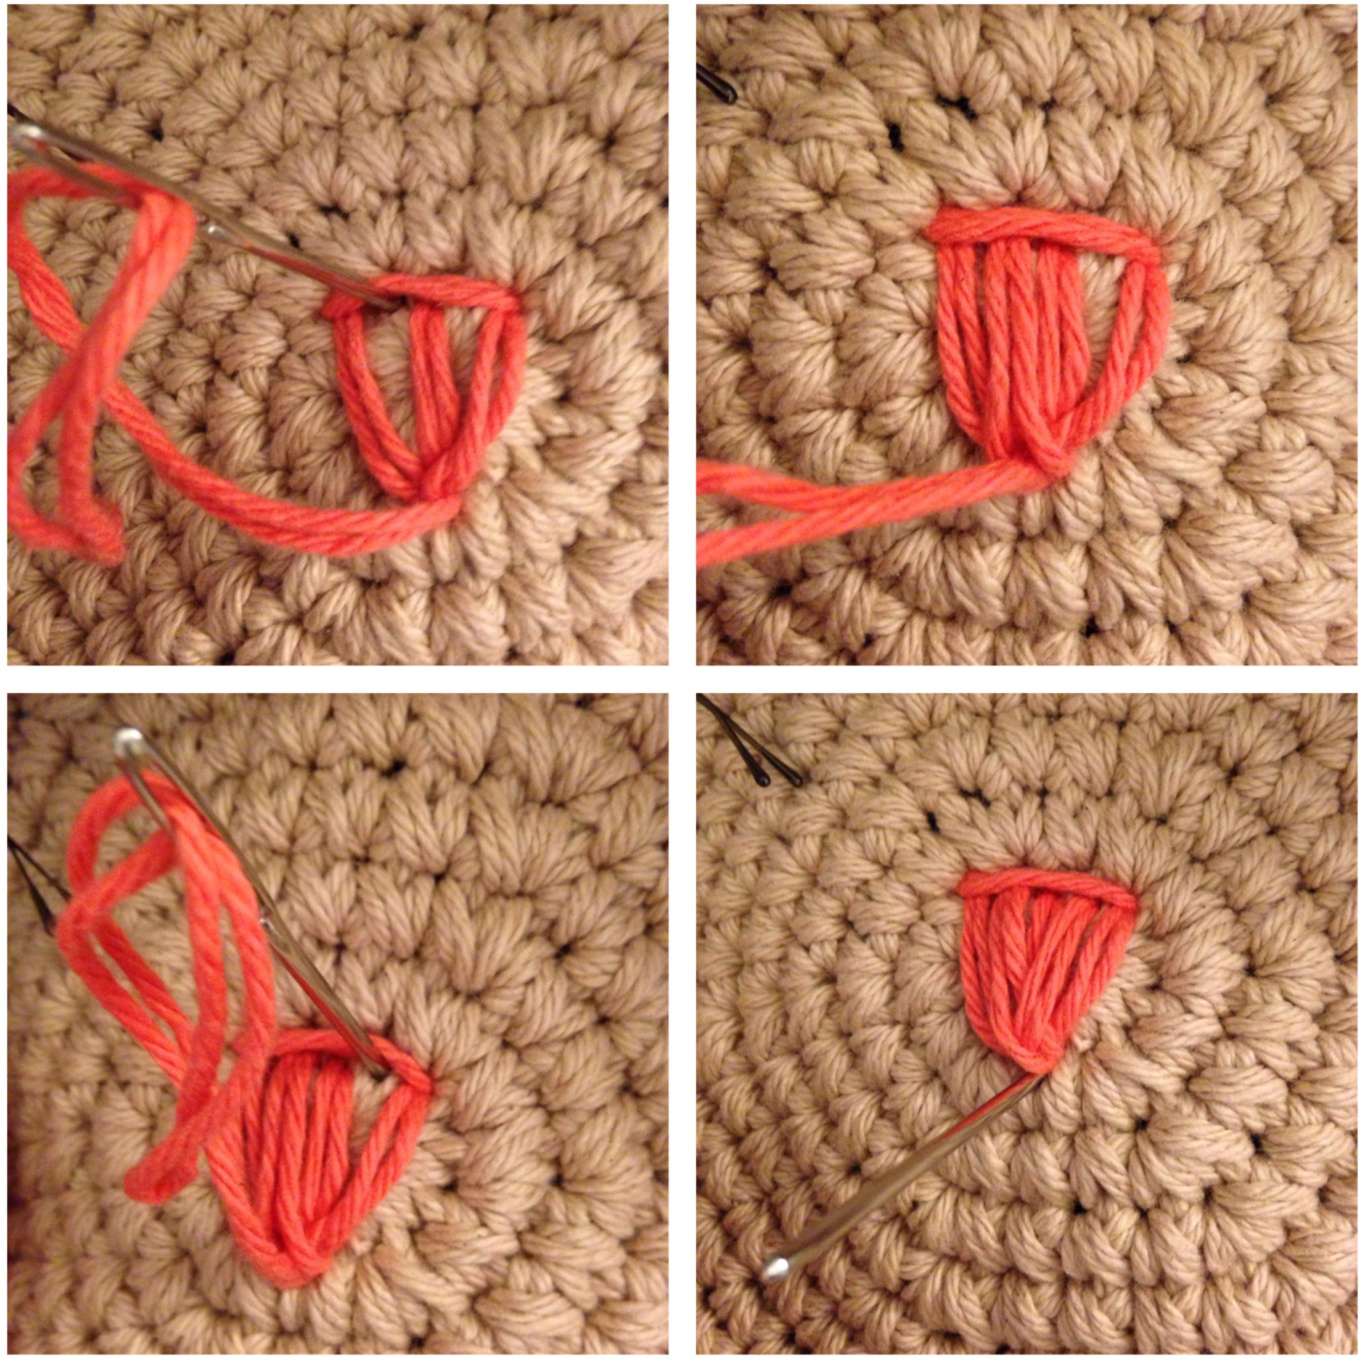
Weave in ends, and the nose is done!
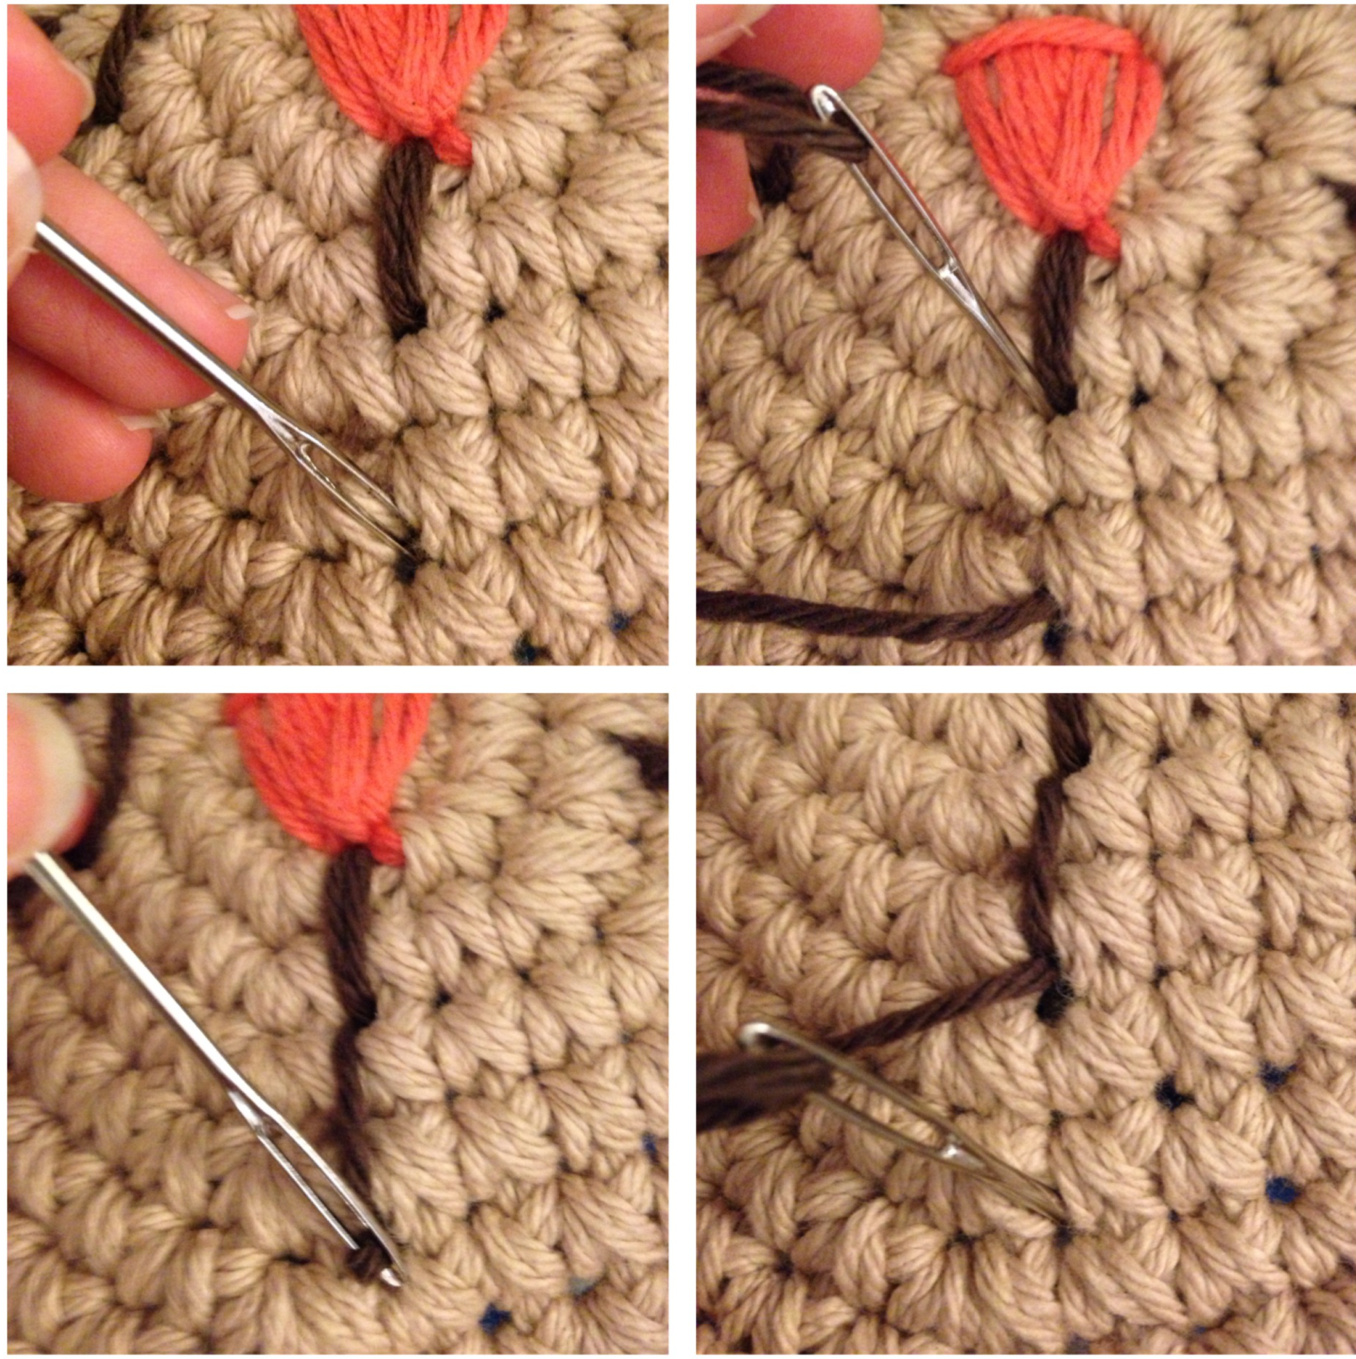
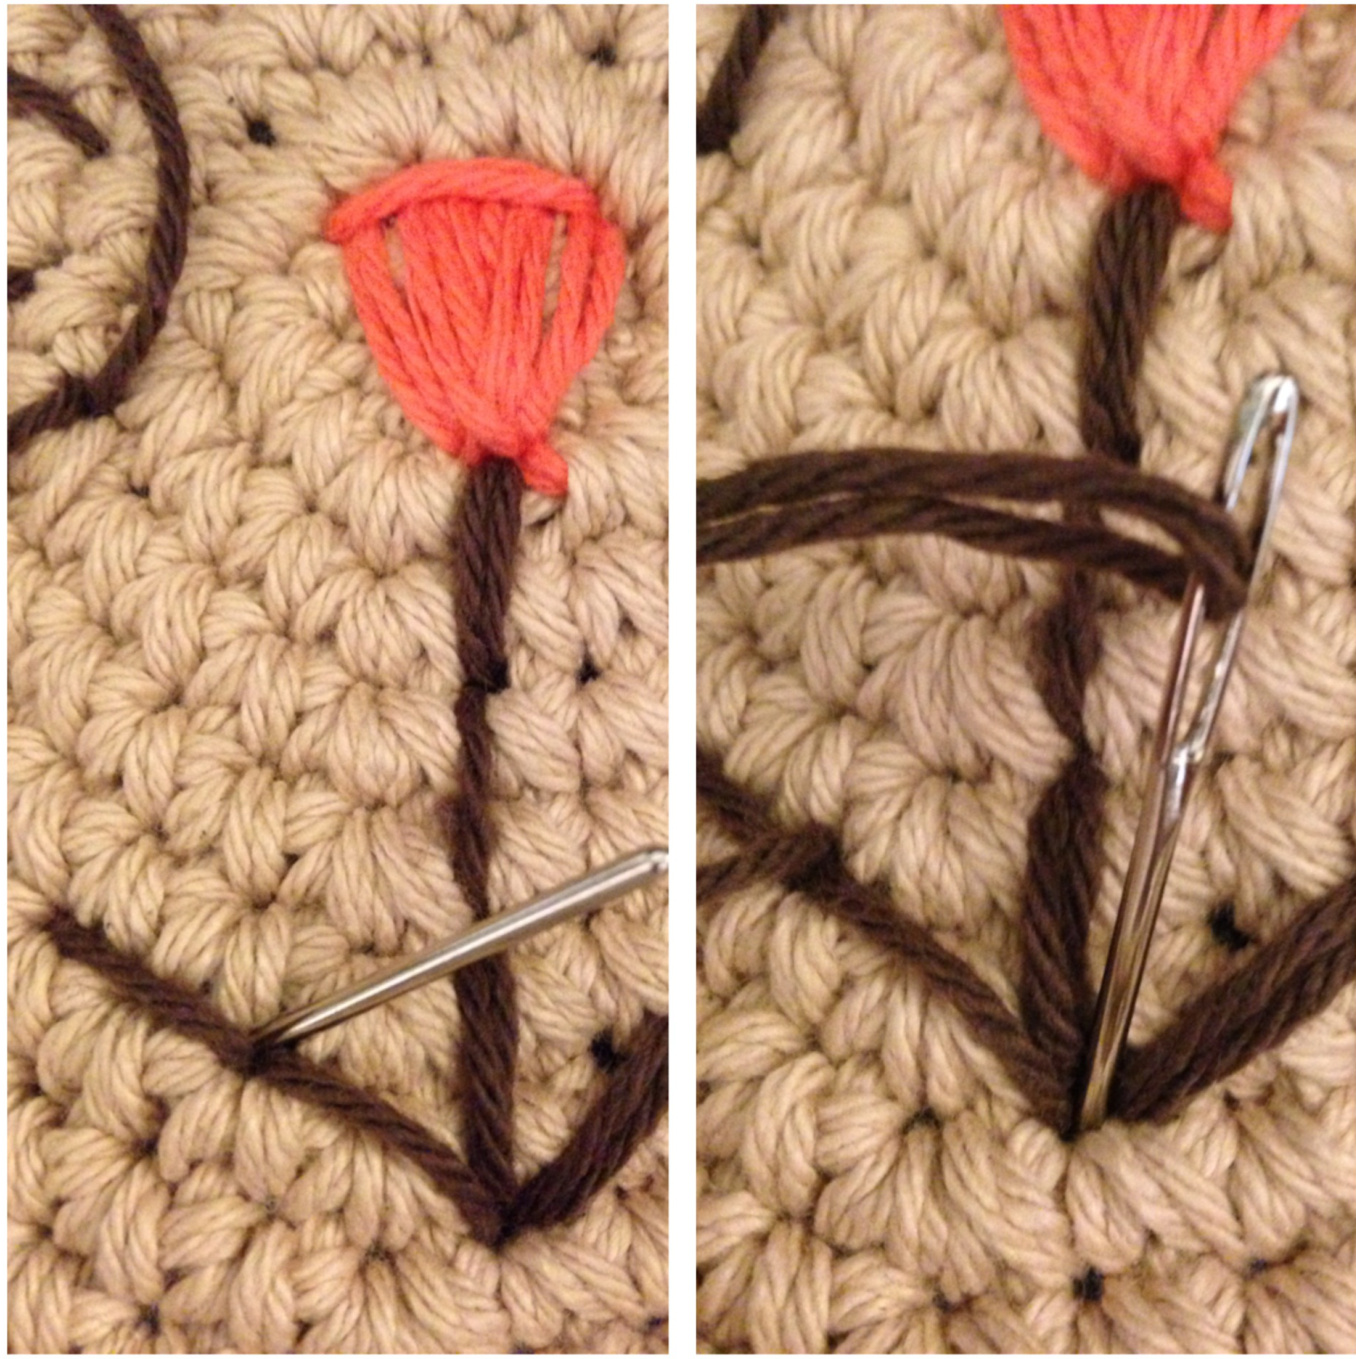
The whiskers:
Cut a piece of brown yarn 20 inches, DO NOT fold in half, and thread the single yarn onto needle. When you first put into head, leave a 5 in tail to weave in later. \*\* I'm only showing how to do the lft whiskers. Simply fllow the same steps in a mirror image on the other side of the face for the right side whiskers.
\*\*NOTE: When you are slipping your needle under stitches in this third step, make sure to slip your needle through the middle of the work (as if you were weaving in ends) so that the yarn does not show on either side.

Weave in ends.
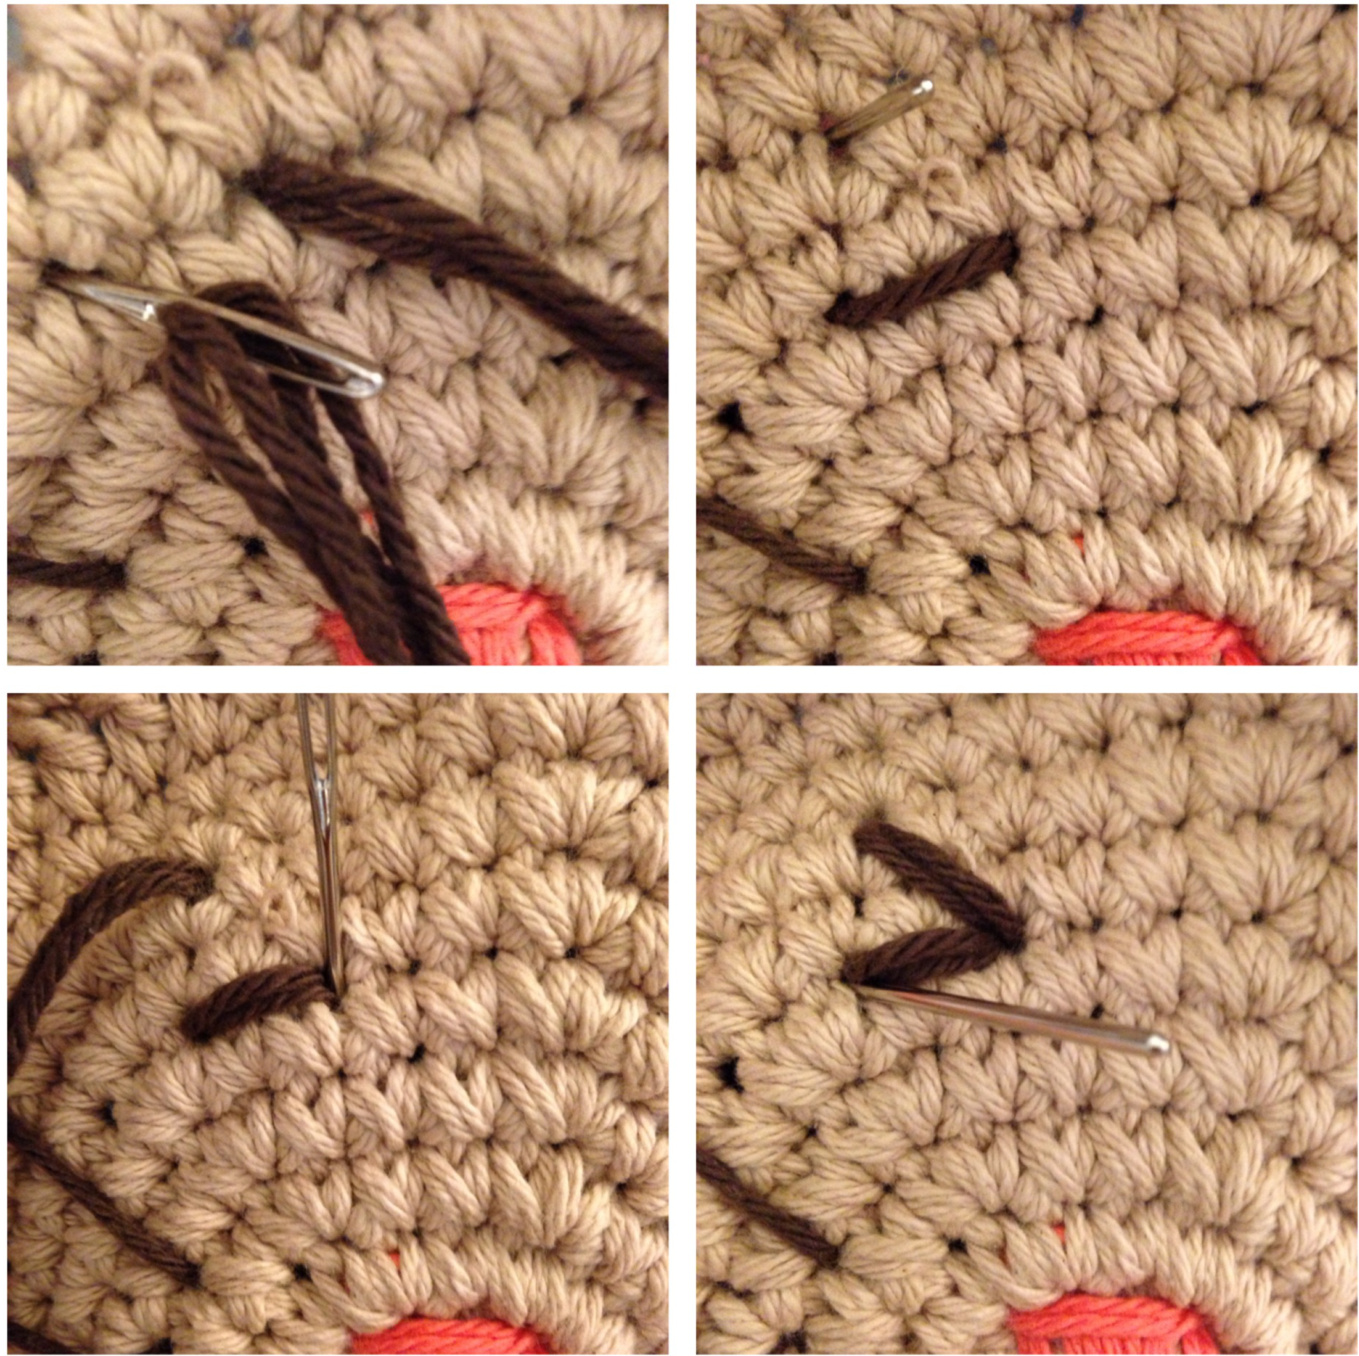
The mouth:
Cut a piece of brown yarn 30 inches, DO NOT fold in half, and thread the single yarn onto needle. When you first put into head, leave a 5 in tail to weave in later.

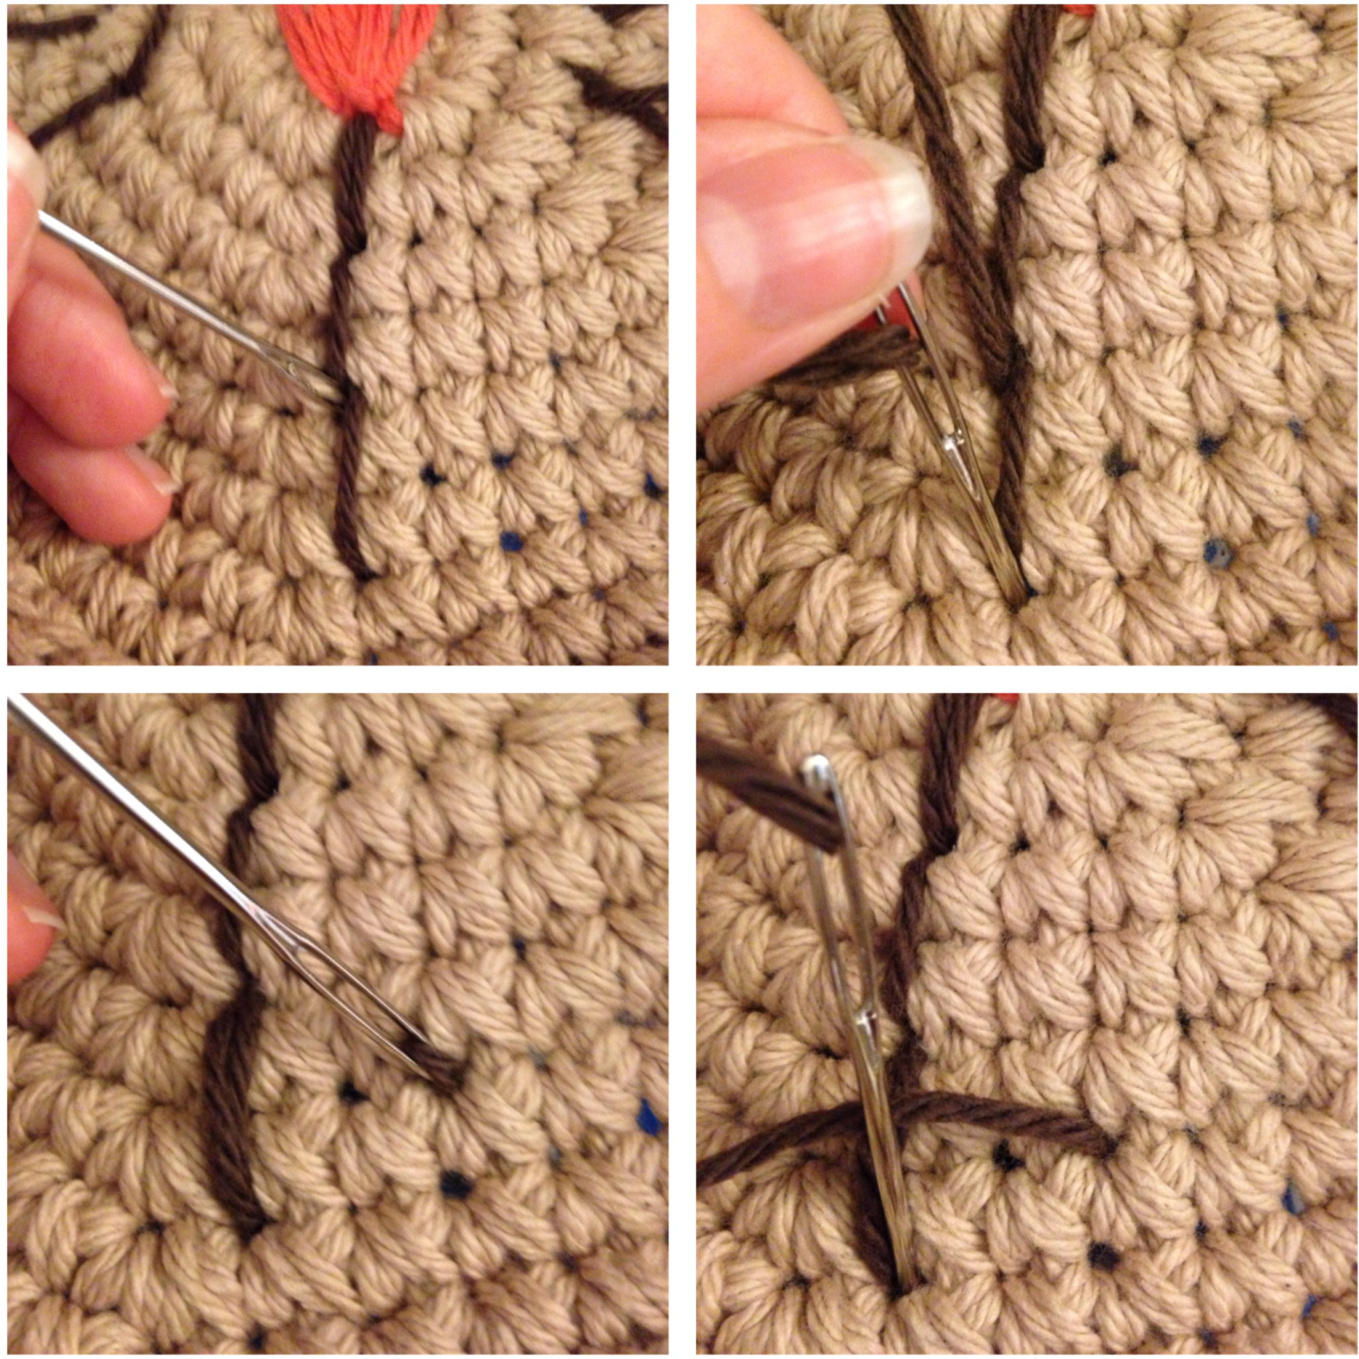
Weave in ends.
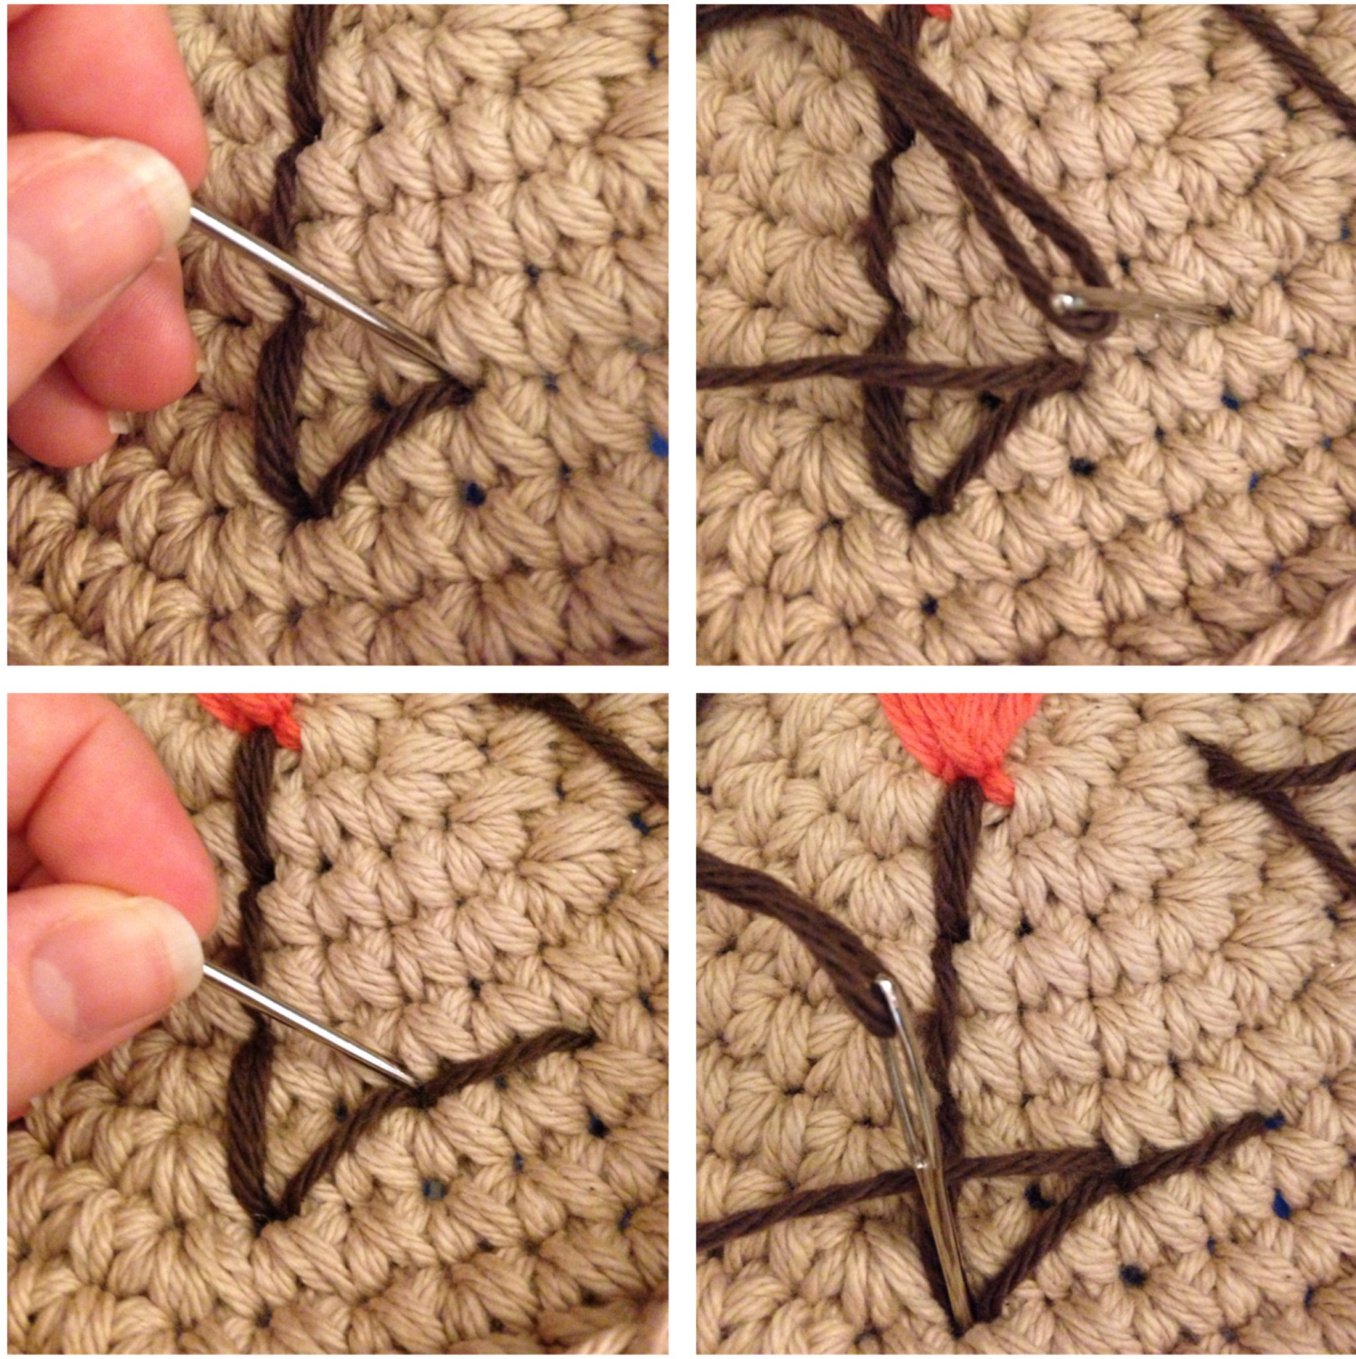
The eyes:
Cut a piece of brown yarn 60 inches, fold in half, and thread the doubled up yarn onto needle. When you first put into head, leave a 5 in tail to weave in later.
Next you are going to weave through to get to the other side (see photo below). Repeat steps for mirror-image eye.
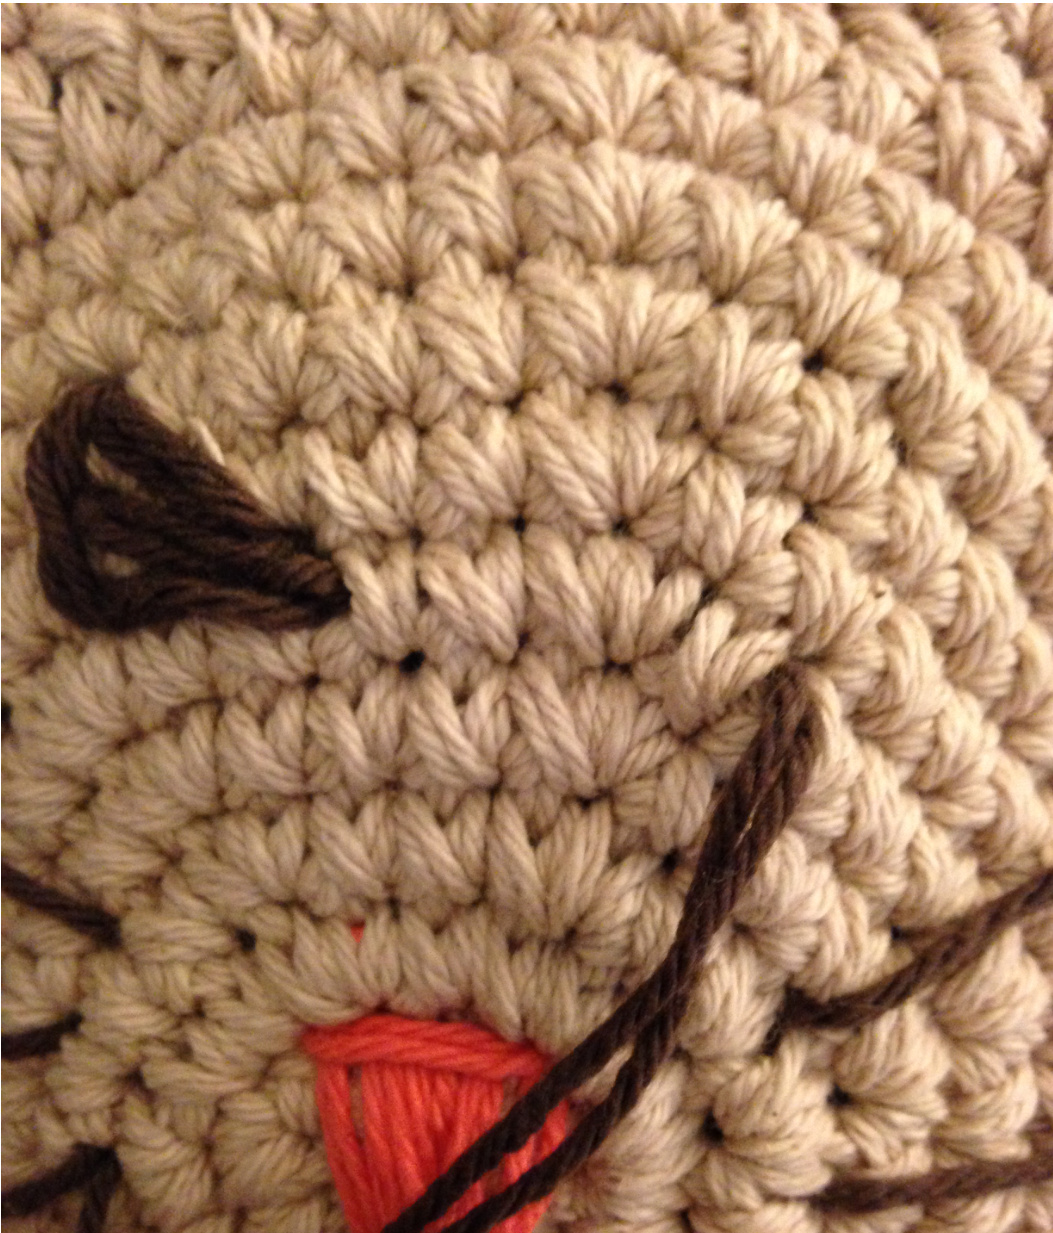
Weave in ends. AND THERE IT IS! Block if needed.


