CROCHET ATTER:
CHY HAT SKiCARET
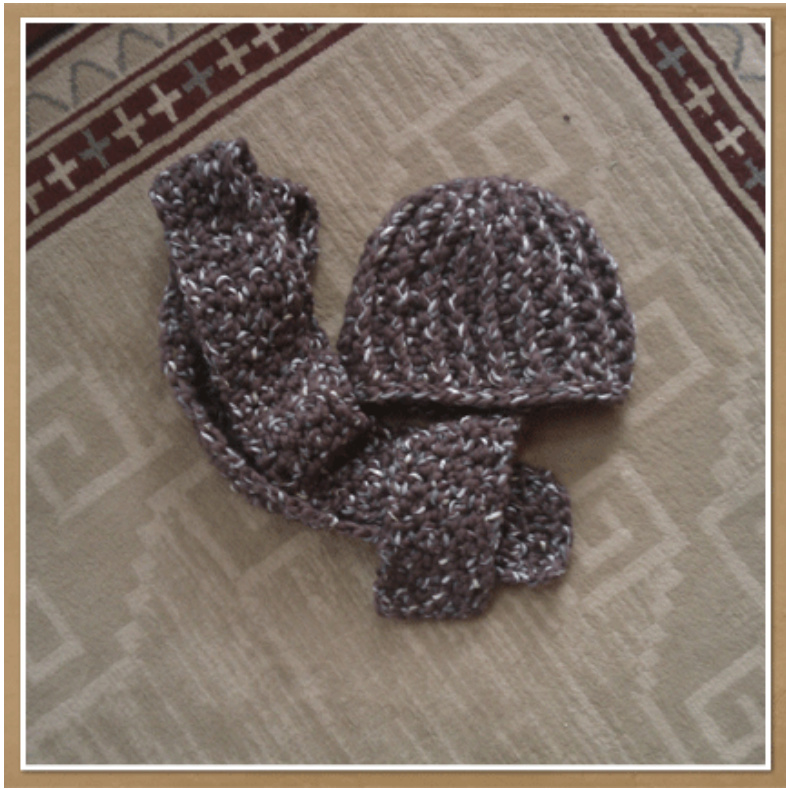
Hi, First of all thanks for your purchase! Proceeds benefit our rescue group and we greatly appreciate it. In this instructional you will find the pattern for our crocheted chunky hat & skinny scarf. Please email me with any questions, comments or difficulties - we are not professional crocheters, and even though we screen all patterns with our crochet group, we are not perfect and welcome questions, comments, and concerns. If you are interested in helping review new patterns, please let us know at admin@ahimsarescue.com - you would get the pattern for free (of course!) and we would appreciate the help - we are very busy around here. Thanks again and enjoy! Materials: O Weight yarn - chunky/super chunky weight. For the demos I used 3 skeins of Rowan ribbon twist OHook: p OYarn needle Stitches used: single crochet (sc), slip stitch (sl), front post double crochet (fpdc), double crochet (dc), half double crochet (hdc) Inc: (hdc, fpdc)in next hdc,(hdc, fpdc) in next fpdc - result-increase 2 st st= stitch the scarf: To start: Ch 7, turn, sc in the 2nd chain from hook and each across - 6 st 1. Ch1, turn, sc in first st, \*dc in next st, sc in next st \* across, ch1, turn 2. Alternate sc& dc across, ch1 turn Note: as you make successive rows, you will be sc'ing in the top of each dc, and dc'ing in the top of each sc; this creates the nubby texture and keeps you from getting a lined effect from crocheting in rows 3.Repeat 2 until you get the desired length 4.Finish by doing a last row of sc across, finish off and weave in ends. Note: for the rowan ribbon twist, I made the hat then used the remainder of the 3 skeins to make the scarf (1 simply ended the scarf when I got to the end of my yarn supply) - I used three skeins exactly for the set.
The hat
1. Ch4 (counts as 1rst dc), work 11 dc in fourth ch from hook - 12 dc 2.Ch2, fpdc in same st, [(hdc, fpdc) in next dc] 11 times, join with sl to top of initial ch 2 - 12 hdc, 12 fpdc 3.Ch2, fpdc in next st, hdc in next hdc, fpdc in next fpdc, work inc (see stitch description previous), \*[hdc in next hdc, fpdc in next fpdc] twice, work inc; repeat from \* three times, join with sl to top of starting ch2 - 16 hdc, 16 fpdc Note: when working a fpdc into an fpdc, make sure you work around the post of the previous row fpdc unless instructed otherwise 4. Ch2, \*hdc in next hdc, fpdc around next fpdc\* around - join with sl to top of initial ch2 - 16 hdc, 16 fpdc 5.Ch2, fpdc in next st, work inc, \*[hdc in next hdc, fpdc in next fpdc] three times, work inc; repeat from \* three times, [hdc in next hdc, fpdc in next fpdc] twice, join with sl to top of initial ch2 - 20 hdc, 20 fpdc 6.Repeat step 4 \*4\* times - 20 hdc, 20 fpdc 7. Somewhere in the next row you are going to work a decrease (dc) by working a fpdc around the posts of two successive fpdc's, ignoring the hdc between the two hdc's, SO....ch2, work alternating hdc/fpdc pattern around working one decrease as described somewhere along the way (I do the first two fpdc's but it is up to you) 8.Repeat step 4 9.Repeat step 7 10. Ch1, sc around, finish off and weave in ends. Thanks again for your purchase and support of our group. We have done our best to make sure the pattern is free of mistakes and easy to understand, but if you find an error or need some clarification, please feel free to contact us - we are friendly people, a little crazy perhaps, but friendly. You can sell any items you make, we don't care but please don't repost our pattern, give it away, etc. Links and references to our group if you like the pattern or sell items online is greatly appreciated. Visit us on the web at www.ahimsarescue.com Feel free to contact us at admin@ahimsarescue.com with any questions, comments or concerns.