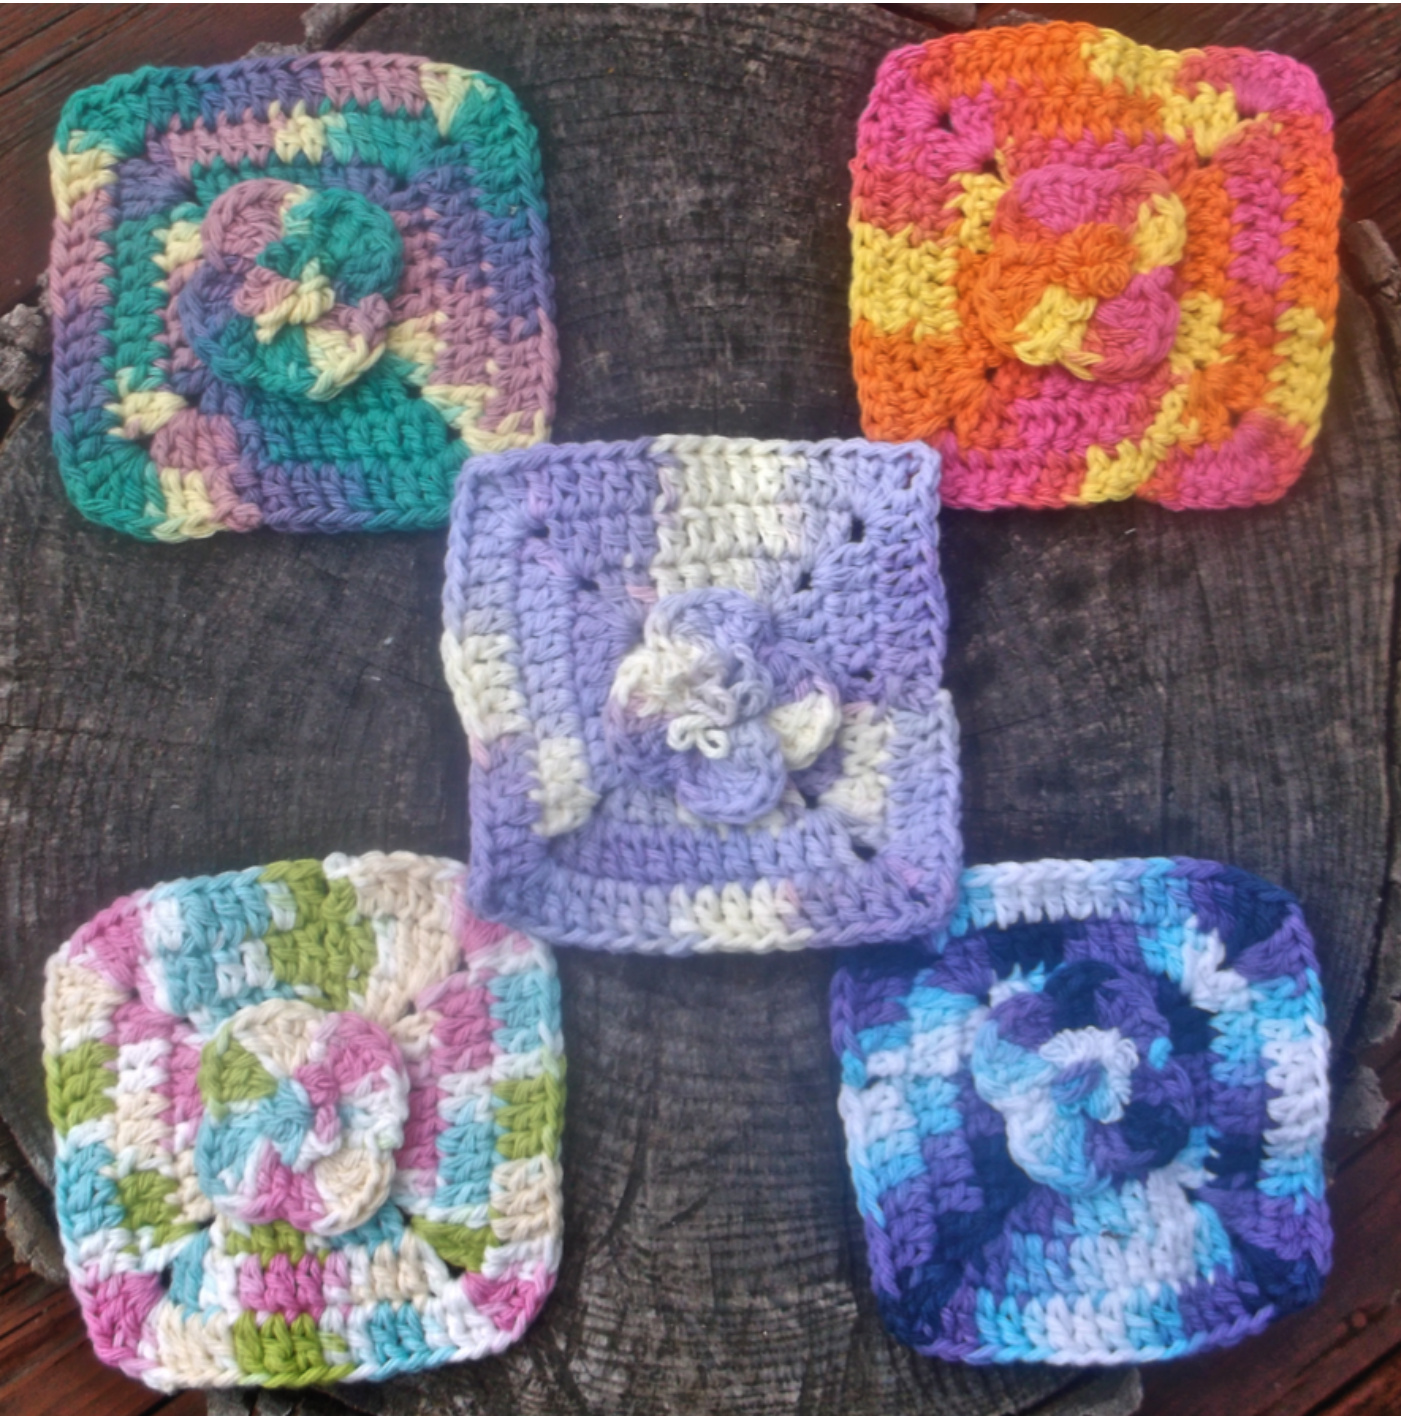
LOOPY CLOUER SQUARE
A tiny square with a surprise in the center. BY: DYE L0T23
This pattern is the property of DYE LO23 and may be printed for personal use only. Distribution of this pattern, including, but not limited to, images, diagrams, and text for any reason is not permitted. This pattern may not be distributed in print or electronic form. Finished products created from this pattern may be sold by the maker of the finished item. Copyright @ 2015
What I Used
Less than 1 Skein Lily Sugar'n Cream Cotton: Medium Weight — 4 H Hook Yarn Needle
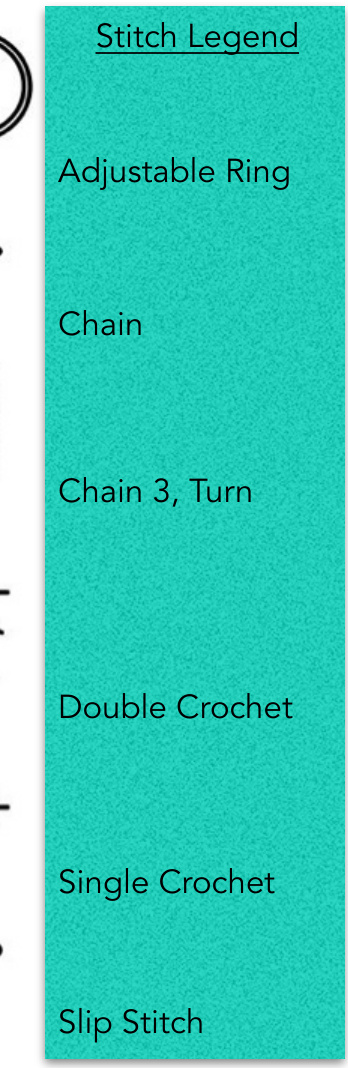
Stitches
Adjustable Ring: ADJ RING Double Crochet: DC Slip Stitch: SS Skill Level Finished Measurements Easy 5 inches
Special Stitches
Adjustable Ring (ADJ RING): Holding your yarn in your right hand, drape the tail of the yarn over the index finger of your left hand. Make two loops on your middle finger, wrapping from back-to-front. Insert your hook into the two loops on your finger and pull up a loop. CH 1, sc in the circle according to the pattern. Once you have worked enough stitches in the circle pull the tail of the yarn (not the working yarn) to close the ring. Do not chain and turn; work in joined rounds.
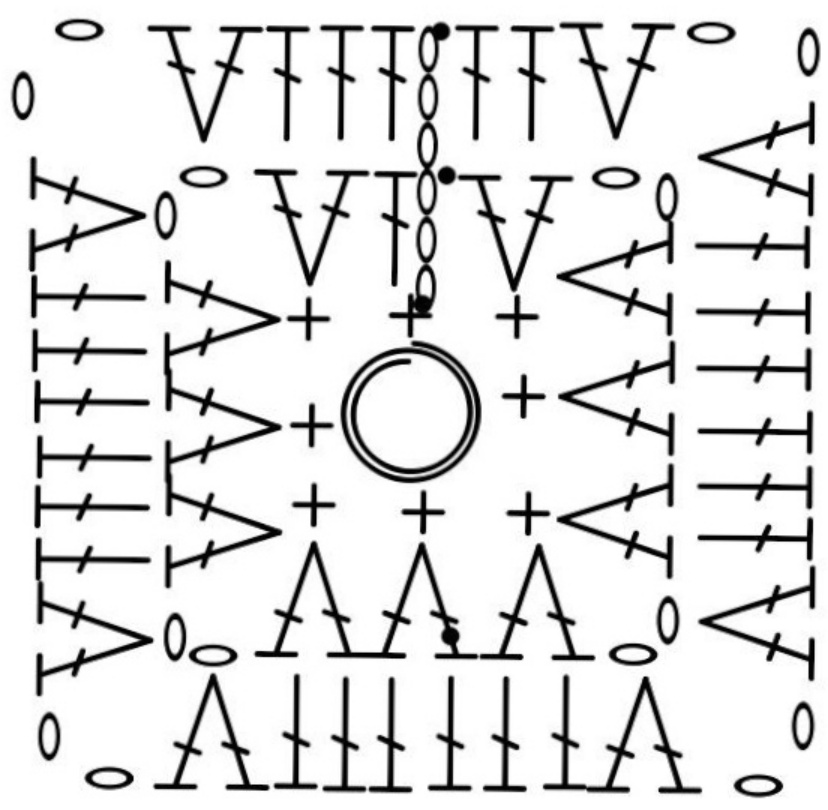
Loopy Clover Square Stitch Diagrams
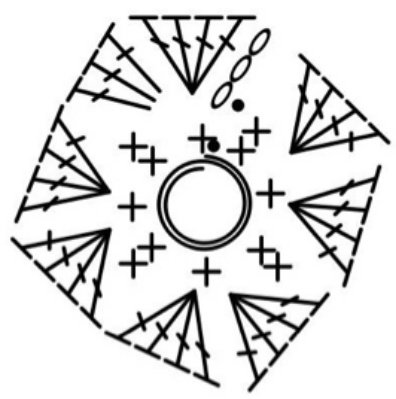
The top diagram below shows the Large Square from the Adj Ring through Round 2. Rounds 3 through 5 of the Large Square are worked in the same manner as the rows shown. The bottom diagram shows the entire Clover which will be sewn to the center of the large square.
Loopy Clover Square Instructions
Large Square
Make an adjustable ring with 8 sc in the ring. Close the ring, join the last stitch to the first stitch with a ss. — 8 sc Round 1: Ch 3 (counts as a dc here and throughout. DC in the same stitch as the join. Work (2 dc in the next stitch, ch 2, 2 dc in the following stitch) three times. Work 2 dc in the last stitch, ch 2. Join with a ss to the top ch of the beginning ch 3. — 16 dc, 4 ch 2 spaces Round 2: Ch 3, \*dc in each stitch to the ch 2 space. In the ch 2 space work (2 dc, ch 2, 2 dc), around. Repeat from the \* around. Join with a ss in the top of the beginning ch 3. - 32 dc, 4 ch 2 spaces Round 3: Repeat round 3. — 48 dc, 4 ch 2 spaces Round 4: Repeat round 3, fasten off. 64 dc, 4 ch 2 spaces
Clover
ajustabie Tmg witn o sc im the hng. Close the Tng, jom the last st Round 1: Ch 3, work 7 dc in the same stitch as the join. SC in the next stitch. \*Work 8dc in the next stitch, sc in the following stitch. Repeat from the \* around. Join with ss in the bottom ch of the beginning ch 3. Fasten off. — 32 dc, 4 Assembly: Sew the clover to the center of the large square. The corners of the clover should be parallel to the corners of the large square. Finishing: Sew up-and-down through the center of the adjustable rings in both squares. Do not pull all the way down, loops will appear in the center of the clover on the right side of the square. Fasten off sewing yarn and weave in all ends.


