DEAR VALENTINE SQUARE
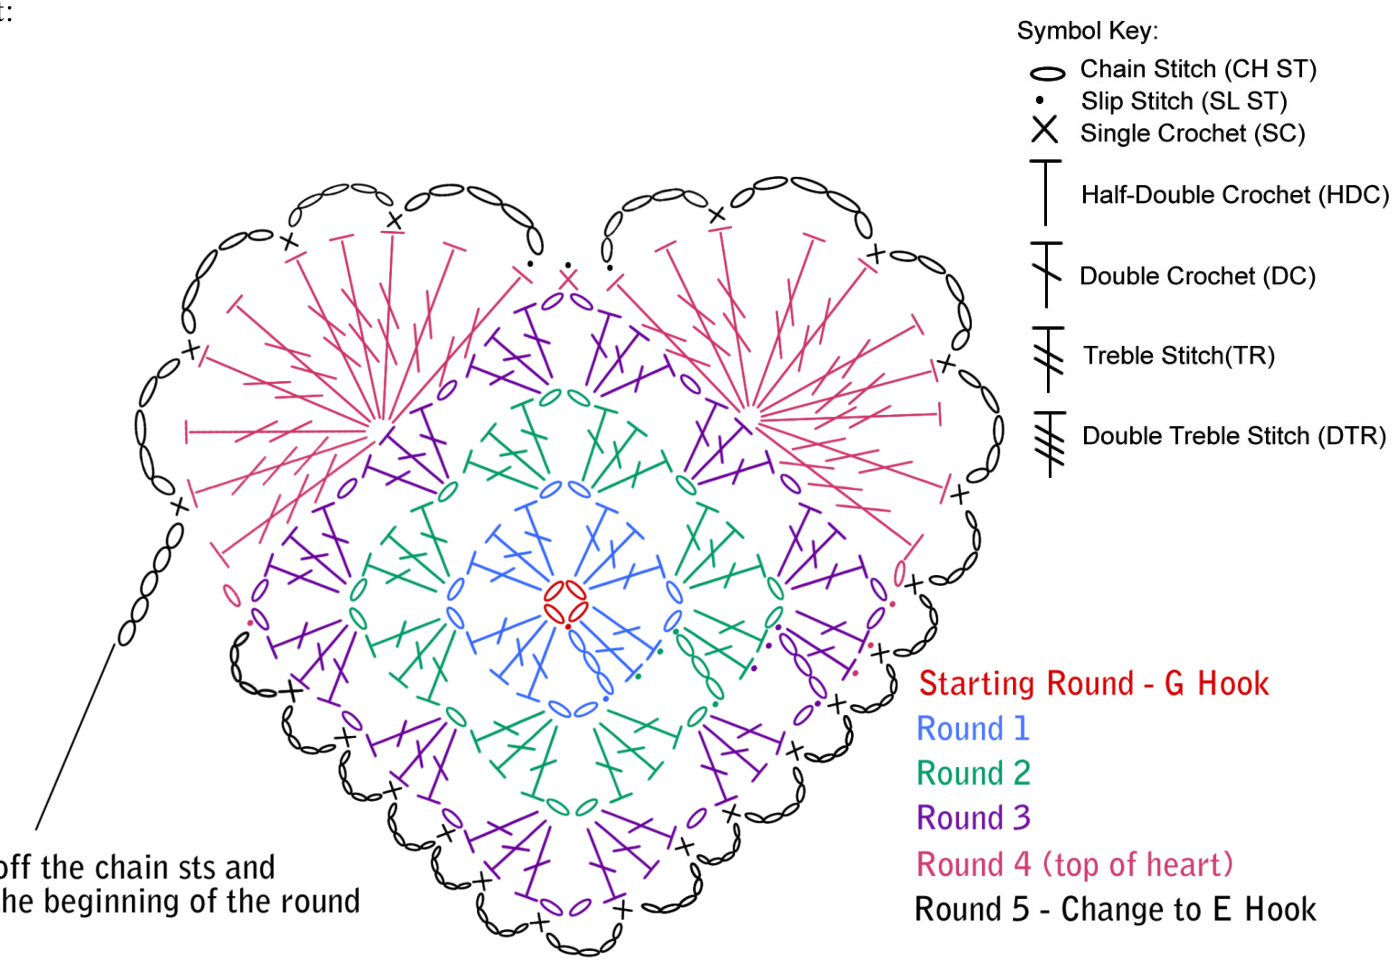
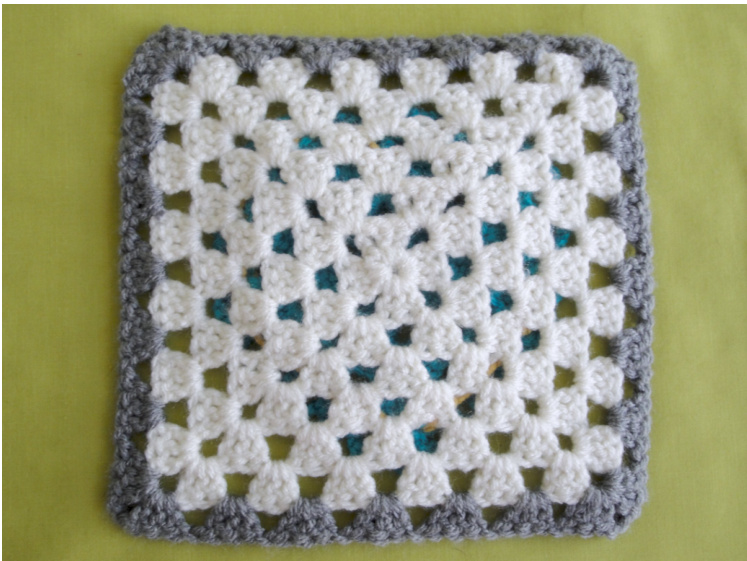
www.craftyminx.com Pattern and images @ 2011 Dana Beach All Rights Reserved For Personal Use Only Written Directions for heart: Starting with G hook and worsted weight yarn, CH 4 and join loop with a SL ST 1. CH 3(counts as one DC), DC2 in to loop, CH 2 (DC 3, CH 2) 3 times and join with a SL ST in 3rd chain. (12 DCs) 2. SL ST in the next two DCs and in the CH 2 space. CH 3 (counts as one DC), DC 2, CH 2, DC 3 in CH 2 space CH 1 (DC 3, CH 2, DC 3 in corner space, CH 1) repeat 2 more times and join with a SL ST in 3rd chain. (24 DCs) 3. SL ST in the next two DCs and in the CH 2 space. CH 3 (counts as one DC), DC 2, CH 2, DC 3 in CH 2 space. CH 1, DC 3 in CH 1 space, CH 1 (DC 3, CH 2, DC 3 in corner space, CH 1, DC 3 in CH 2 space, CH 1) repeat 2 more times and join with a SL ST in 3rd chain. (36 DCs) 4. SL ST in the next two DCs and in the CH 2 space. CH1 DTR 2 and TR 8 into the middle DC of the row. SC in the corner space. TR 8 and DTR 2 into the middle DC of the next side of the square, CH 1. SL ST into the last chain of the corner space. 5. Change to E hook. (CH 5 skip a stitch and SC in next) repeat around to the top center of the heart. Slip stitch in the ST before the SC at the top, the SC and in the next stitch, and continue the O until the end of the round. For the last five STS, break off the yarn and sew the CH 5 to the beginning of the round. 6.Weave in ends. For the square: Using the H hook CH four join with a SL ST to form a ring. ·CH 3, DC 2 in ring, CH 2, (DC 3 in ring and CH 2) three times. Join with SL ST at the top of the CH 3 turning chain. SL ST in the next two DCs and the corner space, CH 3, DC 2, CH 2, DC 3 in same corner CH 1. (DC 3, CH 2 DC 3 in corner and CH 1) three times. Join with SL ST at the top of the CH 2 turning chain. Continue the same pattern until you've completed 6 rounds of Ivory and then add one more round in Grey.
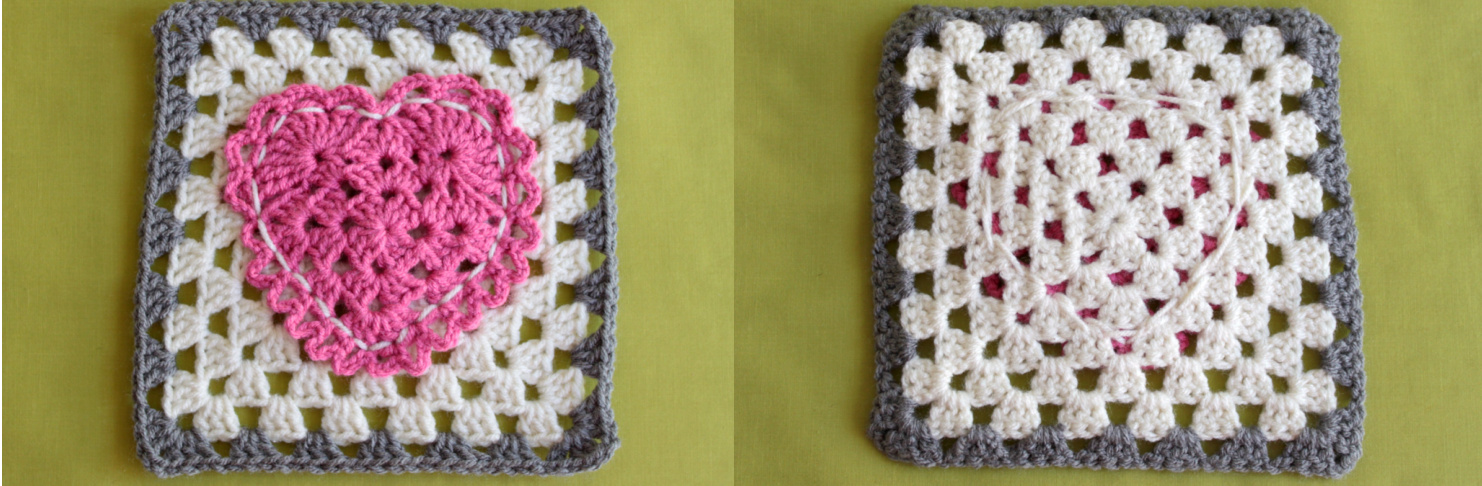
www.craftyminx.com Pattern and images ? 2011 Dana Beach All Rights Reserved For Personal Use Only To attach the heart to the square, you can use a few different methods. For the pink heart, I used a back stitch and didn't bother hiding the stitches on the back. You could do this and make sure to only stitch onto the top of the block and not go all the way through.
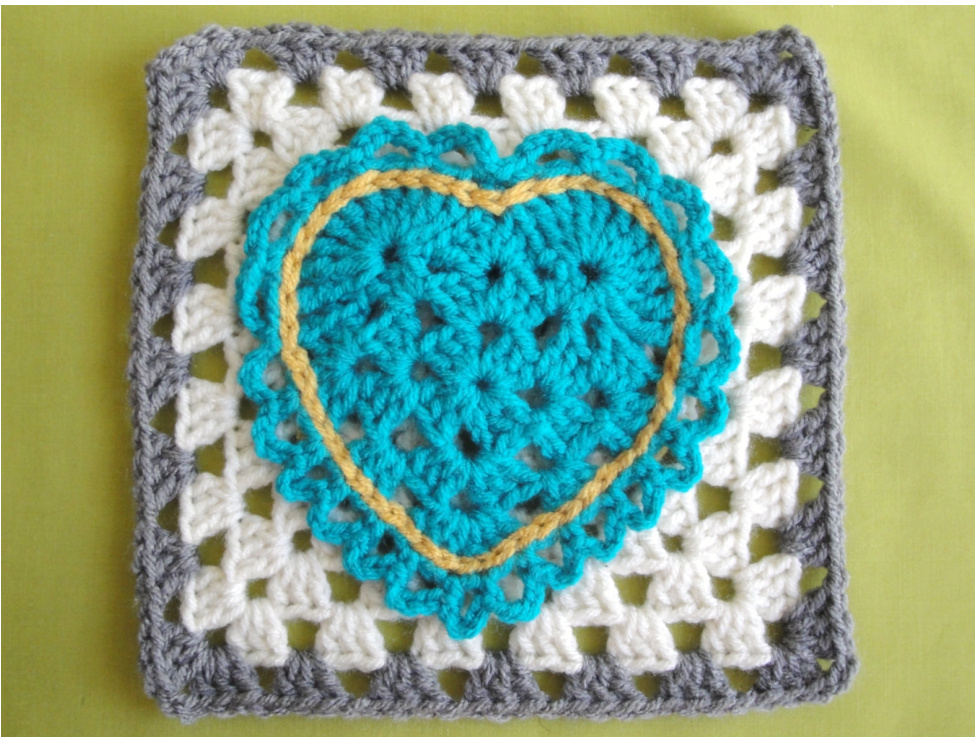
For the turquoise heart, I used slip stitches and made sure to only stitch to the top of the base granny in order to not see the stitches on the other side. The finished block size should be around 8 inches.

www.craftyminx.com Pattern and images ? 2011 Dana Beach All Rights Reserved For Personal Use Only


