Wild Bird Song Designs Ujima Baby Hat
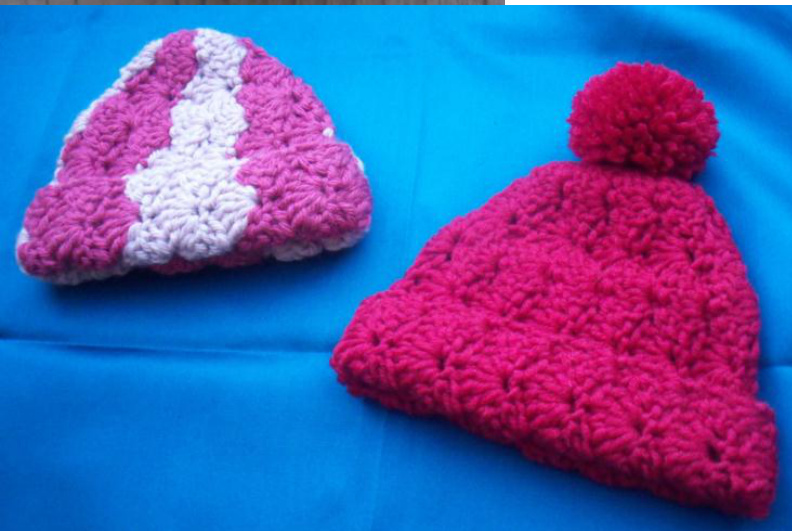
http://wildbirdsongdesigns.wordpress.com Design and Instructions @ Kristen Hein Strohm Logo Painting ? Christine Elder, http://christineelder.com Stitch Ilustrations ? Miranda Currie, www.mirandacurrie.com Questions about this pattern?Answers are available at www.ravelry.com/groups/wild-bird-song-designs. This cheerful cap was inspired by a Partners in Health hospital in Rwanda, where doctors requested hat donations to help keep newborns warm and healthy. To donate your own cap, please visit www.pih.org. hotheadknitters.blogspot.com, or www.goodgoes.org/caps. Ujima is one of seven Wild Bird Song baby hat designs inspired by Partners in Health, each named for one of the Seven Principles of Kwanzaa. "Ujima" means "community responsibility" in Swahili. To see more of Kristen's designs, visit http://wildbirdsongdesigns. wordpress.com.
Sizes:
· XXS (critical premie, less than 2.25kg/5lb): 24cm/9.5in circumference (stretches to 30cm/12in), 12.5cm/5in length before folding brim (length excluding pom-pom) ● XS (2.25-kg/5-lb premie to 6-month infant): 28cm/11in circumference (stretches to 43cm/17in), 16cm/6.25in length before folding brim (length excluding pom-pom) · S (6 months to 3 years): 35.5cm/14in circumference (stretches to 51cm/20in), 23cm/9in length before folding brim (excluding pom-pom) Skill Level: Intermediate Tension: Size XXS (XS, S): 20 (16, 16) st and 10 (91/2, 91/2) rows = 10 cm / 4 inches in shell stitch pattern
· 95 yards (87m) Debbie Bliss Cashmerino Aran or other yarn with similar gauge, such as Be Sweet Bambino/Bambino Taffy, Blue Sky Organic Cotton, Debbie Bliss Eco Cotton, Crystal Palace Mochi Plus, Karabella Aurora 8, Rowan Cashsoft Aran, Bouton d'Or Ksar, Berocco Pure Merino, Malabrigo Rios, Lorna's Laces Shepherd Worsted, Rico Soft Merino Aran, Spud & Chloe Sweater, Madelinetosh Vintage ● Crochet hook size varies with hat size. XXS: G/7 (4.5mm). XS and S: size I (5.5mm) or hook size needed to obtain gauge. To save time and ensure a proper fit, take time to check tension and adjust hook size if necessary. · Yarn needle to weave in ends
Materials:
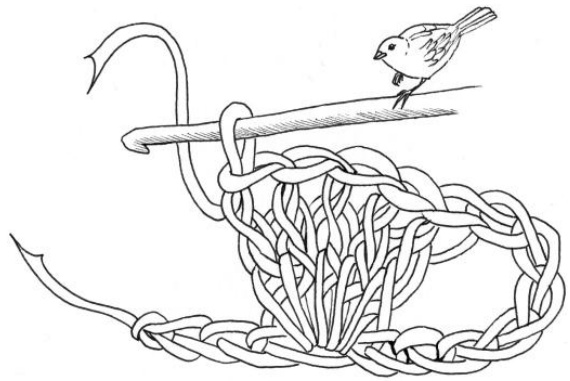
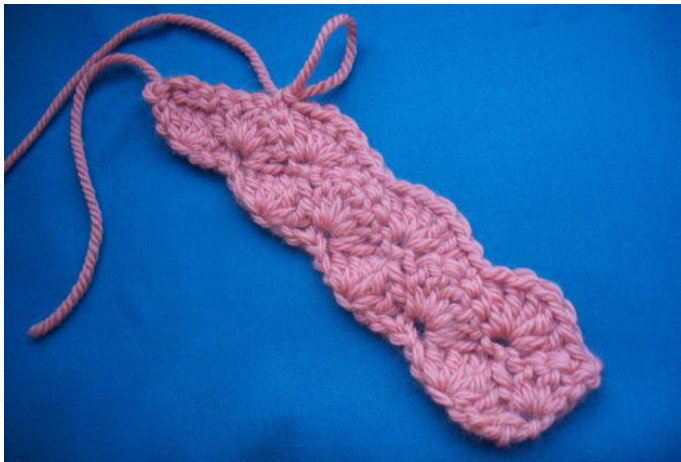
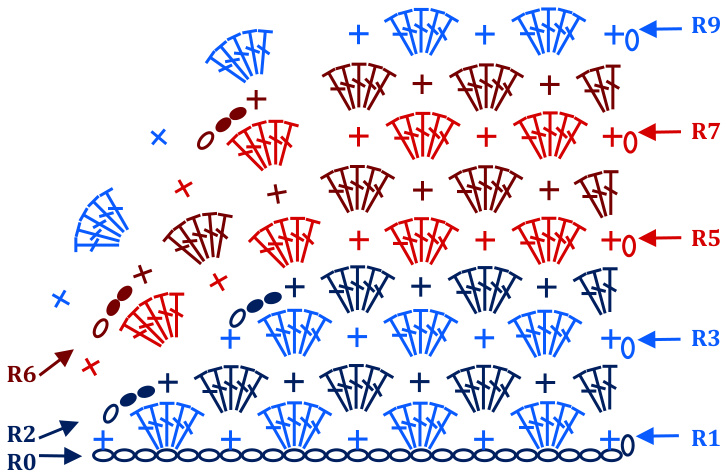
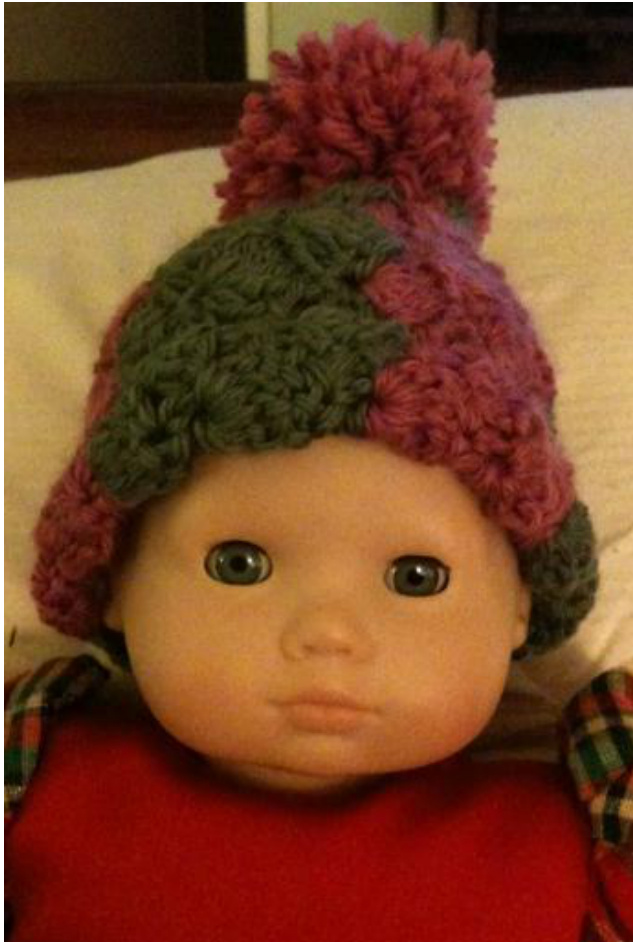
Abbreviations: R = row, st = stitch, ch = chain, dc = double crochet, tr = treble crochet, sl st = slip stitch, rep = repeat, prev = previous, flo = front loop only Special Stitches: Shell stitch = \*dc in next st, miss next 2 st, 5 tr in next st, miss next 2 st, rep from \*. The figure at left illustrates how 5 tr are crocheted into a single st to form a shell. Pattern Notes: Sized from premies to toddlers, this adorable hat is crocheted sideways in a shell-stitch pattern, shaped with short row wedges, and invisibly seamed up the back. The stretchy tension and stitch pattern allows the hat to fit a range of sizes, and the folded-up brim can be gradually let down to accommodate a growing little head. Short row wedges are used to give this hat its proper shape, with the bottom wider than the top. This means that some rows have fewer shell stitch pattern repeats than others, ending and turning "early," before they've reached the end of the previous row (see stitch diagram below). Later long rows continue past the ends of these short rows. With the exception of R0, all yarn tails in colour A should be 25.5 (28, 35.5) cm / 10 (11, 14) inches in length. When finishing, these tails will be woven on the wrong side of the work from the bottom of the hat to the top, tied into the pom-pom, and cut to the length of the other pom-pom strands. Integrating the tails into the pom-pom reduces the opportunity for stray tails to "peek out'" from the fabric after multiple wearings. The yarn tail in R0 should be 33 (38, 51) cm / 13 (15, 20) inches in length, as this tail will be used for seaming from the top of the hat to the bottom before being woven back to the top of the hat and integrated into the pom-pom as the others. Yarn tails in colour B should be 12 (15, 22) cm / 4.75 (6, 8.75) inches in length and woven on the wrong side of the work without being integrated into the pom-pom. Instructions, All Sizes: R1 (right side): Dc in second ch from hook, \* miss next 2 ch, 5 tr in next ch, miss next 2 ch, dc in next ch, rep from \* 3 (3, 5) times, turn. R2 (wrong side): 1 ch, miss first dc, sl st-flo in first 2 tr, dc in next tr, \* miss next 2 tr, 5 tr in next dc, miss next 2 tr, dc in next tr, rep from \* 2 (2, 4) times, miss next 2 tr, 3 tr in next dc, turn. R3: 1 ch, dc in first tr, \* miss next 2 tr, 5 tr in next dc, miss next 2 tr, dc in next tr, rep from \* 2 (2, 4) times, turn. This short row has fewer shell stitch pattern repeats than the 2 prev rows, and ends before reaching the end of either of the 2 prev rows (see photo below). The stitch diagram below details R0-R9 for size XXS, with blue as colour A and red as colour B. Odd-numbered rows are slightly lighter in colour than even-numbered rows, for easier reading. To shape the top of the hat, R3-4 and R7-8 are short rows, and R5 & R9 extend past those short rows & into prev rows.
R4: 1 ch, miss first dc, sl st-flo in first 2 tr, dc in next tr, \* miss next 2 tr, 5 tr in next dc, miss next 2 tr, dc in next tr, rep from \* once (once, 3 times), miss next 2 tr, 3 tr in next dc, fasten off. R5: Join colour B, 1 ch, dc in first tr, \* miss next 2 tr, 5 tr in next dc, miss next 2 tr, dc in next tr, rep from \* once (once, 3 times), miss next 2 tr, 5 tr in next dc, miss next 2 sl st-flo, dc in next dc, miss next 2 tr, 5 tr in next dc, miss next 2 sl st-flo, dc in next dc from R1, turn. Continue the instructions below according to your desired size. To continue size XXS: R6-8: Rep R2-4. R9: Join colour A, 1 ch, dc in first tr, \* miss next 2 tr, 5 tr in next dc, miss next 2 tr, dc in next tr, rep from \* once, miss next 2 tr, 5 tr in next dc, miss next 2 sl st-flo, dc in next dc, miss next 2 tr, 5 tr in next dc, miss next 2 sl st-flo, dc in next dc from R5, turn. R10-12: Rep R2-4. R13: Join colour B, 1 ch, dc in first tr, \* miss next 2 tr, 5 tr in next dc, miss next 2 tr, dc in next tr, rep from \* once, miss next 2 tr, 5 tr in next dc, miss next 2 sl st-flo, dc in next dc, miss next 2 tr, 5 tr in next dc, miss next 2 sl st-flo, dc in next dc from R9, turn. R14-16: Rep R2-4. R17: Join colour A, 1 ch, dc in first tr, \* miss next 2 tr, 5 tr in next dc, miss next 2 tr, dc in next tr, rep from \* once, miss next 2 tr, 5 tr in next dc, miss next 2 sl st-flo, dc in next dc, miss next 2 tr, 5 tr in next dc, miss next 2 sl st-flo, dc in next dc from R13, turn. R18-20: Rep R2-4. R21: Join colour B, 1 ch, dc in first tr, \* miss next 2 tr, 5 tr in next dc, miss next 2 tr, dc in next tr, rep from \* once, miss next 2 tr, 5 tr in next dc, miss next 2 sl st-flo, dc in next dc, miss next 2 tr, 5 tr in next dc, miss next 2 sl st-flo, dc in next dc from R17, turn. R22-24: Rep R2-4. To continue size XS (S): R6: Rep R2.
R7: 1 ch, dc in first tr, \* miss next 2 tr, 5 tr in next dc, miss next 2 tr, dc in next tr, rep from \* twice (4 times), miss next 2 tr, 5 tr in next dc, miss next 2 sl st-flo, dc in next dc from R5, turn. R8: 1 ch, miss first dc, sl st-flo in first 2 tr, dc in next tr, \* miss next 2 tr, 5 tr in next dc, miss next 2 tr, dc in next tr, rep from \* twice (4 times), miss next 2 tr, 3 tr in next dc, fasten off. R9: Join colour A, 1 ch, dc in first tr, \* miss next 2 tr, 5 tr in next dc, miss next 2 tr, dc in next tr, rep from \* twice (4 times), miss next 2 tr, 5 tr in next dc, miss next 2 sl st-flo, dc in next dc from R7, turn. R13: With colour B, 1 ch, dc in first tr, \* miss next 2 tr, 5 tr in next dc, miss next 2 tr, dc in next tr, rep from \* once (3 times), miss next 2 tr, 5 tr in next dc, miss next 2 sl st-flo, dc in next dc, miss next 2 tr, 5 tr in next dc, miss next 2 sl st-flo, dc in next dc from R9, turn. R14: Rep R2. R15: 1 ch, dc in first tr, \* miss next 2 tr, 5 tr in next dc, miss next 2 tr, dc in next tr, rep from \* twice (4 times), miss next 2 tr, 5 tr in next dc, miss next 2 sl st-flo, dc in next dc from R13, turn. R17: Join colour A, 1 ch, dc in first tr, \* miss next 2 tr, 5 tr in next dc, miss next 2 tr, dc in next tr, rep from \* twice (4 times), miss next 2 tr, 5 tr in next dc, miss next 2 sl st-flo, dc in next dc from R15, turn. R21: Join colour B, 1 ch, dc in first tr, \* miss next 2 tr, 5 tr in next dc, miss next 2 tr, dc in next tr, rep from \* once (3 times), miss next 2 tr, 5 tr in next dc, miss next 2 sl st-flo, dc in next dc, miss next 2 tr, 5 tr in next dc, miss next 2 sl st-flo, dc in next dc from R17, turn. R22: Rep R2. R23: 1 ch, dc in first tr, \* miss next 2 tr, 5 tr in next dc, miss next 2 tr, dc in next tr, rep from \* once (3 times), miss next 2 tr, 5 tr in next dc, miss next 2 sl st-flo, dc in next dc, miss next 2 tr, 5 tr in next dc, miss next 2 sl st-flo, dc in next dc from R21, turn. R24: Rep R8. Stop here for size XS. To continue size S, add the following 8 rows: Size S only: R25: Join colour A, 1 ch, dc in first tr, \* miss next 2 tr, 5 tr in next dc, miss next 2 tr, dc in next tr, rep from \* 4 times, miss next 2 tr, 5 tr in next dc, miss next 2 sl st-flo, dc in next dc from R23, turn. R29: Join colour B, 1 ch, dc in first tr, \* miss next 2 tr, 5 tr in next dc, miss next 2 tr, dc in next tr, rep from \* 3 times, miss next 2 tr, 5 tr in next dc, miss next 2 sl st-flo, dc in next dc, miss next 2 tr, 5 tr in next dc, miss next 2 sl st-flo, dc in next dc from R25, turn. R31: 1 ch, dc in first tr, \* miss next 2 tr, 5 tr in next dc, miss next 2 tr, dc in next tr, rep from \* 3 times, miss next 2 tr, 5 tr in next dc, miss next 2 sl st-flo, dc in next dc, miss next 2 tr, 5 tr in next dc, miss next 2 sl st-flo, dc in next dc from R29, turn. R32: Rep R8. All Sizes: Seaming: Using the yarn tail from R0, seam R0 and R24 (R24, R32) together using a modified whip stitch on the wrong side of the work. (If you've never seamed before, an excellent photo-tutorial is available at this link: http://www.crochetspot.com/how-to-whip-stitch-in-crochet/). To make the seam invisible on the right side by matching the look of the shell stitch pattern, modify the traditional whip stitch seam as follows. When weaving the yarn tail through a dc of R24 (R24, R32) or through the third tr of a 5-tr shell of R24 (R24, R32), weave through both loops of these sts. When weaving the yarn tail through the first, second, fourth, and fifth tr of each 5-tr shell of R24 (R24, R32), weave only through the front loop. When weaving the yarn tail through a ch of R0, do so as you normally would. After the seaming is complete, there will be a small hole at the top of the hat; this will be completely covered by the pom-pom. Make Pom-pom: With colour A, wrap the yarn around your 3 (3, 4) smallest fingers 65 (65, 80) times and cut the end. Cut a separate meter/yard of yarn, lay this strand across the back of your fingers, over and perpendicular to the wrapped yarn. Pull one end of this strand from the back of your hand, between the tops of 2 fingers, and toward your palm. Use your crochet hook to pull the other end of this strand from the back of your hand, between the bottom knuckles of the same 2 fingers and toward your palm. Holding these 2 yarn ends with your free hand, slide the wrapped yarn off of your fingers and tie the 2 yarn ends as tightly as possible to secure the wrapped yarn. Each side of the knot will have 65 (65, 80) loops; cut each loop in half to create the pom-pom. Refine the spherical shape by trimming the strands to equal lengths, except the 2 tied ends. Attach Pom-pom and Close Top Hole: Use the 2 long ends to seam the pom-pom across the center hole at the top of the hat, weaving your yarn needle from the pom-pom's knot to the next stitch along the hat's center hole and back to the pom-pom's knot, repeating for each stitch and fastening off to secure the seam after the last pass. Thread the hat's colour A yarn tails through the pom-pom knot, fasten off each one, and cut these last strands to an equal length with the rest of the pom-pom. Finishing: Weave in the yarn tails of colour B, fold up brim, and enjoy!


